


pytest是Python中的一个第三方测试框架,它以简单、灵活和易于使用为特点,可用于单元测试、功能测试和集成测试等。
一、安装
在终端或命令提示符中运行以下命令来安装pytest:
pip install pytest
二、编写用例
1. 定义测试函数
在pytest中,测试用例是普通的Python函数。 为了定义一个测试函数,只需要在函数名称前面加上前缀“test_”。
以下是一个简单的示例:
def test_addition():
    assert 1 + 1 == 2
在此示例中,我们定义了一个测试函数test_addition(),该函数检查1 + 1是否等于2,并使用assert语句进行断言。 如果assertion失败,则测试将失败并显示断言错误消息。
2. 运行测试
命令行中运行pytest命令来运行测试:
pytest
pytest将自动查找测试文件,并运行该文件中的所有测试用例。 如果只想运行特定的测试文件,请在pytest命令后面添加该文件的路径。
3.添加断言
检查函数的输出是否符合预期,如第一步中添加一个断言,检查1+1的结果是否为2。 如果某个断言失败,则pytest将出现断言错误并将测试标记为失败。
4.装饰器
@pytest.fixture
- 用于定义测试函数所需的固定配置或数据,以及在每个测试运行时创建和销毁资源的过程。
- 避免在每个测试函数中都写重复部分的代码,如设置测试环境、初始化对象、连接数据库、登录等等一些需要在测试之前进行的步骤。
- 可以当参数传入,也可以互相调用。
- scope参数可以控制 fixture 作用域的范围(session、module、class、function),控制资源的生命周期。
import pytest

@pytest.fixture
def test_data():
	return {"username": "admin", "password": "password"}

def test_login(test_data):
	assert test_data['username'] == "admin"
	assert test_data['password'] == "password"
@pytest.mark.parametrize
-
用于执行参数化测试,通过多次调用同一个测试函数,每次使用不同的参数执行测试,从而避免编写重复的测试代码。
import pytest

@pytest.mark.parametrize("test_input, expected_output", [
("3+5", 8),
("2*3", 6),
("6*9", 54),
])
def test_eval(test_input, expected_output):
	assert eval(test_input) == expected_output
其他常用装饰器:
@pytest.mark.skip: 用于跳过某些测试用例。
@pytest.mark.xfail: 用于标记某些测试用例是已知的失败情况。
@pytest.mark.timeout: 用于对测试用例执行时间做出最大限制,避免因超时导致测试整体失败。
@pytest.mark.skipif: 用于在满足某些条件时跳过测试用例。
@pytest.mark.usefixtures: 用于指定测试用例所需使用的 fixture。
三、在项目中的实践
1. 配置执行用例
通过配置⽂件pytest.ini来改变以及执⾏⽤例,不管是命令⾏还是主函数,都会读取pytest.ini配置⽂件来执⾏。
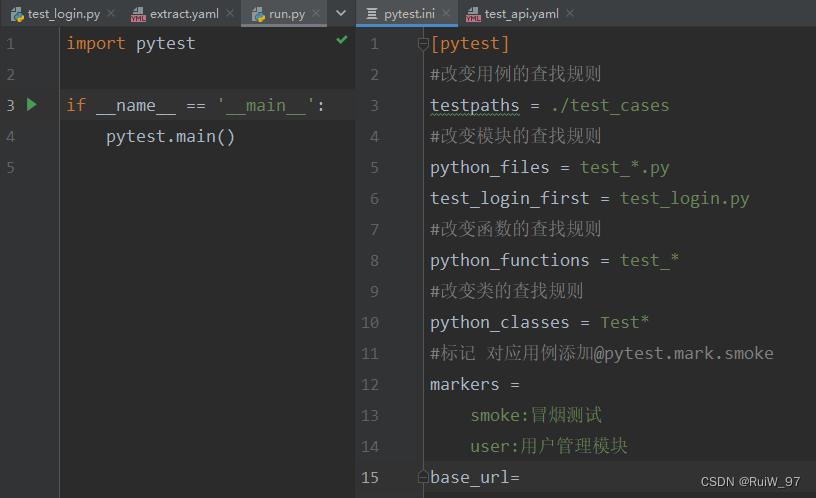
[pytest]
#改变用例的查找规则
testpaths = ./test_cases
#改变模块的查找规则
python_files = test_*.py
test_login_first = test_login.py
#改变函数的查找规则
python_functions = test_*
#改变类的查找规则
python_classes = Test*
#标记 对应用例添加@pytest.mark.smoke
markers =
    smoke:冒烟测试
2. 接口关联封装
通过类变量保存中间变量可以实现接⼝关联,但只限于一个类中传递变量,限制性太强。
基于⼀个独⽴yaml⽂件传递数据,实现接口关联。下面是读、写yaml的关键函数:
import os
import yaml


# 写入:追加
def write_yaml(data):
    with open(os.getcwd() + "/extract.yaml", encoding='utf-8', mode='a+') as f:
        yaml.dump(data, stream=f, allow_unicode=True)


# 读取
def read_yaml(key):
    with open(os.getcwd() + "/extract.yaml", encoding='utf-8', mode='r') as f:
        value = yaml.load(f, yaml.FullLoader)
        return value[key]


# 清空
def clear_yaml():
    with open(os.getcwd() + "/extract.yaml", encoding='utf-8', mode='w') as f:
        f.truncate()

# 通过yaml文件路径读取
def read_yaml_testcase(yamlpath):
    with open(os.getcwd() + "/" + yamlpath, encoding='utf-8', mode='r') as f:
        value = yaml.load(f, yaml.FullLoader)
        return value
例如:获取身份认证信息,并将token写入yaml
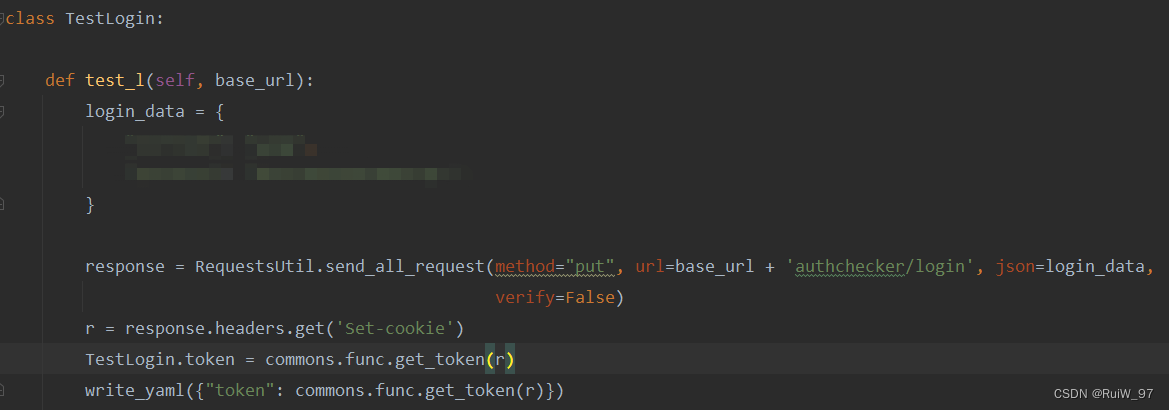
每次运行函数test_l都会将身份认证信息token写入extract.yaml中,但这时就有问题:追加的方式多次写入会有很多token,所以需要及时清空上一次的token值。这时,就可以使用fixture夹具,作用范围是会话session:
#配置固件,作用于所有用例
import pytest

from commons.yaml_util import clear_yaml


@pytest.fixture(scope="session", autouse=True)
def connection_sql():
    clear_yaml()
    yield
这样,其他类就可以通过read_yaml()函数来获取token值进行请求,实现了接口关联。
3. 数据驱动
pytest数据驱动是一种基于参数化的测试框架,它允许在pytest测试用例中使用不同的输入和期望输出数据集合,从而简化测试代码的编写和维护。
将测试数据集合编写在CSV、YAML、JSON等格式的文件中,然后在测试用例函数上使用修饰符@pytest.mark.parametrize引用数据集合即可。yaml 是一种轻量级的数据交换格式,读取和编写都相当方便,因此可以较好地适用于数据驱动测试。
- 例如:
class TestAsset:

    @pytest.mark.parametrize("caseinfo", read_yaml_testcase("test_cases/test_asset.yaml"))
    def test_asset(self, caseinfo):
       	url = caseinfo["request"]["url"]
    	method = caseinfo["request"]["method"]

    	header = {
        	'Accept': 'application/json, text/plain, */*'
    	}
    	res = RequestsUtil.send_all_request(method=method, url=url, headers=header, json=json, verify=False)
        assert res.status_code == 200
        sleep(5)
# test_asset.yaml
-
  case_name: 终端资产_获取资产列表
  request:
    url: https://....
    method: post
    headers:
      Content-Type: application/json
    json:
      page: 1
   	   ...
    status_code: 200
-
  case_name: 终端资产_更新资产
  request:
    url: https://....
    method: post
    headers:
      Content-Type: application/json
    json:
      isAllSelected: true
   		 ...
  expected_output:
    status_code: 200
在test_asset.py文件中编写测试用例,通过 read_yaml_testcase() 方法读取 test_asset.yaml 文件中的数据,解析为 list,然后作为 @pytest.mark.parametrize 装饰器的参数传递给测试函数 test_asset()。多次执行测试函数,测试函数需要通过参数使用收集到的测试数据进行测试。


 1823
1823


 被折叠的 条评论
为什么被折叠?
被折叠的 条评论
为什么被折叠?
 到【灌水乐园】发言


