


css的格式:
选择器 { 属性:值;属性:值 }
选择起的类型:
id选择器:以“#”来定义
#para1
{
    text-align:center;
    color:red;
}class选择器:以“.”来定义
p.center { text-align:center; }//表示p元素中class=“center”时文本默认居中
.color { color:#ff0000; }
ps:选择器的名称不能以数字命名
样式表
外部样式:<link rel="stylesheet" type="text/css" href="mystyle.css">
内部样式:<style>。。。</style>
内联样式:<p style="color:sienna;margin-left:20px">这是一个段落。</p>
内联样式>外部样式>内部样式
css背景的应用
background-color:定义设置元素的背景颜色
body{ background-color:yellow; } h1{ background-color:#00ff00; } p{ background-color:rgb(255,0,255); }background-image:描述了元素的背景图像
body { background-image:url('paper.gif'); }background-repeat:设置背景图像是否及如何重复
值 说明 repeat 背景图像将向垂直和水平方向重复。这是默认 repeat-x 只有水平位置会重复背景图像 repeat-y 只有垂直位置会重复背景图像 no-repeat background-image 不会重复 body { background-image: url('smiley.gif'); background-repeat: no-repeat; }background-attachment:背景图像是否固定或者随着页面的其余部分移动
值 描述 scroll 背景图片随着页面的滚动而滚动,这是默认的。 fixed 背景图片不会随着页面的滚动而滚动。 local 背景图片会随着元素内容的滚动而滚动。 body { background-image:url('http://static.runoob.com/images/mix/smiley.gif'); background-repeat:no-repeat; background-attachment:fixed; }background-position:设置背景图像的起始位置
值 描述 left top
left center
left bottom
right top
right center
right bottom
center top
center center
center bottom如果仅指定一个关键字,其他值将会是"center" x y 第一个值是水平位置,第二个值是垂直。百分比、像素均可 body { background-image: url('smiley.gif'); background-position: 50px 100px; }
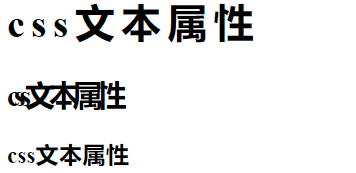
CSS文本属性
color属性:文字颜色
h1{color: #9933ff}
direction属性:文字方向
值 描述 ltr 默认。文本方向从左到右。 rtl 文本方向从右到左。 h1{direction: ltr} h2{direction: rtl}
letter-spaceing属性:字符间距
    h1{letter-spacing: 5px}
    h2{letter-spacing: -5px}
    h3{letter-spacing: normal}/*正常*/
line-height属性:设置行间距
    h1{line-height: 5%}
    h2{line-height: normal}
    h3{line-height: 50px}
text-align属性:指定元素的文本水平对齐方式
值 描述 left 把文本排列到左边。默认值:由浏览器决定。 right 把文本排列到右边。 center 把文本排列到中间。 justify 实现两端对齐文本效果。 h1{text-align: center} h2{text-align: right} h3{text-align: justify}
text-decoration属性:添加文本的修饰
分为text-decoration-line、text-decoration-color、text-decoration-style
值 描述 none 默认。定义标准的文本。 underline 定义文本下的一条线。 overline 定义文本上的一条线。 line-through 定义穿过文本下的一条线。 blink 定义闪烁的文本。 h1{text-decoration: underline red}/*红色下划线*/ h2{text-decoration: overline wavy blue}/*蓝色波浪上划线*/ h3{text-decoration: line-through}/*中横线*/ h4{text-decoration: blink}
text-indent属性:首行文本缩进
    h1{text-indent: 50px}
    h2{text-indent: -10px}
    h3{text-indent: 50%}
text-shadow属性:设置文本阴影
值 描述 h-shadow 必需。水平阴影的位置。允许负值。 v-shadow 必需。垂直阴影的位置。允许负值。 blur 可选。模糊的距离。 color 可选。 h1{text-shadow: 10px 10px red} h2{text-shadow: -10px -10px #bada7a}
h1 {text-shadow:2px 2px 8px #FF0000;}
h1
{
	color:white;
	text-shadow:2px 2px 4px #000000;
}
h1{ text-shadow:0 0 3px #FF0000;}
text-transform属性:控制文本的大小写
值 描述 none 默认。定义带有小写字母和大写字母的标准的文本。 capitalize 文本中的每个单词以大写字母开头。 uppercase 定义仅有大写字母。 lowercase 定义无大写字母,仅有小写字母。 vertical-align属性:设置一个元素的垂直对齐方式
值 描述 baseline 默认。元素放置在父元素的基线上。 sub 垂直对齐文本的下标。 super 垂直对齐文本的上标 top 把元素的顶端与行中最高元素的顶端对齐 text-top 把元素的顶端与父元素字体的顶端对齐 middle 把此元素放置在父元素的中部。 bottom 使元素及其后代元素的底部与整行的底部对齐。 text-bottom 把元素的底端与父元素字体的底端对齐。 X<sub>2</sub><br> Y<sup>2</sup><br>
    h1{vertical-align: top}
    h2{vertical-align: text-top}
    h3{vertical-align: middle}
    h4{vertical-align: bottom}


CSS字体属性
font-family属性:指定文本系列
    h1{font-family: 宋体}
    h2{font-family: 楷体}
    h3{font-family: bolder}
font-size属性:设置文本大小
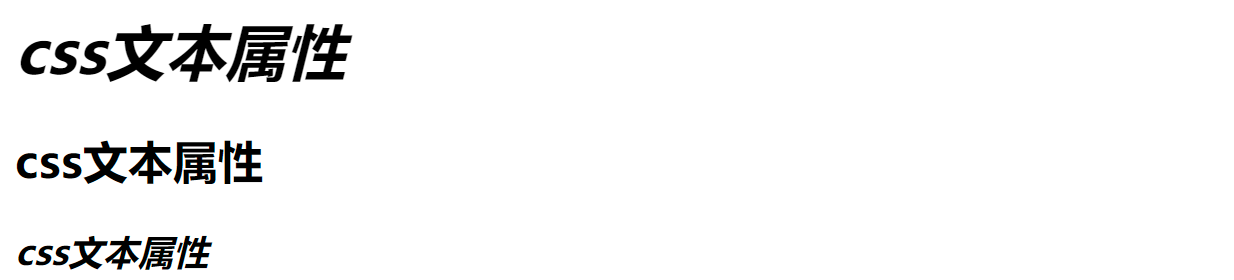
font-style属性:指定文本字体样式
    h1{font-style: italic}/*斜体*/
    h2{font-style: normal}/*正常*/
    h3{font-style: oblique}/*倾斜*/
font-weight属性:字体的加粗或变细
    h1{font-weight: bold}/*加粗*/
    h2{font-weight: lighter}/*变细*/


CSS链接样式
- a:link - 正常,未访问过的链接
- a:visited - 用户已访问过的链接
- a:hover - 当用户鼠标放在链接上时
- a:active - 链接被点击的那一刻
链接字体颜色
a:link {color:#000000;}      /* 未访问链接*/
a:visited {color:#00FF00;}  /* 已访问链接 */
a:hover {color:#FF00FF;}  /* 鼠标移动到链接上 */
a:active {color:#0000FF;}  /* 鼠标点击时 */
链接背景颜色
a:link {background-color:#B2FF99;}
a:visited {background-color:#FFFF85;}
a:hover {background-color:#FF704D;}
a:active {background-color:#FF704D;}
text-decoration属性主要用于删除链接中的下划线
a{text-decoration: none}

CSS列表属性
list-style-image设置列表项的标记
ul{ list-style-image: url("images/03.jpg"); }
list-style-type设置列表项的标记
值 描述 none 无标记。 disc 默认。标记是实心圆。 circle 标记是空心圆。 square 标记是实心方块。 decimal 标记是数字。
list-style-position属性设置标记与文本的相对位置


CSS表格
border属性主要设置表格边框
table,th,td
{
    border:1px solid black;
    /*会出现双边框,因为td,th均有边框*/
}
border-collapse属性设置单一边框
    table{
        border-collapse: collapse;
    }
    table,th,td
    {
        border:1px solid black;
        /*会出现双边框,因为td,th均有边框*/
    }
表格的宽度与高度
    table{
        border-collapse: collapse;
        width: 100%;
    }
    table,th,td
    {
        border:1px solid black;
        /*会出现双边框,因为td,th均有边框*/
    }
    th{
        height: 50px;
    }
text-align属性表格水平文字对齐
    table{
        border-collapse: collapse;
        width: 100%;
        text-align: center;
    }
    table,th,td
    {
        border:1px solid black;
        /*会出现双边框,因为td,th均有边框*/
    }
    th{
        height: 50px;
    }
vertical-align属性表格垂直文字对齐
    table{
        border-collapse: collapse;
        width: 100%;
        text-align: center;
    }
    table,th,td
    {
        border:1px solid black;
        /*会出现双边框,因为td,th均有边框*/
    }
    td{
        height: 80px;
        vertical-align: bottom;
    }
padding属性表格填充
    th{
        padding: 50px;
    }
    td{
        padding: 20px;
    }
表格颜色
th{
    background-color: #bada7a;
}
td{
    background-color: #9933ff;
}


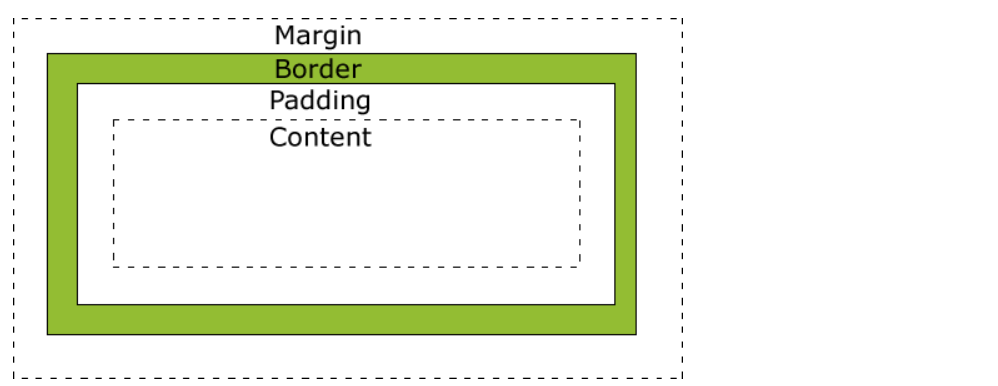
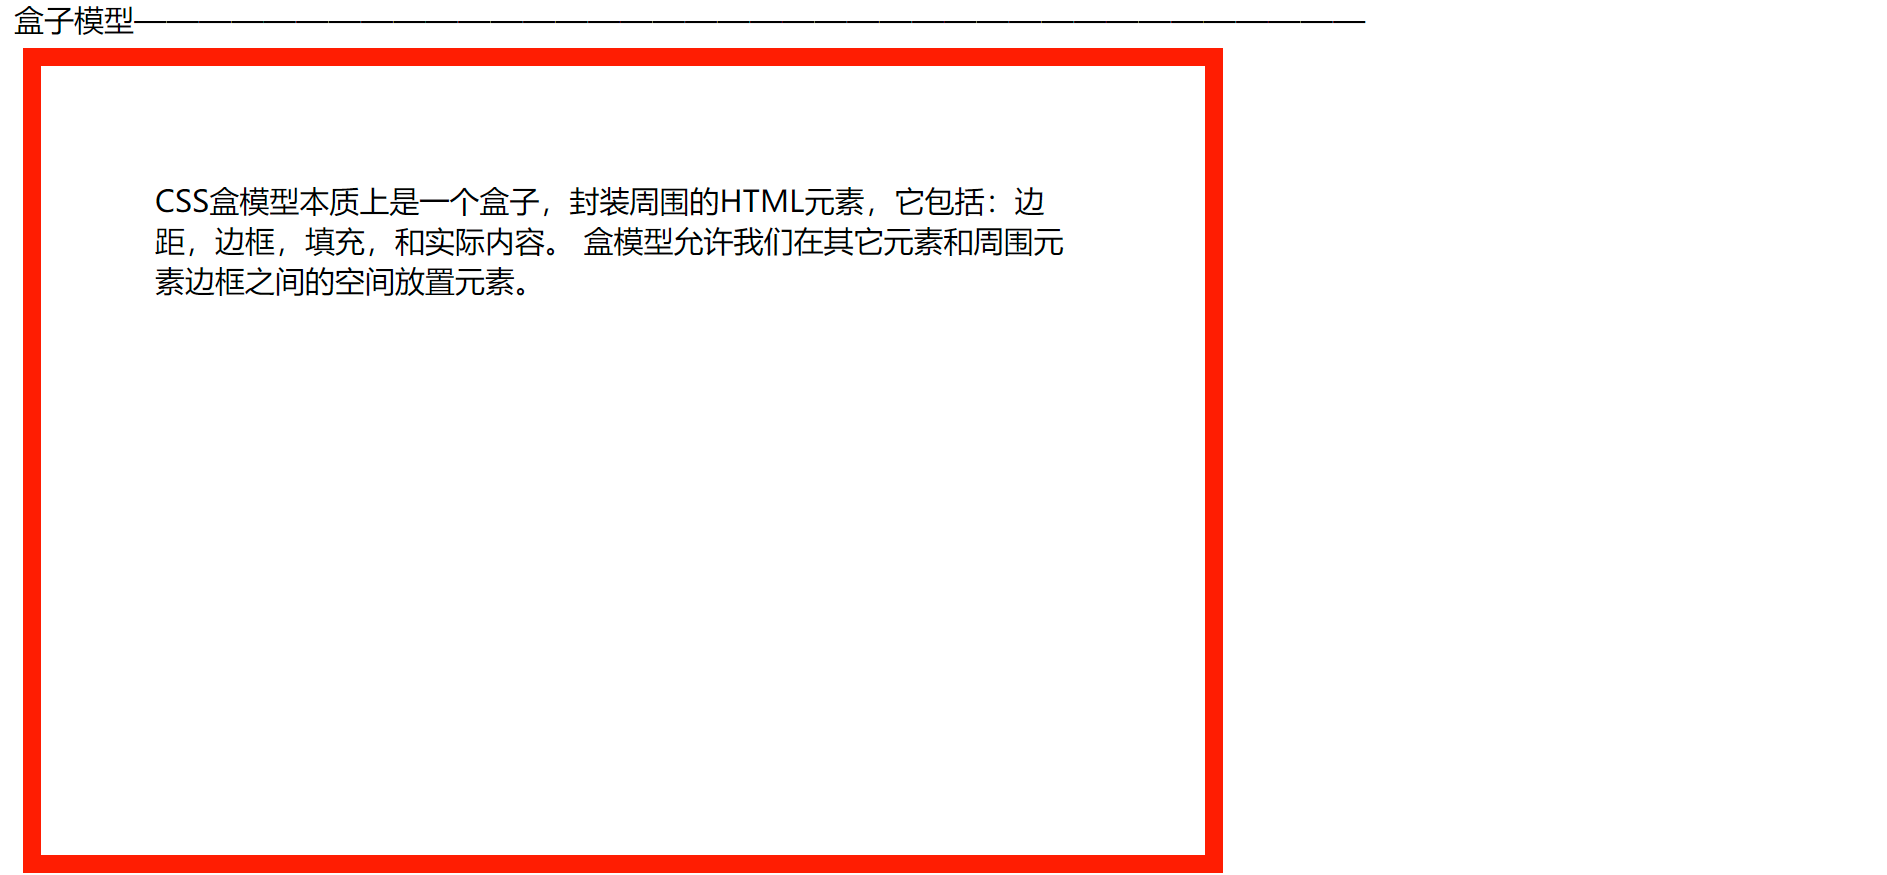
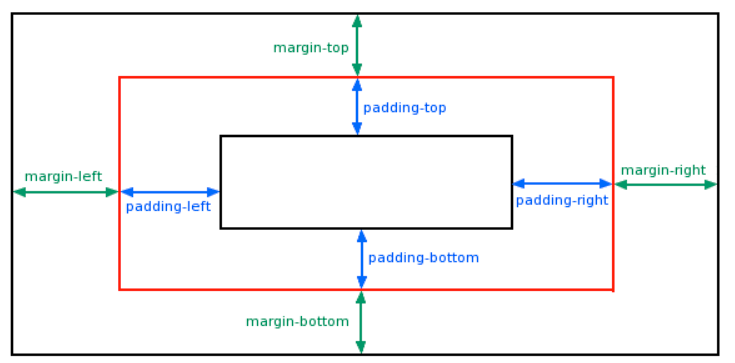
css盒子模型
    div{
        width: 500px;
        height: 300px;
        margin: 5px;
        border: 10px solid red;
        padding: 60px;
    }
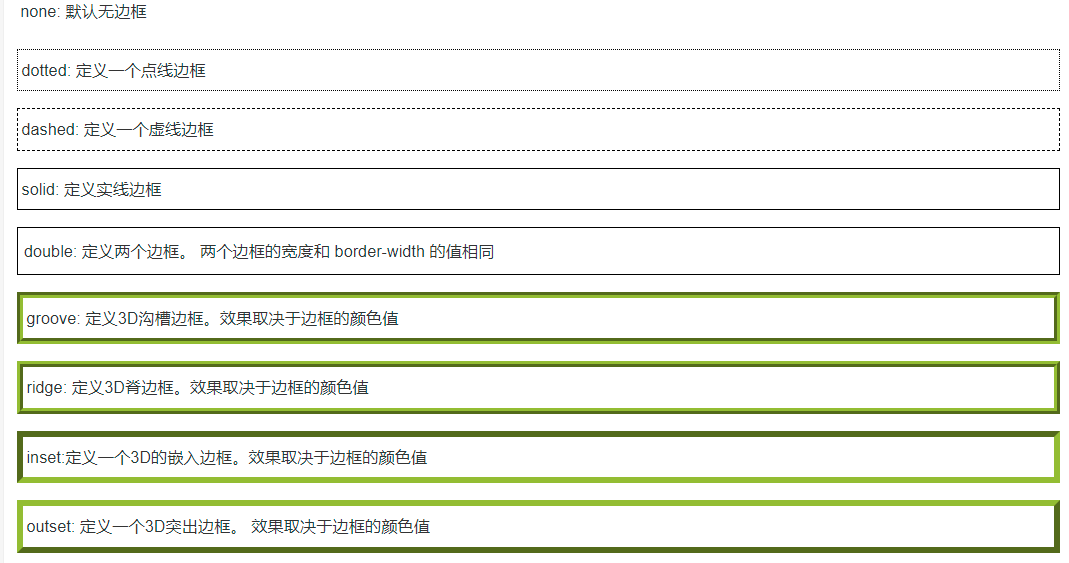
css边框属性
border-style属性用来定义边框的样式
border-width设置边框宽度
border-color属性用于设置边框的颜色
    border-top-style:dotted;
    border-right-style:solid;
    border-bottom-style:dotted;
    border-left-style:solid;
边框简写:border:width style color
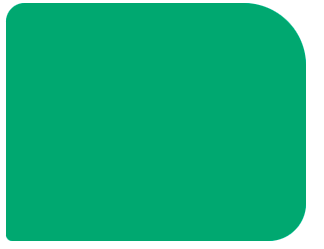
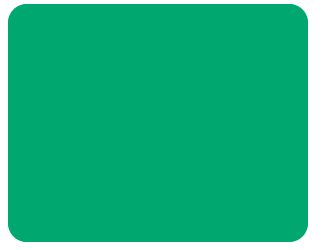
border-radius 属性设置圆角边框
.div1{
        border: 2px solid red;
        padding: 10px 40px;/*width  height*/
        background-color: #b6b6b6;
        width: 400px;
        border-radius: 25px 50px;
    }
    .div2{
        border: 2px dotted;
        padding: 40px;
        width: 500px;
        border-radius: 40px;
    }
椭圆边框- border-radius: 15px 50px 30px 5px:第一个值适用于左上角,第二个值适用于右上角,第三个值适用于右下角,第四个值适用于左下角:
椭圆边框 - border-radius: 15px 50px 30px:第一个值适用于左上角,第二个值适用于右上角和左下角,第三个值适用于右下角:

椭圆边框 - border-radius: 15px 50px:第一个值适用于左上角和右下角,第二个值适用于右上角和左下角

椭圆边框 - border-radius: 15px:该值适用于所有四个角,均等圆角
CSS轮廓属性
    p {border:1px solid red;}
    p.dotted {outline-style:dotted;outline-color: blueviolet;outline-width: thick}
    p.dashed {outline-style:dashed;}
    p.solid {outline-style:solid;}
    p.double {outline-style:double;}
    p.groove {outline-style:groove;}
    p.ridge {outline-style:ridge;}
    p.inset {outline-style:inset;}
    p.outset {outline-style:outset;}
CSS margin(外边距)属性定义元素周围的空间
- margin:25px 50px 75px 100px;
- 上边距为25px
- 右边距为50px
- 下边距为75px
- 左边距为100px
- margin:25px 50px 75px;
- 上边距为25px
- 左右边距为50px
- 下边距为75px
- margin:25px 50px;
- 上下边距为25px
- 左右边距为50px
- margin:25px;
- 所有的4个边距都是25px
CSS padding填充
当元素的 padding(填充)内边距被清除时,所释放的区域将会受到元素背景颜色的填充。
单独使用 padding 属性可以改变上下左右的填充。
padding:25px 50px 75px 100px;
- 上填充为25px
- 右填充为50px
- 下填充为75px
- 左填充为100px
padding:25px 50px 75px;
- 上填充为25px
- 左右填充为50px
- 下填充为75px
padding:25px 50px;
- 上下填充为25px
- 左右填充为50px
padding:25px;
- 所有的填充都是25px


嵌套选择器
- p{ }: 为所有 p 元素指定一个样式。
- .marked{ }: 为所有 class="marked" 的元素指定一个样式。
- .marked p{ }: 为所有 class="marked" 元素内的 p 元素指定一个样式。
<div class="marked">
<p>xxxxxx</p>
</div>
- p.marked{ }: 为所有 class="marked" 的 p 元素指定一个样式。
<p class="marked">xxxxx</p>
Display显示元素
一个内联元素设置为display:block是不允许有它内部的嵌套块元素,可当作换行符
CSS Position(定位)
static定位:没有定位,遵循正常的文档流对象
fixed定位:元素相对于浏览器窗口是固定位置,窗口滚动他也不动
p.pos_fixed
{
	position:fixed;
	top:30px;//距离上方
	right:5px;距离右方
}
relative定位:相对正常位置的位置
h2.pos_left
{
	position:relative;
	left:-20px;//相对偏左
  //top:
}

h2.pos_right
{
	position:relative;
	left:20px;//相对偏右
}
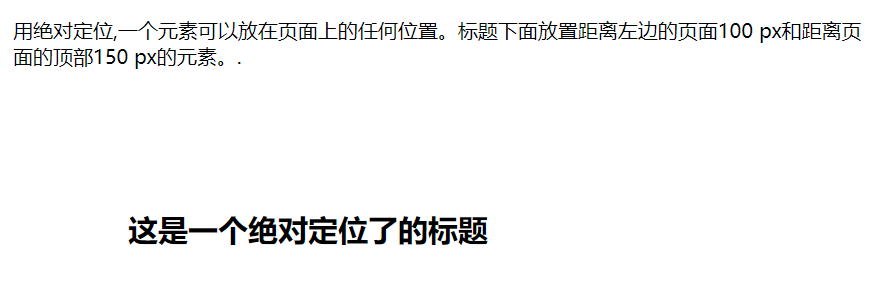
absolute定位:相对于最近的已定位的父元素
h2
{
	position:absolute;
	left:100px;
	top:150px;
}
sticky定位:
position: sticky; 基于用户的滚动位置来定位。
粘性定位的元素是依赖于用户的滚动,在 position:relative 与 position:fixed 定位之间切换。
div.sticky {
  position: -webkit-sticky;
  position: sticky;
  top: 0;
  padding: 5px;
  background-color: #cae8ca;
  border: 2px solid #4CAF50;
}
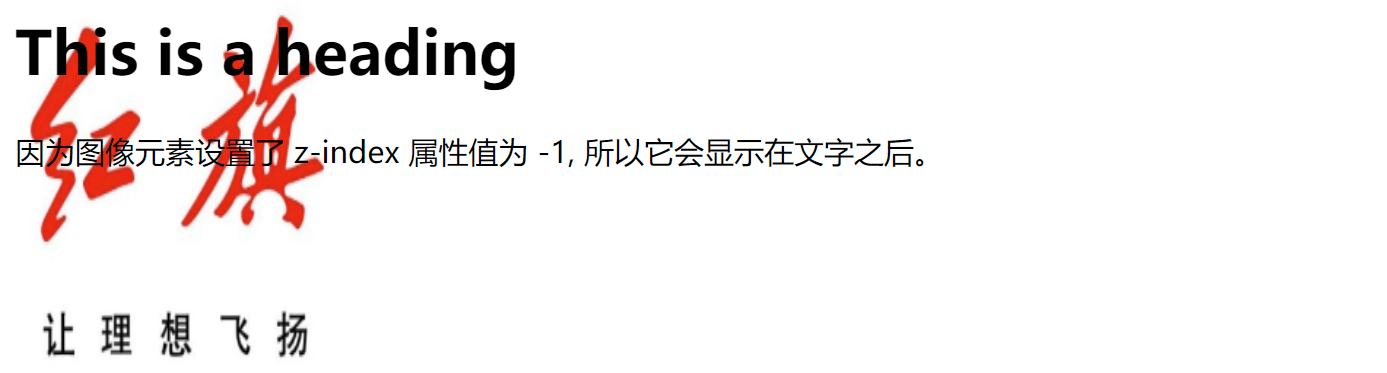
z-index属性:指定元素的堆叠顺序
img
{
	position:absolute;
	left:0px;
	top:0px;
	z-index:-1;//始终在顶部
}


CSS布局 Overflow
值 描述 visible 不裁剪内容,可能会显示在内容框之外。 hidden 裁剪内容 - 不提供滚动机制。 scroll 裁剪内容 - 提供滚动机制。 auto 如果溢出框,则应该提供滚动机制。
overflow-y 指定如何处理顶部/底部边缘的内容溢出元素的内容区域 overflow-x 指定如何处理右边/左边边缘的内容溢出元素的内容区域 <!DOCTYPE html> <html> <head> <meta charset="utf-8"> <title>菜鸟教程(runoob.com)</title> <style> div.ex1 { background-color: lightblue; width: 110px; height: 110px; overflow: scroll; } div.ex2 { background-color: lightblue; width: 110px; height: 110px; overflow: hidden; } div.ex3 { background-color: lightblue; width: 110px; height: 110px; overflow: auto; } div.ex4 { background-color: lightblue; width: 110px; height: 110px; overflow: visible; } div.ex5 { background-color: lightblue; width: 110px; height: 110px; overflow-x: auto; } </style> </head> <body> <h2>overflow: scroll:</h2> <div class="ex1">xxxxxxxxxxxxxxxxxxxxxxxxxxxxxxxxxxxxxxxxxxxxxxxxxxxxxxxxxxxxxxxxx</div> <h2>overflow: hidden:</h2> <div class="ex2">xxxxxxxxxxxxxxxxxxxxxxxxxxxxxxxxxxxxxxxxxxxxxxxxxxxxxxxxxxxxxxxxx</div> <h2>overflow: auto:</h2> <div class="ex3">xxxxxxxxxxxxxxxxxxxxxxxxxxxxxxxxxxxxxxxxxxxxxxxxxxxxxxxxxxxxxxxxx</div> <h2>overflow: visible (默认):</h2> <div class="ex4">xxxxxxxxxxxxxxxxxxxxxxxxxxxxxxxxxxxxxxxxxxxxxxxxxxxxxxxxxxxxxxxxx</div> <h2>overflow-x: 水平滚动条(内部文字宽度大于盒子才可以)</h2> <div class="ex5"><p style="width:150px">xxxxxxxxxxxxxxxxxxxxxxxxxxxxxxxxxxxxxxxxxxxxxxxxxxxxxxxxxxxxxxxxx</p></div> </body> </html>


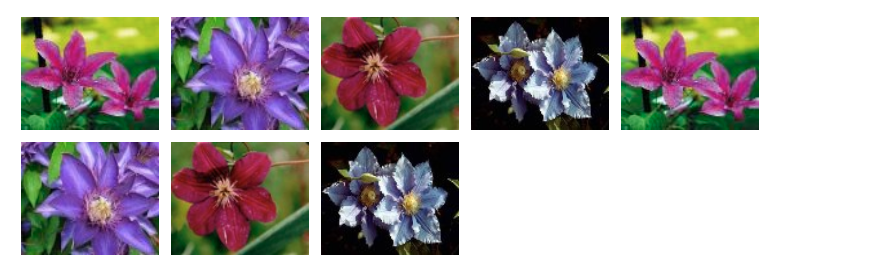
CSS Float浮动
.thumbnail
{
	float:left;//靠左浮动
	width:110px;//每一块的大小、间距
	height:90px;
	margin:5px;
}
<img class="thumbnail" src="/images/klematis_small.jpg" width="107" height="90">
<img class="thumbnail" src="/images/klematis2_small.jpg" width="107" height="80">
<img class="thumbnail" src="/images/klematis3_small.jpg" width="116" height="90">
<img class="thumbnail" src="/images/klematis4_small.jpg" width="120" height="90">
每一张照片均向左排列
CSS 布局 - 水平 & 垂直对齐
margin:auto 使块、图片进行水平居中
.center {
    margin: auto;
    width: 60%;
    border: 3px solid #73AD21;
    padding: 10px;
}
text-align文本居中
<p style="text-align:center">块居中</p>
左右对齐-使用float方式
.right {
    float:right;
    width: 80px;
    border: 3px solid #73AD21;
    padding: 10px;
}
垂直居中:padding


导航栏
垂直导航栏
<!DOCTYPE html>
<html>
<head>
<meta charset="utf-8">
<title></title>
<style>
ul {
    list-style-type: none;
    margin: 0;
    padding: 0;
    width: 200px;
    background-color: #f1f1f1;
}

li a {
    display: block;
    color: #000;
    padding: 8px 16px;
    text-decoration: none;
}

/* 鼠标移动到选项上修改背景颜色 */
li a:hover {
    background-color: #555;
    color: white;
}
</style>
</head>

<body>
<ul>
<li><a href="#home">主页</a></li>
<li><a href="#news">新闻</a></li>
<li><a href="#contact">联系</a></li>
<li><a href="#about">关于</a></li>
</ul>

</body>
</html>
垂直导航栏激活当前导航条
<!DOCTYPE html>
<html>
<head>
<meta charset="utf-8">
<title></title>
<style>
ul {
    list-style-type: none;
    margin: 0;
    padding: 0;
    width: 200px;
    background-color: #f1f1f1;
}

li a {
    display: block;
    color: #000;
    padding: 8px 16px;
    text-decoration: none;
}

li a.active {
    background-color: #4CAF50;
    color: white;
}

li a:hover:not(.active) {
    background-color: #555;
    color: white;
}
</style>
</head>
<body>


<ul>
  <li><a class="active" href="#home">主页</a></li>
  <li><a href="#news">新闻</a></li>
  <li><a href="#contact">联系</a></li>
  <li><a href="#about">关于</a></li>
</ul>

</body>
</html>
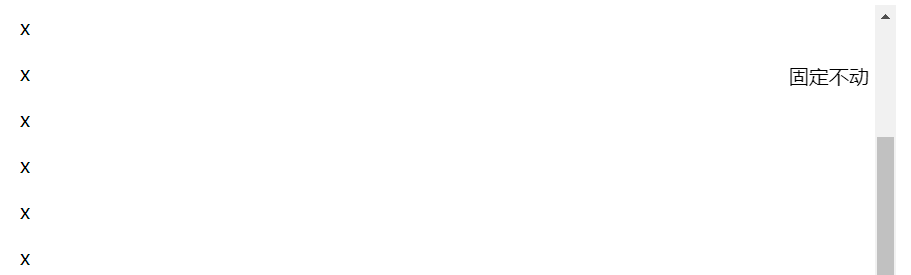
全屏高度的固定导航条
<!DOCTYPE html>
<html>
<head>
    <meta charset="utf-8">
    <title>菜鸟教程(runoob.com)</title>
    <style>
       ul {
            list-style-type: none;
            margin: 0;
            padding: 0;
            width: 25%;
            background-color: #f1f1f1;
            position: fixed;
            height: 100%;
            overflow: auto;
            }

       li a{
           display: block;/*会改变其他部位*/
           color: black;
           padding: 8px 16px;
           text-decoration: none;
       }
       /*鼠标移动改变样式*/
       li a:hover:not(.active){
           background-color: #0dcaf0;
           color: #FFFFFF;
       }
       /*激活当前导航栏*/
       li a.active{
           background-color: #bada7a;
           color: #FFFFFF;
       }
       /**/
    </style>
</head>

<body>
    <ul>
        <li><a  class="active" href="#">导航1</a></li>
        <li><a href="#">导航2</a></li>
        <li><a href="#">导航3</a></li>
        <li><a href="#">导航4</a></li>
    </ul>
<div style="margin-left: 25%;padding: 1px 16px;height: 1000px">
    <p>ssssssssssssssssssssss</p>
    <p>ssssssssssssssssssssss</p>
    <p>ssssssssssssssssssssss</p>
    <p>ssssssssssssssssssssss</p>
    <p>ssssssssssssssssssssss</p>
    <p>ssssssssssssssssssssss</p>
    <p>ssssssssssssssssssssss</p>
    <p>ssssssssssssssssssssss</p>
    <p>ssssssssssssssssssssss</p>
    <p>ssssssssssssssssssssss</p>
    <p>ssssssssssssssssssssss</p>
</div>
</body>
</html>
水平导航栏
使用浮动列表项即可
       ul{
           list-style-type: none;
           padding: 0;
           margin: 0;
           overflow: hidden;***
           background-color: #bada7a;

       }
        li{
            float: left;//向左浮动
            border: 1px solid black;
        }
       li a{
           display: block;/*会改变其他部位*/
           color: black;
           padding: 8px 16px;
           text-decoration: none;
       }
       /*鼠标移动改变样式*/
       li a:hover{
           background-color: #0dcaf0;
           color: #FFFFFF;
       }
固定导航栏在底部
<!DOCTYPE html>
<html>
<head>
    <meta charset="utf-8">
    <title>菜鸟教程(runoob.com)</title>
    <style>
        body {margin:0;}

        ul {
            list-style-type: none;
            margin: 0;
            padding: 0;
            overflow: hidden;
            background-color: #333;
            position: fixed;/*固定*/
            bottom: 0;/*在顶部*/
            width: 100%
        }

        li {
            float: left;
        }

        li a {
            display: block;
            color: white;
            text-align: center;
            padding: 14px 16px;
            text-decoration: none;
        }

        li a:hover:not(.active) {
            background-color: #111;
        }
        .active {
            background-color: #4CAF50;
        }
    </style>
</head>
<body>

<ul>
    <li><a class="active" href="#home">主页</a></li>
    <li><a href="#news">新闻</a></li>
    <li><a href="#contact">联系</a></li>
    <li><a href="#about">关于</a></li>
</ul>

<div style="padding:20px;background-color:#1abc9c;height:1500px;">

    <p>Some text some text some text some text..</p>
    <p>Some text some text some text some text..</p>
    <p>Some text some text some text some text..</p>
    <p>Some text some text some text some text..</p>
    <p>Some text some text some text some text..</p>
    <p>Some text some text some text some text..</p>
    <p>Some text some text some text some text..</p>
    <p>Some text some text some text some text..</p>
    <p>Some text some text some text some text..</p>
    <p>Some text some text some text some text..</p>
    <p>Some text some text some text some text..</p>
    <p>Some text some text some text some text..</p>
    <p>Some text some text some text some text..</p>
    <p>Some text some text some text some text..</p>
    <p>Some text some text some text some text..</p>
    <p>Some text some text some text some text..</p>
    <p>Some text some text some text some text..</p>
    <p>Some text some text some text some text..</p>
    <p>Some text some text some text some text..</p>
    <p>Some text some text some text some text..</p>
</div>

</body>
</html>


下拉菜单
<!DOCTYPE html>
<html>
<head>
    <title>下拉菜单实例|菜鸟教程(runoob.com)</title>
    <meta charset="utf-8">
    <style>
        /**/
        span{/*按钮样式*/
            background-color: #bada7a;
            padding: 5px;
            width: 150px;
        }
        .dropdown {/*下拉菜单必须css*/
            position: relative;
            display: inline-block;

        }
        .dropdown-content {/*菜单样式*/
            display: none;
            position: absolute;
            background-color: #f9f9f9;
            width: 80px;
            padding: 1px;

        }
        .dropdown-content a{/*超链接样式*/
            display: block; /*可理解为换行符*/
            text-decoration: none;
        }

        .dropdown:hover .dropdown-content {
            display: block;
        }
    </style>
</head>
<body>
<div class="dropdown">
    <span>下拉菜单</span>
    <div class="dropdown-content">
        <a href="#">1</a>
        <a href="#">2</a>
        <a href="#">3</a>
        <a href="#">4</a>
    </div>
</div>
</body>
</html>

块、图片透明度属性:opacity
值为1不透


 576
576


 被折叠的 条评论
为什么被折叠?
被折叠的 条评论
为什么被折叠?
 到【灌水乐园】发言


