


背景
项目中使用java 自带的延迟队列Delayed,只有添加进队列的消息,并没有被消费到
版本
jdk1.8
问题原因
上一个消费队列出现异常并且没有捕获,下一个队列就没有进行消费
复现代码
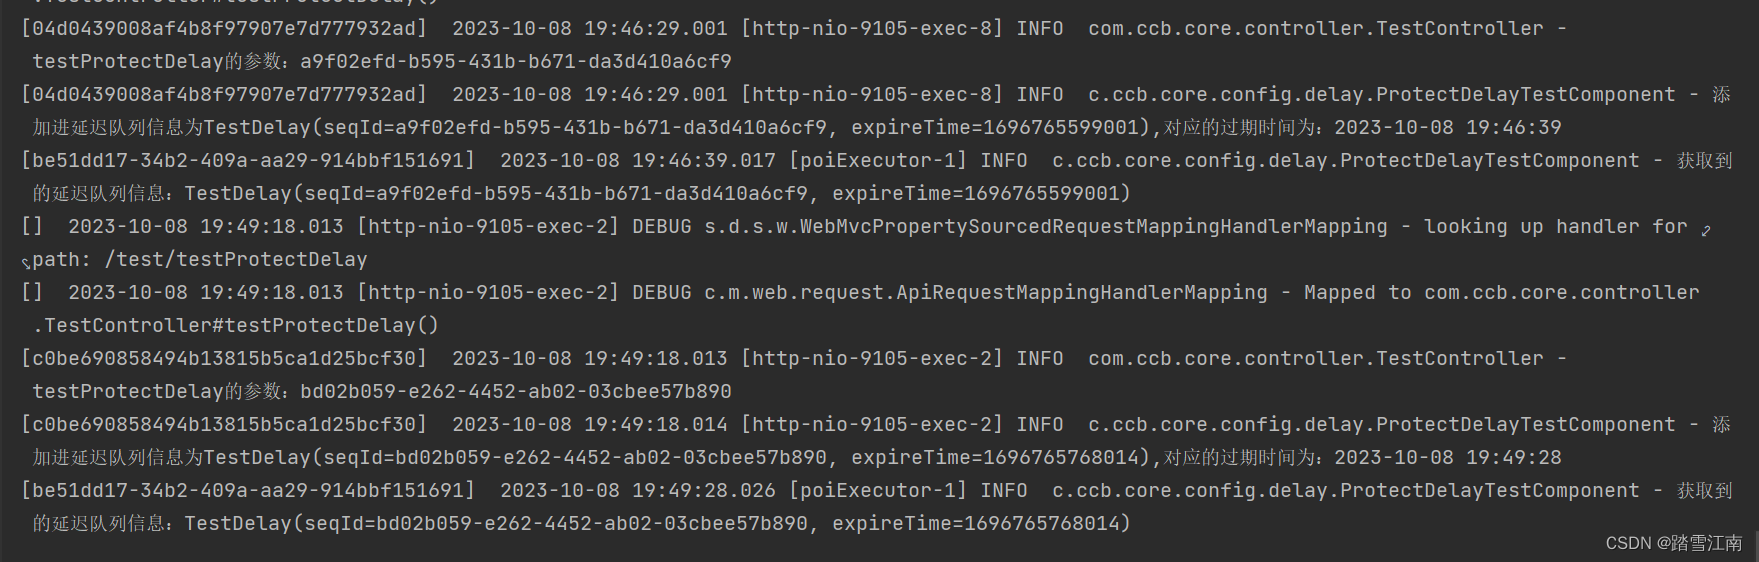
没有抛异常的情况下
package com.ccb.core.config.delay;

import lombok.Data;

import java.util.concurrent.Delayed;
import java.util.concurrent.TimeUnit;

/**
 * 防护舱延迟对象
 *
 * @author sz
 * @version 1.0
 * @date 2023-02-10 15:47
 */
@Data
public class TestDelay implements Delayed {


     private  String seqId;
    /**
    *过期时间
    */
    private Long expireTime;
    @Override
    public long getDelay(TimeUnit unit) {
        return unit.convert(this.expireTime - System.currentTimeMillis() , TimeUnit.MILLISECONDS);
    }

    @Override
    public int compareTo(Delayed other) {
        if (other == this){
            return 0;
        }
        if(other instanceof TestDelay){
            TestDelay otherRequest = (TestDelay)other;
            long otherStartTime = otherRequest.expireTime;
            return (int)(this.expireTime - otherStartTime);
        }
        return 0;
    }
}
package com.ccb.core.config.delay;

import com.ccb.core.common.util.DateUtil;
import lombok.extern.slf4j.Slf4j;
import org.springframework.stereotype.Component;

import javax.annotation.PostConstruct;
import javax.annotation.Resource;
import java.util.concurrent.DelayQueue;
import java.util.concurrent.Executor;

/**
 * @author sz
 * @version 1.0
 * @date 2023-10-08 19:12
 */
@Slf4j
@Component
public class ProtectDelayTestComponent {

    private static DelayQueue<TestDelay> delayQueue = new DelayQueue<TestDelay>();

    @Resource(name = "poiExecutor")
    private Executor poiExecutor;

    /**
     * 系统启动时,预先加载的数据@PostConstruct
     */
    @PostConstruct
    public void init(){

        log.info("线程进入ProtectDelayTestComponent***************init");

        poiExecutor.execute(() -> {

            while(true){
                try {
                    TestDelay protectDelay = delayQueue.take();
                    log.info("获取到的延迟队列信息:{}", protectDelay);
                } catch (InterruptedException e) {
                    e.printStackTrace();
                }
            }
        });

    }

    /**
     * 加入延时队列
     *
     */
    public boolean addDelayQueue(TestDelay protectDelay){
        log.info("添加进延迟队列信息为{},对应的过期时间为:{}",protectDelay, DateUtil.convertTimeToString(protectDelay.getExpireTime(),"yyyy-MM-dd HH:mm:ss"));
        return delayQueue.add(protectDelay);
    }
}
 /**
     * poi线程池设置 由spring容器进行管理
     * @return
     */
    @Bean("poiExecutor")
    public Executor poiExecutor() {
        ThreadPoolTaskExecutor executor = new ThreadPoolTaskExecutor();
        executor.setCorePoolSize(8);
        executor.setMaxPoolSize(16);
        executor.setQueueCapacity(1000);
        executor.setKeepAliveSeconds(60);
        executor.setAllowCoreThreadTimeOut(true);
        executor.setThreadNamePrefix("poiExecutor-");
        executor.setRejectedExecutionHandler(new ThreadPoolExecutor.CallerRunsPolicy());
        return executor;
    }
写TestController 测试正常的添加进入延迟队列
  @GetMapping("/test/testProtectDelay")
    @ApiModelProperty("测试批量死信队列")
    public RespData testProtectDelay(){
        TestDelay protectDelay =new TestDelay();
        String s = UuidUtils.generateUuid();
        log.info("testProtectDelay的参数:{}",s);
        protectDelay.setSeqId(s);
        protectDelay.setExpireTime(System.currentTimeMillis()+10*1000);
        protectDelayTestComponent.addDelayQueue(protectDelay);
        return RespData.success();
    }
正常运行结果
手动抛出异常后
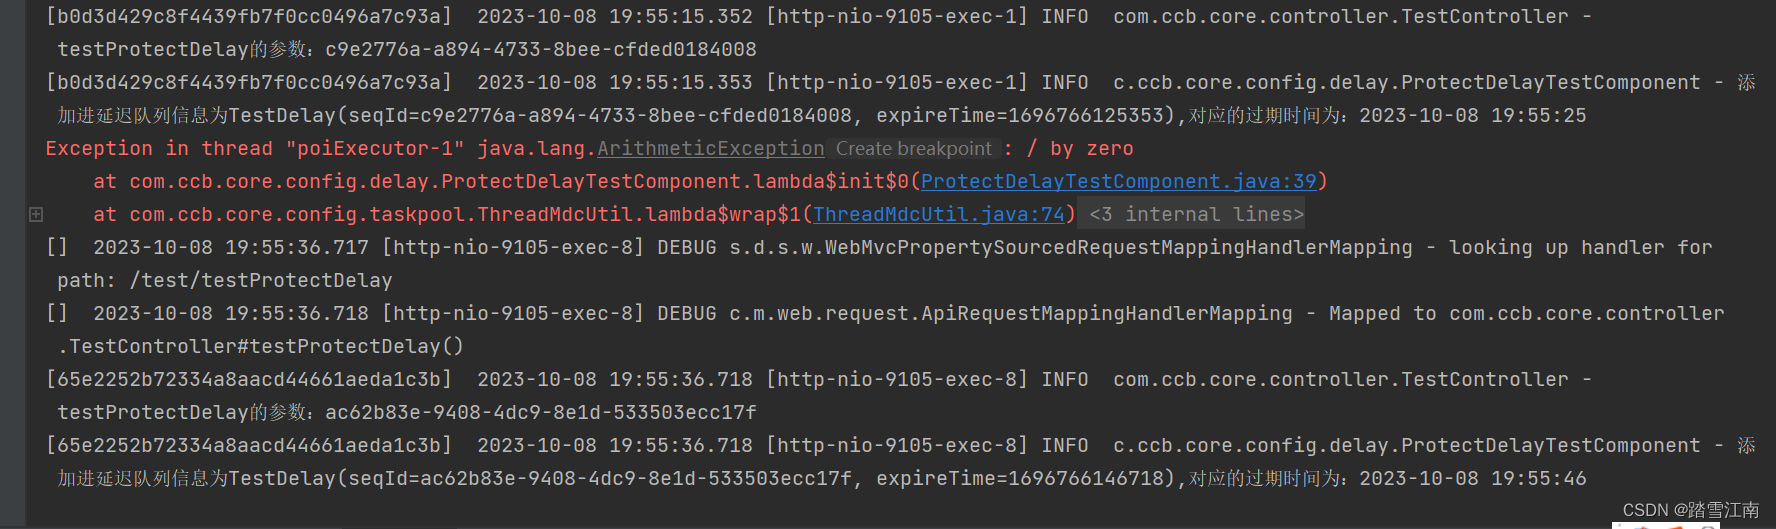
解决方案
在take中捕获Exception ,可以继续消费


 1702
1702

 被折叠的 条评论
为什么被折叠?
被折叠的 条评论
为什么被折叠?
 到【灌水乐园】发言


