


目的:将获取过来的视频流放在网页上,放在网页外网上进行播放
Nginx是一款轻量级的Web 服务器/反向代理服务器及电子邮件(IMAP/POP3)代理服务器。 nginx-rmtp-module是Nginx服务器的流媒体插件。nginx通过rtmp模块提供rtmp服务, ffmpeg推送一个rtmp流到nginx, 然后客户端通过访问nginx来收看实时视频流。
vlc视频播放器(windows安装方便测试),下载地址:https://www.videolan.org/
下载ffmpeg,下载地址:https://ffmpeg.org/download.html ,压缩后进入bin目录,然后复制路径地址,配置到环境变量里,验证ffmpeg的配置,调用命令行(windows+R输入cmd)输入“ffmpeg –version”,如果出现如下说明配置成功
nginx用来做流媒体服务器,(下载带Gryphon的)下载地址 :http://nginx-win.ecsds.eu/download/
rtmp模块:nginx-http-flv-module,下载地址 :https://github.com/winshining/nginx-http-flv-module 解压到nginx-xxx-Gryphon目录中
添加内容:
rtmp {
    server {
        listen 4848;
        chunk_size 4000;
        application live {
             live on;
        }
        application hls {
            live on;
            hls on;
            hls_path hls;
            hls_fragment 5s;
        }
    }
}

//server里
        location /hls {
            types {
                application/vnd.apple.mpegurl m3u8;
                video/mp2t ts;
            }
            alias hls;
            expires -1;
            add_header Access-Control-Allow-Origin *;
            add_header Access-Control-Allow-Methods 'GET, POST, OPTIONS';
            add_header Access-Control-Allow-Headers 'DNT,X-Mx-ReqToken,Keep-Alive,User-Agent,X-Requested-With,If-Modified-Since,Cache-Control,Content-Type,Authorization';
            if ($request_method = 'OPTIONS') {
                return 204;
            }
        }
完整示例:
#user  nobody;
# multiple workers works !
worker_processes  2;

#error_log  logs/error.log;
#error_log  logs/error.log  notice;
#error_log  logs/error.log  info;

#pid        logs/nginx.pid;

events {
    worker_connections  8192;
    # max value 32768, nginx recycling connections+registry optimization =
    #   this.value * 20 = max concurrent connections currently tested with one worker
    #   C1000K should be possible depending there is enough ram/cpu power
    # multi_accept on;
}

rtmp {
    server {
        listen 4848;
        chunk_size 4000;
        application live {
             live on;
        }
        application hls {
            live on;
            hls on;
            hls_path hls;
            hls_fragment 5s;
        }
    }
}

http {
    #include      /nginx/conf/naxsi_core.rules;
    include       mime.types;
    default_type  application/octet-stream;

    #log_format  main  '$remote_addr:$remote_port - $remote_user [$time_local] "$request" '
    #                  '$status $body_bytes_sent "$http_referer" '
    #                  '"$http_user_agent" "$http_x_forwarded_for"';

    #access_log  logs/access.log  main;

#     # loadbalancing PHP
#     upstream myLoadBalancer {
#         server 127.0.0.1:9001 weight=1 fail_timeout=5;
#         server 127.0.0.1:9002 weight=1 fail_timeout=5;
#         server 127.0.0.1:9003 weight=1 fail_timeout=5;
#         server 127.0.0.1:9004 weight=1 fail_timeout=5;
#         server 127.0.0.1:9005 weight=1 fail_timeout=5;
#         server 127.0.0.1:9006 weight=1 fail_timeout=5;
#         server 127.0.0.1:9007 weight=1 fail_timeout=5;
#         server 127.0.0.1:9008 weight=1 fail_timeout=5;
#         server 127.0.0.1:9009 weight=1 fail_timeout=5;
#         server 127.0.0.1:9010 weight=1 fail_timeout=5;
#         least_conn;
#     }

    sendfile        off;
    #tcp_nopush     on;

    server_names_hash_bucket_size 128;

## Start: Timeouts ##
    client_body_timeout   10;
    client_header_timeout 10;
    keepalive_timeout     30;
    send_timeout          10;
    keepalive_requests    10;
## End: Timeouts ##

    #gzip  on;
    server {
        listen       1515;
        server_name  localhost;


        location /stat {
            rtmp_stat all;
            rtmp_stat_stylesheet stat.xsl;
        }
        location /stat.xsl {
            root nginx-rtmp-module/;
        }
        location /control {
            rtmp_control all;
        }
        location /hls {
            types {
                application/vnd.apple.mpegurl m3u8;
                video/mp2t ts;
            }
            alias hls;
            expires -1;
            add_header Access-Control-Allow-Origin *;
            add_header Access-Control-Allow-Methods 'GET, POST, OPTIONS';
            add_header Access-Control-Allow-Headers 'DNT,X-Mx-ReqToken,Keep-Alive,User-Agent,X-Requested-With,If-Modified-Since,Cache-Control,Content-Type,Authorization';
            if ($request_method = 'OPTIONS') {
                return 204;
            }
        }
        #charset koi8-r;
        #access_log  logs/host.access.log  main;

        ## Caching Static Files, put before first location
        #location ~* \.(jpg|jpeg|png|gif|ico|css|js)$ {
        #    expires 14d;
        #    add_header Vary Accept-Encoding;
        #}
# For Naxsi remove the single # line for learn mode, or the ## lines for full WAF mode
        location / {
            #include    /nginx/conf/mysite.rules; # see also http block naxsi include line
            ##SecRulesEnabled;
         ##DeniedUrl "/RequestDenied";
         ##CheckRule "$SQL >= 8" BLOCK;
         ##CheckRule "$RFI >= 8" BLOCK;
         ##CheckRule "$TRAVERSAL >= 4" BLOCK;
         ##CheckRule "$XSS >= 8" BLOCK;
            root   html;
            index  index.html index.htm;
        }

# For Naxsi remove the ## lines for full WAF mode, redirect location block used by naxsi
        ##location /RequestDenied {
        ##    return 412;
        ##}

## Lua examples !
#         location /robots.txt {
#           rewrite_by_lua '
#             if ngx.var.http_host ~= "localhost" then
#               return ngx.exec("/robots_disallow.txt");
#             end
#           ';
#         }

        #error_page  404              /404.html;

        # redirect server error pages to the static page /50x.html
        #
        error_page   500 502 503 504  /50x.html;
        location = /50x.html {
            root   html;
        }

        # proxy the PHP scripts to Apache listening on 127.0.0.1:80
        #
        #location ~ \.php$ {
        #    proxy_pass   http://127.0.0.1;
        #}

        # pass the PHP scripts to FastCGI server listening on 127.0.0.1:9000
        #
        #location ~ \.php$ {
        #    root           html;
        #    fastcgi_pass   127.0.0.1:9000; # single backend process
        #    fastcgi_pass   myLoadBalancer; # or multiple, see example above
        #    fastcgi_index  index.php;
        #    fastcgi_param  SCRIPT_FILENAME  $document_root$fastcgi_script_name;
        #    include        fastcgi_params;
        #}

        # deny access to .htaccess files, if Apache's document root
        # concurs with nginx's one
        #
        #location ~ /\.ht {
        #    deny  all;
        #}
    }

    # another virtual host using mix of IP-, name-, and port-based configuration
    #
    #server {
    #    listen       8000;
    #    listen       somename:8080;
    #    server_name  somename  alias  another.alias;

    #    location / {
    #        root   html;
    #        index  index.html index.htm;
    #    }
    #}

    # HTTPS server
    #
    #server {
    #    listen       443 ssl spdy;
    #    server_name  localhost;

    #    ssl                  on;
    #    ssl_certificate      cert.pem;
    #    ssl_certificate_key  cert.key;
    #    ssl_session_timeout  5m;
    #    ssl_prefer_server_ciphers On;
    #    ssl_protocols TLSv1 TLSv1.1 TLSv1.2;
    #    ssl_ciphers ECDH+AESGCM:ECDH+AES256:ECDH+AES128:ECDH+3DES:RSA+AESGCM:RSA+AES:RSA+3DES:!aNULL:!eNULL:!MD5:!DSS:!EXP:!ADH:!LOW:!MEDIUM;

    #    location / {
    #        root   html;
    #        index  index.html index.htm;
    #    }
    #}

}
添加好配置后
打开cmd窗口进入nginx-xxx-Gryphon目录输入启动命令:nginx.exe -c conf/nginx-win.conf
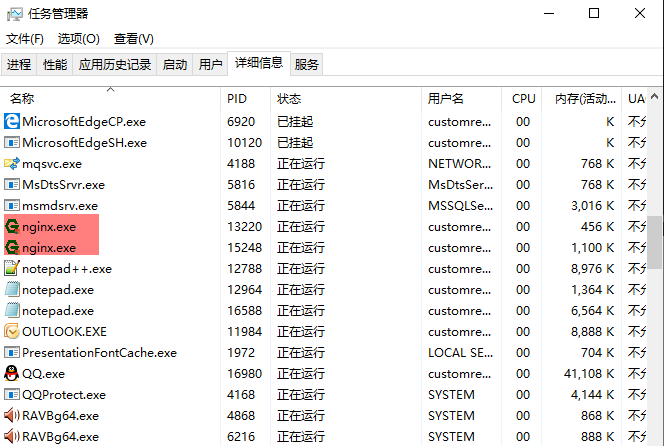
然后打开任务管理器查看nginx服务是否启动,有如下图nginx.exe所示说明已经成功启动。
完成前边所有步骤之后,使用FFmpeg进行转流
打开cmd执行以下命令,推荐使用(rtsp数据流转为hls)
rtsp数据流转为rtmp
nginx配置的为4848端口
ffmpeg -i rtsp的视频流地址 -vcodec libx264 -acodec aac -f flv rtmp://127.0.0.1:4848/live/hls访问路径:rtmp://127.0.0.1:4848/live/hls
rtsp数据流转为hls(m3u8)
目录为nginx下的hls目录,指定文件名
ffmpeg -f rtsp -rtsp_transport tcp -i rtsp的视频流地址 -codec copy -f hls -hls_list_size 2 -hls_flags 2 -hls_time 2 “E:\project\nginx_Gryphon\hls\test.m3u8”访问路径: http://127.0.0.1:1515/hls/test.m3u8
html展示
rtmp展示,记得路径后边加 /
<!DOCTYPE html>
<html lang="en">
<head>

    <title>HTML5 直播</title>
    <link href="http://vjs.zencdn.net/5.19/video-js.min.css" rel="stylesheet">
    <script src="http://vjs.zencdn.net/5.19/video.min.js"></script>
    <script src="https://cdn.jsdelivr.net/npm/videojs-flash@2/dist/videojs-flash.min.js"></script>

</head>
<body>
<video id="myvideo" class="video-js vjs-default-skin" controls preload="auto"
       width="1280" height="720" poster="http://vjs.zencdn.net/v/oceans.png" data-setup="{}">
    <source src="rtmp://127.0.0.1:4848/live/hls/" type="rtmp/flv">

    <p class="vjs-no-js">To view this video please enable JavaScript, and consider upgrading to a web browser that
        <a href="http://videojs.com/html5-video-support/" target="_blank">supports HTML5 video</a>
    </p>
</video>

</body>

</html>
m3u8展示
<!DOCTYPE html>
<html lang="en">
<head>

    <title>HTML5 直播</title>
    <script src="https://cdn.jsdelivr.net/hls.js/latest/hls.min.js"></script>

</head>
<body>
<video id="video"></video>

</body>
<script>
    if(Hls.isSupported()){
        var video=document.getElementById('video');//获取video标签
        var hls=new Hls();//实例化Hls对象
        hls.loadSource('http://127.0.0.1:1515/hls/test.m3u8');//传入路径
        hls.attachMedia(video);
        hls.on(Hls.Events.MANIFEST_PARSED,function(){
            video.play();//调用播放API
        });
    }
</script>
</html>
看到这里了,帮忙点个赞吧,谢谢🙏🙏🙏


 334
334


 被折叠的 条评论
为什么被折叠?
被折叠的 条评论
为什么被折叠?
 到【灌水乐园】发言


