


mock简介
应用在前后端分离的开发模式中
敏捷管理中需要测试左移
模拟后端与前端对接调试。实现满足接口逻辑通路,保证基本接口功能。
mock开源框架
- 只需配置request和response就可以满足要求
- 支持http/https/socket 协议
- 支持在request中配置header、cookie、StatusCode
- 对GET /POST/PUT/DELET请求方式都支持
- 有java环境即可
- 配置后即可生效
- 支持多种数据格式:JSON、HTML、xml、File
mock服务搭建
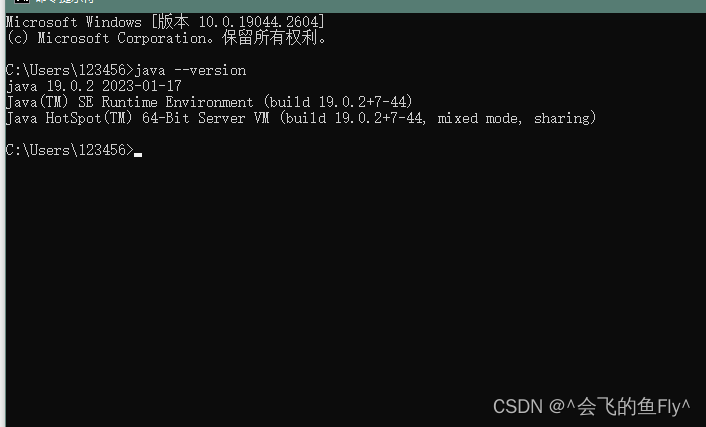
moco项目是java开发的,启动moco前需要安装jdk
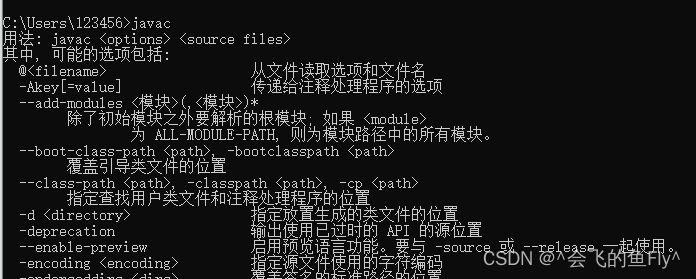
验证环境:
java --version
或者
javac
工具下载:
官网:
https://github.com/dreamhead/moco#latest-release
链接:https://pan.baidu.com/s/1-fMUu-s4fPeuLoMy64kbuw
提取码:ertf

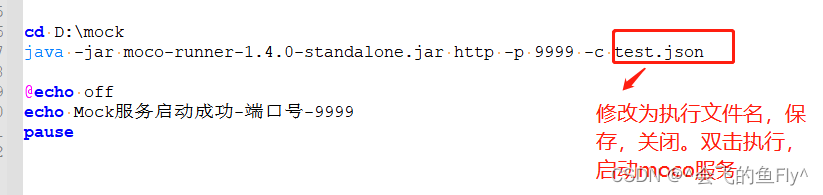
运行方法:通过执行工具运行moco的jar包:

通过java指令只需要修改相应协议、执行端口号(不冲突都行)、执行文件名,就可以执行mock进行测试接口
注意:
1.端口号自定义不要设置常用的,8080,443,22,80以免冲突。
2.moco跨平台的,支持windows/linux系统、Mac系统
3.上述命令是制作成了启动文件,也可以直接在命令行窗口执行手打执行,相对麻烦
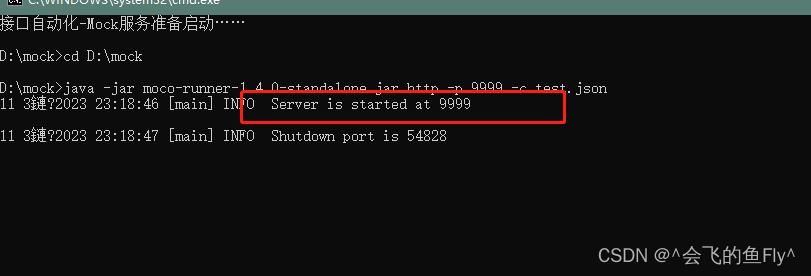
执行
- 编写接口文档,也就是json执行文件

脚本如下:
[
{
	"description":"demo1=约定URI",
	"request":{
		"uri":"test001"
		},
	"response":{
		"text":"Hello,world"
	}
}
]
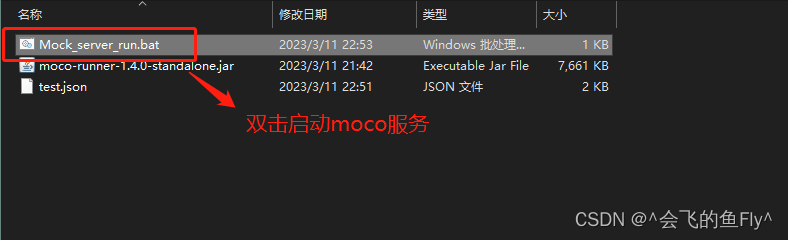
- 启动moco服务
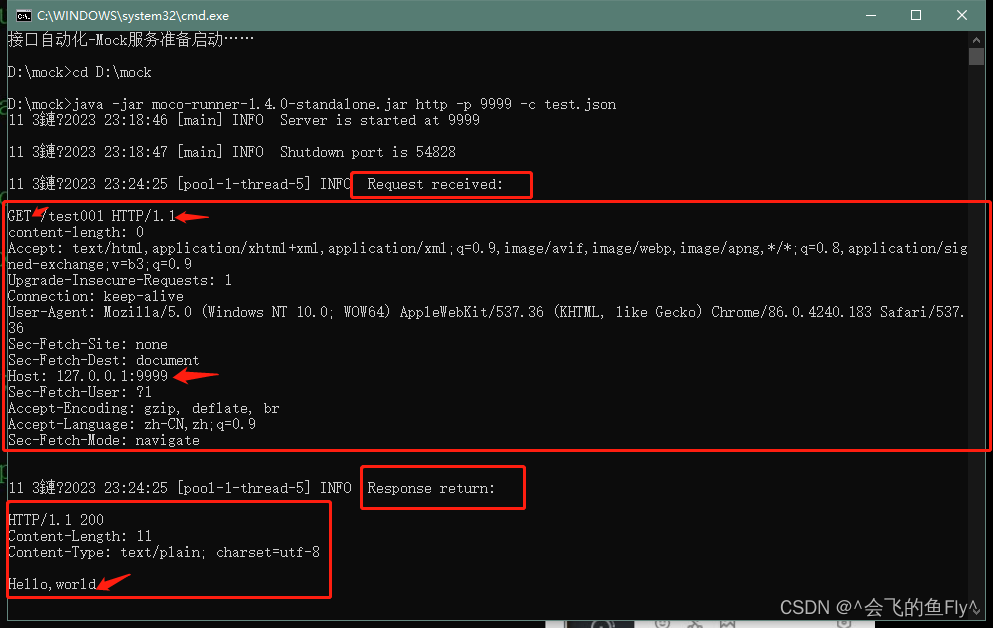
- 验证接口
在网页输入:127.0.0.1:9999/test001

-
- 响应日志:
也可以通过postman调用验证:
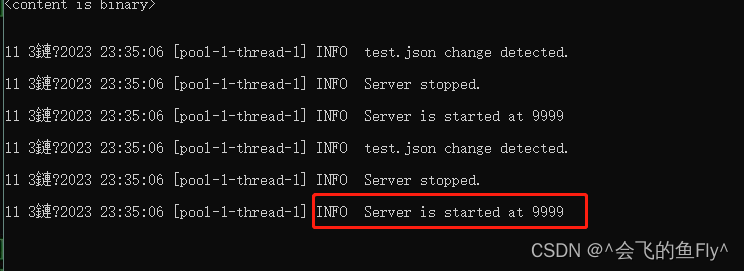
本地脚本修改保存,
服务自动重启,不用每次都关闭服务:这就是非常方便的好处
---------------------------------以上是基本的mock的工作原理-------------------------------------------
- 响应日志:
配置不同的请求编写
GET请求可以在浏览器中直接访问:http://localhost:9999/uri?queries 返回json数据。
- Moco框架的http协议get方法的Mock实现
-
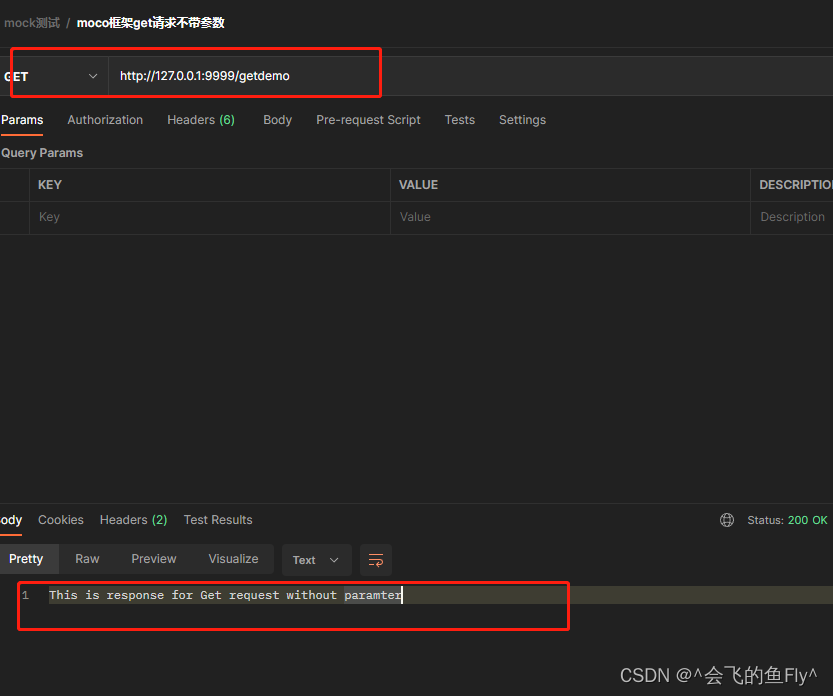
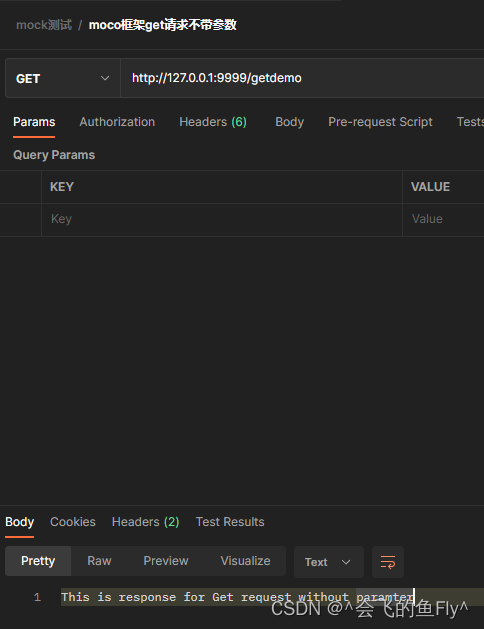
- 不带参数的get实现:访问:http://localhost:9999/getdemo
[
  {
   "description":"This is Get request without paramter",
   "request":{
       "uri":"/getdemo",
       "method":"get"
   },
   "response":{
       "text":"This is response for Get request without paramter "
   }
  }
]
验证结果:
-
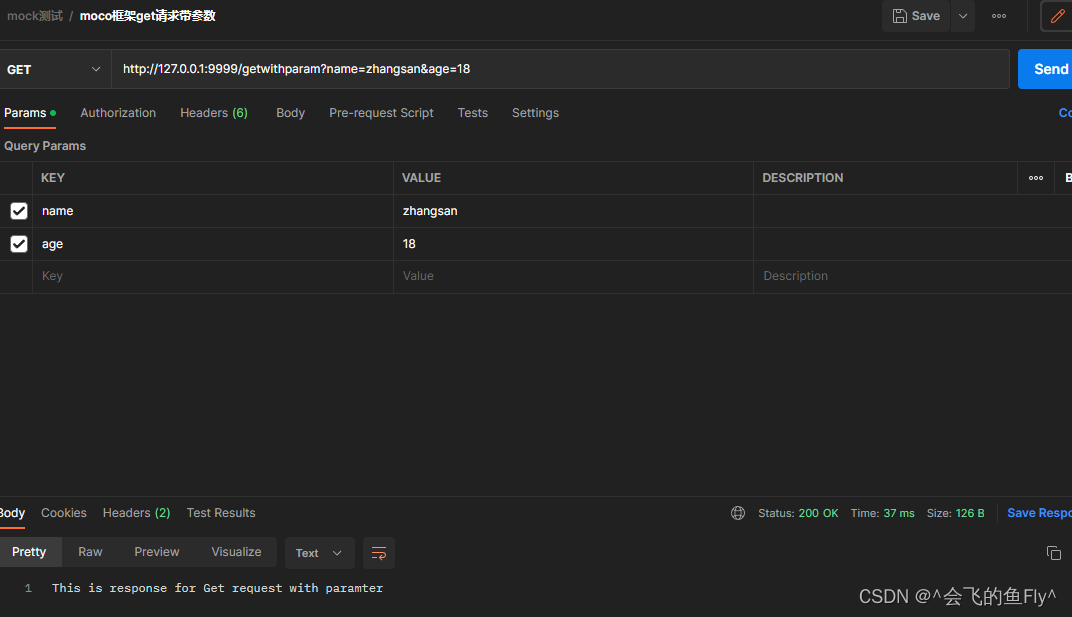
- 带参数的get实现:访问:http://localhost:9999/getwithparam?name=zhangsan&age=18
{
   "description":"This is Get request with paramter",
   "request":{
       "uri":"/getwithparam",
       "method":"get",
       "queries":{
           "name":"zhangsan",
           "age":"18"
       }
   },
   "response":{
       "text":"This is response for Get request with paramter "
   }
  }
验证结果:
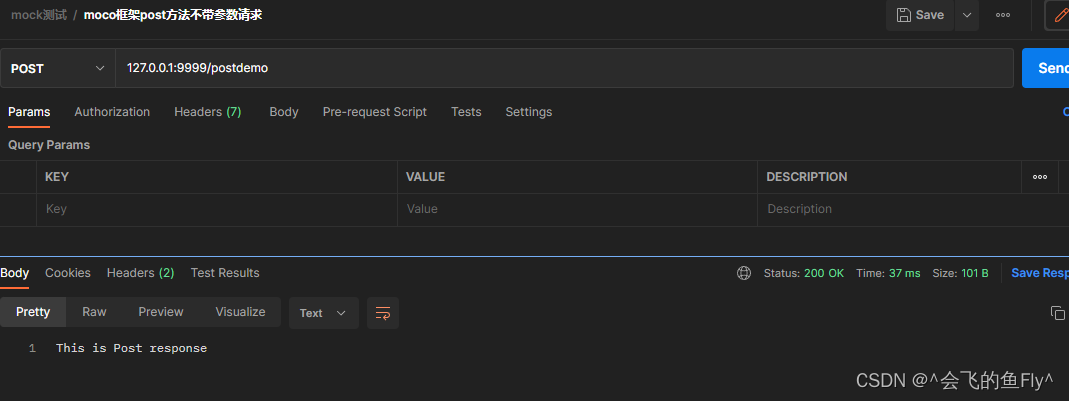
post请求不能直接在浏览器中访问,我们需要借助jmeter、 postman或者写代码等测试工具进行post请求的测试
- Moco框架的http协议Post方法的Mock实现
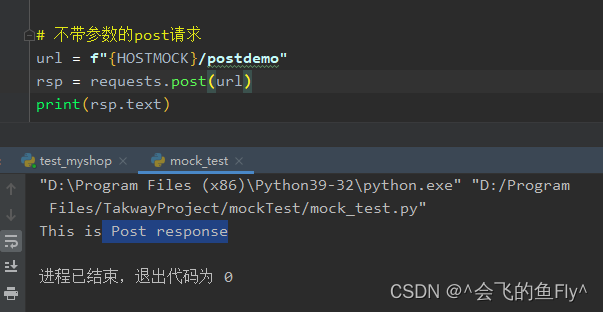
- 不带参数的post请求
[
  {
   "description":"This is Post request",
   "request":{
       "uri":"/postdemo",
       "method":"post"
   },
   "response":{
       "text":"This is Post response"
   }
  }
]
postman验证:
python脚本验证:
-
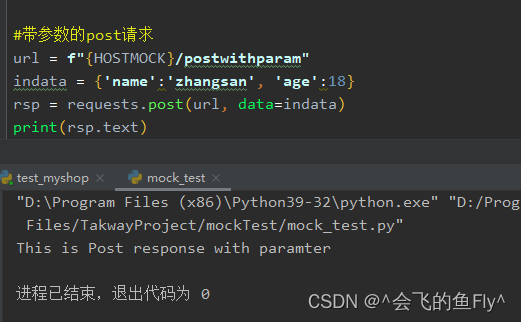
- 带参数的post请求实现
[
{
   "description":"This is Post request with paramter",
   "request":{
       "uri":"/postwithparam",
       "method":"post",
       "forms":{
           "name":"zhangsan",
           "age":"18"
       }
   },
   "response":{
       "text":"This is Post response with paramter"
   }
  }
]
postman验证:

python脚本验证:
- Moco框架如何加入Cookies
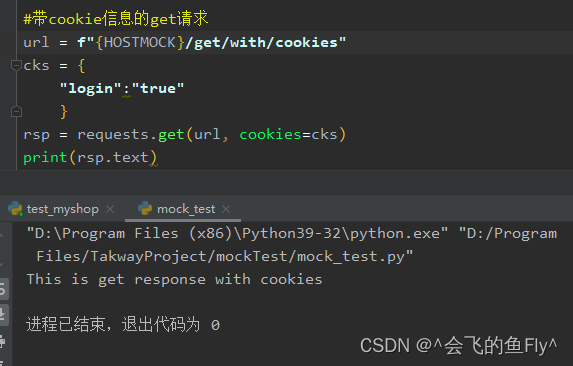
- 带cookies信息的get请求
[
{
   "description":"This is Get request with cookies",
   "request":{
       "uri":"/get/with/cookies",
       "method":"get",
       "cookies":{
          "login":"true"
       }
   },
   "response":{
       "text":"This is get response with cookies"
   }
  }
]
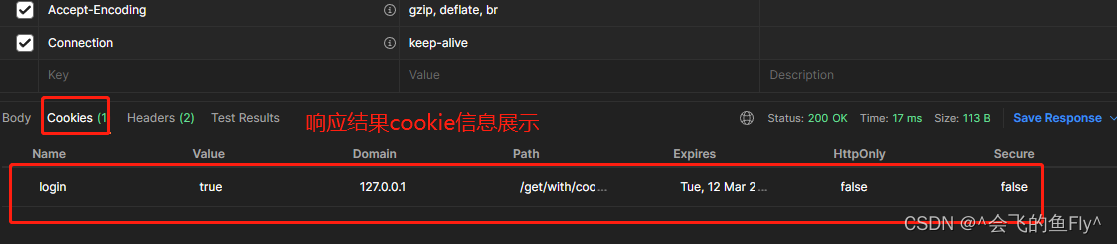
postman验证:
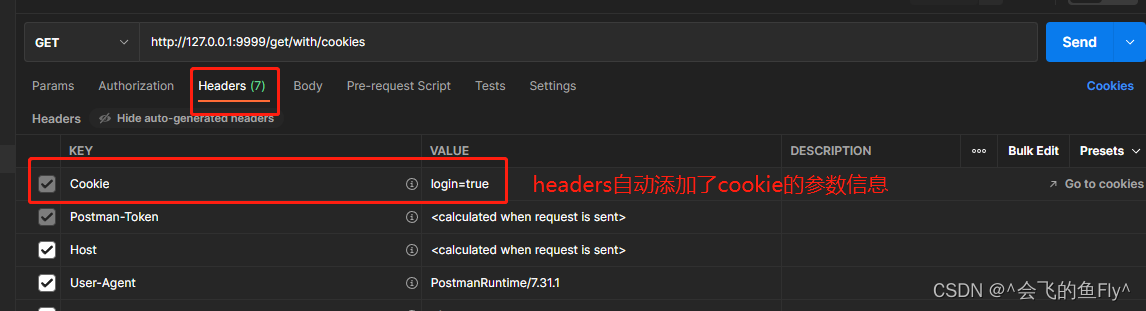
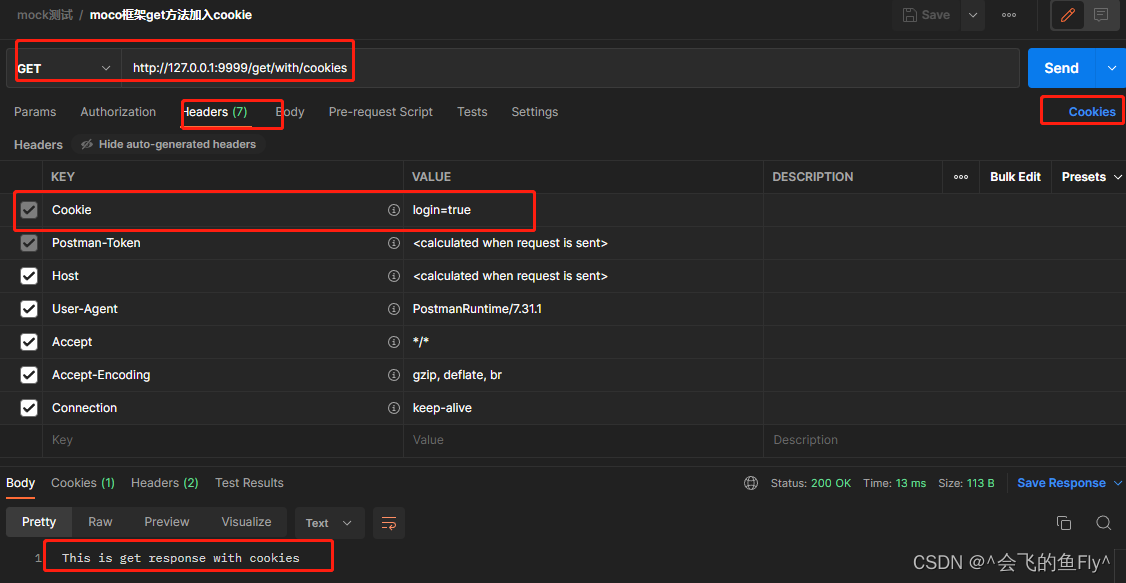
配置postman,添加域名:127.0.0.1,add cookie:login=true ,path=/get/with/cookies,保存
1、入口
 2、添加域名

3、添加cookie信息

4、header自动添加cookie参数信息
5、发送get请求
python脚本实现:
-
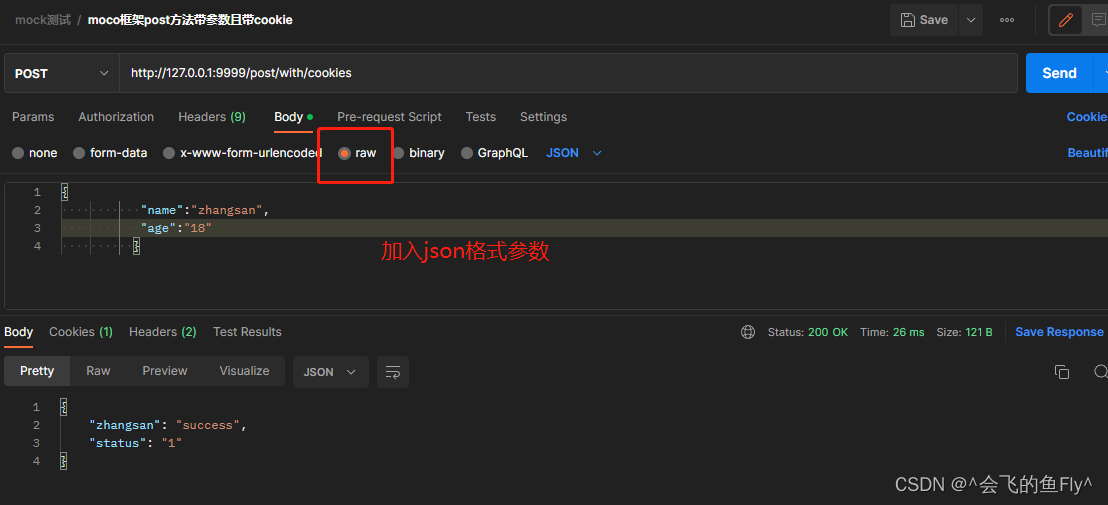
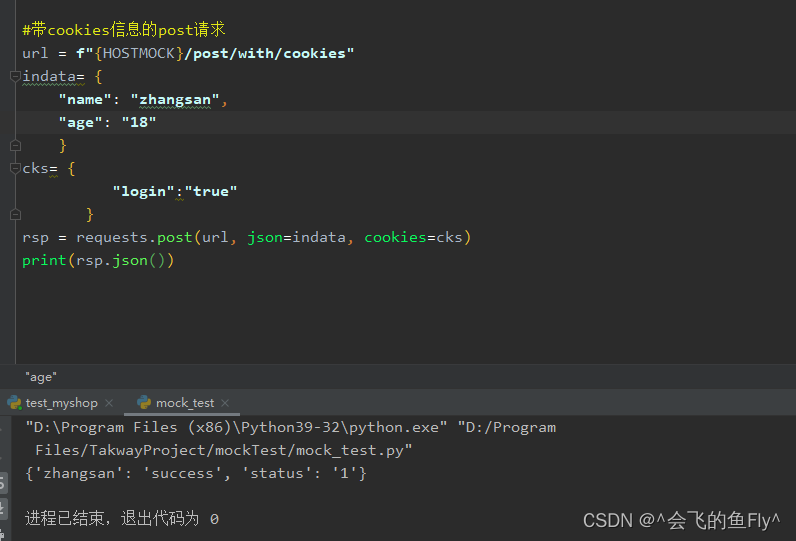
- 带cookies信息的post请求
[
{
   "description":"This is Post request with cookies",
   "request":{
       "uri":"/post/with/cookies",
       "method":"post",
       "cookies":{
          "login":"true"
       },
       "json":{
           "name":"zhangsan",
           "age":"18"
       }
   },
   "response":{
       "status":200,
       "json":{
          "zhangsan":"success",
           "status":"1"
       }
   }
  }
  ]
postman验证:
在postman中,body选择raw,json格式,输入发送的json数据(注意不带方括号[]),得到响应成功返回的json数据
python脚本:
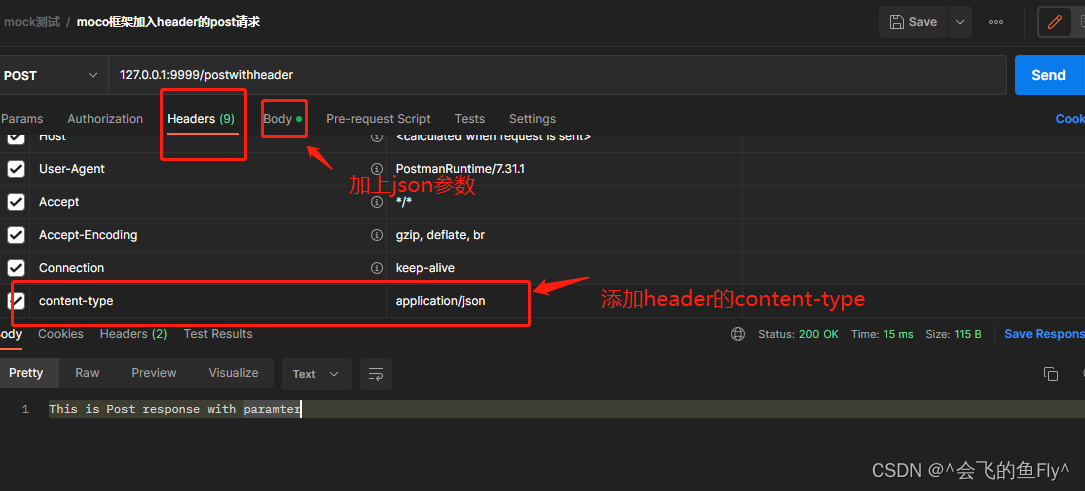
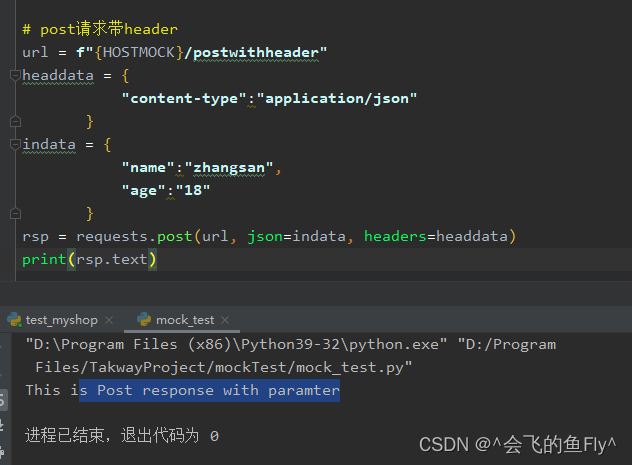
- Moco框架如何加入Header
- Header请求头信息的格式在get和post请求中是一致的。
{
   "description":"This is Post request with header",
   "request":{
       "uri":"/postwithheader",
       "method":"post",
       "headers":{
           "content-type":"application/json"
       },
       "json":{
           "name":"zhangsan",
           "age":"18"
       }
   },
   "response":{
       "text":"This is Post response with paramter"
   }
  }
postman验证:
python脚本:
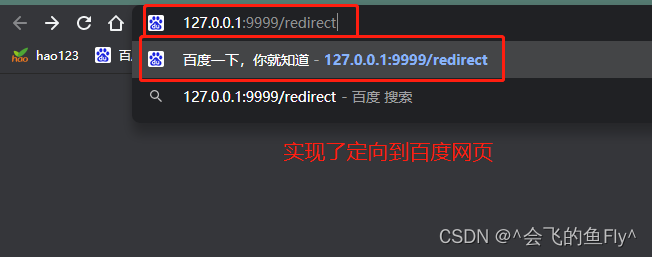
- Moco框架如何进行重定向
- 重定向到baidu
{
   "description":"redirect to www.baidu.com",
   "request":{
       "uri":"/redirect"
    },
   "redirectTo":"http://www.baidu.com"
  }
-
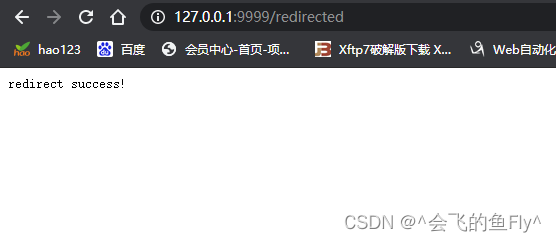
- 重定向到自己网站的某个地址
{
   "description":"redirect to my path",
   "request":{
       "uri":"/redirect2"
    },
   "redirectTo":"redirected"
  },

  {
   "description":"This is my path",
   "request":{
       "uri":"/redirected"
   },
   "response":{
       "text":"redirect success!"
   }
  }
重定向多层跳转,实际就是嵌套了重定向的逻辑。跳转到重定向的逻辑内再次重定向。


 1249
1249


 被折叠的 条评论
为什么被折叠?
被折叠的 条评论
为什么被折叠?
 到【灌水乐园】发言


