


jumpserver堡垒机组件说明:
1、Jumpserver:
现指 Jumpserver 管理后台,是核心组件(Core), 使用 Django Class Based View 风格开发,支持 Restful API。
2、Coco:
实现了 SSH Server 和 Web Terminal Server 的组件,提供 SSH 和 WebSocket 接口, 使用 Paramiko 和 Flask 开发。
3、Luna:
现在是 Web Terminal 前端,计划前端页面都由该项目提供,Jumpserver 只提供 API,不再负责后台渲染html等。
部署Jumpserver运行环境
将需要的软件包拷贝到/opt目录下

关闭防火墙和SElinux安全机制
[root@liudongyiCentos7 ~]# setenforce 0
[root@liudongyiCentos7 ~]# systemctl stop firewalld.service
[root@liudongyiCentos7 ~]# systemctl disable firewalld.service
因为后续的堡垒机是基于中午界面的。所以我们把虚拟机设置成为中文
# 修改字符集,否则可能报 input/output error的问题,因为日志里打印了中文
[root@liudongyiCentos7 ~]# localedef -c -f UTF-8 -i zh_CN zh_CN.UTF-8
[root@liudongyiCentos7 ~]# export LC_ALL=zh_CN.UTF-8
[root@liudongyiCentos7 ~]# echo 'LANG=zh_CN.UTF-8' > /etc/locale.conf
[root@liudongyiCentos7 ~]# exit
我服务器IP地址为:192.168.241.129
1、安装依赖包
注:安装前,可以开启yum缓存功能,把软件包下载下来,方便后期使用。(缓存下来的安装包在/var/cache/yum/$basearch/$releasever下)
[root@liudongyiCentos7 opt]# vim /etc/yum.conf

编译安装所需要的依赖包
yum -y install wget sqlite-devel xz gcc automake zlib-devel openssl-devel epel-release git
准备 Python3 和 Python 编译安装虚拟环境(因为我们的jumpserver是基于Python, Django开发的开源跳板机系统)
步骤如下:
cd /opt
tar xvf Python-3.6.1.tar.xz && cd Python-3.6.1
./configure && make -j 4 && make install
编译完成以后,我们python用TAB补全可以下看到以下内容

[root@liudongyiCentos7 ~]# cd /opt/
[root@liudongyiCentos7 opt]# python3 -m venv py3 生成一个py3的目录,可以改其他名
[root@liudongyiCentos7 opt]# source /opt/py3/bin/activate 切换成功可以看到在前方看到,py3的标识
# 看到下面的提示符代表成功,以后运行 Jumpserver 都要先运行以上 source 命令,以下所有命令均在该虚拟环境中运行

我们可以查看Python的版本
python -V

安装 Jumpserver 1.0.0
注:在线下载方法:
git clone --depth=1 https://github.com/jumpserver/jumpserver.git && cd jumpserver && git checkout master
注:depth用于指定克隆深度,为1即表示只克隆最近一次commit
(py3) [root@liudongyiCentos7 opt]# cd jumpserver/
(py3) [root@liudongyiCentos7 jumpserver]# ls
apps data jms logs requirements tmp
config_example.py docs LICENSE README.md run_server.py utils
(py3) [root@liudongyiCentos7 jumpserver]#

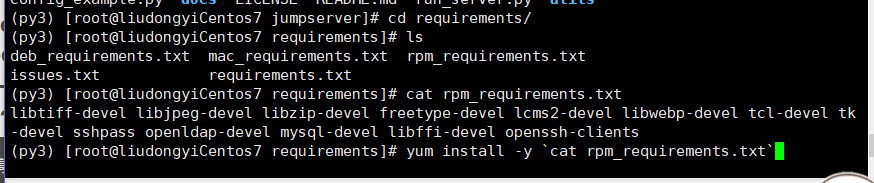
使用``符号括住cat rpm_requirements.txt文件,前头加yum install -y 即可,因为文件中包含了,我们所以需的依赖包名
(py3) [root@liudongyiCentos7 jumpserver]# cd requirements/
(py3) [root@liudongyiCentos7 requirements]# ls
deb_requirements.txt mac_requirements.txt rpm_requirements.txt
issues.txt requirements.txt
(py3) [root@liudongyiCentos7 requirements]# cat rpm_requirements.txt
libtiff-devel libjpeg-devel libzip-devel freetype-devel lcms2-devel libwebp-devel tcl-devel tk-devel sshpass openldap-devel mysql-devel libffi-devel openssh-clients
(py3) [root@liudongyiCentos7 requirements]# yum install -y `cat rpm_requirements.txt`

(py3) [root@liudongyiCentos7 requirements]# pip -V
查看pip的版本(pip是一个安装库文件的命令)

我们需要进入到我们那会儿上传了一个python-package的包


我们进入包的目录都进行pip安装
方法1:(py3) [root@liudongyiCentos7 python-package]# pip install ./*
方法2:在线安装:(py3) [root@xuegod63 ~]# pip install -r /opt/jumpserver/requirements/requirements.txt
pip 是一个安装和管理 Python 包的工具,相当于yum命令
 最低0.47元/天 解锁文章


 2336
2336


 被折叠的 条评论
为什么被折叠?
被折叠的 条评论
为什么被折叠?
 到【灌水乐园】发言


