


| 博客 |
|---|
| JavaWeb |
文章目录
Javascript组成详解
1.javascript的组成图解
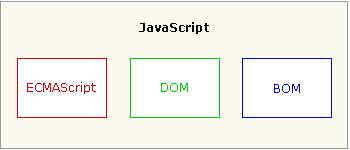
ECMAScript:它是javascript的核心(语法、变量、数据类型、语句、函数……)。
DOM:document object model 整个文档对象。
BOM:浏览器对象。
2.BOM+DOM物理图解
以BOM为主

3.BOM+DOM逻辑图解

BOM
1. BOM概念
Browser Object Model 浏览器对象模型
	 将浏览器的各个组成部分封装成对象。
2. 组成
Window:窗口对象
Navigator:浏览器对象
Screen:显示器屏幕对象
History:历史记录对象
Location:地址栏对象
3. Window:窗口对象
1. 创建
2. 方法
1. 与弹出框有关的方法
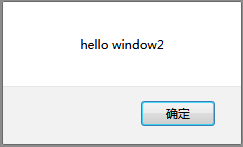
alert():显示带有一段消息和一个确认按钮的警告框。
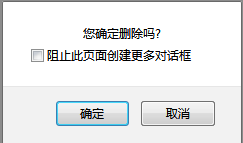
confirm():显示带有一段消息以及确认按钮和取消按钮的对话框。
如果用户点击确定按钮,则方法返回true。
如果用户点击取消按钮,则方法返回false。
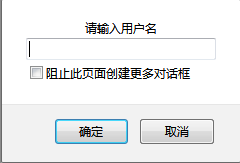
prompt():显示可提示用户输入的对话框。
返回值:获取用户输入的值。
代码演示
<!DOCTYPE html>
<html lang="en">
<head>
    <meta charset="UTF-8">
    <title>Title</title>
</head>
<script>
        //警告框
        //window.alert("hello window1");
        alert("hello window2");

        //确认框
        //var conf1 = window.confirm("您确定删除吗?")
        var conf2 = confirm("您确定删除吗?");
        if(conf2){

            alert("删除了");
        }else {

            alert("不删除");
        }

        //输入框
        //window.prompt("请输入用户名");
        //返回输入的值
        var inp = prompt("请输入用户名");
        alert(inp);
</script>
<body>
</body>
</html>
警告框
确认框:返回值boolean
输入框:返回值是输入值
2. 与打开关闭有关的方法
open()	打开一个新的浏览器窗口。
	返回新的Window对象。
close()	关闭浏览器窗口。
	谁调用我 ,我关谁。
代码演示
<!DOCTYPE html>
<html lang="en">
<head>
<meta charset="UTF-8">
<title>Title</title>
</head>
<body>
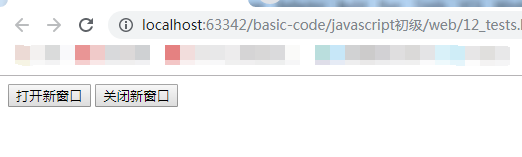
<input id="openbut" type="button" value="打开新窗口">
<input id="closebut" type="button" value="关闭新窗口">
</body>
<script>
//打开一个新的浏览器窗口,返回新的窗口window对象。
document.getElementById("openbut").onclick = function () {
//var newwindow = window.open();
var newwindow = open();
}
document.getElementById("closebut").onclick = function () {
//关闭当前浏览器窗口,谁调用我我就关闭谁。
window.close();//火狐浏览器,不能关闭一个非脚本打开的窗口。google演示是可以的。
//关闭新打开的窗口,谁调用我我就关闭谁。
//newwindow.close();
}
</script>
</html>
打开和关闭
3. 与定时器有关的方式
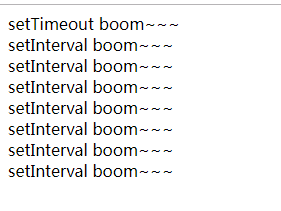
setTimeout():在指定的毫秒数后调用函数或计算表达式。
     参数:
        1. js代码或者方法对象
        2. 毫秒值
     返回值:唯一标识,用于取消定时器
clearTimeout():取消由 setTimeout() 方法设置的timeout。

setInterval():按照指定的周期(以毫秒计)来调用函数或计算表达式。
clearInterval():取消由setInterval()设置的timeout。
代码演示
<!DOCTYPE html>
<html lang="en">
<head>
    <meta charset="UTF-8">
    <title>Title</title>
</head>
<script>
    //一次性定时器
    //var id1 = window.setTimeout("func()",2000);
    var id1 = window.setTimeout(func,2000);
    function func(){

        document.write("boom~~~");
    }
    //销毁一次性定时器
    //window.clearTimeout(id1);

    //循环定时器
    //var id2 = window.setInterval("func()",2000);
    var id2 = window.setInterval(func(),2000);
    //销毁循环定时器
    //window.clearInterval(id2);
</script>
<body>
</body>
</html>
一次和循环定时器
3. 属性
1. 获取其他BOM对象
window.history = history
window.location = location
window.Navigator = Navigator
window.Screen = Screen
2. 获取DOM对象
window.document = document
4. 特点
Window对象不需要创建可以直接使用 window使用。 window.方法名();
window引用可以省略。  方法名();
5.案例:轮播图
代码演示
<!DOCTYPE html>
<html lang="en">
<head>
    <meta charset="UTF-8">
    <title>Title</title>
</head>
<style>
    div{

        width: 1300px;
        height: 300px;
        margin: auto;
    }
</style>
<body>
<div>
    <img id="lunbo" width="100%" height="100%" src="img/banner_1.jpg">
</div>
<script>
/*
    分析:
          1.在页面上使用img标签展示图片
          2.定义一个方法,修改图片对象的src属性
          3.定义一个定时器,每隔3秒调用方法一次。
    */
    //循环调用lunbo()方法
    setInterval(lunbo,3000);
    var num =1;

    //定义替换图片的方法
    function lunbo(){

        num++;
        if(num>3){

            num=1;
        }
        document.getElementById("lunbo").src = "img/banner_"+num+".jpg";
    }
</script>
</body>
</html>
lunbo.html

4.Location:地址栏对象
1. 创建
1. window.location
2. location
代码演示
<!DOCTYPE html>
<html lang="en">
<head>
    <meta charset="UTF-8">
    <title>Title</title>
</head>
<script>
    var l1 = window.location;
    var l2 = location;
</script>
<body>
</body>
</html>
2. 方法
1.刷新当前页面
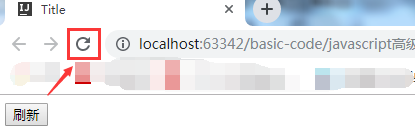
reload():重新加载当前文档,刷新。
	该方法没有规定参数,或者参数是false。如果文档没有改变会读缓存中的文档。(和浏览器中的刷新一样)
	该方法参数是true,每次会直接绕过缓存,重新下载文档。
代码演示
<!DOCTYPE html>
<html lang="en">
<head>
    <meta charset="UTF-8">
    <title>Title</title>
</head>
<body>
    <input id="buttonIn" type="button" value="刷新">
</body>
<script>

        document.getElementById("buttonIn").onclick = function () {

            //刷新当前页面
            //window.location.reload();
            location.reload();
        }
</script>
</html>
刷新
3. 属性
1.设置URL
href:设置或返回完整的 URL。
代码演示
<!DOCTYPE html>
<html lang="en">
<head>
    <meta charset="UTF-8">
    <title>Title</title>
</head>
<body>
    <input id="button" type="button" value="转百度">
</body>
<script>
    //获取URL
    var hr = location.href;
    alert(hr);//http://localhost:63342/basic-code/javascript%E9%AB%98%E7%BA%A7/web/01_%E5%AE%9A%E6%97%B6%E5%92%8C%E5%BE%AA%E7%8E%AF%E8%B0%83%E7%94%A8%E6%96%B9%E6%B3%95.html?_ijt=sdr5n561s4qb7vdnhspgo44p8e
    var button = document.getElementById("button").onclick =function () {

        //设置URL
        location.href="http://www.baidu.com";
    }
</script>
</html>
跳转URL到百度

4.案例:自动跳转
代码演示
<!DOCTYPE html>
<html lang="en">
<head>
    <meta charset="UTF-8">
    <title>Title</title>
</head>
<style>
    div{

        border: 0px solid red;
        width: 200px;
        height: 100px;
        margin: auto;
    }
    span {

        color: red;
    }
</style>
<body>
<div>
    <span>5</span>秒后跳转到百度....
</div>
</body>
<script>
/*
   分析:
        1.显示页面效果  <div>
        2.倒计时读秒效果实现
            2.1 定义一个方法,获取span标签,修改span标签体内容,时间--
            2.2 定义一个定时器,1秒执行一次该方法
        3.在方法中判断时间如果<= 0 ,则跳转到首页
    */
    // 2.倒计时读秒效果实现
    window.setInterval(zidong, 1000);
    var num = 5;

    function zidong() {

        num--;
        if(num < 0) {

            window.location.href = "http://www.baidu.com";
        } else {

            //window.document.getElementById("span").innerHTML = num;
            window.document.getElementsByTagName("span")[0].innerHTML=num;
        }
    }
</script>
</html>
zidon.html

5. History:历史记录对象
1. 创建
<!DOCTYPE html>
<html lang="en">
<head>
    <meta charset="UTF-8">
    <title>Title</title>
</head>
<script>
      var h1 = window.history;
      var h2 = history;
</script>
<body>
</body>
</html>
2. 方法
1.上一页和下一页方法
back():加载 history 列表中的前一个 URL。
forward():加载 history 列表中的下一个 URL。
go(参数):加载 history 列表中的某个具体页面。
    参数:
        正数:前进几个历史记录
        负数:后退几个历史记录
代码演示
01.html
<!DOCTYPE html>
<html lang="en">
<head>
    <meta charset="UTF-8">
    <title>Title</title>
</head>
<body>
    <input id="button1" type="button" value="跳转到02.html">
    <input id="button2" type="button" value="前进">
</body>
<script>
    document.getElementById("button1").onclick = function () {

        location.href="http://localhost:63342/basic-code/javascript高级/web/02.html";
    }

    document.getElementById("button2").onclick = function () {

        //跳转到下一个页面。
        //history.forward();
        history.go(1);
    }
</script>
</html>
02.html
<!DOCTYPE html>
<html lang="en">
<head>
    <meta charset="UTF-8">
    <title>Title</title>
</head>
<body>
    <input id="button2" type="button" value="后退">
</body>
<script>
    document.getElementById("button2").
最低0.47元/天 解锁文章


 386
386


 被折叠的 条评论
为什么被折叠?
被折叠的 条评论
为什么被折叠?
 到【灌水乐园】发言


