


 本文详细指导了在CentOS 7.4环境中通过PCS、Corosync、Pacemaker和HAProxy构建高可用负载均衡集群的步骤,包括防火墙配置、主机名设置、时间同步、双机互信、pacemaker集群配置、haproxy的安装与配置等关键步骤。
pcs+corosync+pacemaker+haproxy负载均衡环境部署
一、实验环境:
centos7.4
三台服务器做集群,两台服务器做后端web服务器
cos11:192.168.124.11
cos135 : 192.168.124.135
cos136 : 192.168.124.136
web后端服务器
cos10:192.168.124.10
cos40:192.168.124.40
cos11、cos135、cos136三台机器上面都安装pacemaker,因此下述操作都需要在三台机器上面都执行。
二、修改环境
1、cos11&cos135&cos136关闭firewalld及selinux防火墙
systemctl disable firewalld
systemctl stop firewalld
vim /etc/selinux/conf
SELINUX==disabled
2、配置hostname
cos11:
hostnamectl --static --transient set-hostname cos11
cos135:
hostnamectl --static --transient set-hostname cos135
cos136:
hostnamectl --static --transient set-hostname cos136
3.修改hosts
cos11&cos135&cos136:
vim /etc/hosts
127.0.0.1   localhost localhost.localdomain localhost4 localhost4.localdomain4
::1         localhost localhost.localdomain localhost6 localhost6.localdomain6
192.168.124.11  cos11
192.168.124.135  cos135
192.168.124.136  cos136
4、时间同步
cos11&cos135&cos136:
yum install ntp -y
vim /etc/ntp.conf
# new(新增阿里云ntp服务器)
server ntp1.aliyun.com prefer
server ntp2.aliyun.com
timedatectl set-timezone Asia/Shanghai (设置时区)
ntpdate ntp1.aliyun.com (时间同步)
systemctl status ntpd (启动ntpd服务)
systemctl enable ntpd.service (ntpd服务设置开机自启动)
5、双机互信(本次实验发现,不配置双机互信似乎也不会出现问题):
[root@cos11 ~]#
ssh-keygen -t rsa
ssh-copy-id -i  ~/.ssh/id_rsa.pub root@cos135
ssh-copy-id -i  ~/.ssh/id_rsa.pub root@cos136
[root@cos135 ~]#
ssh-keygen -t rsa
ssh-copy-id -i  ~/.ssh/id_rsa.pub root@cos11
ssh-copy-id -i  ~/.ssh/id_rsa.pub root@cos136
[root@cos136 ~]#
ssh-keygen -t rsa
ssh-copy-id -i  ~/.ssh/id_rsa.pub root@cos11
ssh-copy-id -i  ~/.ssh/id_rsa.pub root@cos135

6、安装pacemaker集群相关组件:
yum install pcs pacemaker corosync fence-agents-all -y
启动pcsd服务(开机自启动)
systemctl start pcsd.service
systemctl enable pcsd.service
7、创建集群用户:
passwd hacluster(此用户在安装pcs时候会自动创建,密码为hacluster)
上述所有操作都需要在三个集群服务器上面执行,下面命令只需要在一台集群服务器上面做操作
8、集群各节点之间进行认证:
pcs cluster auth cos11 cos135 cos136(此处需要输入的用户名必须为pcs自动创建的hacluster,其他用户不能添加成功)
9,创建并启动名为my_cluster的集群,其中cos11 cos135 cos136为集群成员:
pcs cluster setup --start --name my_cluster cos11 cos135 cos136
10、设置集群自启动:
pcs cluster enable --all
11、查看并设置集群属性:
查看当前集群状态:
pcs cluster status
检查pacemaker服务:
ps aux | grep pacemaker
检验Corosync的安装及当前corosync状态:
corosync-cfgtool -s
corosync-cmapctl | grep members
pcs status corosync
禁用STONITH: && 无法仲裁时候,选择忽略:
pcs property set stonith-enabled=false
pcs property set no-quorum-policy=ignore
三、编译安装haproxy服务
1.创建存放安装包的文件夹并下载haproxy压缩包
mkdir /etc/haproxy
curl -o /etc/haproxy/haproxy-2.0.28.tar.gz
https://www.haproxy.org/download/2.0/src/haproxy-2.0.28.tar.gz
2.进入haproxy目录并解压haproxy-2.0.28.tar.gz
tar -zxvf haproxy-2.0.28.tar.gz
3.编译安装
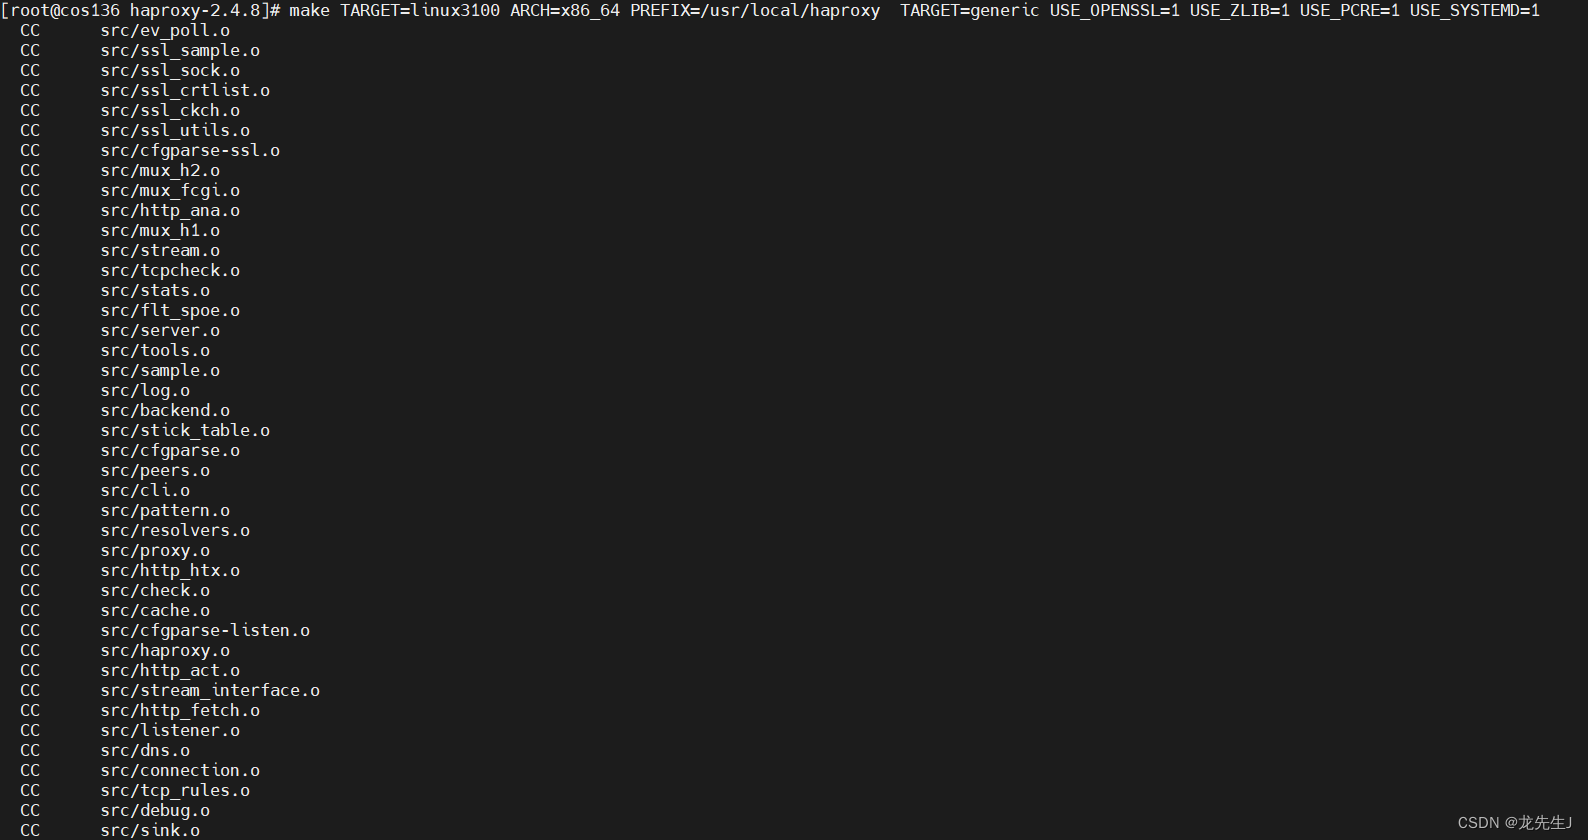
进入解压好的目录运行make编译安装,(make编译安装时,后面跟的几个参数,需要确定已安装,如OPENSSL、ZLIB、PCRE、SYSTEMD,没有安装使用yum命令先安装上之后再运行make)
make TARGET=linux3100 ARCH=x86_64 PREFIX=/usr/local/haproxy TARGET=generic USE_OPENSSL=1 USE_ZLIB=1 USE_PCRE=1 USE_SYSTEMD=1
make isntall /usr/local/haproxy (haproxy安装目录,不使用make install 该服务无法正常安装到服务器。)
安装完成运行haproxy -v 确定服务安装完成

编译参数说明:
TARGET:linux内核版本
ARCH: linux系统版本
PREFIX:haprox安装目录
OPENSSL、ZLIB、PCRE、SYSTEMD安装haproxy需要的工具,不安装启动haproxy时会报错
4.haproxy安装完成之后,需配置haproxy的配置文件及启动文件
(1)、新增haproxy配置文件(配置文件放到一个常用的路径)
 mkdir /etc/haproxy

 vim /etc/haproxy/haproxy.cfg
global
#       log        loghost   local0
#       log        syslog-2.zpepc.com.cn local3 info

       log        localhost local3 info
        maxconn    25000
        uid        99
        gid        99
        chroot     /var/run
        pidfile    /var/run/haproxy.pid
        daemon
        quiet

defaults
        log global
        timeout client 600s
        timeout server 600s
        timeout connect 30s
        option log-health-checks


#frontend cos32
#        bind       192.168.85.132:8080
#        mode       tcp
#        log        global
#        maxconn    50000
#  default_backend cos

frontend cos135
        bind       192.168.124.138:80
        mode       tcp
        log        global
        maxconn    50000


#2020-10-10
        capture request header WL-Proxy-Client-IP len 15
        capture request header Referer len 150
        capture request header User-agent len 150
        capture request header Host len 40


        acl url_stats                path_beg /admin/stats
        use_backend stats   if url_stats
        default_backend cos


backend default
        mode    http
        balance roundrobin
        fullconn 100
        timeout connect 20000
        timeout server  20000
        retries 2
        server apache1 127.0.0.1:8090

backend  cos
        mode    http
        balance roundrobin
#       balance source
        cookie  cos insert indirect nocache
        server w1 192.168.124.10:80  cookie www10 check inter 16000
        server w2 192.168.124.40:80  cookie www40 check inter 16000


        # long timeout to support connection queueing
        timeout connect 200000
        timeout server 200000
        option redispatch
        retries 3


backend stats
        log             global
        mode            http
        stats           uri /
        balance         roundrobin
(2)、haproxy启动文件,使用systemctl启动,需设置service文件
在/usr/lib/systemd/system/目录下面创建一个haproxy.service的文件
cd /usr/lib/systemd/system/

vim haproxy.service
[Unit]
Description=HAProxy Load Balancer
After=network.target

[Service]
Environment="CONFIG=/etc/haproxy/haproxy.cfg" "PIDFILE=/run/haproxy.pid"
ExecStartPre=/usr/local/sbin/haproxy -f $CONFIG -c -q
ExecStart=/usr/local/sbin/haproxy -Ws -f $CONFIG -p $PIDFILE
ExecReload=/usr/local/sbin/haproxy -f $CONFIG -c -q
ExecReload=/bin/kill -USR2 $MAINPID
KillMode=mixed
Restart=always
SuccessExitStatus=143
#Type=notify

# The following lines leverage SystemD's sandboxing options to provide
# defense in depth protection at the expense of restricting some flexibility
# in your setup (e.g. placement of your configuration files) or possibly
# reduced performance. See systemd.service(5) and systemd.exec(5) for further
# information.

# NoNewPrivileges=true
# ProtectHome=true
# If you want to use 'ProtectSystem=strict' you should whitelist the PIDFILE,
# any state files and any other files written using 'ReadWritePaths' or
# 'RuntimeDirectory'.
# ProtectSystem=true
# ProtectKernelTunables=true
# ProtectKernelModules=true
# ProtectControlGroups=true
# If your SystemD version supports them, you can add: @reboot, @swap, @sync
# SystemCallFilter=~@cpu-emulation @keyring @module @obsolete @raw-io

[Install]
WantedBy=multi-user.target
3、创建pcs_test集群并设置开机自启动
(1)、创建pcs_test集群
pcs cluster setup --start --name pcs_test cos11 cos135 cos136 --force
(2)、设置集群开机自启动
pcs cluster enable --all
(3)、配置虚IP资源(虚IP地址为192.168.124.138)
pcs resource create vip138 ocf:heartbeat:IPaddr2 ip=192.168.124.138 cidr_netmask=24 op monitor interval=10s timeout=15s
(4)、配置haproxy进程资源
pcs resource create haproxy systemd:haproxy op monitor interval=10s
(5)、配置资源约束绑定
pcs constraint colocation add haproxy with vip138
(6)、配置优先级约束
pcs constraint order start vip138 then haproxy
(7)、创建资源组
pcs resource group add pcs_test vip138 haproxy
配置完成启动资源,确认是否启动正常
pcs resource cleanup vip138
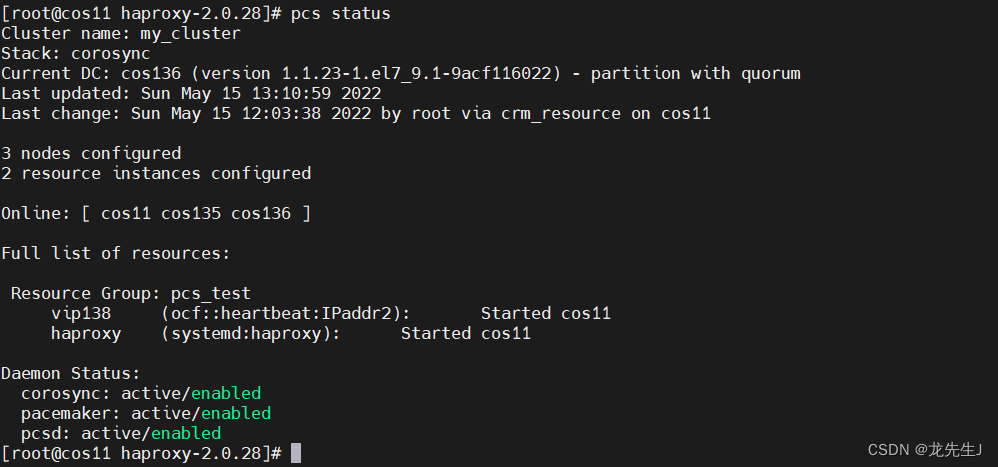
查询资源状态,确认资源是否启动
pcs status
pcsd常用命令
验证集群安装
pacemakerd -F              ## 查看pacemaker组件,ps axf | grep pacemaker
corosync-cfgtool -s                  ## 查看corosync序号
corosync-cmapctl | grep members          ## corosync 2.3.x
orosync-objctl | grep members          ## corosync 1.4.x
查看集群资源
pcs resource standards              ## 查看支持资源类型
pcs resource providers              ## 查看资源提供商
pcs resource agents                ## 查看所有资源代理
pcs resource list                 ## 查看支持资源列表
pcs stonith list                ## 查看支持Fence列表
pcs property list --all            ## 显示群集默认变量参数
crm_simulate -sL                    ## 检验资源 score 值
使用集群脚本
pcs cluster cib ra_cfg                ## 将群集资源配置信息保存在指定文件
pcs -f ra_cfg resource create            ## 创建群集资源并保存在指定文件中(而非保存在运行配置)
pcs -f ra_cfg resource show          ## 显示指定文件的配置信息,检查无误后
pcs cluster cib-push ra_cfg              ## 将指定配置文件加载到运行配置中
管理集群
pcs status                      ## 查看群集状态
pcs status cluster
pcs status corosync
pcs cluster stop [node11]              ## 停止群集
pcs cluster start --all                ## 启动群集
pcs cluster standby cos11              ## 将节点置为后备standby状态,pcs cluster unstandby cos11
pcs cluster destroy [--all]              ## 删除群集,[--all]同时恢复corosync.conf文件
pcs resource cleanup ClusterIP        ## 清除指定资源的状态与错误计数
pcs stonith cleanup vmware-fencing     ## 清除Fence资源的状态与错误计数
pcs resource move vip138 cos135     ## 漂移vip资源到cos135


 被折叠的 条评论
为什么被折叠?
被折叠的 条评论
为什么被折叠?
 到【灌水乐园】发言


