


vue+express+MySQL实现ueditor富文本内容的保存(含图片上传)(下)
接上章 我们已经搭好了后台数据连接!
现在我们来实现 vue集成 uditor 富文本
参考来源:Vue项目中最简单的使用集成UEditor方式
这里再赘述一下
Installation
npm i vue-ueditor-wrap
# 或者
yarn add vue-ueditor-wrap
一、下载 UEditor
下载最新编译的 UEditor。官网目前最新的版本是1.4.3.3,存在诸多 BUG,例如
Issue1,且官方不再积极维护。为了世界的和平,针对一些常见 BUG,我进行了修复,并把编译好的文件放在了本仓库的
assets/downloads 目录下,你可以放心下载,当然你也可以自己 clone 官方源码并编译。
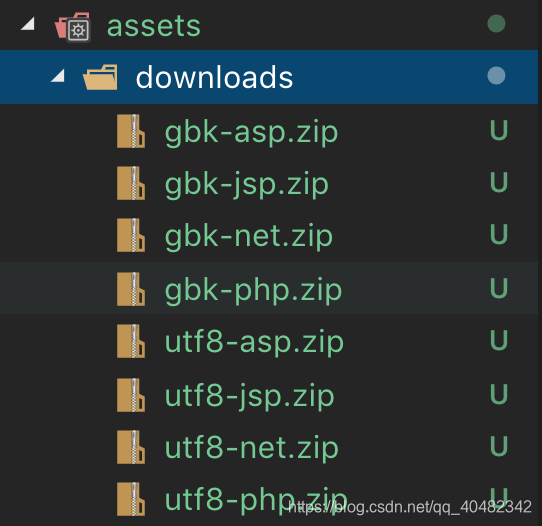
将下载的压缩包解压并重命名为 UEditor(只需要选择一个你需要的版本,比如 utf8-php),放入你项目的 static 目录下。
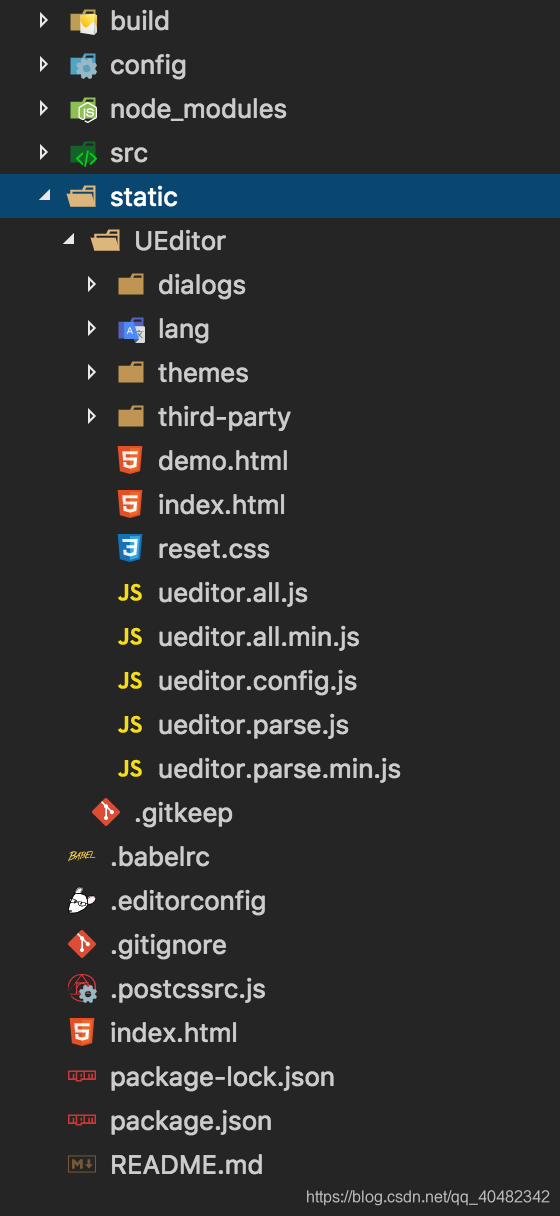
如果你使用的是 vue-cli 3.x,可以把 UEditor 文件夹放入项目的 public 目录下。
二、在vue的main.js中引入VueUeditorWrap组件
import VueUeditorWrap from 'vue-ueditor-wrap' // ES6 Module
// 或者
const VueUeditorWrap = require('vue-ueditor-wrap') // CommonJS
三、注册组件
// 在 main.js 里将它注册为全局组件
Vue.component('vue-ueditor-wrap', VueUeditorWrap)
四、v-model绑定数据
<vue-ueditor-wrap v-model="msg"></vue-ueditor-wrap>
data () {
  return {
    msg: '<h2><img src="http://img.baidu.com/hi/jx2/j_0003.gif"/>Vue + UEditor + v-model双向绑定</h2>'
  }
}
至此你已经可以在页面中看到一个初始化之后的 UEditor 了,并且它已经成功和数据绑定了
五、根据项目需求修改配置,完整配置选项查看 ueditor.config.js 源码或 官方文档
<vue-ueditor-wrap v-model="msg" :config="myConfig"></vue-ueditor-wrap>
data () {
  return {
    msg: '<h2><img src="http://img.baidu.com/hi/jx2/j_0003.gif"/>Vue + UEditor + v-model双向绑定</h2>',
    myConfig: {
      // 编辑器不自动被内容撑高
      autoHeightEnabled: false,
      // 初始容器高度
      initialFrameHeight: 240,
      // 初始容器宽度
      initialFrameWidth: '100%',
      // 上传文件接口(这个地址是我为了方便各位体验文件上传功能搭建的临时接口,请勿在生产环境使用!!!)
      serverUrl: 'http://35.201.165.105:8000/controller.php',
      // UEditor 资源文件的存放路径,如果你使用的是 vue-cli 生成的项目,通常不需要设置该选项,vue-ueditor-wrap 会自动处理常见的情况,如果需要特殊配置,参考下方的常见问题2
      UEDITOR_HOME_URL: '/static/UEditor/'
    }
  }
}
以上是vue引用ueditor的基本流程,具体请见:
https://blog.csdn.net/haochuan9421/article/details/81975966?depth_1-utm_source=distribute.pc_relevant.none-task-blog-BlogCommendFromMachineLearnPai2-1&utm_source=distribute.pc_relevant.none-task-blog-BlogCommendFromMachineLearnPai2-1
下面上我们页面的代码:
<template>
    <div class="hello">
      <div class="layui-row">
        <div class="layui-col-md6">
          <div id="left">
            <div id="UeForm">
              <h1>政策编辑</h1>
              <!--<vue-ueditor-wrap style="margin-left:5%" v-model="content" :config="myConfig"></vue-ueditor-wrap>-->
              <form>
                <vue-ueditor-wrap style="margin-left:5%;margin-top: 10px" v-model="content" :config="myConfig"></vue-ueditor-wrap>
                <a href="javascript:;" style="margin-top: 20px" class="layui-btn" @click="addInfo">提交</a>
              </form>
            </div>
          </div>
        </div>
        <div class="layui-col-md6">
          <div id="head" style="text-align: center" >
            <h1>预览界面</h1>
          </div>
          <div id="right" v-html="content">

          </div>
        </div>
      </div>
    </div>
</template>

<script>
export default {
  name: 'hello',
  data () {
    return {
      msg: '',
      myConfig: {
        // 编辑器不自动被内容撑高
        autoHeightEnabled: false,
        // 初始容器高度
        initialFrameHeight: 700,
        // 初始容器宽度
        initialFrameWidth: '98%',
        // 上传文件接口
       // serverUrl: '/api/ueditor/ueditor/ue',
      },
      content: '',
      contentInfo: '',
      name:''
    }
  },
  mounted () {
    layui.use('element', function() {
      var element = layui.element
    })
  },
  methods: {
    addInfo () {
      let that = this
      layui.use('layer', function () {
        layer.prompt({
          formType: 0,
          value: '',
          offset: 'auto',
          title: '请输入内容标题'
        }, function (value, index, elem) {
          that.name = value;
          layer.close(index);
          that.addUser();
        })
      })
    },
    addUser () {
      var content = this.content
      var name = this.name
      this.$http.post('/api/user/userApi/addUditor', {
        content: content,
        name: name
      }, {}).then((response) => {
        if (response.ok === true) {
          this.layerForm(true);
        }else {
          this.layerForm(false)
        }
      })
    },
    layerForm (e) {
      var tips = '';
      var icon = '';
      layui.use('layer', function () {
        //配置一个透明的询问框
        if (e){
          icon = '1'
          tips = '添加成功'
        }else{
          icon = '2'
          tips = '添加失败'
        }
        layer.msg(tips, {
          icon: icon,
          time: 2000, //20s后自动关闭
        })
      })
    }
  }
}
</script>

<style scoped>

  #right{
    margin-top: 10px;
    padding-top: 20px;
    border: #cecece 1px solid;
    min-height: 841px;
    max-height: 850px;
    overflow-y: scroll;
    padding-left: 20px;
  }
  #UeForm {
    text-align: center;
  }
</style>
我这里引用了layui具体引用方式可以查看:vuejs+layui的使用
引用方式很简单 下载layui 放入static文件夹中 在index.html中引用。
---------------------------------------------------------------------------------------
下面是我们的重点:如何实现ueditor的图片上传
1.先安装依赖:
npm install ueditor --save
2.在sever的index.js文件中添加下面ueditor模块node配置项
//使用ueditor模块
app.use("/api/ueditor/ue", ueditor(path.join(__dirname, 'public'), function (req, res, next) {
  // ueditor 客户发起上传图片请求
  if (req.query.action === 'uploadimage') {
    //console.log(1);
    var foo = req.ueditor;

    var imgname = req.ueditor.filename;

    var img_url = '/ueditor/images/';//保存在项目文件夹中,你也可以设置绝对路径保存在项目外的文件夹中
    res.ue_up(img_url); //你只要输入要保存的地址 。保存操作交给ueditor来做
    res.setHeader('Content-Type', 'text/html');//IE8下载需要设置返回头尾text/html 不然json返回文件会被直接下载打开
  }
  //  客户端发起图片列表请求
  else if (req.query.action === 'listimage') {
    var dir_url = '/ueditor/images/';
    res.ue_list(dir_url); // 客户端会列出 dir_url 目录下的所有图片
  }
  // 客户端发起其它请求
  else {
    //console.log('config.json')
    res.setHeader('Content-Type', 'application/json');
    res.redirect('/nodejs/config.json');
  }
}));
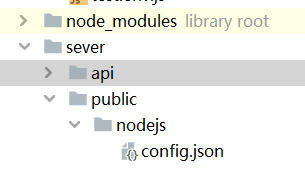
这里需要注意的是因为已经require了ueditor,所以该插件已经安装到了node_module内,所以不需要再拷贝额外的文件了,只需要需要在这个目录下面新建public文件夹存放返回给后台的数据,另外,还需要引入配置文件config.json
config.json 文件你可以从之前你下载放在static中UEditor > jsp>config.json 复制到下面sever的public文件夹中。
vue的前台配置我们之前已经下载了UEditor
把serverUrl改成下面 你在node配置项中定义的ueditor接口的路径

这样基本上就能完成图片的上传了。


 1413
1413


 被折叠的 条评论
为什么被折叠?
被折叠的 条评论
为什么被折叠?
 到【灌水乐园】发言


