


在qemu中运行OVMF
安装qemu
首先需要在Ubuntu中安装qemu,使用如下命令安装。
sudo apt-get install qemu
选择正确的处理器架构
Be sure to align the processor architecture for OVMF with the proper processor archtecture of QEMU.
For the IA32 build of OVMF, there is a little more choice, since the X64 processor is also compatible with IA32. Therefore, with the IA32 build of OVMF, you can use the following commands: qemu, qemu-system-i386 or qemu-system-x86_64.
For the X64 build of OVMF, however, you can only use the qemu-system-x86_64 command.
为OVMF QEMU建立BIOS目录
- 创建一个目录,并且cd至该目录。
bash$ mkdir ~/run-ovmf
bash$ cd ~/run-ovmf
- 将OVMF.fd文件复制到该目录下,并且重命名为bios.bin:
bash$ cp /path/to/ovmf/OVMF.fd bios.bin
- 创建一个目录作为QEMU的硬盘映像
(QEMU can turn the contents of a directory into a disk image ‘on-the-fly’):
bash$ mkdir hda-contents
使用OVMF运行QEMU
下面三个命令类似,只是参数不同。
bash$ qemu-system-x86_64 -L . -hda fat:hda-contents
命令行后加上-net none可以禁用PXE启动。
qemu-system-x86_64 -L . --bios ~/src/edk2/Build/OvmfX64/DEBUG_GCC5/FV/OVMF.fd -net none
我使用下面这个命令。
qemu-system-x86_64 -pflash bios.bin -hda fat:hda-contents -net none

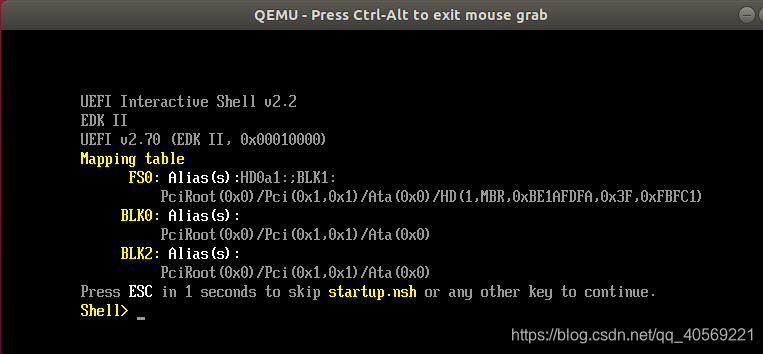
输入exit可退出
参考:How-to-build-OVMF
上一篇:UEFI开发学习1 - Ubuntu18.04搭建edk2环境


 1915
1915

 被折叠的 条评论
为什么被折叠?
被折叠的 条评论
为什么被折叠?
 到【灌水乐园】发言


