


一、本地镜像发布到阿里云
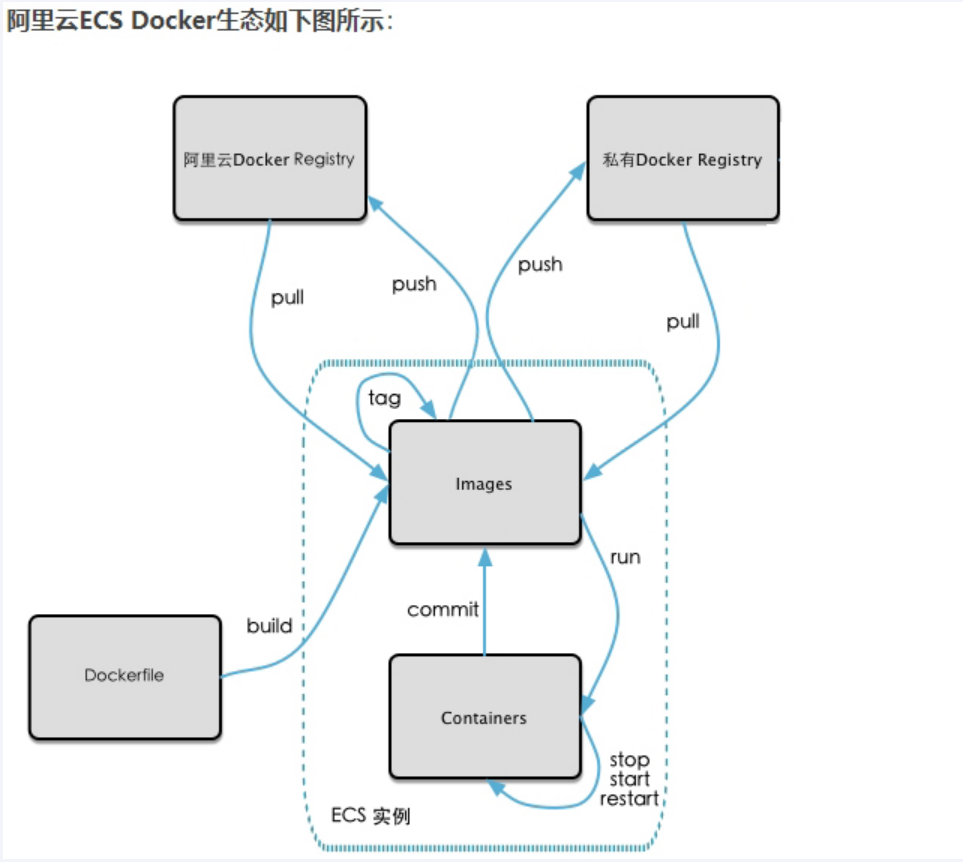
1、阿里云ECS Docker生态如下图示
二、镜像生成方法
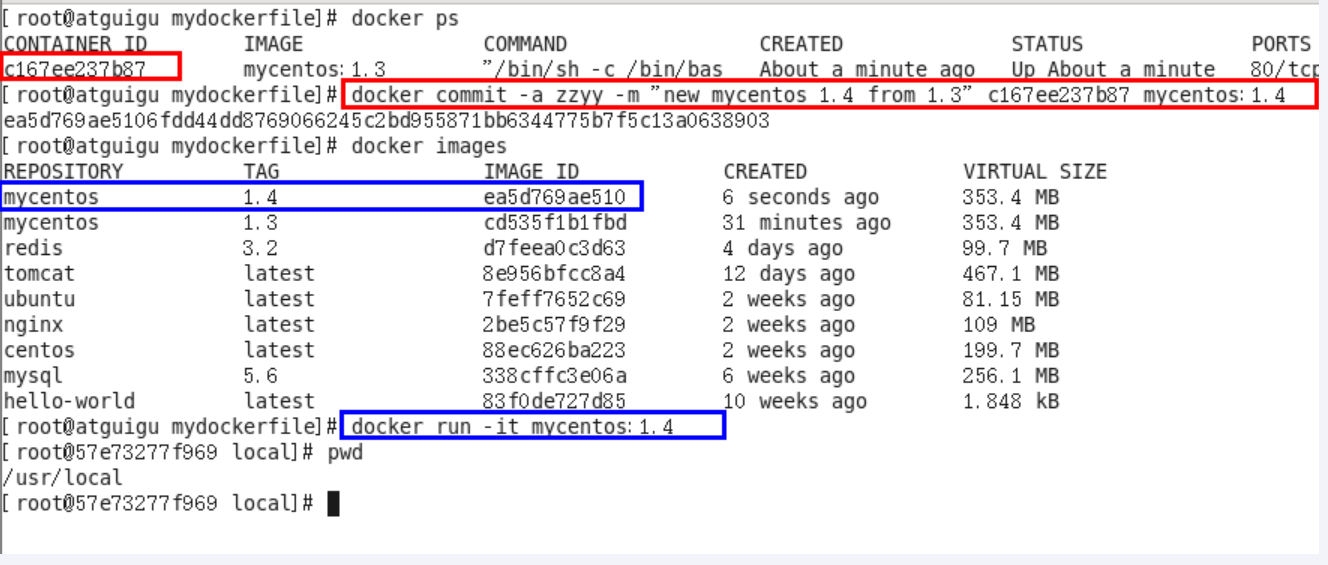
1、基于当前容器创建一个新的镜像,新功能增强
命令
docker commit [OPTIONS] 容器ID [REPOSITORY:[TAG]]OPTIONS说明:
-a :提交的镜像作者;
-m :提交时的说明文字;
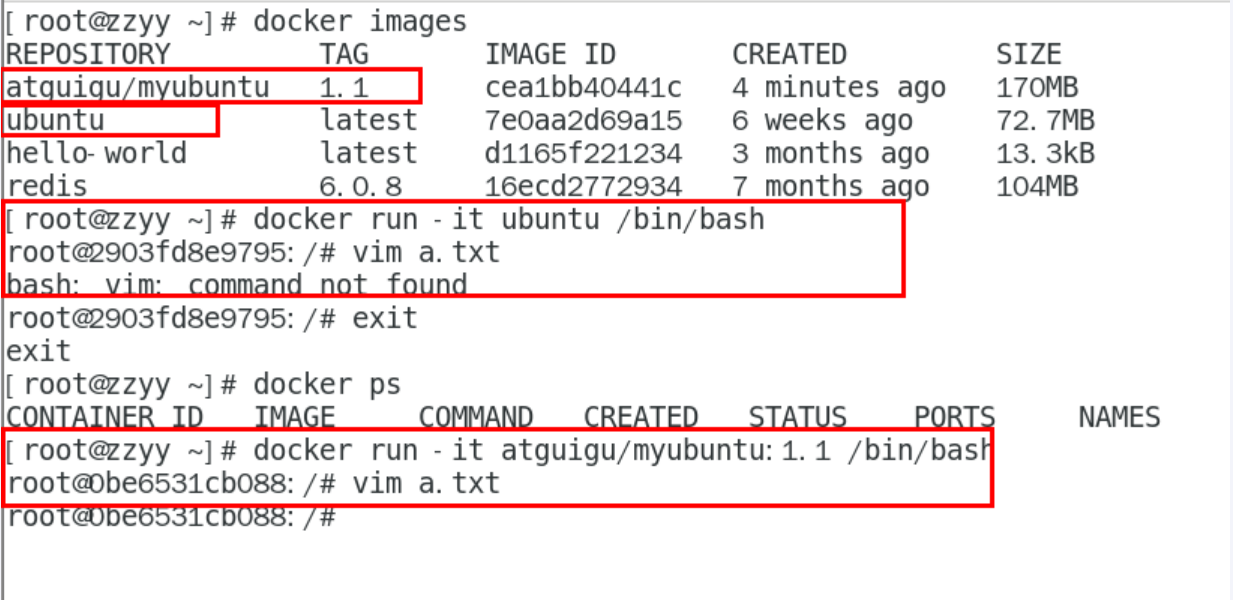
本次案例centos+ubuntu两个,当堂讲解一个,家庭作业一个,请大家务必动手,亲自实操。
三、将本地镜像推送到阿里云
1、本地镜像素材原型


2、阿里云开发者平台

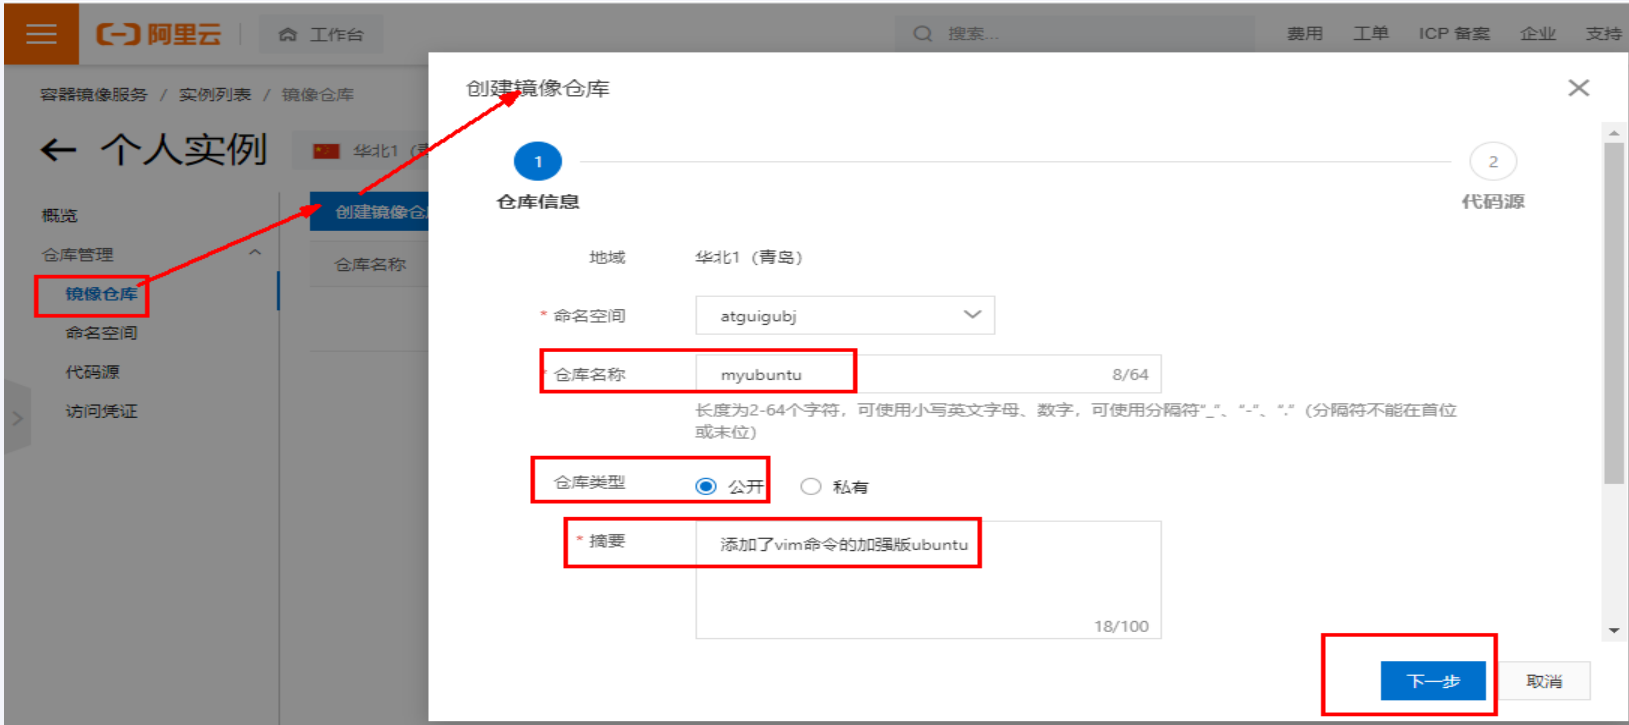
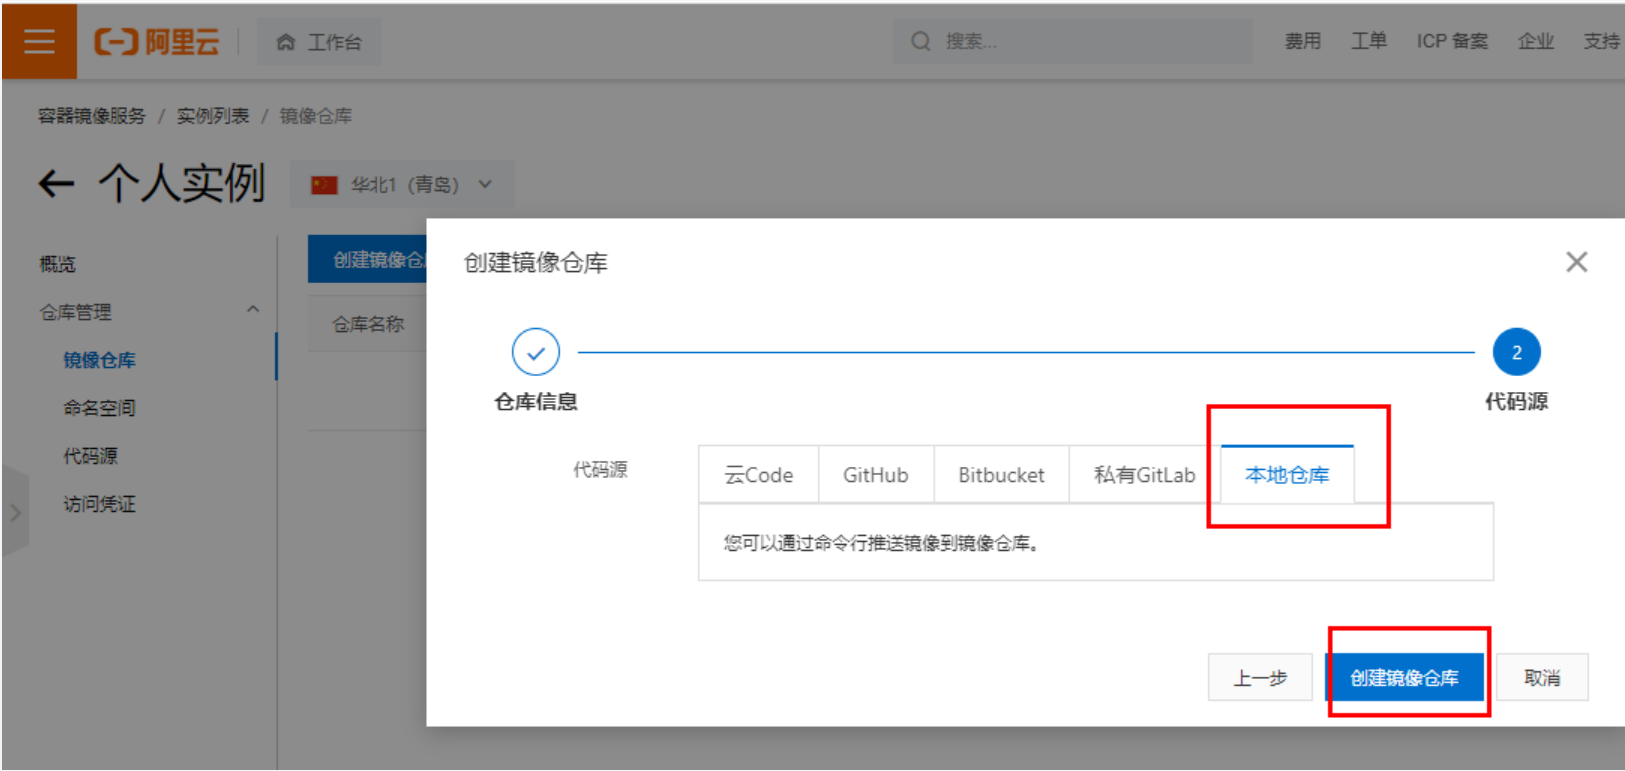
2.1、创建仓库镜像
2.1.1、选择控制台,进入容器服务

2.1.2、选择个人实例

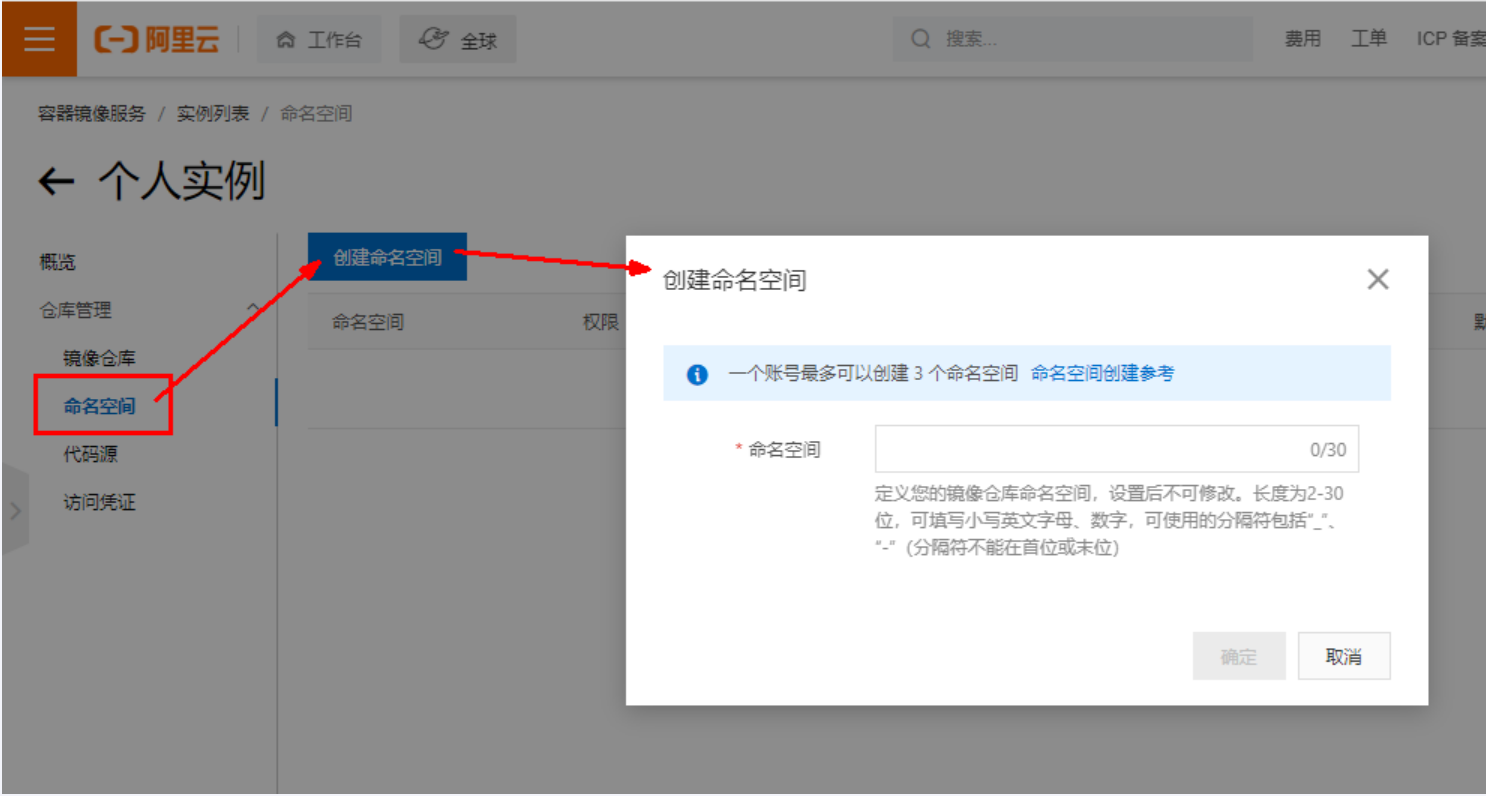
2.1.3、命名空间
2.1.4、仓库名称
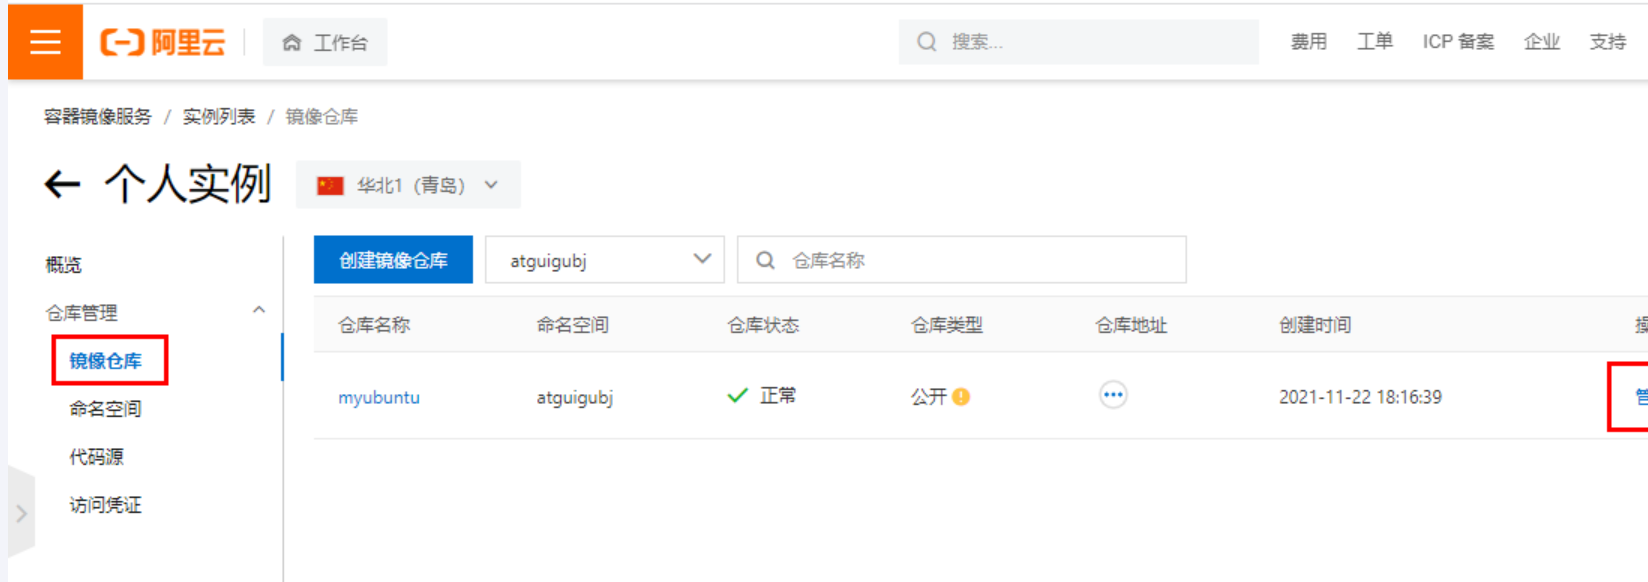
2.1.5、进入管理界面获得脚本
2.2、将镜像推送到阿里云
2.2.1、管理界面脚本
注意:只需要根据红色框命令就可以
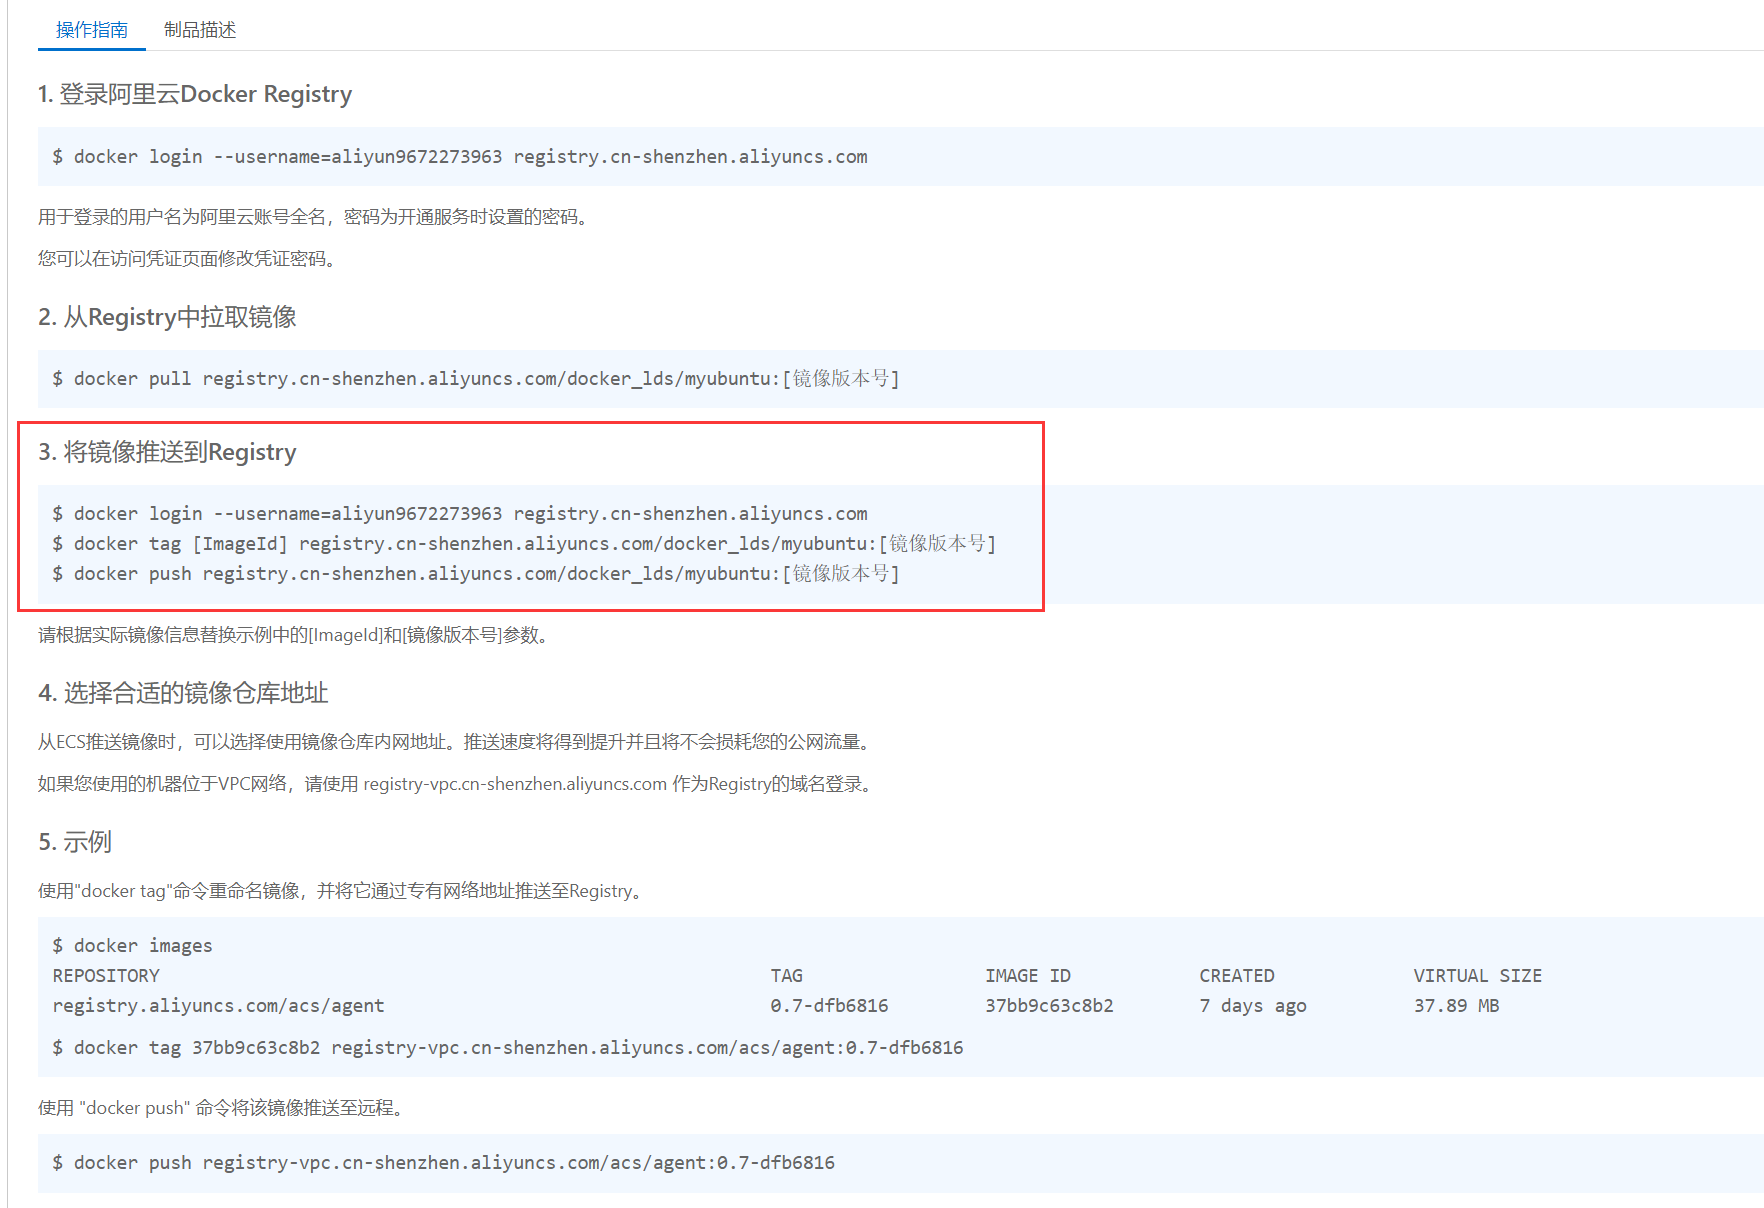
2.2.2、脚本实例
命令:根据上一步脚本一样
# 这边自行组装命令
docker login --username=aliyun9672273963 registry.cn-shenzhen.aliyuncs.com
docker tag [ImageId] registry.cn-shenzhen.aliyuncs.com/docker_lds/myubuntu:[镜像版本号]
docker push registry.cn-shenzhen.aliyuncs.com/docker_lds/myubuntu:[镜像版本号]

2.3、将阿里云上的镜像下载到本地
docker pull registry.cn-hangzhou.aliyuncs.com/atguiguwh/myubuntu:[TAG]


 1140
1140

 被折叠的 条评论
为什么被折叠?
被折叠的 条评论
为什么被折叠?
 到【灌水乐园】发言


