


菜单的创建及菜单的消息处理
工具栏和状态栏的创建和消息处理
1 菜单的创建及菜单的消息处理
1.1 问题
菜单的创建、消息以及状态更新消息。
1.2 方案
创建两个菜单,打开和退出,并做相应的消息处理.
1.3 步骤
实现此案例需要按照如下步骤进行。
步骤一:添加应用程序类
添加CWinApp类的派生类CMyWinApp类。代码如下所示:
class CMenuApp : public CWinApp
{
public:
virtual BOOL InitInstance( );
DECLARE_MESSAGE_MAP( )
public:
afx_msg void OnExit( );
afx_msg void OnOpen( );
};
步骤二:完成应用程序窗口的创建
编写InitInstance函数,完成应用程序窗口的创建以及两个消息处理函数。代码如下所示:
BEGIN_MESSAGE_MAP( CMenuApp, CWinApp )
ON_COMMAND( ID_EXIT, OnExit )
ON_COMMAND( ID_OPEN, OnOpen )
END_MESSAGE_MAP( )
BOOL CMenuApp::InitInstance( )
{
CMenuFrame *pFrame = new CMenuFrame;
pFrame->Create( NULL, “Menu” );
m_pMainWnd = pFrame;
pFrame->ShowWindow( SW_SHOW );
pFrame->UpdateWindow( );
return TRUE;
}/.
void CMenuApp::OnOpen( )
{
AfxMessageBox( “打开” );
}
void CMenuApp::OnExit( )
{
AfxMessageBox( “CMenuApp::OnExit” );
}
步骤三:添加CMyFrameWnd类
添加CFrameWnd类的派生类CMyFrameWnd类。并声明菜单栏点击处理消息成员函数
class CMenuFrame : public CFrameWnd
{
public:
DECLARE_MESSAGE_MAP( )
public:
afx_msg int OnCreate( LPCREATESTRUCT pCreateStruct );
afx_msg void OnExit( );
afx_msg void OnUpdateUIExit( CCmdUI * pCmdUI );
protected:
afx_msg void OnContextMenu(CWnd*, CPoint point);
};
步骤四:创建菜单栏,编写消息处理
设置主窗口创建菜单栏,并编写点击菜单相应的消息处理
BEGIN_MESSAGE_MAP( CMenuFrame, CFrameWnd )
ON_WM_CONTEXTMENU()
ON_WM_CREATE( )
ON_COMMAND( ID_EXIT, OnExit )
ON_UPDATE_COMMAND_UI( ID_EXIT, OnUpdateUIExit )
END_MESSAGE_MAP( )
int CMenuFrame::OnCreate( LPCREATESTRUCT pCreateStruct )
{
if( -1 == CFrameWnd::OnCreate( pCreateStruct ) )
{
return -1;
}
CMenu menu;
menu.LoadMenu( IDR_MAINFRM );
SetMenu( &menu );
menu.Detach( );
return 0;
}
void CMenuFrame::OnExit( )
{
AfxMessageBox( “CMenuFrame::OnExit” );
PostQuitMessage( 0 );
}
void CMenuFrame::OnUpdateUIExit( CCmdUI * pCmdUI )
{
pCmdUI->SetCheck( 1 );
}
1.4 完整代码
本案例的完整代码如下所示:
#include “stdafx.h”
#include “resource.h”
class CMenuFrame : public CFrameWnd
{
public:
DECLARE_MESSAGE_MAP( )
public:
afx_msg int OnCreate( LPCREATESTRUCT pCreateStruct );
afx_msg void OnExit( );
afx_msg void OnUpdateUIExit( CCmdUI * pCmdUI );
protected:
afx_msg void OnContextMenu(CWnd*, CPoint point);
};
BEGIN_MESSAGE_MAP( CMenuFrame, CFrameWnd )
ON_WM_CONTEXTMENU()
ON_WM_CREATE( )
ON_COMMAND( ID_EXIT, OnExit )
ON_UPDATE_COMMAND_UI( ID_EXIT, OnUpdateUIExit )
END_MESSAGE_MAP( )
int CMenuFrame::OnCreate( LPCREATESTRUCT pCreateStruct )
{
if( -1 == CFrameWnd::OnCreate( pCreateStruct ) )
{
return -1;
}
CMenu menu;
menu.LoadMenu( IDR_MAINFRM );
SetMenu( &menu );
menu.Detach( );
return 0;
}
void CMenuFrame::OnExit( )
{
AfxMessageBox( “CMenuFrame::OnExit” );
PostQuitMessage( 0 );
}
void CMenuFrame::OnUpdateUIExit( CCmdUI * pCmdUI )
{
pCmdUI->SetCheck( 1 );
}
class CMenuApp : public CWinApp
{
public:
virtual BOOL InitInstance( );
DECLARE_MESSAGE_MAP( )
public:
afx_msg void OnExit( );
afx_msg void OnOpen( );
};
CMenuApp theApp;
BEGIN_MESSAGE_MAP( CMenuApp, CWinApp )
ON_COMMAND( ID_EXIT, OnExit )
ON_COMMAND( ID_OPEN, OnOpen )
END_MESSAGE_MAP( )
BOOL CMenuApp::InitInstance( )
{
CMenuFrame *pFrame = new CMenuFrame;
pFrame->Create( NULL, “Menu” );
m_pMainWnd = pFrame;
pFrame->ShowWindow( SW_SHOW );
pFrame->UpdateWindow( );
return TRUE;
}/.
void CMenuApp::OnOpen( )
{
AfxMessageBox( “打开” );
}
void CMenuApp::OnExit( )
{
AfxMessageBox( “CMenuApp::OnExit” );
}
运行结果,如图-1,图-2所示:

2 工具栏和状态栏的创建和消息处理
2.1 问题
工具栏的创建及消息处理,创建状态栏以及信息的显示。
2.2 方案
创建工具栏和状态栏,掌握工具栏,状态栏的创建和处理
2.3 步骤
实现此案例需要按照如下步骤进行。
步骤一:完成应用程序窗口的创建
编写InitInstance函数,完成应用程序窗口的创建。代码如下所示:
class CToolBarApp : public CWinApp
{
public:
virtual BOOL InitInstance( );
};
CToolBarApp theApp;
BOOL CToolBarApp::InitInstance( )
{
CToolBarFrame * pFrame = new CToolBarFrame;
pFrame->Create( NULL, “ToolBar”, WS_OVERLAPPEDWINDOW,
CFrameWnd::rectDefault, NULL,
MAKEINTRESOURCE( IDR_MAINFRM ) );
m_pMainWnd = pFrame;
m_pMainWnd->ShowWindow( SW_SHOW );
m_pMainWnd->UpdateWindow( );
return TRUE;
}
步骤二:创建工具栏和状态栏
创建和设置工具栏和状态栏的属性和风格
class CToolBarFrame : public CFrameWnd
{
public:
virtual BOOL PreCreateWindow( CREATESTRUCT& cs );
DECLARE_MESSAGE_MAP( )
public:
afx_msg int OnCreate( LPCREATESTRUCT pCreateStruct );
afx_msg void OnTimer( UINT nIDEvent );
afx_msg void OnOpen( );
afx_msg void OnSave( );
afx_msg void OnViewStdBar( );
afx_msg void OnMouseMove( UINT nFlags, CPoint point );
public:
CToolBar m_wndToolBar;
CStatusBar m_wndStatusBar;
};
int CToolBarFrame::OnCreate( LPCREATESTRUCT pCreateStruct )
{
if( -1 == CFrameWnd::OnCreate( pCreateStruct ) )
{
return -1;
}
m_wndToolBar.CreateEx( this, TBSTYLE_FLAT,
WS_CHILD|WS_VISIBLE|CBRS_ALIGN_TOP|CBRS_TOOLTIPS );
m_wndToolBar.LoadToolBar( IDR_MAINFRM );
m_wndToolBar.EnableDocking( CBRS_ALIGN_ANY );
EnableDocking( CBRS_ALIGN_ANY );
DockControlBar( &m_wndToolBar, AFX_IDW_DOCKBAR_TOP );
m_wndToolBar.SetWindowText( “标准” );
m_wndStatusBar.CreateEx( this );
m_wndStatusBar.SetIndicators( g_nIndicators,
sizeof( g_nIndicators )/ sizeof( UINT ) );
SetTimer( 100, 1000, NULL );
return 0;
}
2.4 完整代码
本案例的完整代码如下所示:
#include “stdafx.h”
#include “resource.h”
class CToolBarFrame : public CFrameWnd
{
public:
virtual BOOL PreCreateWindow( CREATESTRUCT& cs );
DECLARE_MESSAGE_MAP( )
public:
afx_msg int OnCreate( LPCREATESTRUCT pCreateStruct );
afx_msg void OnTimer( UINT nIDEvent );
afx_msg void OnOpen( );
afx_msg void OnSave( );
afx_msg void OnViewStdBar( );
afx_msg void OnMouseMove( UINT nFlags, CPoint point );
public:
CToolBar m_wndToolBar;
CStatusBar m_wndStatusBar;
};
UINT g_nIndicators[] = {
0,
IDS_TIME,
ID_INDICATOR_CAPS,
ID_INDICATOR_NUM,
ID_INDICATOR_OVR
};
BEGIN_MESSAGE_MAP( CToolBarFrame, CFrameWnd )
ON_WM_CREATE( )
ON_WM_TIMER( )
ON_COMMAND( ID_OPEN, OnOpen )
ON_COMMAND( ID_SAVE, OnSave )
ON_COMMAND( ID_VIEW_STDBAR, OnViewStdBar )
ON_WM_MOUSEMOVE()
END_MESSAGE_MAP( )
void CToolBarFrame::OnMouseMove( UINT nFlags, CPoint point )
{
CString strTemp;
strTemp.Format(“X=%d,Y=%d”,point.x,point.y);
m_wndStatusBar.SetPaneText( 0, strTemp );
}
BOOL CToolBarFrame::PreCreateWindow( CREATESTRUCT& cs )
{
if(!CFrameWnd::PreCreateWindow( cs ) )
{
return FALSE;
}
cs.dwExStyle &= ~WS_EX_CLIENTEDGE;
return TRUE;
}
int CToolBarFrame::OnCreate( LPCREATESTRUCT pCreateStruct )
{
if( -1 == CFrameWnd::OnCreate( pCreateStruct ) )
{
return -1;
}
m_wndToolBar.CreateEx( this, TBSTYLE_FLAT,
WS_CHILD|WS_VISIBLE|CBRS_ALIGN_TOP|CBRS_TOOLTIPS );
m_wndToolBar.LoadToolBar( IDR_MAINFRM );
m_wndToolBar.EnableDocking( CBRS_ALIGN_ANY );
EnableDocking( CBRS_ALIGN_ANY );
DockControlBar( &m_wndToolBar, AFX_IDW_DOCKBAR_TOP );
m_wndToolBar.SetWindowText( “标准” );
m_wndStatusBar.CreateEx( this );
m_wndStatusBar.SetIndicators( g_nIndicators,
sizeof( g_nIndicators )/ sizeof( UINT ) );
SetTimer( 100, 1000, NULL );
return 0;
}
void CToolBarFrame::OnTimer( UINT nIDEvent )
{
CTime tmCur = CTime::GetCurrentTime( );
CString strTime = tmCur.Format( “%Y-%m-%d %H:%M:%S” );
m_wndStatusBar.SetPaneText( 1, strTime );
}
void CToolBarFrame::OnOpen( )
{
AfxMessageBox( “CToolBarFrame::OnOpen” );
}
void CToolBarFrame::OnSave( )
{
AfxMessageBox( “CToolBarFrame::OnSave” );
}
void CToolBarFrame::OnViewStdBar( )
{
if( m_wndToolBar.IsWindowVisible() )
{
ShowControlBar( &m_wndToolBar, FALSE, FALSE );
}
else
{
ShowControlBar( &m_wndToolBar, TRUE, FALSE );
}
}
class CToolBarApp : public CWinApp
{
public:
virtual BOOL InitInstance( );
};
CToolBarApp theApp;
BOOL CToolBarApp::InitInstance( )
{
CToolBarFrame * pFrame = new CToolBarFrame;
pFrame->Create( NULL, “ToolBar”, WS_OVERLAPPEDWINDOW,
CFrameWnd::rectDefault, NULL,
MAKEINTRESOURCE( IDR_MAINFRM ) );
m_pMainWnd = pFrame;
m_pMainWnd->ShowWindow( SW_SHOW );
m_pMainWnd->UpdateWindow( );
return TRUE;
}
运行结果:如图-3所示

探索的创造及菜单消息处理
使用运行时类信息判断是否属于某类
使用动态创造判断所属类
1前端的创建及菜单消息处理
1.1问题
创建视图窗口以及对视图窗口消息的处理。
1.2方案
创建视图,以及在视图类中处理菜单消息。
1.3步骤
实现此案例需要按照如下步骤进行。
步骤一:添加应用程序类,完成应用程序窗口的创建
和编写InitInstance函数,完成应用程序窗口的创建。代码如下所示:
CViewApp 类: 公共 CWinApp
{
公众:
虚拟BOOL InitInstance ( );
} ;
CViewApp theApp ;
布尔CViewApp :: InitInstance ( )
{
CViewFrame * pFrame = 新的 CViewFrame ;
pFrame- > 创建( NULL , “ ViewApp” ,
WS_OVERLAPPEDWINDOW , CFrameWnd :: rectDefault ,
NULL , MAKEINTRESOURCE ( IDR_MAINFRM ) );
m_pMainWnd = pFrame ;
m_pMainWnd- > ShowWindow ( SW_SHOW );
m_pMainWnd- > UpdateWindow ( );
返回 TRUE ;
}
步骤二:视图玻璃处理
添加CView类的派生类CmyView类,视图窗口的消息处理函数。代码如下所示:
CMyView 类: 公共 CView
{
公众:
虚拟void OnDraw ( CDC * pDC );
DECLARE_MESSAGE_MAP ( )
公众:
afx_msg void OnPaint ( );
afx_msg void OnTest ( );
} ;
BEGIN_MESSAGE_MAP ( CMyView , CView )
// ON_WM_PAINT()
ON_COMMAND ( ID_TEST , OnTest )
END_MESSAGE_MAP ( )
无效的CMyView :: OnPaint ( )
{
// CView :: OnPaint();
PAINTSTRUCT ps = { 0 } ;
CDC * pDC = BeginPaint ( & ps );
的pDC - > 的TextOut ( 100 , 120 , “CMyView” , 7 );
EndPaint ( & ps );
}
无效的CMyView :: OnDraw ( CDC * pDC )
{
的pDC - > 的TextOut ( 100 , 100 , “你好查看” );
}
无效的CMyView :: OnTest ( )
{
AfxMessageBox ( “ CMyView :: OnTest” );
}
步骤三:设置应用程序主窗口
添加CFrameWnd类的派生类CViewFrame类,设置应用程序主窗口,并创建窗体窗口。代码如下所示:
CViewFrame 类: 公共 CFrameWnd
{
公众:
CViewFrame ();
DECLARE_MESSAGE_MAP ( )
公众:
afx_msg int OnCreate ( LPCREATESTRUCT pCreateStruct );
公众:
CMyView * m_pwndView ;
} ;
BEGIN_MESSAGE_MAP ( CViewFrame , CFrameWnd )
ON_WM_CREATE ( )
END_MESSAGE_MAP ( )
CViewFrame :: CViewFrame ( )
{
m_pwndView = NULL ;
}
int CViewFrame :: OnCreate ( LPCREATESTRUCT pCreateStruct )
{
如果( - 1 == CFrameWnd的:: OnCreate中( pCreateStruct ) )
{
返回 - 1 ;
}
m_pwndView = 新的 CMyView ;
m_pwndView- > 创建( NULL , “ MyView” ,
WS_CHILD | WS_VISIBLE | WS_BORDER ,
的CRect ( 0 , 0 , 0 , 0 ), 这, AFX_IDW_PANE_FIRST );
SetActiveView ( m_pwndView );
返回 0 ;
}
1.4完整代码
本案例的完整代码如下所示:
CMyView 类: 公共 CView
{
公众:
虚拟void OnDraw ( CDC * pDC );
DECLARE_MESSAGE_MAP ( )
公众:
afx_msg void OnPaint ( );
afx_msg void OnTest ( );
} ;
BEGIN_MESSAGE_MAP ( CMyView , CView )
// ON_WM_PAINT()
ON_COMMAND ( ID_TEST , OnTest )
END_MESSAGE_MAP ( )
无效的CMyView :: OnPaint ( )
{
// CView :: OnPaint();
PAINTSTRUCT ps = { 0 } ;
CDC * pDC = BeginPaint ( & ps );
的pDC - > 的TextOut ( 100 , 120 , “CMyView” , 7 );
EndPaint ( & ps );
}
无效的CMyView :: OnDraw ( CDC * pDC )
{
的pDC - > 的TextOut ( 100 , 100 , “你好查看” );
}
无效的CMyView :: OnTest ( )
{
AfxMessageBox ( “ CMyView :: OnTest” );
}
CViewFrame 类: 公共 CFrameWnd
{
公众:
CViewFrame ();
DECLARE_MESSAGE_MAP ( )
公众:
afx_msg int OnCreate ( LPCREATESTRUCT pCreateStruct );
公众:
CMyView * m_pwndView ;
} ;
BEGIN_MESSAGE_MAP ( CViewFrame , CFrameWnd )
ON_WM_CREATE ( )
END_MESSAGE_MAP ( )
CViewFrame :: CViewFrame ( )
{
m_pwndView = NULL ;
}
int CViewFrame :: OnCreate ( LPCREATESTRUCT pCreateStruct )
{
如果( - 1 == CFrameWnd的:: OnCreate中( pCreateStruct ) )
{
返回 - 1 ;
}
m_pwndView = 新的 CMyView ;
m_pwndView- > 创建( NULL , “ MyView” ,
WS_CHILD | WS_VISIBLE | WS_BORDER ,
的CRect ( 0 , 0 , 0 , 0 ), 这, AFX_IDW_PANE_FIRST );
SetActiveView ( m_pwndView );
返回 0 ;
}
CViewApp 类: 公共 CWinApp
{
公众:
虚拟BOOL InitInstance ( );
} ;
CViewApp theApp ;
布尔CViewApp :: InitInstance ( )
{
CViewFrame * pFrame = 新的 CViewFrame ;
pFrame- > 创建( NULL , “ ViewApp” ,
WS_OVERLAPPEDWINDOW , CFrameWnd :: rectDefault ,
NULL , MAKEINTRESOURCE ( IDR_MAINFRM ) );
m_pMainWnd = pFrame ;
m_pMainWnd- > ShowWindow ( SW_SHOW );
m_pMainWnd- > UpdateWindow ( );
返回 TRUE ;
}
运行结果:如下-1所示

2使用运行时类信息判断是否属于某个类
2.1问题
创建一个窗口程序,使用运行时类信息判断它是否属于某个类。
2.2方案
定义一个CAnimal以及其子类CDog。定义CDog类的对象,使用运行时类信息判断它是否属于某个类。
2.3步骤
实现此案例需要按照如下步骤进行。
步骤一:定义一个CAnimal以及其子类CDog
添加CObject类的派生类CAnimal类。添加CAnimal类的派生类CDog类。代码如下所示:
CAnimal 类: 公共 CObject
{
公众:
DECLARE_DYNAMIC ( CAnimal )
} ;
IMPLEMENT_DYNAMIC ( CAnimal , CObject )
CDog 类: 公共 CAnimal
{
公众:
DECLARE_DYNAMIC ( CDog )
} ;
IMPLEMENT_DYNAMIC ( CDog , CAnimal )
步骤二:编写主函数_tmain函数
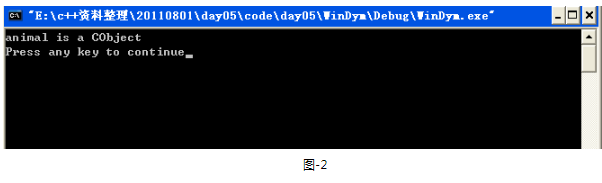
定义CAnimal对象,使用运行时类信息判断animal属不属于CObject。,如果属于打印animal是CObject,负责直接退出程序。代码如下所示:
int _tmain ( int argc , TCHAR * argv [], TCHAR * envp [])
{
动物;
如果(动物。IsKindOf (RUNTIME_CLASS ( CObject的)))
{
printf (“动物是CObject” );
}
返回 0 ;
}
2.4完整代码
本案例的完整代码如下所示:
CAnimal 类: 公共 CObject
{
公众:
DECLARE_DYNAMIC ( CAnimal )
} ;
IMPLEMENT_DYNAMIC ( CAnimal , CObject )
CDog 类: 公共 CAnimal
{
公众:
DECLARE_DYNAMIC ( CDog )
} ;
IMPLEMENT_DYNAMIC ( CDog , CAnimal )
int _tmain ( int argc , TCHAR * argv [], TCHAR * envp [])
{
动物;
如果(动物。IsKindOf (RUNTIME_CLASS ( CObject的)))
{
printf (“动物是CObject” );
}
返回 0 ;
}
运行结果:如下-2所示
3使用动态创建判断所属类
3.1问题
动态创建Cdog类的对象并判断它所属的类。
3.2方案
定义一个CAnimal以及其子类CDog。动态创建CDog类的对象,并判断它所属的类。
3.3步骤
实现此案例需要按照如下步骤进行。
步骤一:定义一个CAnimal以及其子类CDog
添加CAnimal类的派生类CDog类,并编写创建函数,创建对象。代码如下所示:
CAnimal 类:公共 CObject
{
DECLARE_DYNAMIC ( CAnimal )
静态 CObject * PASCAL CreateObject ();
} ;
CObject * PASCAL CAnimal :: CreateObject ()
{
返回 新的 CAnimal ;
}
IMPLEMENT_RUNTIMECLASS ( CAnimal , CObject , 0xFFFF ,
CAnimal :: CreateObject )
CDog 类:公共 CAnimal
{
DECLARE_DYNCREATE ( CDog )
} ;
IMPLEMENT_DYNCREATE ( CDog , CAnimal )
CObject * 创建 ( CRuntimeClass * pClass )
{
CObject * pObject = pClass- > CreateObject ();
返回 pObject ;
}
步骤二:编写主函数_tmain函数
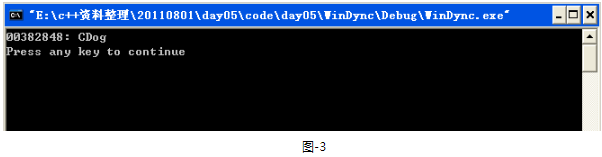
调用创建函数创建CDog对象,并调用运行时类消息,判断属不属于CDog类,如果属于的话就打印出创建CDog对象地址,负责直接退出程序!
int _tmain ( int argc , TCHAR * argv [], TCHAR * envp [])
{
CObject的* pObject = 创建( RUNTIME_CLASS ( CDog伴生) );
如果( pObject - > IsKindOf ( RUNTIME_CLASS ( CDog伴生) ) )
{
printf ( “%p:CDog \ n ” , pObject );
}
返回 0 ;
}
3.4完整代码
本案例的完整代码如下所示:
CAnimal 类:公共 CObject
{
// DECLARE_DYNCREATE(CAnimal)
DECLARE_DYNAMIC ( CAnimal )
静态 CObject * PASCAL CreateObject ();
} ;
// IMPLEMENT_DYNCREATE(CAnimal,CObject)
CObject * PASCAL CAnimal :: CreateObject ()
{
返回 新的 CAnimal ;
}
//这个宏和运行时类信息除最后一个参数外,都一样
IMPLEMENT_RUNTIMECLASS ( CAnimal , CObject , 0xFFFF ,
CAnimal :: CreateObject )
CDog 类:公共 CAnimal
{
DECLARE_DYNCREATE ( CDog )
} ;
IMPLEMENT_DYNCREATE ( CDog , CAnimal )
CObject * 创建 ( CRuntimeClass * pClass )
{
CObject * pObject = pClass- > CreateObject ();
返回 pObject ;
}
int _tmain ( int argc , TCHAR * argv [], TCHAR * envp [])
{
CObject的* pObject = 创建( RUNTIME_CLASS ( CDog伴生) );
如果( pObject - > IsKindOf ( RUNTIME_CLASS ( CDog伴生) ) )
{
printf ( “%p:CDog \ n ” , pObject );
}
返回 0 ;
}
运行结果:如下-3所示


 153
153


 被折叠的 条评论
为什么被折叠?
被折叠的 条评论
为什么被折叠?
 到【灌水乐园】发言


