


- 最近公司产品特别喜欢使用弹幕来做h5的落地页。应对业务需要,所以写了一个这样的弹幕库。
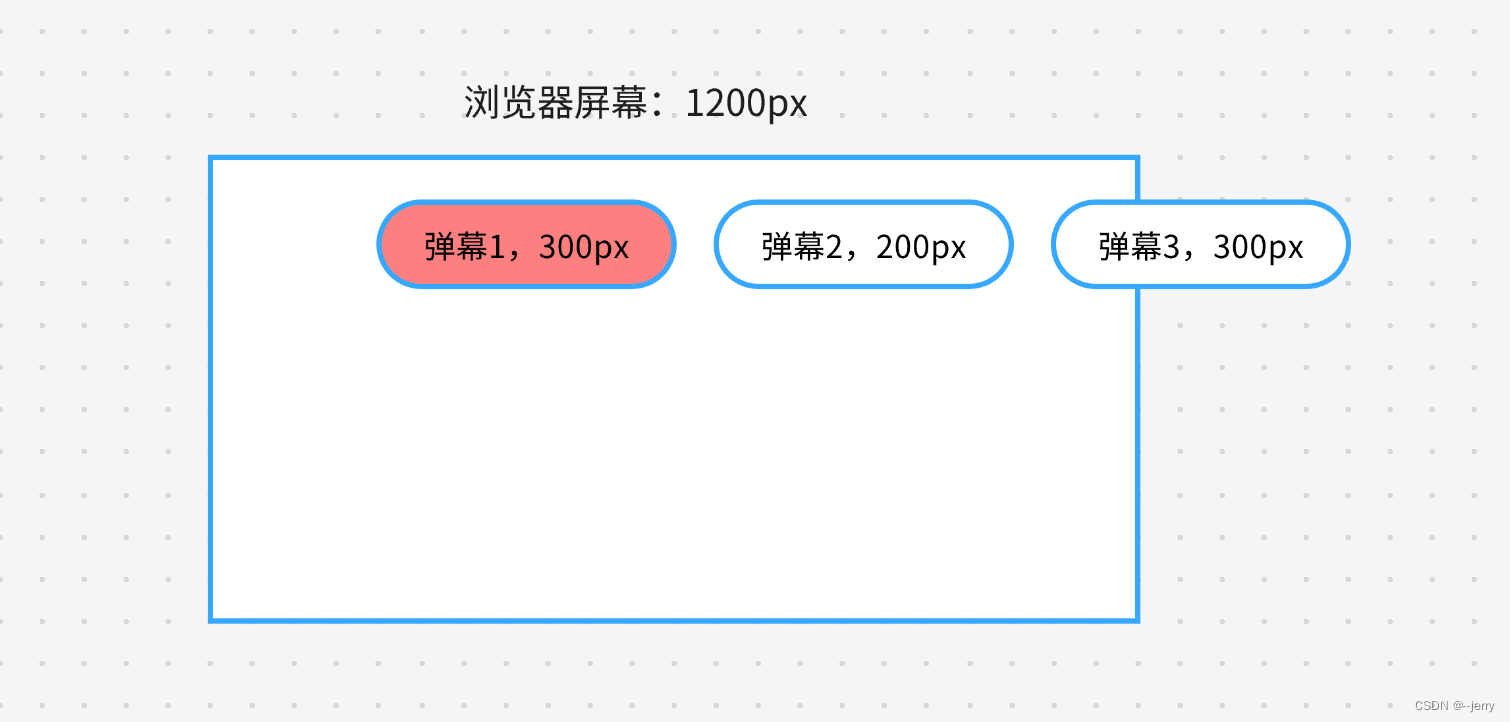
- 先来看看使用后的效果
- 最后根据这个效果,成功蒙混过关。
- 接下来是弹幕 每个节点主要的 思路分析 和代码实现逻辑。最后会有项目地址和npm包地址
- 分五步走,确定弹幕的初始位置、确定所有弹幕的位置、让弹幕动起来、让弹幕停止、让弹幕重新开始
主要逻辑的实现思路
1、确定弹幕的初始位置
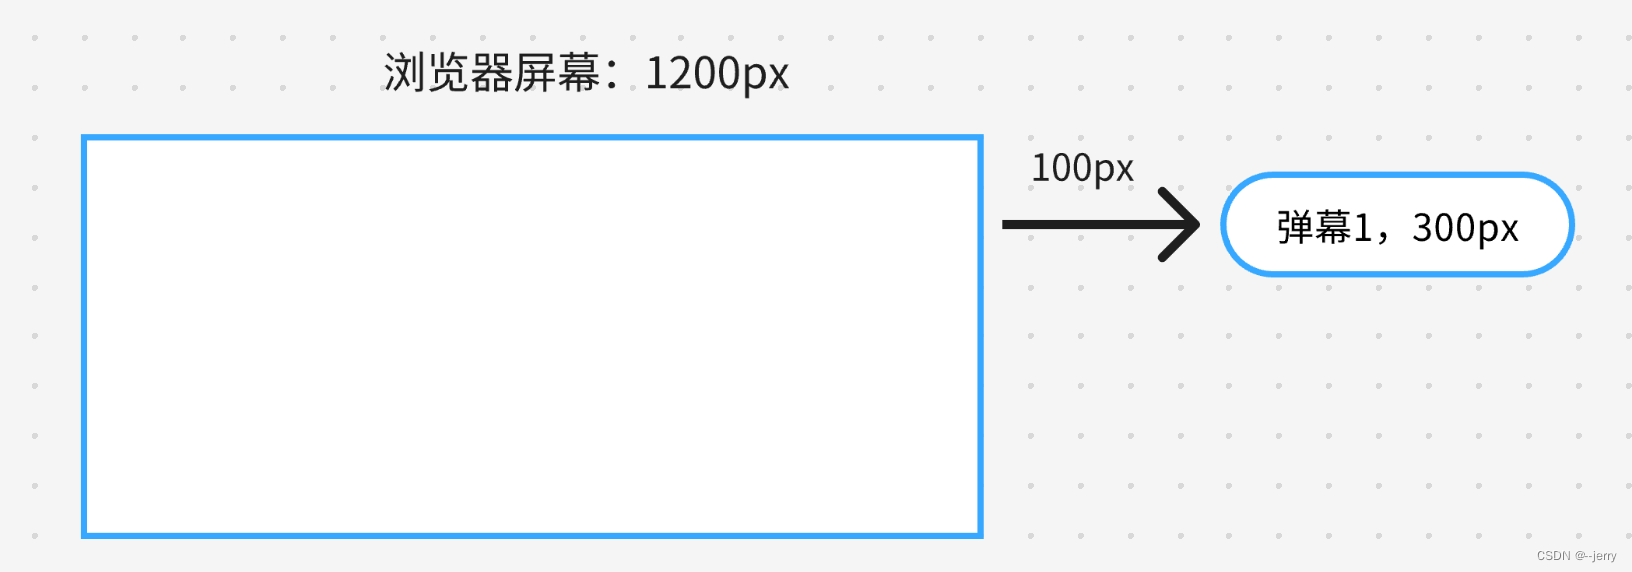
如图:分析
- 浏览器屏幕 宽度 1200px
- 第一个弹幕距离屏幕视口 100px
- 那么第一个弹幕的left 值就是 1200 + 100 = 1300px
// 容器宽度
let wrapWidth = 0

let space = 100

wrapWidth = document.documentElement.clientWidth

let options = {left: wrapWidth + space}
2、确定后面所有弹幕的位置
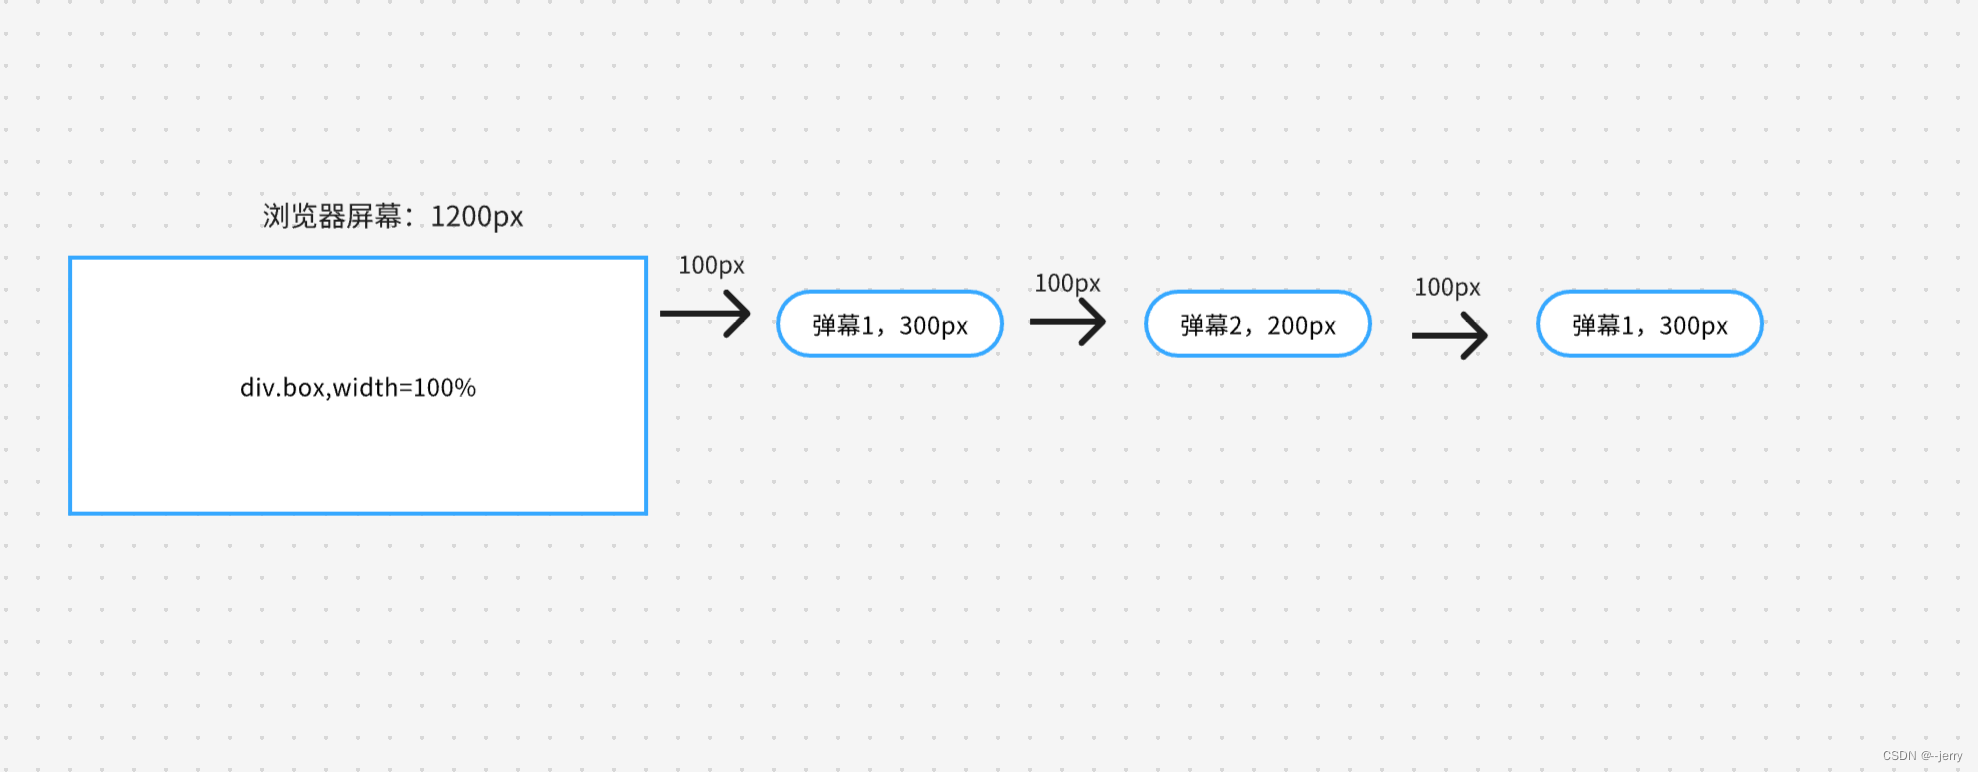
如图分析:
- 弹幕2 的 位置:弹幕1的 left + 弹幕1自身的宽度 + 100px
- 弹幕3 的 位置:弹幕2的 left + 弹幕2自身的宽度 + 100px
- 弹幕n 的 位置:弹幕(n - 1) 的 left + 弹幕(n - 1)自身的宽度 + 100px
由此
// 容器宽度
let wrapWidth = 0
// 间距
let space = 100
// 存储最后一个弹幕
let lastElementList = []

wrapWidth = document.documentElement.clientWidth

// 创建一个div,即创建一个弹幕,插入到屏幕节点
const createBarrage = (option) => {
	const { root, value, left } = option
	const div = document.createElement('div')
	div.innerHTML = value
	div.setAttribute(
	    'style',
	    'position: absolute;'.concat('left: ', left + '', 'px;')
 	)
	root.appendChild(div)
	lastElementList[0] = div

}

// 有个push 方法
const push = (value: string) => {
	const root = document.querySelector(".box")
	// 最后一个div
	const lastDiv = lastElementList[0]
	let left = 0
	// 最后一个div有,那就是上一个div的left + 上一个div的width + 间距space
	if(lastDiv) {
		 const info = lastDiv.getBoundingClientRect()
		 left = info.left + info.width + space
	}else{
		// 没有就是 屏幕宽度 + 间距space
		left = wrapWidth + space
	}
	const options = {
		root,
		value,
		left,
	}
	createBarrage(options)
}

push('111111')
push('222222')
push('333333')
3、做滚动动画

如图分析:
- 第一个弹幕移动距离,自身的left + 自身的width, 然后消失
- 第二个弹幕移动距离,自身的left + 自身的width, 然后消失
- 第三个弹幕移动距离,自身的left + 自身的width, 然后消失
…
	const dis = left + width
	div.setAttribute(
	   'style',
	   'position: absolute;'.concat('left: ', left + '', 'px;')
	     .concat('transform: translateX(', (`${-dis}`), 'px);')
	     .concat('width: max-content')
	 )
- 这时我们 根据 每个弹幕的 translateX 距离动态计算 动画 时间。动态计算的原因是能让弹幕暂停和重新开始
/** 移动速度 */
let speed = 120

// 运动时间
const time = ((left + width) / speed).toFixed(2)
div.setAttribute(
    'style',
    'position: absolute;'.concat('left: ', left + '', 'px;')
      .concat('transform: translateX(', (`${-dis}`), 'px);')
      .concat('transition: transform ', time, 's', ' linear;')
      .concat('width: max-content')
  )
- 动画结束删除div
 div.addEventListener('transitionend', () => {
    div.remove()
  })
- 以上步骤实现,我们就能看到弹幕在屏幕中移动了。
4、让弹幕暂停
- 让 transform 的值等于当前位置的值
- 让 transition 的时间等于 0
const pause = () => {
	const itemNodeList = document.querySelector(".box").childNodes

    let len = itemNodeList.length
    if (len < 0) { return }

    while (len > 0) {
      len--
      const transform = window.getComputedStyle(itemNodeList[len]).getPropertyValue('transform')
      itemNodeList[len].style.transform = transform
      // 把时间设置为 0 暂停动画
      itemNodeList[len].style.transition = 'transition 0s linear'
    }
  }
注:这里暂停后transform:matrix() 函数的形式,这是css动画的矩阵计算,不用太在意
** 5、重新开始动画 **
- 重新计算translateX 和 transition 的值
const start = () => {
   	const itemNodeList = document.querySelector(".box").childNodes
    let len = itemNodeList.length
    if (len < 0) { return }

    while (len > 0) {
      len--
      const left = window.getComputedStyle(itemNodeList[len]).getPropertyValue('left')
      const info = itemNodeList[len].getBoundingClientRect()
      // 计算动画终点的距离,距离结束的距离还是 和 初始的一样
      const dis = info.width + parseFloat(left)

      // 开始的动画的时间,时间会变短,用元素的left + 自身宽度 / 速度
      const time = ((info.left + info.width) / speed).toFixed(2)
      itemNodeList[len].style.transform = `translateX(${-dis}px)`
      itemNodeList[len].style.transition = `transform ${time}s linear`
    }
  }
- 完整代码和效果请参考下面的链接
- npm 地址 https://www.npmjs.com/package/yp-barrage
- github 地址 https://github.com/jackajin/barrage


 498
498

 被折叠的 条评论
为什么被折叠?
被折叠的 条评论
为什么被折叠?
 到【灌水乐园】发言


