


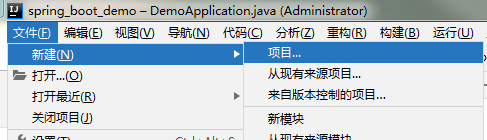
一、新建项目

左边如果没有,点击文件-设置-插件 搜索Spring Assistant下载重启即可
右边是默认在线模板的地址
二、点击下一步

maven项目以及java版本
三、选择默认依赖
这里是选择默认依赖,会自动添加依赖到pom.xml里边,由maven进行管理下载

我们选择 Spring Web 以及SQL里边的MySQL Driver、Spring Data JPA 以及Template类别下的Thymeleaf
点击下一步,点完成
四、查看目录结构

创建controller包,创建一个controller类,下边templates里边放html代码 修改application的后缀为yml
主程序代码:

控制器代码

index.html代码

application.yml代码
spring:
  datasource:
    name: test  #数据库名
    url: jdbc:mysql://localhost:3306/test #url
    username: root  #用户名
    password: 123456  #密码
    driver-class-name: com.mysql.jdbc.Driver  #数据库链接驱动
五、运行程序
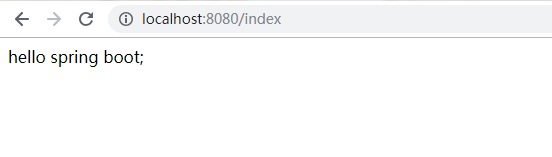
如果出现
Circular view path [index]: would dispatch back to the current handler URL [/index] again
打开pom.xml
添加:
<dependency>
   <groupId>org.springframework.boot</groupId>
   <artifactId>spring-boot-starter-test</artifactId>
   <scope>test</scope>
</dependency>
maven导入,重启即可


 2451
2451


 被折叠的 条评论
为什么被折叠?
被折叠的 条评论
为什么被折叠?
 到【灌水乐园】发言


