


Ubuntu18.04安装 NVIDIA驱动
Ubuntu18.04安装 NVIDIA驱动
参考自博客:https://blog.csdn.net/jsjason1/article/details/88086904
我确定这篇文章是否很有必要,我最开始的时候,按照这篇文章所述,重新安装了NVIDIA驱动,但是后来以为 CUDA与TensorFlow的版本问题,选择了软件更新管理器中附加驱动里的专有驱动(nvidia-driver-390),然后后续安装成功没再进行测试,但可以肯定,因为本文章是带领着安装最新的官方NVIDIA驱动,所以,支持的CUDA版本也较高,我当时看到信息中支持的CUDA版本是10.0,但我需要的是9.0
下面开始讲述安装官方最新NVIDIA显卡驱动的步骤
为了减少重启次数,并不丢失本文章,建议你,先把本文章链接保存一下,然后到BIOS里的security选项中禁用secure boot,然后你就可以跳过第2步。
1.删除原有NVIDIA驱动
sudo apt-get remove --purge nvidia*
2.在BIOS的security选项中禁用secure boot
3.禁用nouveau
sudo gedit /etc/modprobe.d/blacklist.conf
在最后一行添加
blacklist nouneau
执行
sudo update-initramfs -u
重启
lsmod | grep nouveau # 没输出代表禁用生效,要在重启之后执行
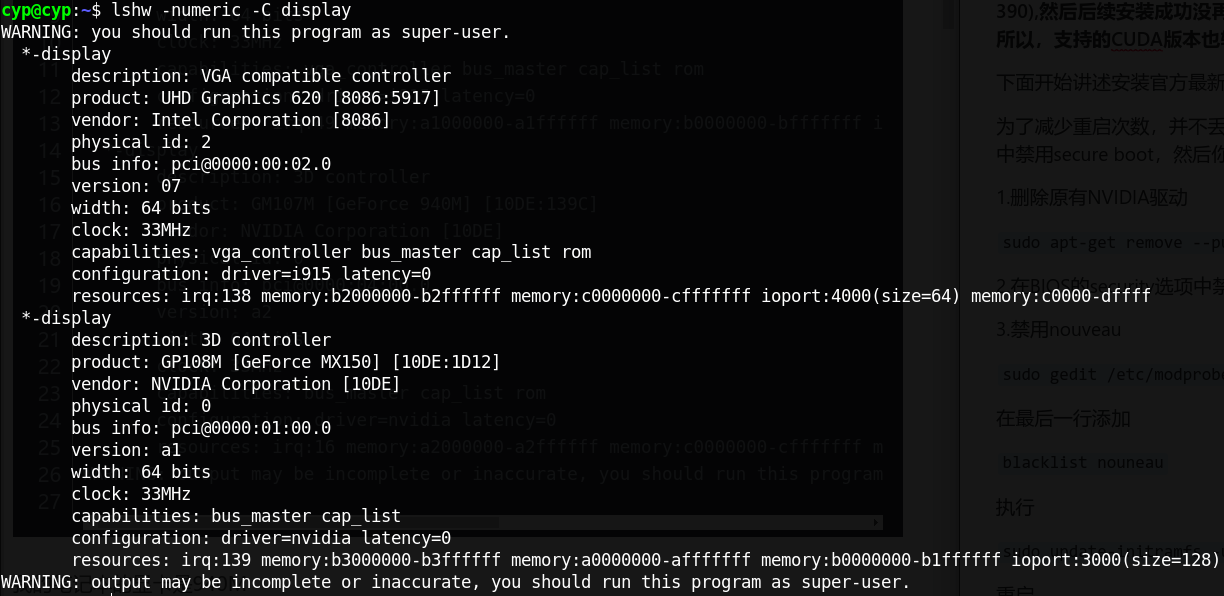
4.查询自己的显卡型号
lshw -numeric -C display
以下是我的显卡信息,我的时Geforce MX150
5.从NVIDIA显卡驱动下载对应的显卡驱动
6.安装
sudo chmod a+x NVIDIA-Linux-x86_64-418.43.run
sudo ./NVIDIA-Linux-x86_64-418.43.run --no-opengl-files --no-x-check --no-nouveau-check- –no-opengl-files 只安装驱动文件,不安装OpenGL文件。这个参数最重要
- –no-x-check 安装驱动时不检查X服务
- –no-nouveau-check 安装驱动时不检查nouveau
如果遇到./nvidia-installer: unrecognized option:
执行sudo ./NVIDIA-Linux-x86_64-418.43.run -A #查询高级选项,输出太多,放在文章最后(附录),就是介绍一些后面可以加的指令,因为本文讲的随时间推移有些命令可能也会不再合适
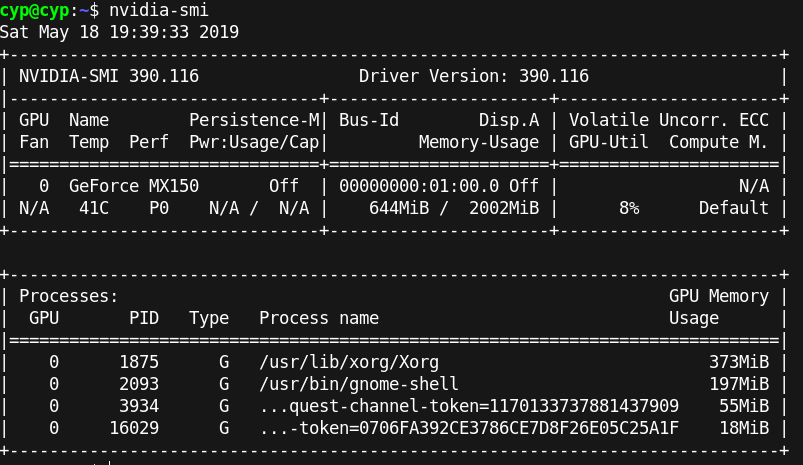
7.检验是否安装成功,命令nvidia-smi
附录:
  -v, --version
      Print the nvidia-installer version and exit.

  -h, --help
      Print usage information for the common commandline options and exit.

  -A, --advanced-options
      Print usage information for the common commandline options as well as the
      advanced options, and then exit.

  -a, --accept-license
      This option is obsolete and ignored by nvidia-installer.  It is provided
      for compatibility with older versions of nvidia-installer, which required
      this option for explicit license acceptance. Use of the NVIDIA driver
      implies acceptance of the NVIDIA Software License Agreement, contained in
      the file 'LICENSE' (in the top level directory of the driver package).

  -i, --driver-info
      Print information about the currently installed NVIDIA driver version.

  --uninstall
      Uninstall the currently installed NVIDIA driver.

  --skip-module-unload
      When uninstalling the driver, skip unloading of the NVIDIA kernel module.
      This option is ignored when the driver is being installed.

  --sanity
      Perform basic sanity tests on an existing NVIDIA driver installation.

  -e, --expert
      Enable 'expert' installation mode; more detailed questions will be asked,
      and more verbose output will be printed; intended for expert users.  The
      questions may be suppressed with the '--no-questions' commandline
      option.

  -q, --no-questions
      Do not ask any questions; the default (normally 'yes') is assumed for all
      yes/no questions, and the default string is assumed in any situation
      where the user is prompted for string input.

  -s, --silent
      Run silently; no questions are asked and no output is printed, except for
      error messages to stderr.  This option implies '--ui=none
      --no-questions'.

  --x-prefix=X-PREFIX
      The prefix under which the X components of the NVIDIA driver will be
      installed; the default is '/usr/X11R6' unless nvidia-installer detects
      that X.Org >= 7.0 is installed, in which case the default is '/usr'.
      Only under rare circumstances should this option be used.

  --xfree86-prefix=XFREE86-PREFIX
      This is a deprecated synonym for --x-prefix.

  --x-module-path=X-MODULE-PATH
      The path under which the NVIDIA X server modules will be installed.  If
      this option is not specified, nvidia-installer uses the following search
      order and selects the first valid directory it finds: 1) `X
      -showDefaultModulePath`, 2) `pkg-config --variable=moduledir
      xorg-server`, or 3) the X library path (see the '--x-library-path'
      option) plus either 'modules' (for X servers older than X.Org 7.0) or
      'xorg/modules' (for X.Org 7.0 or later).

  --x-library-path=X-LIBRARY-PATH
      The path under which the NVIDIA X libraries will be installed.  If this
      option is not specified, nvidia-installer uses the following sea
最低0.47元/天 解锁文章


 2290
2290


 被折叠的 条评论
为什么被折叠?
被折叠的 条评论
为什么被折叠?
 到【灌水乐园】发言


