


从b站学习springcloud项目,现在进行总结,该总结除去了视频中出现的小错误,对有些易错的地方进行了提醒
b站链接:https://www.bilibili.com/video/av55629580?p=1
资料链接:
https://pan.baidu.com/s/1o0Aju3IydKA15Vo1pP4z5w
提取码: 21ru
上一节链接:
https://blog.csdn.net/qq_40893824/article/details/103609138
下一节链接:
https://blog.csdn.net/qq_40893824/article/details/103618769
下面的内容总结:
module(user)→configserver/shared新建user-dev.yml→bootstrap.yml→
com.southwind.UserApplication.java→controler.UserHandler.java→检查
user/entity/User.java→repository/UserRepository.java→resources/mapping/MenuRepository.xml→UserHandler.java→检查
对用户的增、删、查操作
实现细节:
1.新建module命名为user,其pom文件添加的代码和menu一样!
	<dependencies>
        <dependency>
            <groupId>org.springframework.cloud</groupId>
            <artifactId>spring-cloud-starter-netflix-eureka-client</artifactId>
            <version>2.0.2.RELEASE</version>
        </dependency>

        <dependency>
            <groupId>org.springframework.cloud</groupId>
            <artifactId>spring-cloud-starter-config</artifactId>
            <version>2.0.2.RELEASE</version>
        </dependency>

        <dependency>
            <groupId>org.mybatis.spring.boot</groupId>
            <artifactId>mybatis-spring-boot-starter</artifactId>
            <version>1.3.2</version>
        </dependency>

        <dependency>
            <groupId>mysql</groupId>
            <artifactId>mysql-connector-java</artifactId>
            <version>8.0.11</version>
        </dependency>
    </dependencies>
2.配置:在confiserver/resources/shared中再复制一份menu-dev.yml但改名为user-dev.yml,并修改port为8040,name为user,其他不变:
server:
  port: 8040
spring:
  application:
    name: user
  datasource:
    name: qwe
    url: jdbc:mysql://localhost:3306/qwe?useUnicode=true&characterEncoding=UTF-8&serverTimezone=UTC
    username: root
    password: 123456
    driver-class-name: com.mysql.cj.jdbc.Driver
eureka:
  client:
    service-url:
      defaultZone: http://localhost:8761/eureka/
  instance:
    prefer-ip-address: true
mybatis:
  mapper-locations: classpath:/mapping/*.xml
  type-aliases-package: com.southwind.entity
#  这个mybatis是在menu - resources - mapping写好后加的。
3.user读取configserver中的配置将menu/resources中的bootstrap.yml复制至user/resources,修改name为user:
spring:
  application:
    name: user
  profiles:
    active: dev
  cloud:
    config:
      uri: http://localhost:8762
      fail-fast: true
4.在user/java中创包com.southwind,在southwind中新建启动类UserApplication.java加入代码:
package com.southwind;

import org.mybatis.spring.annotation.MapperScan;
import org.springframework.boot.SpringApplication;
import org.springframework.boot.autoconfigure.SpringBootApplication;

@SpringBootApplication
@MapperScan("com.southwind.repository")
public class UserApplication {
    public static void main(String[] args) {
        SpringApplication.run(UserApplication.class,args);
    }
}
5.在user/southwind中创包controller,在里面新建控制器UserHandler.java,加入代码:
package com.southwind.controller;

import org.springframework.beans.factory.annotation.Value;
import org.springframework.web.bind.annotation.GetMapping;
import org.springframework.web.bind.annotation.RequestMapping;
import org.springframework.web.bind.annotation.RestController;

@RestController
@RequestMapping("/user")
public class UserHandler {

    @Value("${server.port}")
    private String port;

    @GetMapping("/index")
    public String index(){
        return "当前端口:"+this.port;
    }
}
6.重启 configserver 启动user 检查端口是否可以调通:进入 http://localhost:8761
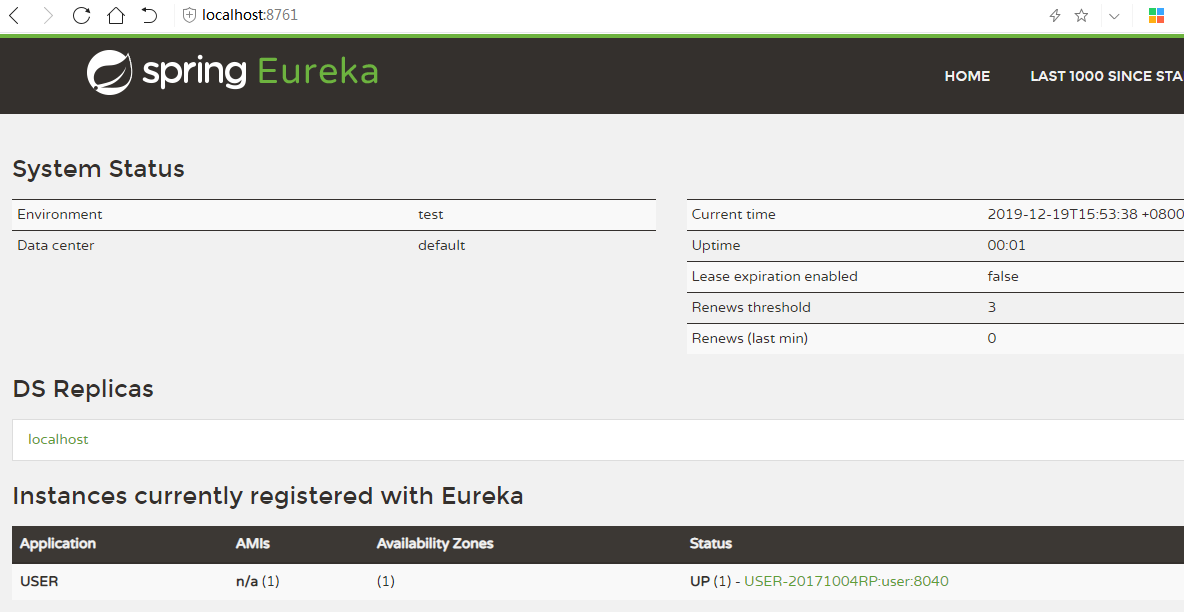
再进入 http://localhost:8040/user/index
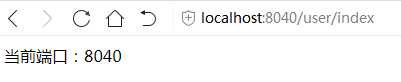
说明可以调通!
实现数据接口:
7.在user/southwind中创包entity,创建实体类User.java,加入代码:
package com.southwind.entity;

import lombok.Data;

@Data
public class User {
    private long id;
    private String username;
    private String password;
    private String nickname;
    private String gender;
    private String telephone;
    private Date registerdate;
    private String address;
}
其中registerdate是注册日期,其类型可以这样查看:
对着t_user右键单击
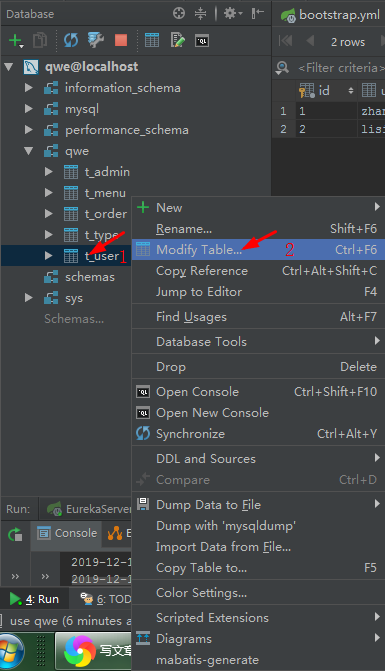
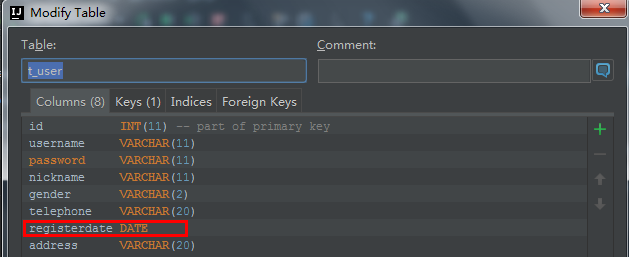
可以看到registerdate的类型是Date
8.在southwind中创包repository,在里面新建接口UserRepository.java,加入代码:
package com.southwind.repository;

import com.southwind.entity.User;

import java.util.List;

public interface UserRepository {

    /*增*/
    public void save(User user);
    /*删*/
    public void deleteById(long id);
    /*查*/
    public List<User>findAll(int index ,int limit);
    public User findById(long id);
    /*改*/
    public void update(User user);
    /*计数*/
    public int count();
}
9.在user/resources中创包mapping,将menu/mapping中的MenuRepository.xml复制至User/mapping中,并改名为UserRepository.xml,修改代码:
第三行MenuRepository改为UserRepository
删除5-11行的< resultMap>
现在的第5行findAll 和第13行的findById 中 resultMap=“menuMap” 改为 resultType=“User”
下一行的 及后面所有的t_menu 改为 t_user
17和21行的save和update修改,对应user中的属性
<?xml version="1.0" encoding="UTF-8" ?>
<!DOCTYPE mapper PUBLIC "-//mybatis.org//DTD Mapper 3.0//EN" "http://mybatis.org/dtd/mybatis-3-mapper.dtd">
<mapper namespace="com.southwind.repository.UserRepository">

	<select id="findAll" resultType="User">
		select * from t_user limit #{param1},#{param2}
	</select>

	<select id="count" resultType="int">
		select count(id) from t_user
	</select>

	<select id="findById" parameterType="long" resultType="User">
		select * from t_user where id = #{id}
	</select>

	<insert id="save" parameterType="User">
		insert into t_user(username,password,nickname,gender,telephone,registerdate,address) values(#{username},#{password},#{nickname},#{gender},#{telephone},#{registerdate},#{address})
	</insert>

	<update id="update" parameterType="User">
		update t_user set username = #{username},password = #{password},nickname = #{nickname}, gender=#{gender},telephone = #{telephone},registerdate = #{registerdate},address=#{address} where id = #{id}
	</update>

	<delete id="deleteById" parameterType="long">
		delete from t_user where id = #{id}
	</delete>
</mapper>
10.现在去user/UserHandler中修改代码:
删除port的代码
然后加入代码:
package com.southwind.controller;

import com.southwind.entity.User;
import com.southwind.repository.UserRepository;
import org.springframework.beans.factory.annotation.Autowired;
import org.springframework.web.bind.annotation.*;

import java.util.List;

@RestController
@RequestMapping("/user")
public class UserHandler {

    @Autowired
    private UserRepository userRepository;

    /*增*/
    @PostMapping("/save")
    public void save(@RequestBody User  user){
        userRepository.save(user);
    }

    @PutMapping("/update")
    public void update(@RequestBody User user){
        userRepository.update(user);
    }
    /*删*/
    @DeleteMapping("/deleteById/{id}")
    public void deleteById(@PathVariable("id")long id){
        userRepository.deleteById(id);
    }

    /*查*/
    @GetMapping("/findAll/{index}/{limit}")
    public List<User>findAll(@PathVariable("index") int index ,@PathVariable("limit") int limit){
        return userRepository.findAll(index, limit);
    }

    @GetMapping("/findById/{id}")
    public User findById(@PathVariable("id")long id){
        return userRepository.findById(id);
    }

    @GetMapping("/count")
    public int count(){
        return userRepository.count();
    }
}
11.检查:启动user
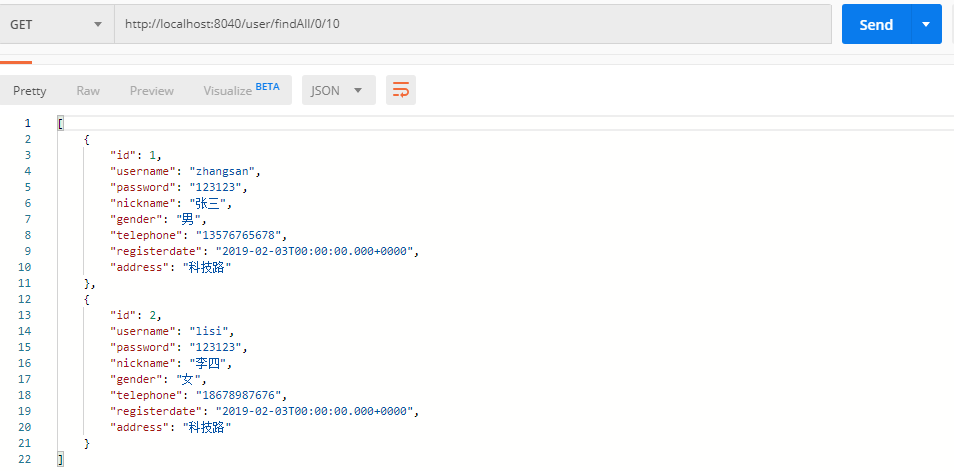
a. 打开postman,进入 get http://localhost:8040/user/findAll/0/10
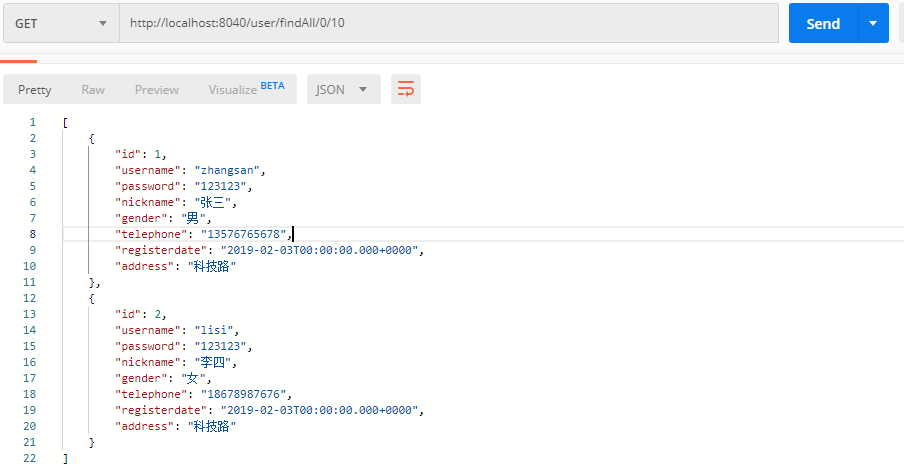
findAll调用成功!
b. 进入 get http://localhost:8040/user/findById/2
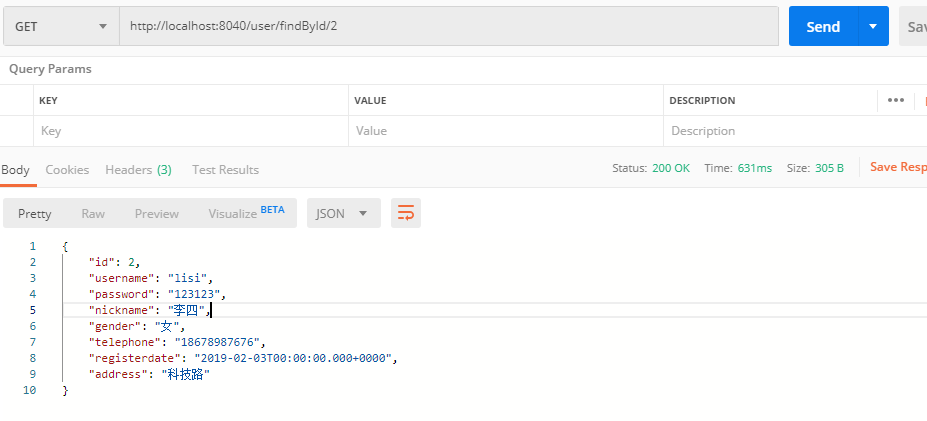
findById调用成功!
c. 进入 get http://localhost:8040/user/count
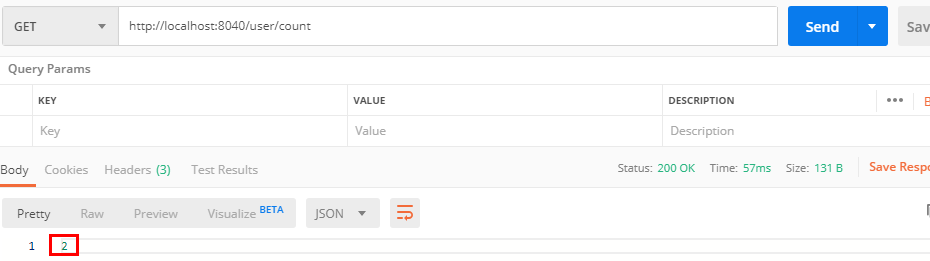
count成功!
d. 进入 post http://localhost:8040/user/save
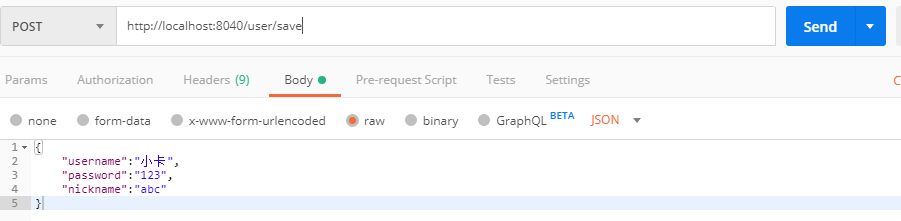
进入 get http://localhost:8040/user/findAll/0/10

成功添加!
e. 进入 put http://localhost:8040/user/update
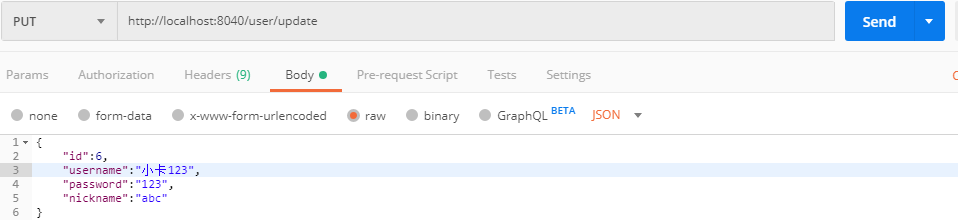
进入 get http://localhost:8040/user/findAll/0/10
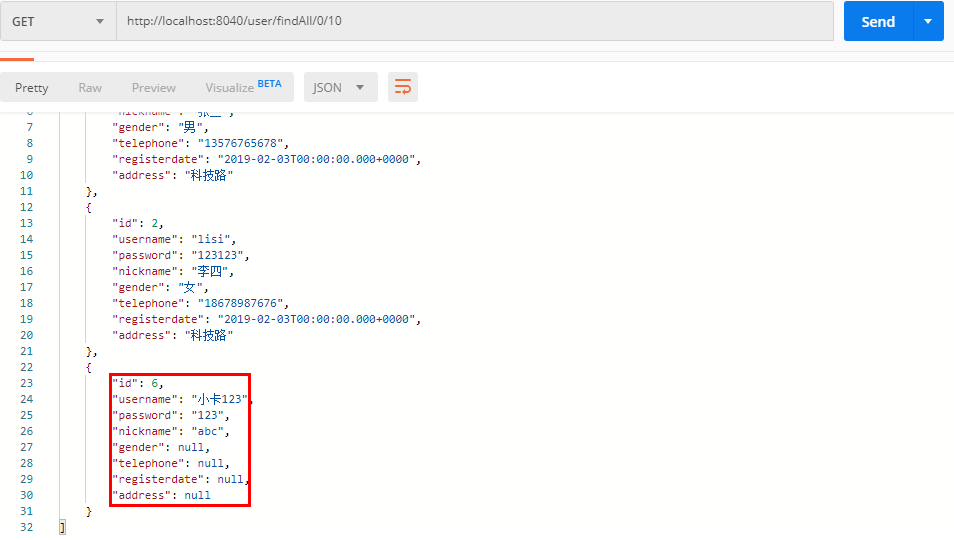
更新成功!
f. 进入 delete http://localhost:8040/user/deleteById/6
再进入 get http://localhost:8040/user/findAll/0/10
成功删除!
这样user的功能就实现了!
上一节链接:
https://blog.csdn.net/qq_40893824/article/details/103609138
下一节链接:
https://blog.csdn.net/qq_40893824/article/details/103618769


 2172
2172


 被折叠的 条评论
为什么被折叠?
被折叠的 条评论
为什么被折叠?
 到【灌水乐园】发言


