


本文将讲述一些 Hexo 博客的美化,本文以作者 luuman 的 spfk 主题和作者 xaoxuu 的 Material X 主题为例,实际效果欢迎访问我的博客进行查看,本文章会不定时进行更新。文章涉及有关参考资料、教程、链接如有侵权请联系我删除!
请注意:不同主题可能方法有些不同,相同主题不同版本,配置方法也有所差异!阅读主题文档非常重要!
博客美化前提条件:有一定的前端基础,了解 HTML、CSS、JS,了解 CSS 预处理语言 Sass、Less、Stylus,搞懂 hexo 的目录结构。
博客美化通用步骤:选定主题,认真阅读主题文档,分析主题目录结构,了解每个文件是对应网页哪个部分的,认真阅读美化教程,美化教程本质上只为你提供核心代码和思路,具体代码要添加到哪个地方,需要你自己搞懂主题结构,添加到需要的、合适的位置!
博客美化终极奥秘:创作第一,体验第二,避免繁杂,简洁为上!
欢迎关注我的专栏:《Github/Coding Pages + Hexo》,从前期搭建到后期美化一条龙,帮你解决 Hexo 常见问题!
推荐阅读:《Hexo 博客优化之实用功能添加系列(持续更新)》
Hexo 交流群:924812033,有问题可以一起交流解决。
【01】添加卡通人物(看板娘)
我在逛别人博客的时候偶然发现右下角居然有一个萌萌的卡通人物,还能根据你鼠标位置摇头,瞬间被吸引到了,赶紧也给自己博客添加一个吧!点击此处进入该项目地址
输入如下命令获取 live2d :
$npm install --save hexo-helper-live2d
输入以下命令,下载相应的模型,将 packagename 更换成模型名称即可,更多模型选择请点击此处,各个模型的预览请访问原作者的博客
npm install packagename打开站点目录下的 _config.yml 文件,添加如下代码:
live2d:
	enable: true
	scriptFrom: local
	model:
		use: live2d-widget-model-haruto #模型选择
	display:
		position: right  #模型位置
		width: 150       #模型宽度
		height: 300      #模型高度
	mobile:
		show: false      #是否在手机端显示
设置好过后我们就拥有了一个卡通人物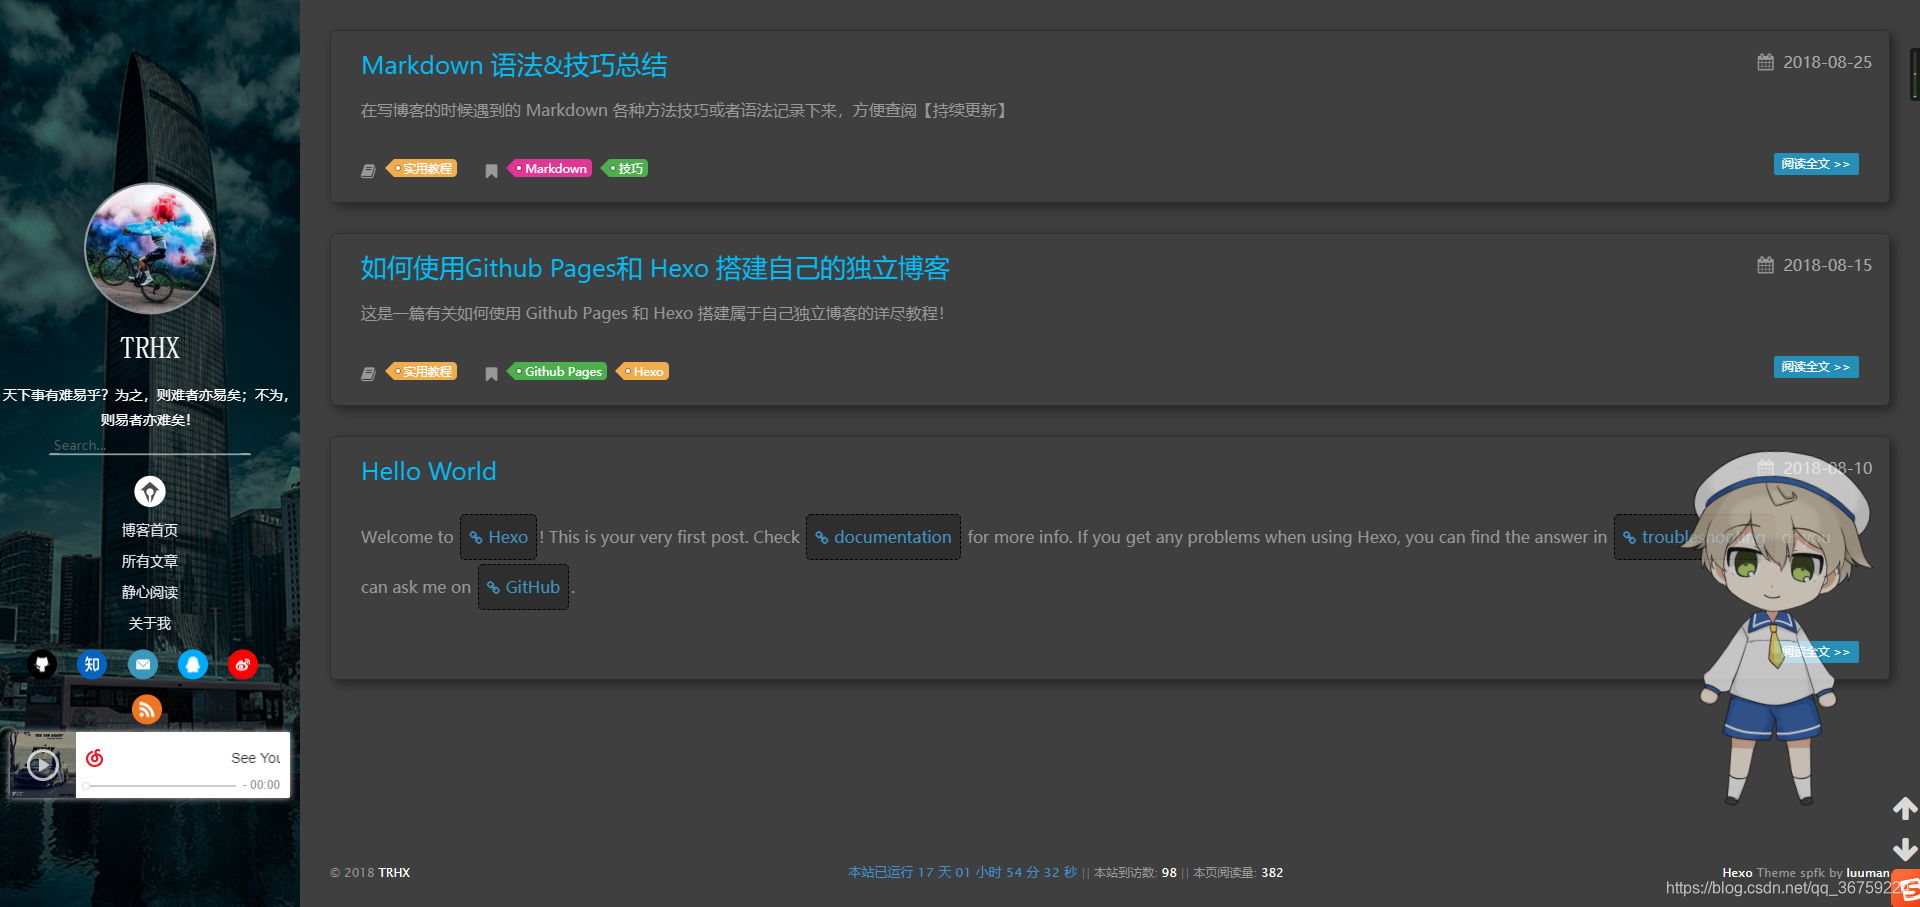
【02】添加鼠标点击爱心效果
在 \themes\hexo-theme-spfk\source\js 下新建文件 love.js,在 love.js 文件中添加以下代码:
!function(e,t,a){function n(){c(".heart{width: 10px;height: 10px;position: fixed;background: #f00;transform: rotate(45deg);-webkit-transform: rotate(45deg);-moz-transform: rotate(45deg);}.heart:after,.heart:before{content: '';width: inherit;height: inherit;background: inherit;border-radius: 50%;-webkit-border-radius: 500%;-moz-border-radius: 50%;position: fixed;}.heart:after{top: -5px;}.heart:before{left: -5px;}"),o(),r()}function r(){for(var e=0;e<d.length;e++)d[e].alpha<=0?(t.body.removeChild(d[e].el),d.splice(e,1)):(d[e].y--,d[e].scale+=.004,d[e].alpha-=.013,d[e].el.style.cssText="left:"+d[e].x+"px;top:"+d[e].y+"px;opacity:"+d[e].alpha+";transform:scale("+d[e].scale+","+d[e].scale+") rotate(45deg);background:"+d[e].color+";z-index:99999");requestAnimationFrame(r)}function o(){var t="function"==typeof e.onclick&&e.onclick;e.onclick=function(e){t&&t(),i(e)}}function i(e){var a=t.createElement("div");a.className="heart",d.push({el:a,x:e.clientX-5,y:e.clientY-5,scale:1,alpha:1,color:s()}),t.body.appendChild(a)}function c(e){var a=t.createElement("style");a.type="text/css";try{a.appendChild(t.createTextNode(e))}catch(t){a.styleSheet.cssText=e}t.getElementsByTagName("head")[0].appendChild(a)}function s(){return"rgb("+~~(255*Math.random())+","+~~(255*Math.random())+","+~~(255*Math.random())+")"}var d=[];e.requestAnimationFrame=function(){return e.requestAnimationFrame||e.webkitRequestAnimationFrame||e.mozRequestAnimationFrame||e.oRequestAnimationFrame||e.msRequestAnimationFrame||function(e){setTimeout(e,1e3/60)}}(),n()}(window,document);
在 \themes\hexo-theme-spfk\layout\layout.ejs 文件末尾添加以下代码:
<!-- 页面点击小红心 -->
<script type="text/javascript" src="/js/love.js"></script>
完成以操作后,当我们点击鼠标的时候就可以看见爱心的特效了
【03】添加鼠标点击显示字体效果
在 /themes/hexo-theme-spfk/source/js 下新建文件 click_show_text.js,在 click_show_text.js 文件中添加以下代码:
var a_idx = 0;
jQuery(document).ready(function($) {
    $("body").click(function(e) {
        var a = new Array
        ("富强", "民主", "文明", "和谐", "自由", "平等", "公正", "法治", "爱国", "敬业", "诚信", "友善");
        var $i = $("<span/>").text(a[a_idx]);
        a_idx = (a_idx + 1) % a.length;
        var x = e.pageX,
        y = e.pageY;
        $i.css({
            "z-index": 5,
            "top": y - 20,
            "left": x,
            "position": "absolute",
            "font-weight": "bold",
            "color": "#FF0000"
        });
        $("body").append($i);
        $i.animate({
            "top": y - 180,
            "opacity": 0
        },
			3000,
			function() {
			    $i.remove();
			});
    });
    setTimeout('delay()', 2000);
});

function delay() {
    $(".buryit").removeAttr("onclick");
}
其中的社会主义核心价值观可以根据你自己的创意替换为其他文字
如果想要每次点击显示的文字为不同颜色,可以将其中 color 值进行如下更改:
"color": "rgb(" + ~~(255 * Math.random()) + "," + ~~(255 * Math.random()) + "," + ~~(255 * Math.random()) + ")"
然后在 \themes\hexo-theme-spfk\layout\layout.ejs 文件末尾添加以下代码:
<!--单击显示文字-->
<script type="text/javascript" src="/js/click_show_text.js"></script>
最终实现效果如下: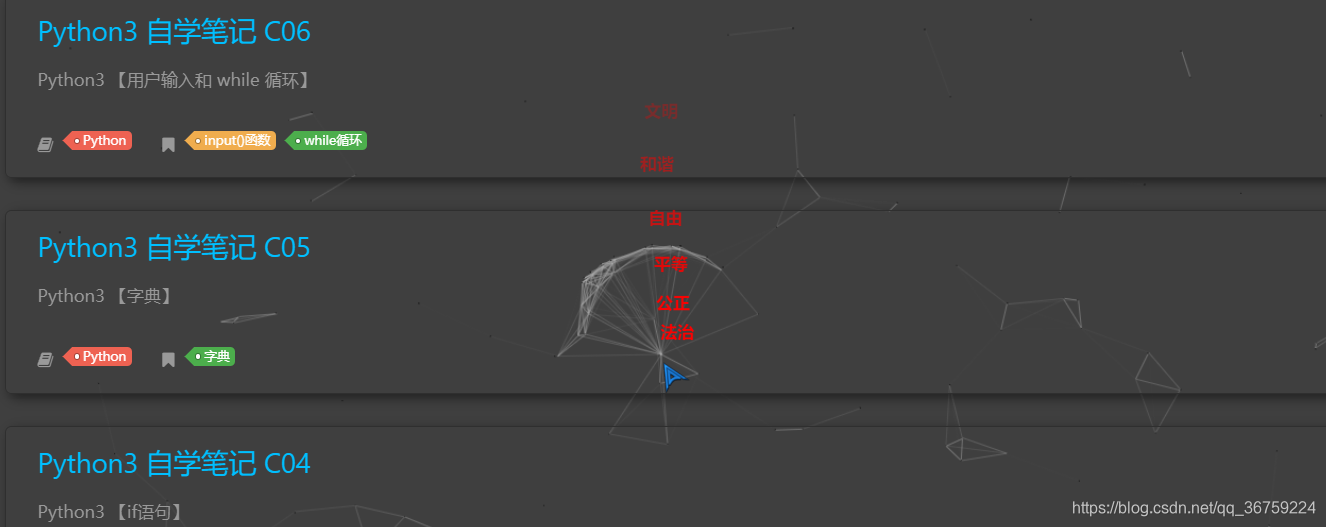
【04】添加鼠标点击烟花爆炸效果
在 \themes\material-x\source\js 目录下新建一个 fireworks.js 的文件,里面写入以下代码:
"use strict";function updateCoords(e){pointerX=(e.clientX||e.touches[0].clientX)-canvasEl.getBoundingClientRect().left,pointerY=e.clientY||e.touches[0].clientY-canvasEl.getBoundingClientRect().top}function setParticuleDirection(e){var t=anime.random(0,360)*Math.PI/180,a=anime.random(50,180),n=[-1,1][anime.random(0,1)]*a;return{x:e.x+n*Math.cos(t),y:e.y+n*Math.sin(t)}}function createParticule(e,t){var a={};return a.x=e,a.y=t,a.color=colors[anime.random(0,colors.length-1)],a.radius=anime.random(16,32),a.endPos=setParticuleDirection(a),a.draw=function(){ctx.beginPath(),ctx.arc(a.x,a.y,a.radius,0,2*Math.PI,!0),ctx.fillStyle=a.color,ctx.fill()},a}function createCircle(e,t){var a={};return a.x=e,a.y=t,a.color="#F00",a.radius=0.1,a.alpha=0.5,a.lineWidth=6,a.draw=function(){ctx.globalAlpha=a.alpha,ctx.beginPath(),ctx.arc(a.x,a.y,a.radius,0,2*Math.PI,!0),ctx.lineWidth=a.lineWidth,ctx.strokeStyle=a.color,ctx.stroke(),ctx.globalAlpha=1},a}function renderParticule(e){for(var t=0;t<e.animatables.length;t++){e.animatables[t].target.draw()}}function animateParticules(e,t){for(var a=createCircle(e,t),n=[],i=0;i<numberOfParticules;i++){n.push(createParticule(e,t))}anime.timeline().add({targets:n,x:function(e){return e.endPos.x},y:function(e){return e.endPos.y},radius:0.1,duration:anime.random(1200,1800),easing:"easeOutExpo",update:renderParticule}).add({targets:a,radius:anime.random(80,160),lineWidth:0,alpha:{value:0,easing:"linear",duration:anime.random(600,800)},duration:anime.random(1200,1800),easing:"easeOutExpo",update:renderParticule,offset:0})}function debounce(e,t){var a;return function(){var n=this,i=arguments;clearTimeout(a),a=setTimeout(function(){e.apply(n,i)},t)}}var canvasEl=document.querySelector(".fireworks");if(canvasEl){var ctx=canvasEl.getContext("2d"),numberOfParticules=30,pointerX=0,pointerY=0,tap="mousedown",colors=["#FF1461","#18FF92","#5A87FF","#FBF38C"],setCanvasSize=debounce(function(){canvasEl.width=2*window.innerWidth,canvasEl.height=2*window.innerHeight,canvasEl.style.width=window.innerWidth+"px",canvasEl.style.height=window.innerHeight+"px",canvasEl.getContext("2d").scale(2,2)},500),render=anime({duration:1/0,update:function(){ctx.clearRect(0,0,canvasEl.width,canvasEl.height)}});document.addEventListener(tap,function(e){"sidebar"!==e.target.id&&"toggle-sidebar"!==e.target.id&&"A"!==e.target.nodeName&&"IMG"!==e.target.nodeName&&(render.play(),updateCoords(e),animateParticules(pointerX,pointerY))},!1),setCanvasSize(),window.addEventListener("resize",setCanvasSize,!1)}"use strict";function updateCoords(e){pointerX=(e.clientX||e.touches[0].clientX)-canvasEl.getBoundingClientRect().left,pointerY=e.clientY||e.touches[0].clientY-canvasEl.getBoundingClientRect().top}function setParticuleDirection(e){var t=anime.random(0,360)*Math.PI/180,a=anime.random(50,180),n=[-1,1][anime.random(0,1)]*a;return{x:e.x+n*Math.cos(t),y:e.y+n*Math.sin(t)}}function createParticule(e,t){var a={};return a.x=e,a.y=t,a.color=colors[anime.random(0,colors.length-1)],a.radius=anime.random(16,32),a.endPos=setParticuleDirection(a),a.draw=function(){ctx.beginPath(),ctx.arc(a.x,a.y,a.radius,0,2*Math.PI,!0),ctx.fillStyle=a.color,ctx.fill()},a}function createCircle(e,t){var a={};return a.x=e,a.y=t,a.color="#F00",a.radius=0.1,a.alpha=0.5,a.lineWidth=6,a.draw=function(){ctx.globalAlpha=a.alpha,ctx.beginPath(),ctx.arc(a.x,a.y,a.radius,0,2*Math.PI,!0),ctx.lineWidth=a.lineWidth,ctx.strokeStyle=a.color,ctx.stroke(),ctx.globalAlpha=1},a}function renderParticule(e){for(var t=0;t<e.animatables.length;t++){e.animatables[t].target.draw()}}function animateParticules(e,t){for(var a=createCircle(e,t),n=[],i=0;i<numberOfParticules;i++){n.push(createParticule(e,t))}anime.timeline().add({targets:n,x:function(e){return e.endPos.x},y:function(e){return e.endPos.y},radius:0.1,duration:anime.random(1200,1800),easing:"easeOutExpo",update:renderParticule}).add({targets:a,radius:anime.random(80,160),lineWidth:0,alpha:{value:0,easing:"linear",duration:anime.random(600,800)},duration:anime.random(1200,1800),easing:"easeOutExpo",update:renderParticule,offset:0})}function debounce(e,t){var a;return function(){var n=this,i=arguments;clearTimeout(a),a=setTimeout(function(){e.apply(n,i)},t)}}var canvasEl=document.querySelector(".fireworks");if(canvasEl){var ctx=canvasEl.getContext("2d"),numberOfParticules=30,pointerX=0,pointerY=0,tap="mousedown",colors=["#FF1461","#18FF92","#5A87FF","#FBF38C"],setCanvasSize=debounce(function(){canvasEl.width=2*window.innerWidth,canvasEl.height=2*window.innerHeight,canvasEl.style.width=window.innerWidth+"px",canvasEl.style.height=window.innerHeight+"px",canvasEl.getContext("2d").scale(2,2)},500),render=anime({duration:1/0,update:function(){ctx.clearRect(0,0,canvasEl.width,canvasEl.height)}});document.addEventListener(tap,function(e){"sidebar"!==e.target.id&&"toggle-sidebar"!==e.target.id&&"A"!==e.target.nodeName&&"IMG"!==e.target.nodeName&&(render.play(),updateCoords(e),animateParticules(pointerX,pointerY))},!1),setCanvasSize(),window.addEventListener("resize",setCanvasSize,!1)};
- 1
然后在 \themes\material-x\layout\layout.ejs 文件中写入以下代码:
<canvas class="fireworks" style="position: fixed;left: 0;top: 0;z-index: 1; pointer-events: none;" ></canvas>
<script type="text/javascript" src="//cdn.bootcss.com/animejs/2.2.0/anime.min.js"></script>
<script type="text/javascript" src="/js/fireworks.js"></script>
最终效果:
【05】自定义鼠标指针样式
在 \themes\material-x\source\less\_base.less 文件 body 样式里写入如下代码:
body {
    cursor: url(https://cdn.jsdelivr.net/gh/TRHX/CDN-for-itrhx.com@2.1.6/images/mouse.cur),auto;
    background-color: @theme_background;
    ......
    ......
}
鼠标指针可以用 Axialis CursorWorkshop 这个软件自己制作,不同主题具体放的文件有所不同,确保在博客主体 body 的 CSS 文件中即可,其中的鼠标指针链接可替换成自己的,首先尝试加载https://cdn.jsdelivr.net/gh/TRHX/CDN-for-itrhx.com@2.1.6/images/mouse.cur ,如果该文件不存在或由于其他原因无效,那么 auto 会被使用,也就是自动默认效果,图片格式为.ico、.ani、.cur,建议使用.cur,如果使用.ani或者其他格式无效,原因是浏览器兼容问题,请阅读参考文档或者参考以下兼容表:
| 浏览器 | 最低版本 | 格式 |
|---|---|---|
| Internet Explorer | 6.0 | .cur / .ani |
| Firefox (Gecko), Windows and Linux | 1.5 (1.8) | .cur / .png / .gif / .jpg |
| Firefox (Gecko) | 4.0 (2.0) | .cur / .png / .gif / .jpg / .svg |
| Opera | — | — |
| Safari (Webkit) | 3.0 (522-523) | .cur / .png / .gif / .jpg |
拓展阅读:《CSS 鼠标样式 cursor属性》 (By:歪脖先生的博客)
【06】添加彩色滚动变换字体
在你想要添加彩色滚动变换字体的地方写入以下代码即可,其中文字可自行更改:
<div id="binft"></div>
  <script>
    var binft = function (r) {
      function t() {
        return b[Math.floor(Math.random() * b.length)]
      }
      function e() {
        return String.fromCharCode(94 * Math.random() + 33)
      }
      function n(r) {
        for (var n = document.createDocumentFragment(), i = 0; r > i; i++) {
          var l = document.createElement("span");
          l.textContent = e(), l.style.color = t(), n.appendChild(l)
        }
        return n
      }
      function i() {
        var t = o[c.skillI];
        c.step ? c.step-- : (c.step = g, c.prefixP < l.length ? (c.prefixP >= 0 && (c.text += l[c.prefixP]), c.prefixP++) : "forward" === c.direction ? c.skillP < t.length ? (c.text += t[c.skillP], c.skillP++) : c.delay ? c.delay-- : (c.direction = "backward", c.delay = a) : c.skillP > 0 ? (c.text = c.text.slice(0, -1), c.skillP--) : (c.skillI = (c.skillI + 1) % o.length, c.direction = "forward")), r.textContent = c.text, r.appendChild(n(c.prefixP < l.length ? Math.min(s, s + c.prefixP) : Math.min(s, t.length - c.skillP))), setTimeout(i, d)
      }
      var l = "",
      o = ["青青陵上柏,磊磊涧中石。", "人生天地间,忽如远行客。","斗酒相娱乐,聊厚不为薄。", "驱车策驽马,游戏宛与洛。","洛中何郁郁,冠带自相索。","长衢罗夹巷,王侯多第宅。","两宫遥相望,双阙百余尺。","极宴娱心意,戚戚何所迫?"].map(function (r) {
      return r + ""
      }),
      a = 2,
      g = 1,
      s = 5,
      d = 75,
      b = ["rgb(110,64,170)", "rgb(150,61,179)", "rgb(191,60,175)", "rgb(228,65,157)", "rgb(254,75,131)", "rgb(255,94,99)", "rgb(255,120,71)", "rgb(251,150,51)", "rgb(226,183,47)", "rgb(198,214,60)", "rgb(175,240,91)", "rgb(127,246,88)", "rgb(82,246,103)", "rgb(48,239,130)", "rgb(29,223,163)", "rgb(26,199,194)", "rgb(35,171,216)", "rgb(54,140,225)", "rgb(76,110,219)", "rgb(96,84,200)"],
      c = {
        text: "",
        prefixP: -s,
        skillI: 0,
        skillP: 0,
        direction: "forward",
        delay: a,
        step: g
      };
      i()
      };
      binft(document.getElementById('binft'));
  </script>
最终效果:
【07】添加背景音乐
打开网页版网易云音乐,选择你准备添加的背景音乐,点击生成外链播放器,前提是要有版权,不然是无法生成外链播放器的,复制底下的HTML代码
然后将此代码放到你想要放的地方,比如放在博客的左侧,则打开 \themes\hexo-theme-spfk\layout\_partial\left-col.ejs 文件,将复制的HTML代码粘贴进去,再进行适当的位置设置让播放器更美观,其中 auto=1 表示打开网页自动播放音乐,auto=0 表示关闭自动播放音乐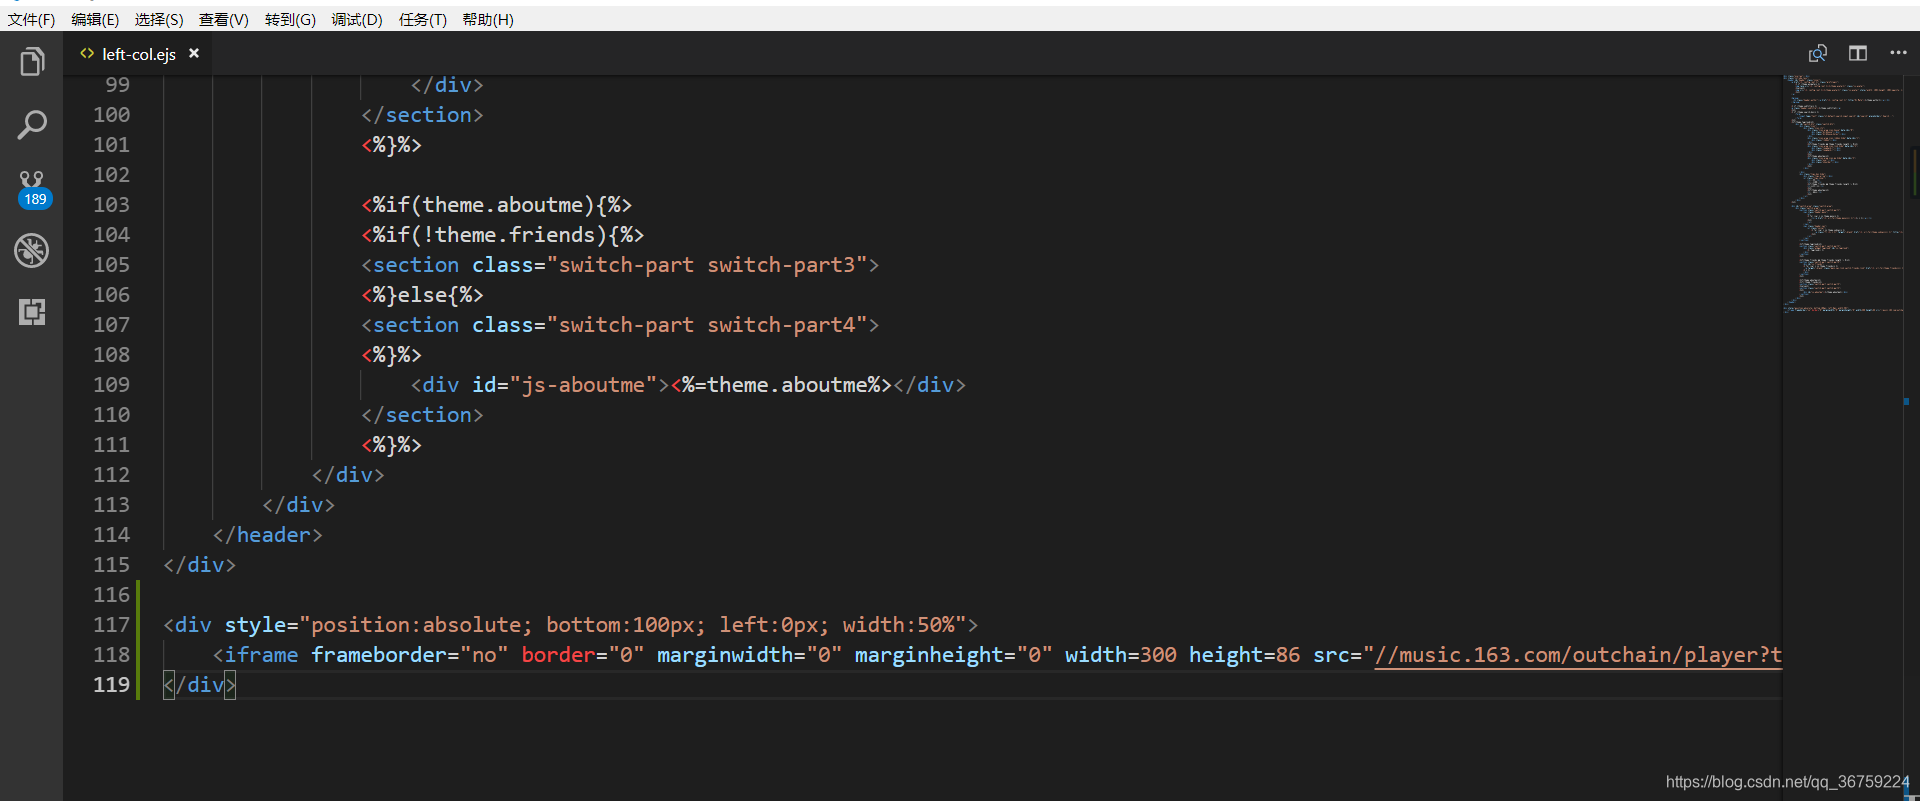
最后效果如下: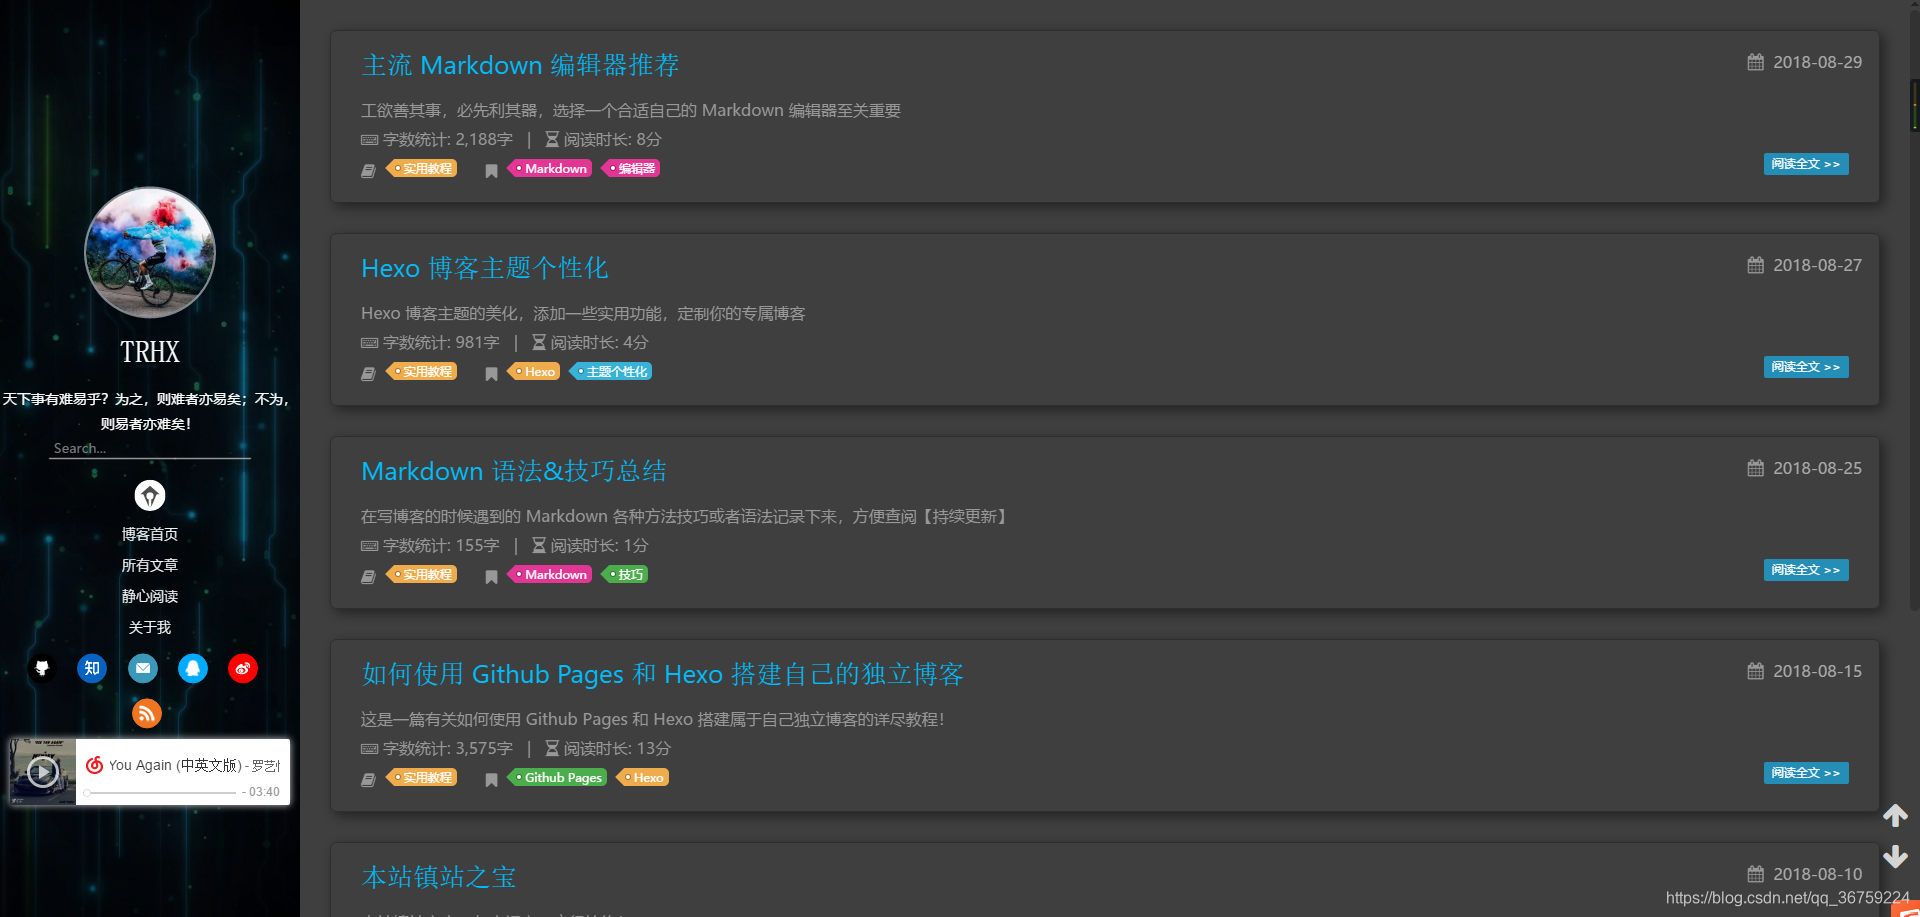
这种网易云音乐外链的方式有很多局限性,因此推荐使用aplayer,GitHub地址为:https://github.com/MoePlayer/APlayer ,参考教程:《hexo上的aplayer应用》
【08】浏览器网页标题恶搞
当用户访问你的博客时点击到了其他网页,我们可以恶搞一下网页标题,呼唤用户回来,首先在目录 \themes\material-x\source\js 下新建一个 FunnyTitle.js 文件,在里面填写如下代码:
// 浏览器搞笑标题
var OriginTitle = document.title;
var titleTime;
document.addEventListener('visibilitychange', function () {
    if (document.hidden) {
        $('[rel="icon"]').attr('href', "/funny.ico");
        document.title = '╭(°A°`)╮ 页面崩溃啦 ~';
        clearTimeout(titleTime);
    }
    else {
        $('[rel="icon"]').attr('href', "/favicon.ico");
        document.title = '(ฅ>ω<*ฅ) 噫又好啦 ~' + OriginTitle;
        titleTime = setTimeout(function () {
            document.title = OriginTitle;
        }, 2000);
    }
});
其中 funny.ico 是用户切换到其他标签后你网站的图标,favicon.ico 是正常图标,然后在 \themes\material-x\layout\layout.ejs 文件中添加如下代码:
<!--浏览器搞笑标题-->
<script type="text/javascript" src="/js/FunnyTitle.js"></script>
再次部署博客后就可以看见标题搞笑的效果了:


【09】背景添加动态线条效果
在 \Hexo\themes\hexo-theme-spfk\layout\layout.ejs 文件中添加如下代码:
<!--动态线条背景-->
<script type="text/javascript"
color="220,220,220" opacity='0.7' zIndex="-2" count="200" src="//cdn.bootcss.com/canvas-nest.js/1.0.0/canvas-nest.min.js">
</script>
- color:表示线条颜色,三个数字分别为(R,G,B),默认:(0,0,0)
- opacity:表示线条透明度(0~1),默认:0.5
- count:表示线条的总数量,默认:150
- zIndex:表示背景的z-index属性,css属性用于控制所在层的位置,默认:-1
最终实现效果:
【10】添加人体时钟等有趣的挂件
无意中发现了个有趣的人体时钟 HONE HONE CLOCK,作者是个日本人,点击此处访问作者博客,点击此处在作者原博客上查看动态样式,点击此处查看动态大图,如果你的博客上有合适的地方,加上一个人体时钟会很有趣的
实现代码:
<!--人体时钟背景透明-->
<script charset="Shift_JIS" src="http://chabudai.sakura.ne.jp/blogparts/honehoneclock/honehone_clock_tr.js"></script>

<!--人体时钟背景白-->
<script charset="Shift_JIS" src="http://chabudai.sakura.ne.jp/blogparts/honehoneclock/honehone_clock_wh.js"></script>
其他网页小挂件推荐:
- http://abowman.com/ 里面有很多有趣的小挂件,可以养养鱼、龟、狗、仓鼠等各式各样的虚拟宠物,能根据你的鼠标指针位置移动,直接复制代码就可以用
- http://www.revolvermaps.com/ 它提供网站访客地理信息,可以以2D、3D等形式显示
- http://www.amazingcounters.com/ 免费网站计数器,有非常多的样式供你选择,可以设置计数器初始数值,可以设置按访问量计数,也可以按独立访问者计数
- https://www.seniverse.com/widget/get 心知天气提供基于Web的免费天气插件,可以为你的网站添加一项简洁美观的天气预报功能,并自动适配PC和手机上的浏览
【11】添加网站雪花飘落效果
样式一和样式二分别如下: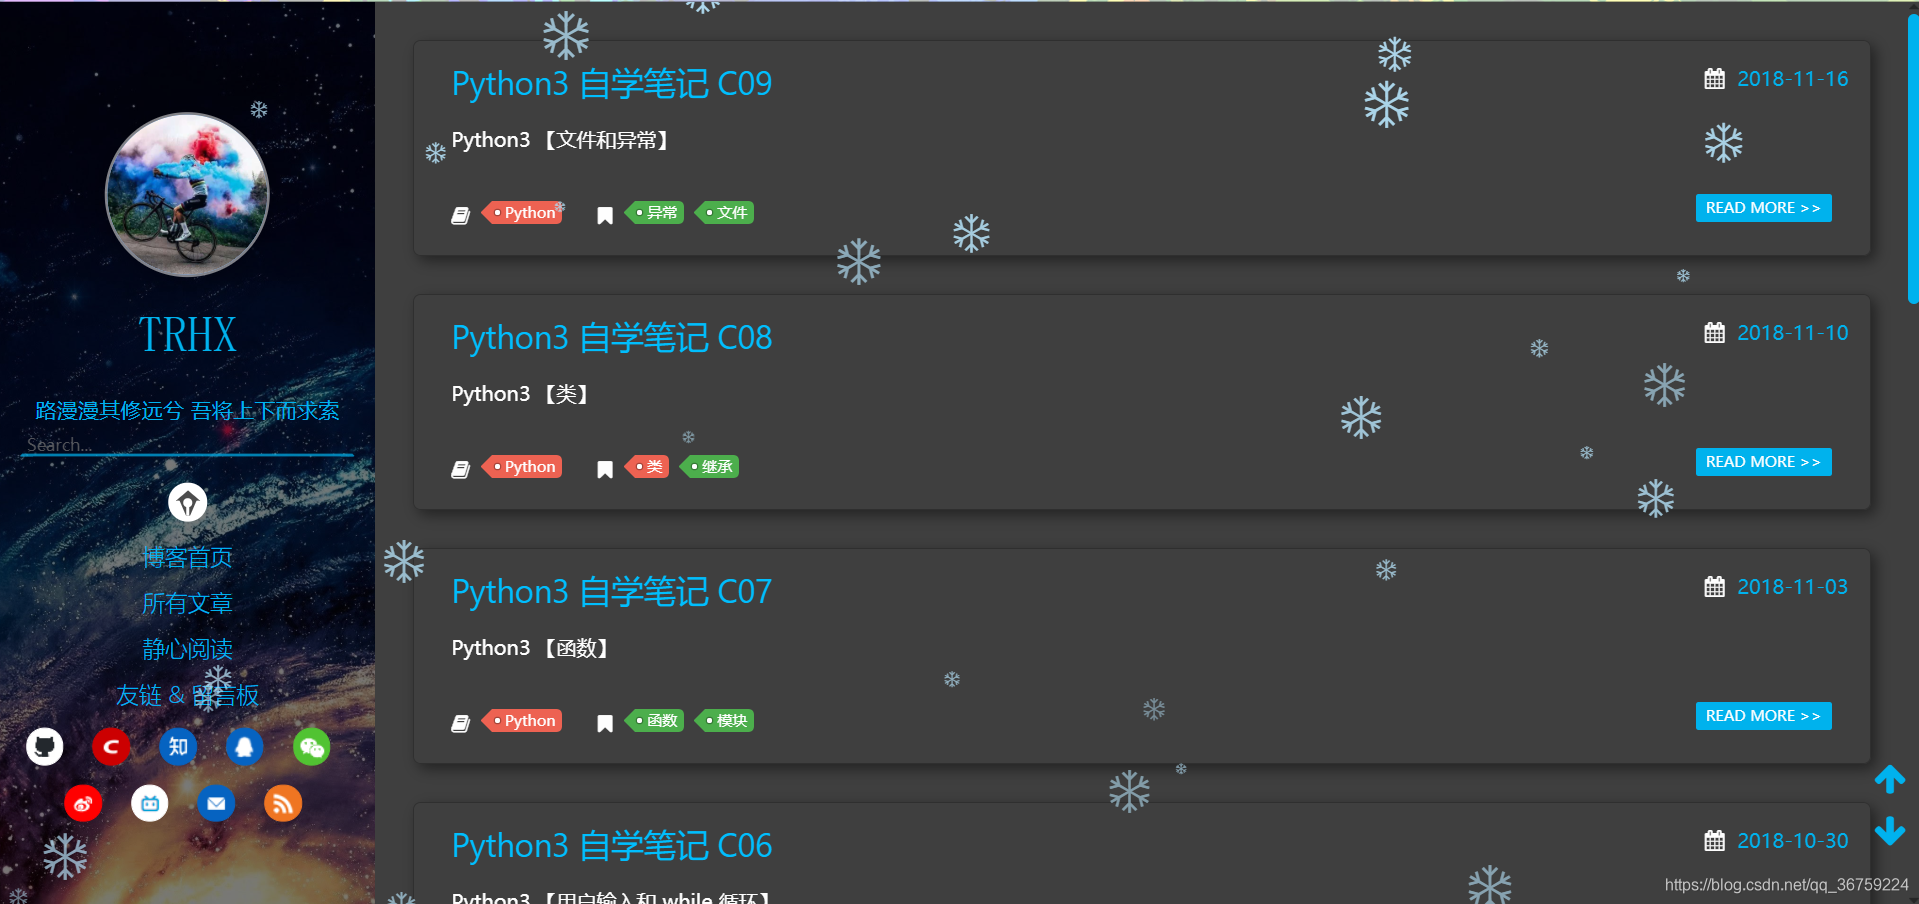
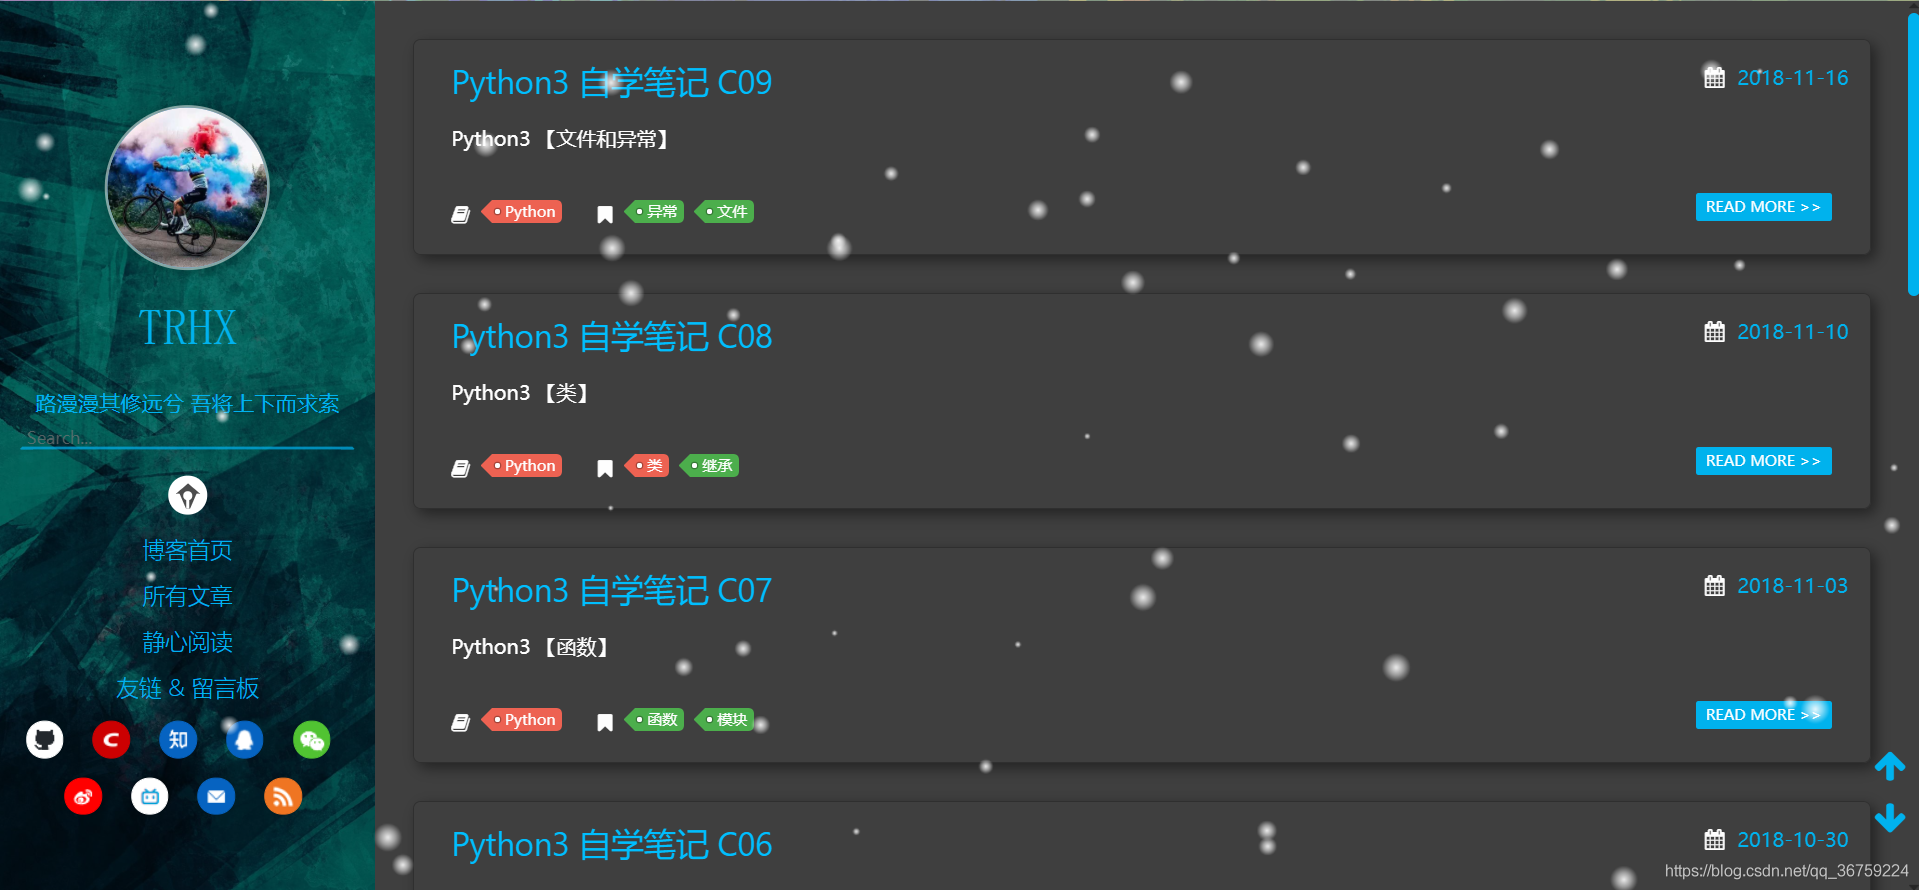
实现方法:在 \Hexo\themes\hexo-theme-spfk\source\js 目录下新建一个 snow.js 文件,粘贴以下代码:
/*样式一*/
(function($){
$.fn.snow = function(options){
var $flake = $('<div id="snowbox" />').css({'position': 'absolute','z-index':'9999', 'top': '-50px'}).html('❄'),
documentHeight = $(document).height(),
documentWidth = $(document).width(),
defaults = {
minSize : 10,
maxSize : 20,
newOn : 1000,
flakeColor : "#AFDAEF" /* 此处可以定义雪花颜色,若要白色可以改为#FFFFFF */
},
options = $.extend({}, defaults, options);
var interval= setInterval( function(){
var startPositionLeft = Math.random() * documentWidth - 100,
startOpacity = 0.5 + Math.random(),
sizeFlake = options.minSize + Math.random() * options.maxSize,
endPositionTop = documentHeight - 200,
endPositionLeft = startPositionLeft - 500 + Math.random() * 500,
durationFall = documentHeight * 10 + Math.random() * 5000;
$flake.clone().appendTo('body').css({
left: startPositionLeft,
opacity: startOpacity,
'font-size': sizeFlake,
color: options.flakeColor
}).animate({
top: endPositionTop,
left: endPositionLeft,
opacity: 0.2
},durationFall,'linear',function(){
$(this).remove()
});
}, options.newOn);
};
})(jQuery);
$(function(){
$.fn.snow({
minSize: 5, /* 定义雪花最小尺寸 */
maxSize: 50,/* 定义雪花最大尺寸 */
newOn: 300 /* 定义密集程度,数字越小越密集 */
});
});
/*样式二*/
/* 控制下雪 */
function snowFall(snow) {
    /* 可配置属性 */
    snow = snow || {};
    this.maxFlake = snow.maxFlake || 200;   /* 最多片数 */
    this.flakeSize = snow.flakeSize || 10;  /* 雪花形状 */
    this.fallSpeed = snow.fallSpeed || 1;   /* 坠落速度 */
}
/* 兼容写法 */
requestAnimationFrame = window.requestAnimationFrame ||
    window.mozRequestAnimationFrame ||
    window.webkitRequestAnimationFrame ||
    window.msRequestAnimationFrame ||
    window.oRequestAnimationFrame ||
    function(callback) { setTimeout(callback, 1000 / 60); };

cancelAnimationFrame = window.cancelAnimationFrame ||
    window.mozCancelAnimationFrame ||
    window.webkitCancelAnimationFrame ||
    window.msCancelAnimationFrame ||
	window.oCancelAnimationFrame;
/* 开始下雪 */
snowFall.prototype.start = function(){
    /* 创建画布 */
    snowCanvas.apply(this);
    /* 创建雪花形状 */
    createFlakes.apply(this);
    /* 画雪 */
    drawSnow.apply(this)
}
/* 创建画布 */
function snowCanvas() {
    /* 添加Dom结点 */
    var snowcanvas = document.createElement("canvas");
    snowcanvas.id = "snowfall";
    snowcanvas.width = window.innerWidth;
    snowcanvas.height = document.body.clientHeight;
    snowcanvas.setAttribute("style", "position:absolute; top: 0; left: 0; z-index: 1; pointer-events: none;");
    document.getElementsByTagName("body")[0].appendChild(snowcanvas);
    this.canvas = snowcanvas;
    this.ctx = snowcanvas.getContext("2d");
    /* 窗口大小改变的处理 */
    window.onresize = function() {
        snowcanvas.width = window.innerWidth;
        /* snowcanvas.height = window.innerHeight */
    }
}
/* 雪运动对象 */
function flakeMove(canvasWidth, canvasHeight, flakeSize, fallSpeed) {
    this.x = Math.floor(Math.random() * canvasWidth);   /* x坐标 */
    this.y = Math.floor(Math.random() * canvasHeight);  /* y坐标 */
    this.size = Math.random() * flakeSize + 2;          /* 形状 */
    this.maxSize = flakeSize;                           /* 最大形状 */
    this.speed = Math.random() * 1 + fallSpeed;         /* 坠落速度 */
    this.fallSpeed = fallSpeed;                         /* 坠落速度 */
    this.velY = this.speed;                             /* Y方向速度 */
    this.velX = 0;                                      /* X方向速度 */
    this.stepSize = Math.random() / 30;                 /* 步长 */
    this.step = 0                                       /* 步数 */
}
flakeMove.prototype.update = function() {
    var x = this.x,
        y = this.y;
    /* 左右摆动(余弦) */
    this.velX *= 0.98;
    if (this.velY <= this.speed) {
        this.velY = this.speed
    }
    this.velX += Math.cos(this.step += .05) * this.stepSize;

    this.y += this.velY;
    this.x += this.velX;
    /* 飞出边界的处理 */
    if (this.x >= canvas.width || this.x <= 0 || this.y >= canvas.height || this.y <= 0) {
        this.reset(canvas.width, canvas.height)
    }
};
/* 飞出边界-放置最顶端继续坠落 */
flakeMove.prototype.reset = function(width, height) {
    this.x = Math.floor(Math.random() * width);
    this.y = 0;
    this.size = Math.random() * this.maxSize + 2;
    this.speed = Math.random() * 1 + this.fallSpeed;
    this.velY = this.speed;
    this.velX = 0;
};
// 渲染雪花-随机形状(此处可修改雪花颜色!!!)
flakeMove.prototype.render = function(ctx) {
    var snowFlake = ctx.createRadialGradient(this.x, this.y, 0, this.x, this.y, this.size);
    snowFlake.addColorStop(0, "rgba(255, 255, 255, 0.9)");  /* 此处是雪花颜色,默认是白色 */
    snowFlake.addColorStop(.5, "rgba(255, 255, 255, 0.5)"); /* 若要改为其他颜色,请自行查 */
    snowFlake.addColorStop(1, "rgba(255, 255, 255, 0)");    /* 找16进制的RGB 颜色代码。 */
    ctx.save();
    ctx.fillStyle = snowFlake;
    ctx.beginPath();
    ctx.arc(this.x, this.y, this.size, 0, Math.PI * 2);
    ctx.fill();
    ctx.restore();
};
/* 创建雪花-定义形状 */
function createFlakes() {
    var maxFlake = this.maxFlake,
        flakes = this.flakes = [],
        canvas = this.canvas;
    for (var i = 0; i < maxFlake; i++) {
        flakes.push(new flakeMove(canvas.width, canvas.height, this.flakeSize, this.fallSpeed))
    }
}
/* 画雪 */
function drawSnow() {
    var maxFlake = this.maxFlake,
        flakes = this.flakes;
    ctx = this.ctx, canvas = this.canvas, that = this;
    /* 清空雪花 */
    ctx.clearRect(0, 0, canvas.width, canvas.height);
    for (var e = 0; e < maxFlake; e++) {
        flakes[e].update();
        flakes[e].render(ctx);
    }
    /*  一帧一帧的画 */
    this.loop = requestAnimationFrame(function() {
        drawSnow.apply(that);
    });
}
/* 调用及控制方法 */
var snow = new snowFall({maxFlake:60});
snow.start();
然后在 \Hexo\themes\hexo-theme-spfk\layout\layout.ejs 文件里引用即可:
<!-- 雪花特效 -->
<script type="text/javascript" src="\js\snow.js"></script>
如果没效果,请确认网页是否已载入JQurey,如果没有请在下雪代码之前引入JQ即可:
<script type="text/javascript" src="http://libs.baidu.com/jquery/1.8.3/jquery.js"></script>
<script type="text/javascript" src="http://libs.baidu.com/jquery/1.8.3/jquery.min.js"></script>
【13】添加背景代码雨特效
新建 DigitalRain.js,写入以下代码:
window.onload = function(){
    //获取画布对象
    var canvas = document.getElementById("canvas");
    //获取画布的上下文
    var context =canvas.getContext("2d");
    var s = window.screen;
    var W = canvas.width = s.width;
    var H = canvas.height;
    //获取浏览器屏幕的宽度和高度
    //var W = window.innerWidth;
    //var H = window.innerHeight;
    //设置canvas的宽度和高度
    canvas.width = W;
    canvas.height = H;
    //每个文字的字体大小
    var fontSize = 12;
    //计算列
    var colunms = Math.floor(W /fontSize);
    //记录每列文字的y轴坐标
    var drops = [];
    //给每一个文字初始化一个起始点的位置
    for(var i=0;i<colunms;i++){
        drops.push(0);
    }
    //运动的文字
    var str ="WELCOME TO WWW.ITRHX.COM";
    //4:fillText(str,x,y);原理就是去更改y的坐标位置
    //绘画的函数
    function draw(){
        context.fillStyle = "rgba(238,238,238,.08)";//遮盖层
        context.fillRect(0,0,W,H);
        //给字体设置样式
        context.font = "600 "+fontSize+"px  Georgia";
        //给字体添加颜色
        context.fillStyle = ["#33B5E5", "#0099CC", "#AA66CC", "#9933CC", "#99CC00", "#669900", "#FFBB33", "#FF8800", "#FF4444", "#CC0000"][parseInt(Math.random() * 10)];//randColor();可以rgb,hsl, 标准色,十六进制颜色
        //写入画布中
        for(var i=0;i<colunms;i++){
            var index = Math.floor(Math.random() * str.length);
            var x = i*fontSize;
            var y = drops[i] *fontSize;
            context.fillText(str[index],x,y);
            //如果要改变时间,肯定就是改变每次他的起点
            if(y >= canvas.height && Math.random() > 0.99){
                drops[i] = 0;
            }
            drops[i]++;
        }
    };
    function randColor(){//随机颜色
        var r = Math.floor(Math.random() * 256);
        var g = Math.floor(Math.random() * 256);
        var b = Math.floor(Math.random() * 256);
        return "rgb("+r+","+g+","+b+")";
    }
    draw();
    setInterval(draw,35);
};
在主题文件的相关css文件中(以 Material X 1.2.1 主题为例,在\themes\material-x-1.2.1\source\less\_main.less 文件末尾)添加以下代码:
canvas {
  position: fixed;
  right: 0px;
  bottom: 0px;
  min-width: 100%;
  min-height: 100%;
  height: auto;
  width: auto;
  z-index: -1;
}
然后在主题的 layout.ejs 文件中引入即可:
  <!-- 数字雨 -->
  <canvas id="canvas" width="1440" height="900" ></canvas>
  <script type="text/javascript" src="/js/DigitalRain.js"></script>
最终效果: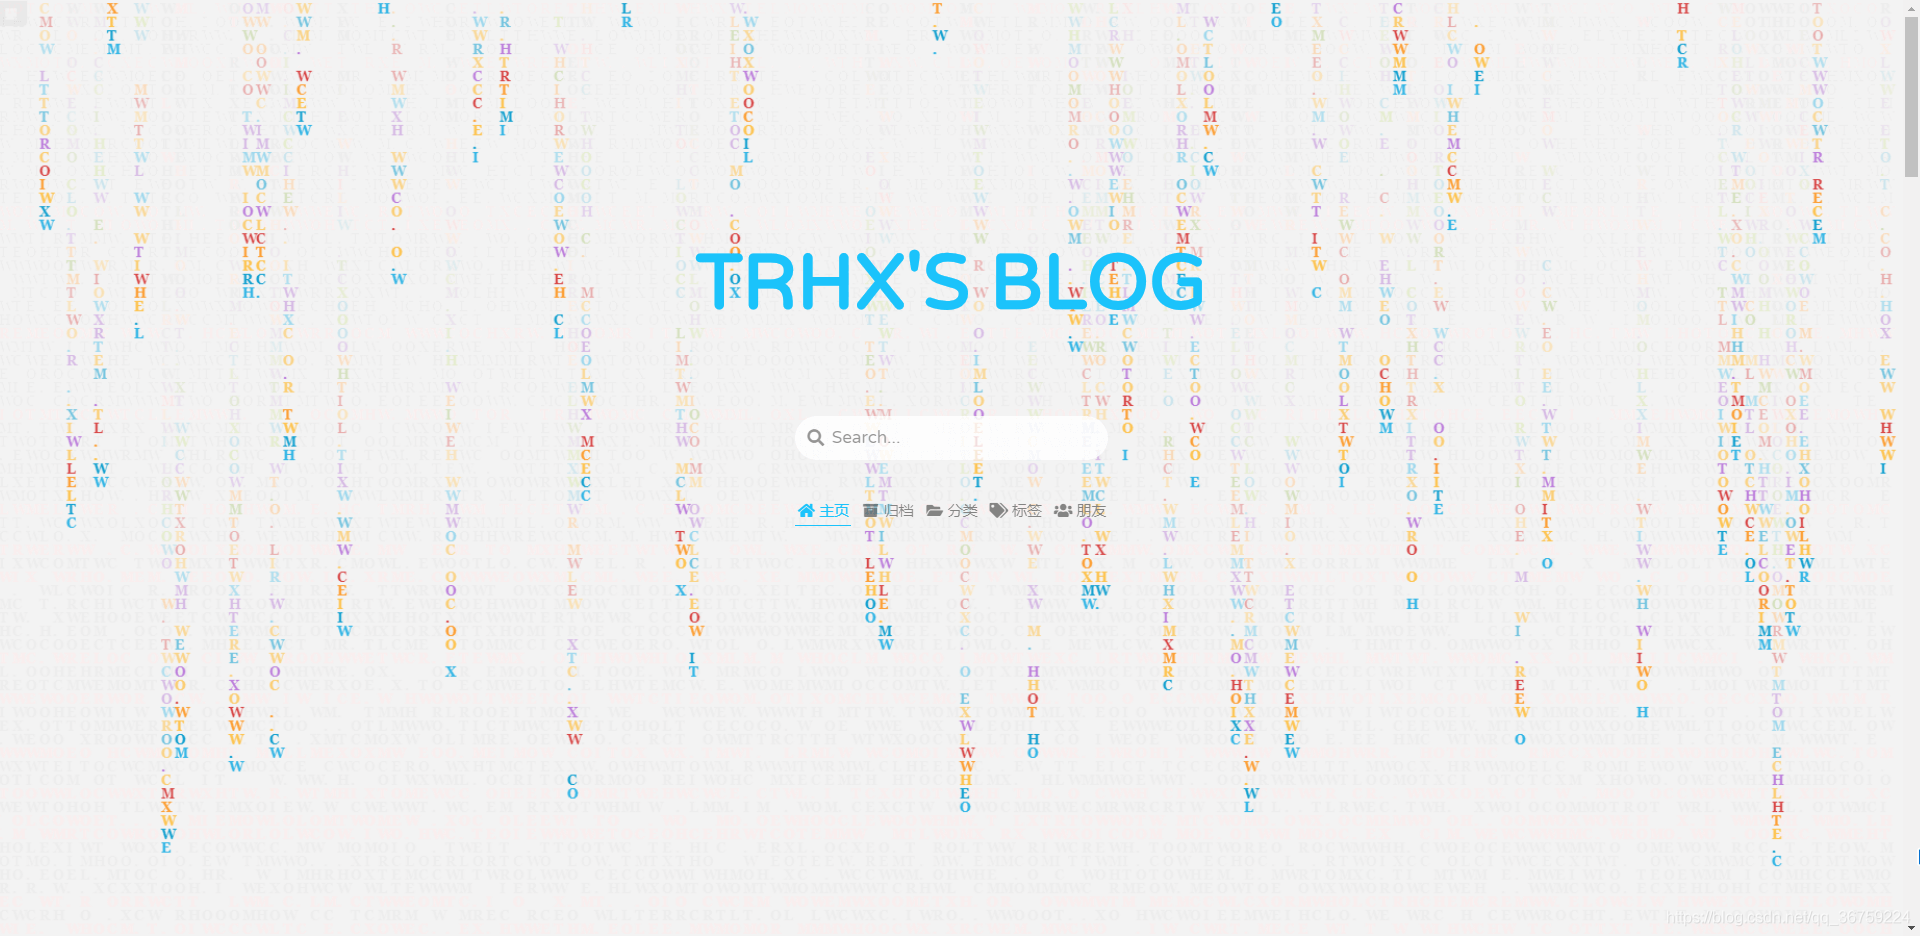
代码来源:http://www.lxl8800.cn/Main/Resource


 2988
2988


 被折叠的 条评论
为什么被折叠?
被折叠的 条评论
为什么被折叠?
 到【灌水乐园】发言


