


近日在工作之余梳理android的input代码时,发现监控屏幕上的input输入,除了之前的MonitorInput的方法,有出现了一种新的方式——SpyWindow。
下面将从 注册过程,分发阶段如何获得屏幕的输入事件,主要的应用场景等几个方面,分别梳理下InputMonitor和SpyWindow。
一.MonitorInput
1.MonitorInput的注册过程
①.DisplayConten
在DisplayContent的构造函数中会通过mWmService.mInputManager.monitorInput开始向InputWindowManager注册一个monitor,随后得到一个InputChannel 用来接收事件,随后把该inputChannel 封装到PointerEventDispatcher来方便对事件的处理。
DisplayContent(Display display, RootWindowContainer root,
            @NonNull DeviceStateController deviceStateController) {
	// 向inputMangerService注册monitorInput,返回一个inputChannel,用来接收事件
	final InputChannel inputChannel = mWmService.mInputManager.monitorInput(
                "PointerEventDispatcher" + mDisplayId, mDisplayId);
        mPointerEventDispatcher = new PointerEventDispatcher(inputChannel, mDisplayId);

}
从上文中可以发现,每一个DisplayConten天生就会有一个monitorInput来监控当前屏幕上的事件。接下来 将分析InputMangerService的monitorInput方法。
②.InputMangerService
frameworks/base/services/core/java/com/android/server/input/InputManagerService.java
/**
     * Creates an input channel that will receive all input from the input dispatcher.
     * @param inputChannelName The input channel name.
     * @param displayId Target display id.
     * @return The input channel.
     */
    public InputChannel monitorInput(String inputChannelName, int displayId) {
        Objects.requireNonNull(inputChannelName, "inputChannelName not be null");

        if (displayId < Display.DEFAULT_DISPLAY) {
            throw new IllegalArgumentException("displayId must >= 0.");
        }
		// 进一步调用了 NativeInputManagerService的createInputMonitor
        return mNative.createInputMonitor(displayId, inputChannelName, Binder.getCallingPid());
    }
frameworks/base/services/core/java/com/android/server/input/NativeInputManagerService.java
class NativeImpl implements NativeInputManagerService {
	// 直接调用到jni方法
	@Override
        public native InputChannel createInputMonitor(int displayId, String name, int pid);
}
从上文中可以看到 InputMangerService.monitorInput并没有什么处理 ,一路调用到了native方法.
③.InputDispatcher
跳过jni环节,直接来到InputDispatcher,看看 monitorInput如何注册到input的分发中心——InputDispatcher 中的。
在InputDispatcher中,相关方法命名为createInputMonitor:
如下在createInputMonitor中首先构造出了两个InputChannel,一个对应server端 一个对应client端。随后通过openInputChannelPair使得这两个channel建立socket点对点连接,紧接着把serverChannel作为参数构造出一个Connection,在把该Connection保存在mConnectionsByToken中,再把serverChannel以displayId为key添加到 mGlobalMonitorsByDisplay 中,至此,monitorInput已经在InputDispatcher完成了注册。最后再把clientChannel返回给上层,以便上层从clientChannel获取事件。
frameworks/native/services/inputflinger/dispatcher/InputDispatcher.cpp
Result<std::unique_ptr<InputChannel>> InputDispatcher::createInputMonitor(int32_t displayId,
                                                                          const std::string& name,
                                                                          int32_t pid) {
     // 构造出两个   InputChannel,一个对应server端一个对应    clientChannel端
    std::shared_ptr<InputChannel> serverChannel;
    std::unique_ptr<InputChannel> clientChannel;
    // 通过该方法 serverChannel和clientChannel将建立socket点对点连接
    status_t result = openInputChannelPair(name, serverChannel, clientChannel);
    if (result) {
        return base::Error(result) << "Failed to open input channel pair with name " << name;
    }

    { // acquire lock
        std::scoped_lock _l(mLock);

        if (displayId < 0) {
            return base::Error(BAD_VALUE) << "Attempted to create input monitor with name " << name
                                          << " without a specified display.";
        }

		// 使用serverChannel构造出Connection
        std::shared_ptr<Connection> connection =
                std::make_shared<Connection>(serverChannel, /*monitor=*/true, mIdGenerator);
        const sp<IBinder>& token = serverChannel->getConnectionToken();
        const int fd = serverChannel->getFd();

        if (mConnectionsByToken.find(token) != mConnectionsByToken.end()) {
            ALOGE("Created a new connection, but the token %p is already known", token.get());
        }
        // 把Connection保存在mConnectionsByToken中
        mConnectionsByToken.emplace(token, connection);
        std::function<int(int events)> callback = std::bind(&InputDispatcher::handleReceiveCallback,
                                                            this, std::placeholders::_1, token);

		// 重点,把serverChannel以displayId为key添加到 mGlobalMonitorsByDisplay 中
        mGlobalMonitorsByDisplay[displayId].emplace_back(serverChannel, pid);

        mLooper->addFd(fd, 0, ALOOPER_EVENT_INPUT, sp<LooperEventCallback>::make(callback),
                       nullptr);
    }

    // Wake the looper because some connections have changed.
    mLooper->wake();
    // 返回一个clientChannel
    return clientChannel;
}
至此 ,注册的过程结束了,但是上层还接受不到 当前屏幕全局的事件,因为上层还没有活动全局事件的接收器 clientChannel。
回到DisplayConten,梦开始的地方:
DisplayContent(Display display, RootWindowContainer root,
            @NonNull DeviceStateController deviceStateController) {
	// 向inputMangerService注册monitorInput,返回一个inputChannel,用来接收事件
	final InputChannel inputChannel = mWmService.mInputManager.monitorInput(
                "PointerEventDispatcher" + mDisplayId, mDisplayId);
        // 使用从InputDispatcher一路返回到上层的InputChannel 构造出PointerEventDispatcher
        mPointerEventDispatcher = new PointerEventDispatcher(inputChannel, mDisplayId);

}
如下,可见PointerEventDispatcher 继承自老朋友InputEventReceiver ,在PointerEventDispatcher 构造函数中调用了,调用了PointerEventDispatcher 的构造函数,并传入了InputChannel ,后续当当前屏幕上有事件时就会触发到PointerEventDispatcher 的onInputEvent中进行处理。
除此之外我们还在PointerEventDispatcher 发现了PointerEventListener的列表,这就表明了如果对当前屏幕中的全局事件感兴趣,就可以通过向当前DisplayConten的PointerEventDispatcher中添加监听就可以获取全局的事件了,避免了过多的调用monitorInput。
frameworks/base/services/core/java/com/android/server/wm/PointerEventDispatcher.java
public class PointerEventDispatcher extends InputEventReceiver {
	private final ArrayList<PointerEventListener> mListeners = new ArrayList<>();
    private PointerEventListener[] mListenersArray = new PointerEventListener[0];

	PointerEventDispatcher(InputChannel inputChannel, int displayId) {
        this(inputChannel);

	public PointerEventDispatcher(InputChannel inputChannel) {
        super(inputChannel, UiThread.getHandler().getLooper());
    }

	@Override
    public void onInputEvent(InputEvent event) {
    	....
    }
}
2.在InputDispatcher的事件分发阶段
在InputDispatcher中在分发触摸事件和分发key事件过程中,都会向InputMonitor进行分发。接下来 以分发触摸事件为例子进行分析:
在InputDispatcher分发触摸事件工程中,会首先找出该事件应该分发给目标,并保存在inputTargets中,随后通过addGlobalMonitoringTargetsLocked把当前屏幕的InputMonitor添加到inputTargets中,随后把当前事件分发给inputTargets的所有目标。随后上层的InputMonitor就可以接收到当前屏幕的全局事件了。
frameworks/native/services/inputflinger/dispatcher/InputDispatcher.cpp
bool InputDispatcher::dispatchMotionLocked(nsecs_t currentTime, std::shared_ptr<MotionEntry> entry,
                                           DropReason* dropReason, nsecs_t* nextWakeupTime) {

    // Identify targets.
    // 创造一个InputTarget列表,用来保存接收触摸事件的目标
    std::vector<InputTarget> inputTargets;
    // 找出芥末该次触摸事件的目标
	std::vector<InputTarget> inputTargets;
        inputTargets =
                findTouchedWindowTargetsLocked(currentTime, *entry, &conflictingPointerActions,
                                               /*byref*/ injectionResult);
  	// 重点,当前屏幕的InputMonitor添加进inputTargets
    addGlobalMonitoringTargetsLocked(inputTargets, getTargetDisplayIdLocked(*entry));
	//  把当前时间分发给inputTargets中的所有目标、
    dispatchEventLocked(currentTime, entry, inputTargets);
    return true;
}

// InputMonitor添加进inputTargets
void InputDispatcher::addGlobalMonitoringTargetsLocked(std::vector<InputTarget>& inputTargets,
                                                       int32_t displayId) {
    auto monitorsIt = mGlobalMonitorsByDisplay.find(displayId);
    if (monitorsIt == mGlobalMonitorsByDisplay.end()) return;

    for (const Monitor& monitor : selectResponsiveMonitorsLocked(monitorsIt->second)) {
        InputTarget target;
        target.inputChannel = monitor.inputChannel;
        target.flags = InputTarget::Flags::DISPATCH_AS_IS;
        // target.firstDownTimeInTarget is not set for global monitors. It is only required in split
        // touch and global monitoring works as intended even without setting firstDownTimeInTarget
        if (const auto& it = mDisplayInfos.find(displayId); it != mDisplayInfos.end()) {
            target.displayTransform = it->second.transform;
        }
        target.setDefaultPointerTransform(target.displayTransform);
        inputTargets.push_back(target);
    }
}
3.MonitorInput的应用场景:
上文提到可以上层可以通过向PointerEventDispatcher添加监听来获取全局触摸事件:
如下:
public class PointerEventDispatcher extends InputEventReceiver {
	public void registerInputEventListener(PointerEventListener listener) {
        synchronized (mListeners) {
            if (mListeners.contains(listener)) {
                throw new IllegalStateException("registerInputEventListener: trying to register" +
                        listener + " twice.");
            }
            mListeners.add(listener);
            mListenersArray = null;
        }
    }
}
看看哪里都调用了调用了该方法:
void registerPointerEventListener(@NonNull PointerEventListener listener) {
        mPointerEventDispatcher.registerInputEventListener(listener);
    }

DisplayContent(Display display, RootWindowContainer root,
            @NonNull DeviceStateController deviceStateController) {
       ....
       // mMousePositionTracker,mTapDetectors使用 MonitorInput
	 registerPointerEventListener(mTapDetector);
        registerPointerEventListener(mWmService.mMousePositionTracker);
        if (mWmService.mAtmService.getRecentTasks() != null) {
            registerPointerEventListener(
                    mWmService.mAtmService.getRecentTasks().getInputListener());
        }
       ....

}
二. SpyWindow
为什么叫SpyWIndow呢,google官方也没有对于接下来介绍的屏幕全局的事件监听的方式有确切的命名,SpyWIndow是我自己认为应该叫这个名字,是因为,这种方式的注册过程中会构造GestureMonitorSpyWindow,同时改种方式会使用到InputWindowHandle, 在初始化InputWindowHandle的时候给InputWindowHandle添加了 InputConfig.SPY 的 config. 同时在InputDispatcher中,处理该种类型的全局事件监控的的函数命名 包含有 “SpyWindow”, 故我把接下来的这种方式称之为SpyWindow.
SpyWindow并不是WMS中所描述的Window不是一个东西,不继承自WIndowContaner, 不属于wms窗口层级体系.
1. SpyWindow的注册阶段
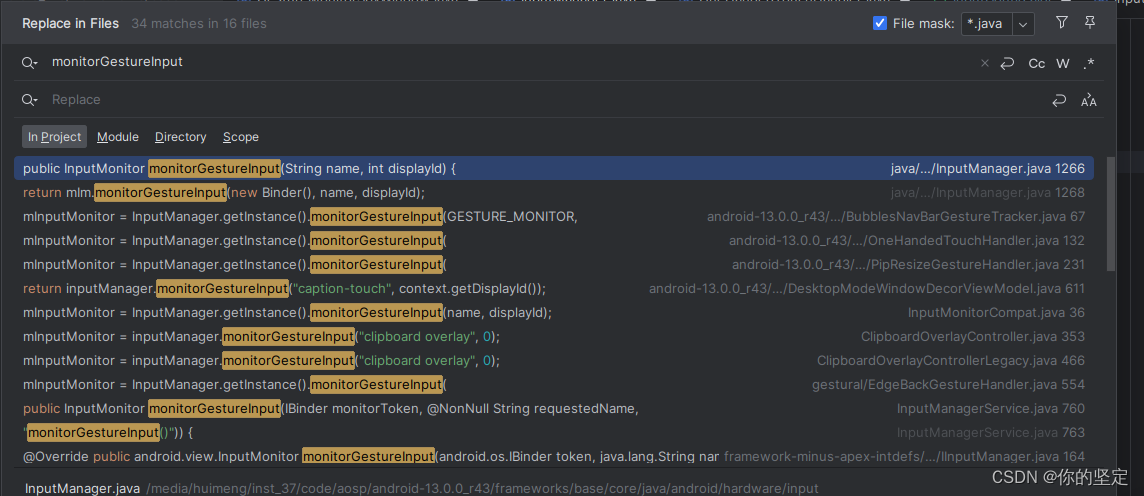
注意方法虽然叫做monitorGestureInput,但实际上和上面介绍的做monitoInput不一样,它走的是SpyWindow的方式
在InputManagerService中对外保留方法 monitorGestureInput,通过该方法可构造一个InputMonitor,返回各客户端,主要流程如下:
- 构造SurfaceControl
- 构造InputChannel
- 构造InputMonitor,并返回给客户端.
frameworks/base/services/core/java/com/android/server/input/InputManagerService.java
/**
     * Creates an input monitor that will receive pointer events for the purposes of system-wide
     * gesture interpretation.
     *
     * @param requestedName The input channel name.
     * @param displayId Target display id.
     * @return The input channel.
     */
    @Override // Binder call
    public InputMonitor monitorGestureInput(IBinder monitorToken, @NonNull String requestedName,
            int displayId) {
        // 检查权限
        if (!checkCallingPermission(android.Manifest.permission.MONITOR_INPUT,
                "monitorGestureInput()")) {
            throw new SecurityException("Requires MONITOR_INPUT permission");
        }
        // 检查参数
        Objects.requireNonNull(requestedName, "name must not be null.");
        Objects.requireNonNull(monitorToken, "token must not be null.");

        if (displayId < Display.DEFAULT_DISPLAY) {
            throw new IllegalArgumentException("displayId must >= 0.");
        }
        final String name = "[Gesture Monitor] " + requestedName;
        final int pid = Binder.getCallingPid();
        final int uid = Binder.getCallingUid();

        final long ident = Binder.clearCallingIdentity();
        try {
        	// 1.构造SurfaceControl
 		 	// 2.构造InputChannel
            final InputChannel inputChannel =
                            createSpyWindowGestureMonitor(monitorToken, name, displayId, pid, uid);
            // 3.构造InputMonitor,并返回给客户端.
            return new InputMonitor(inputChannel, new InputMonitorHost(inputChannel.getToken()));
        } finally {
            Binder.restoreCallingIdentity(ident);
        }
    }
frameworks/base/services/core/java/com/android/server/input/InputManagerService.java
private InputChannel createSpyWindowGestureMonitor(IBinder monitorToken, String name,
            int displayId, int pid, int uid) {
         //  1.构造SurfaceControl
        final SurfaceControl sc = mWindowManagerCallbacks.createSurfaceForGestureMonitor(name,
                displayId);
        if (sc == null) {
            throw new IllegalArgumentException(
                    "Could not create gesture monitor surface on display: " + displayId);
        }
        // 2.构造InputChannel 这个和普通窗口新建一个InputChannel没什么区别将会调用到InputDispatcher,并给调用端返回InputChannel,用来接收从InputDispatcher发送过来的事件,
        final InputChannel channel = createInputChannel(name);

        try {
            monitorToken.linkToDeath(() -> removeSpyWindowGestureMonitor(channel.getToken()), 0);
        } catch (RemoteException e) {
            Slog.i(TAG, "Client died before '" + name + "' could be created.");
            return null;
        }
        synchronized (mInputMonitors) {
        	// 构造GestureMonitorSpyWindow,并把把起保存在mInputMonitors中
            mInputMonitors.put(channel.getToken(),
                    new GestureMonitorSpyWindow(monitorToken, name, displayId, pid, uid, sc,
                            channel));
        }

        final InputChannel outInputChannel = new InputChannel();
        // 把channel拷贝到outInputChannel 并返回
        channel.copyTo(outInputChannel);
        return outInputChannel;
    }
①. 构造对应的SurfaceControl
这个和之前的inputmonitor流程有了很大的区别了,构造了一个SurfaceControl,让spywaindow在sf也有了身份.
需要注意的是SurfaceControl设置类型为ContainerLayer,意味着该SurfacControl对应的layer没有surface,设置parent为DisplayContent对应的surfaceControl
frameworks/base/services/core/java/com/android/server/wm/InputManagerCallback.java
public SurfaceControl createSurfaceForGestureMonitor(String name, int displayId) {
        synchronized (mService.mGlobalLock) {
        // 根据displayId获取对应的 DisplayContent
            final DisplayContent dc = mService.mRoot.getDisplayContent(displayId);
            if (dc == null) {
                Slog.e(TAG, "Failed to create a gesture monitor on display: " + displayId
                        + " - DisplayContent not found.");
                return null;
            }
            return mService.makeSurfaceBuilder(dc.getSession())
                    .setContainerLayer() // 设置类型为ContainerLayer,意味着该SurfacControl对应的layer没有surface
                    .setName(name)
                    .setCallsite("createSurfaceForGestureMonitor")
                    .setParent(dc.getSurfaceControl())  // 设置parent为DisplayContent对应的surfaceControl
                    .build();  // 构造并返回 SurfaceControl
        }
    }
②. 构造InputChannel
通过InputManagerService的createSpyWindowGestureMonitor构造了InputChannel,该流程 新建一个InputChannel,这个和普通窗口新建一个InputChannel没什么 区别,用来接收从InputDispatcher发送过来的事件,随后构造GestureMonitorSpyWindow,并把把起保存在mInputMonitors中,这里面会对之前创造的SurfaceControl进一步的做处理
frameworks/base/services/core/java/com/android/server/input/InputManagerService.java
@NonNull
    private InputChannel createSpyWindowGestureMonitor(IBinder monitorToken, String name,
            SurfaceControl sc, int displayId, int pid, int uid) {
		// 新建一个InputChannel,这个和普通窗口新建一个InputChannel没什么 区别,用来接收从InputDispatcher发送过来的事件,
        final InputChannel channel = createInputChannel(name);

        try {
            monitorToken.linkToDeath(() -> removeSpyWindowGestureMonitor(channel.getToken()), 0);
        } catch (RemoteException e) {
            Slog.i(TAG, "Client died before '" + name + "' could be created.");
            return null;
        }
        synchronized (mInputMonitors) {
            mInputMonitors.put(channel.getToken(),
            		// 构造GestureMonitorSpyWindow,并把把起保存在mInputMonitors中
                    new GestureMonitorSpyWindow(monitorToken, name, displayId, pid, uid, sc,
                            channel));
        }

        final InputChannel outInputChannel = new InputChannel();
        // 把channel拷贝到outInputChannel 并返回
        channel.copyTo(outInputChannel);
        return outInputChannel;
    }
构造GestureMonitorSpyWindow,并把把起保存在mInputMonitors中,这里面会对之前创造的SurfaceControl进一步的做处理
frameworks/base/services/core/java/com/android/server/input/GestureMonitorSpyWindow.java
class GestureMonitorSpyWindow {
    GestureMonitorSpyWindow(IBinder token, String name, int displayId, int pid, int uid,
            SurfaceControl sc, InputChannel inputChannel) {
        mMonitorToken = token;
        // 保存inputChannel
        mClientChannel = inputChannel;
        // 保存之前的SurfaceControl
        mInputSurface = sc;
		// 创建InputApplicationHandle
        mApplicationHandle = new InputApplicationHandle(null, name,
                DEFAULT_DISPATCHING_TIMEOUT_MILLIS);
        // 重点:构造InputWindowHandle
        mWindowHandle = new InputWindowHandle(mApplicationHandle, displayId);
		// 初始化InputWindowHandle
        mWindowHandle.name = name;
        mWindowHandle.token = mClientChannel.getToken();
        // 设置对应窗口的类型,这里其实并没有创建窗口,是用该属性可以确实事件 可以被透传
        mWindowHandle.layoutParamsType = WindowManager.LayoutParams.TYPE_SECURE_SYSTEM_OVERLAY;
        // 设置 anr超时事件
        mWindowHandle.dispatchingTimeoutMillis = DEFAULT_DISPATCHING_TIMEOUT_MILLIS;
        mWindowHandle.ownerPid = pid;
        mWindowHandle.ownerUid = uid;
        // 不进行缩放
        mWindowHandle.scaleFactor = 1.0f;
        mWindowHandle.replaceTouchableRegionWithCrop(null /* use this surface's bounds */);
        // 给该InputWindowHandle配置Config NOT_FOCUSABLE:不可被focus,SPY:为类型 TRUSTED_OVERLAY:和透传相关
        mWindowHandle.inputConfig =
                InputConfig.NOT_FOCUSABLE | InputConfig.SPY | InputConfig.TRUSTED_OVERLAY;

        final SurfaceControl.Transaction t = new SurfaceControl.Transaction();
        // 把surfacecontorl和 InputWindowHandle 绑定
        t.setInputWindowInfo(mInputSurface, mWindowHandle);
        t.setLayer(mInputSurface, Integer.MAX_VALUE); // 设置层级为最高,
        t.setPosition(mInputSurface, 0, 0);
        t.setCrop(mInputSurface, null /* crop to parent surface */);
        t.show(mInputSurface);
		// 提交Transaction到sf
        t.apply();
    }
}
③. 构造InputMonitor,并返回给客户端.
InputMonitor继承自Parcelable,主要作用对象的封装,主要用来把接受事件的组建发送给 客户端,这样客户端才有接收事件的能力.
std::vector<sp<WindowInfoHandle>> InputDispatcher::findTouchedSpyWindowsAtLocked(
        int32_t displayId, int32_t x, int32_t y, bool isStylus) const {
    // Traverse windows from front to back and gather the touched spy windows.
    std::vector<sp<WindowInfoHandle>> spyWindows;
    const auto& windowHandles = getWindowHandlesLocked(displayId);
    for (const sp<WindowInfoHandle>& windowHandle : windowHandles) {
        const WindowInfo& info = *windowHandle->getInfo();

        if (!windowAcceptsTouchAt(info, displayId, x, y, isStylus)) {
            continue;
        }
        if (!info.isSpy()) {
            // The first touched non-spy window was found, so return the spy windows touched so far.
            return spyWindows;
        }
        spyWindows.push_back(windowHandle);
    }
    return spyWindows;
}
2.在InputDispatcher的事件分发阶段
同样以触摸事件举例,在触摸事件的分发阶段,InputDispatcher会通过findTouchedWindowTargetsLocked寻找触摸事件需要分发非的窗口,期间会通过findTouchedSpyWindowsAtLocked 找到对应屏幕的所有SpyWindow,并把他们添加到 触摸事件的目标装口列表中, 后续 SpyWindow将通过之前创造的InputChannel收到当前屏幕上的全局触摸事件.
// 寻找触摸的目标窗口
InputEventInjectionResult InputDispatcher::findTouchedWindowTargetsLocked() {
	....
	 std::vector<sp<WindowInfoHandle>> newTouchedWindows =
                findTouchedSpyWindowsAtLocked(displayId, x, y, isStylus);
        if (newTouchedWindowHandle != nullptr) {
            // Process the foreground window first so that it is the first to receive the event.
            newTouchedWindows.insert(newTouchedWindows.begin(), newTouchedWindowHandle);
        }
	....
}

// 寻找符合要求的SpyWindows
std::vector<sp<WindowInfoHandle>> InputDispatcher::findTouchedSpyWindowsAtLocked(
        int32_t displayId, int32_t x, int32_t y, bool isStylus) const {
    // Traverse windows from front to back and gather the touched spy windows.
    std::vector<sp<WindowInfoHandle>> spyWindows;
    const auto& windowHandles = getWindowHandlesLocked(displayId);
    for (const sp<WindowInfoHandle>& windowHandle : windowHandles) {
        const WindowInfo& info = *windowHandle->getInfo();

        if (!windowAcceptsTouchAt(info, displayId, x, y, isStylus)) {
            continue;
        }
        if (!info.isSpy()) {
            // The first touched non-spy window was found, so return the spy windows touched so far.
            return spyWindows;
        }
        spyWindows.push_back(windowHandle);
    }
    return spyWindows;
}
2.SpyWindow的应用
在core/java/android/hardware/input/InputManager.java提供了注册SpyWindow类型的全局事件的监听方式,但是hide的.同时使用该接口进行注册时,在InputManagerService中 还会进行相关权限检查.
core/java/android/hardware/input/InputManager.java
/**
     * Monitor input on the specified display for gestures.
     *
     * @hide
     */
    public InputMonitor monitorGestureInput(String name, int displayId) {
        try {
            return mIm.monitorGestureInput(new Binder(), name, displayId);
        } catch (RemoteException ex) {
            throw ex.rethrowFromSystemServer();
        }
    }
举几个使用该种方式的例子:
可见,主要还是用在屏幕手势上:
三.总结
inputMonitor和Spywindow 两种方式都会到InputDispather中去创造InputChannel(必然的,这就是接收事件的渠道)
对比inputMonitor和Spywindow 稍微总结一下这两种方式的区别:
- inputMonitor:使用上目前inputMonitor的方式中能在SystemServer中使用,对比 普通窗口创建 Input相关的组件,该种方式只创建了和InputChannel 和 InputReciver。
- Spywindow :InputManager提供了使用该方式的接口,虽然该接口三方应用不能使用,对比 普通窗口创建 Input相关的组件,该种方式使用到的组件比较齐全:InputHandle,surfaceControl,ApplicationHandle…
我只是简单总结了下,欢迎大家来补充这两种方式的区别,以及为什么谷歌添加SpyWindow这种方式
这篇文章,只是大概介绍了13_r43上两种全局屏幕 触摸/key 事件的监控方式,其中很ANDROID INPUT的细节没有详细介绍. 如果对ANDROID INPUT感兴趣,可以看看马哥的博客:千里马


 7992
7992

 被折叠的 条评论
为什么被折叠?
被折叠的 条评论
为什么被折叠?
 到【灌水乐园】发言


