


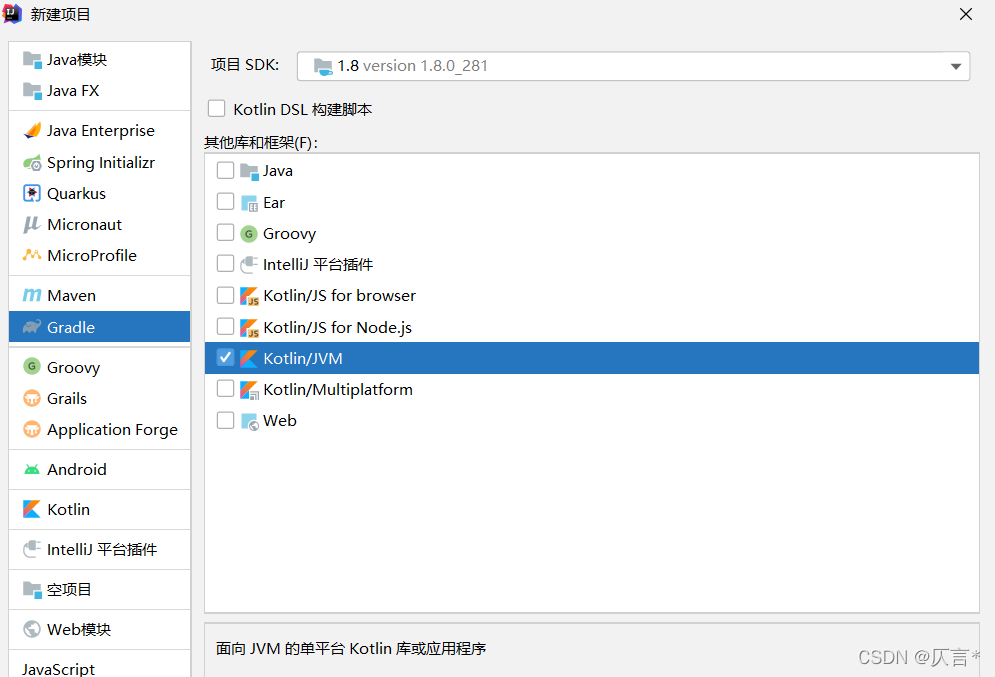
1.新建工程
新建项目 -> Gradle -> Kotlin/JVM
2.Gradle build.gradle配置文件介绍
//创建项目输入groupId
group 'pers.gradle'
//jdk的版本,1.8
sourceCompatibility = 1.8
//创建项目所输入的版本
version '1.0-SNAPSHOT'

/**
 * 指定所使用仓库的路径
 * mavenCentral(),中央仓库,项目中所使用的jar包都会从中央仓库下载到本地仓库。
 *                 若本地仓库已经拥有相应的jar包,则不会重复下载
 *                 可以使用命令maven { url "http://maven.aliyun.com/nexus/content/groups/public" }指定maven的远程仓库地址
 * mavenLocal()本地仓库,与GRADLE_USER_HOME配置的路径一致。
 * */
repositories {
    mavenCentral()
    mavenLocal()
    maven { url "http://maven.aliyun.com/nexus/content/groups/public" }
}

/**
 * gradle所有的jar包文件坐标都在dependencies属性内放置
 * 每一个jar包都具备以下特点
 * 1.scope(作用域):gradle支持compile、runtime、testCompile、testRuntime四种scope
 *   compile:jar包在编译期与运行期依赖。
 *   runtime:jar包在运行期依赖。
 *   testCompile:jar包在测试编译期与运行期依赖。
 *   testRuntime:jar包在测试运行期依赖。
 *   补充:
 *   providedCompile:jar包/依赖代码 仅在编译的时候需要,但是在运行时不需要依赖。
 *   providedCompile与compile,runtime区别:
 *   compile: 前提:apply plugin: 'war'或者apply plugin: 'java'
 *   providedCompile:前提:apply plugin: 'war',若前提为'java',则使用compileOnly
 *   runtime:前提:apply plugin: 'war'
 *   以上所说的前提,如果不正确配置的话,就会遇到依赖包无法导入,以及runtime以及providedCompile无法使用的情况。
 * 2. group:与maven的groupId一致。
 *    name:与maven的artifactId一致。
 *    version:与maven的version一致。
 */
dependencies {
	//gradle jar包坐标可以访问,maven中央仓库[https://mvnrepository.com],找到相对应的jar包,选择[gradle]选项卡,复制该地址即可。
    implementation "org.jetbrains.kotlin:kotlin-stdlib"
    testImplementation 'org.junit.jupiter:junit-jupiter-api:5.6.0'
    testRuntimeOnly 'org.junit.jupiter:junit-jupiter-engine'
    //引入spring依赖
    compile group: 'org.springframework', name: 'spring-context', version: '5.1.5.RELEASE'
    //引入lombok依赖
    //@Data注解在类上,会为类的所有属性自动生成setter/getter、equals、canEqual、hashCode、toString方法,如为final属性,则不会为该属性生成setter方法。
    compileOnly group: 'org.projectlombok', name: 'lombok', version: '1.18.2'
}
3.Gradle Spring 项目
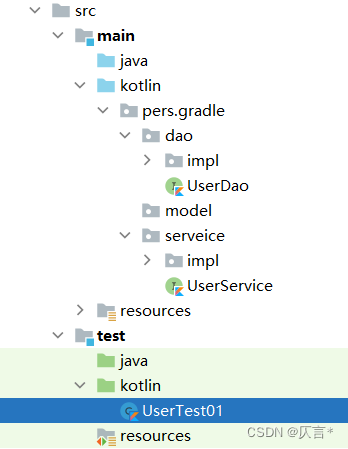
项目结构:
- 在dao文件夹下编写接口类与实现类
- 在model文件夹下编写实体类
- 在service文件夹下编写接口类与实现类
- 在test.kotlin文件夹下编写测试类UserTest01
4.配置文件applicationContext.xml
在resources文件夹下编写配置文件applicationContext.xml
<?xml version="1.0" encoding="UTF-8"?>
<beans xmlns="http://www.springframework.org/schema/beans"
       xmlns:context="http://www.springframework.org/schema/context"
       xmlns:xsi="http://www.w3.org/2001/XMLSchema-instance"
       xsi:schemaLocation="http://www.springframework.org/schema/beans http://www.springframework.org/schema/beans/spring-beans.xsd
                           http://www.springframework.org/schema/context http://www.springframework.org/schema/context/spring-context.xsd">


<!--    <bean id="userDao" class="com.lining.dao.impl.UserDaoImpl"/>-->

    <!--  注解的组件扫描  -->
    <context:component-scan base-package="pers.gradle"></context:component-scan>

</beans>
5.测试
class UserTest01 {

    @Test
    fun test(){
        val applicationContext = ClassPathXmlApplicationContext("applicationContext.xml")
        val userDaoImpl:UserDaoImpl = applicationContext.getBean("userDao") as UserDaoImpl
        userDaoImpl.save()
        val userServiceImpl: UserServiceImpl = applicationContext.getBean("userService") as UserServiceImpl
        userServiceImpl.save()
    }

}
测试结果:


 3929
3929

 被折叠的 条评论
为什么被折叠?
被折叠的 条评论
为什么被折叠?
 到【灌水乐园】发言


