


shell 基础-02
二.四剑客(find grep sed awk)
2.1 find:查找目录下的文件
1.1 查找多少天内的文件
[root@shell ~]# find . -atime -2
./.bash_profile
#查找两天内受到访问的文件使用-atime,-2表示两天内
#-n表示文件更改时间距现在n天以内
#+n表示文件更改时间距现在n天以前
#n表示距现在第n天
1.2 查找指定文件
[root@shell ~]# find /root/ -mtime -4 -name ‘*.xml’
/root/10.xml
1.3 查找文件或者当前目录下的目录
[root@shell ~]# find . -type f
./10.xml
[root@shell ~]# find . -type d
./.pki
1.4 按照权限查找文件
[root@shell ~]# find . -perm 644
./10.xml
1.5 按照所属用户或者组来寻找
[root@shell ~]# find . -user root -group root
./10.xml
1.6 查找比某个文件新的文件
[root@shell ~]# find . -newer 1.xml
./8.xml
#更改时间比文件1.xml新的文件
[root@shell ~]# find . ! -newer 1.xml
./10.xml
#更改时间比文件1.xml的文件
1.7 逻辑操作符的使用
[root@shell ~]# find . -maxdepth 1 -type d ! -name “.”
./.pki
#-maxdepth 查找一级目录,!表示取反。
1.8 ls -l 命令放在find的-exec 选项中执行
[root@shell ~]# find . -type f -exec ls -l {} ;
-rw-r–r-- 1 root root 48 9月 10 21:06 ./10.xml
#{}表示所有查找到的内容,\表示结束标志
1.8 将目录下所有扩展名为.sh ,把包含”hello”的字符串全部替换为”world”
[root@shell ~]# find . -name “*.xml” -exec sed ‘s/hello/world/g’ {} ;
world boer
dflaflafjdlkf world
xargs:将标准输入转换成命令行参数
1.1 多行输入变单行的例子
[root@shell ~]# cat 1.xml
world boer
dflaflafjdlkf world
testw rewl world
[root@shell ~]# xargs <1.xml
world boer dflaflafjdlkf world testw rewl world
1.2 通过-n 指定每行的输出个数的例子
[root@shell ~]# xargs -n 3 <1.xml
world boer dflaflafjdlkf
1.3 自定义分割符(-d)
[root@shell ~]# xargs -n 3 <1.xml |xargs -d w
orld boer dflaflafjdlkf
1.4 find+xargs的使用
[root@shell ~]# find . -name “*.xml” |xargs -i mv {} test/
[root@shell ~]# cd test/
[root@shell test]# ls
10.xml 2.xml 4.xml 6.xml 8.xml wenben
[root@shell test]# find . -type f -name ‘*.xml’ |xargs rm -r
[root@shell test]# ls
1.5 查找linux系统下以txt结尾,30天没有修改的文件大小大于20K同时具有执行权限的文件并备份/data/backup:
find / -name *.txt -mtime +30 -type f -size +20k -perm a=x -exec cp {} /data/backup/ ;
2.2 grep的使用
1.grep 的使用
参数说明:
-c:表示打印符合要求的行数
-i:表示忽略大小写
-n:表示输出符合要求的行号
-v:表示反向选择,打印不符合要求的行
2.实战
2.1 查找包含root的行
[root@shell ~]# grep -n ‘root’ /etc/passwd
1:root: x:0:0:root:/root:/bin/bash
2.2 查找不包含nologin 的行
[root@shell ~]# grep -v ‘nologin’ /etc/passwd
youngboy10:x:521:521::/home/youngboy10:/bin/bash
2.3 查找包含数字的行
[root@shell ~]# grep -n ‘[0-9]’ /etc/inittab
15:# upstart works, see init(5), init(8), and initctl(8)
2.4 过滤掉所有空行和以#开头的行
[root@shell ~]# grep -Ev ‘^$|#’ /etc/httpd/conf/httpd.conf
ServerTokens OS
ServerRoot “/etc/httpd”
PidFile run/httpd.pid
Timeout 60
2.5 查找r 和t之间有两个任意字符的行
[root@shell ~]# grep ‘r…t’ /etc/passwd --color
root:x:0:0:root:/root:/bin/bash
operator:x:11:0:operator:/root:/sbin/nologin
ftp:x:14:50:FTP User:/var/ftp:/sbin/nologin
2.6 查找指定字符的出现次数的行
[root@shell ~]# grep ‘o{2}’ /etc/passwd --color
root:x:0:0:root:/root:/bin/bash
lp:x:4:7:lp:/var/spool/lpd:/sbin/nologin
mail:x:8:12:mail:/var/spool/mail:/sbin/nologin
#o 出现2次
[root@shell ~]# grep ‘o{1,2}’ /etc/passwd --color
root:x:0:0:root:/root:/bin/bash
bin:x:1:1:bin:/bin:/sbin/nologin
daemon:x:2:2:daemon:/sbin:/sbin/nologin
#o 出现1~2次
*表示0个或者多个*前面的字符。 “.” 表示任意一个字符
2.3 sed的使用
1.打印某行
[root@shell ~]# sed -n '2’p /etc/passwd
bin:x:1:1:bin:/bin:/sbin/nologin
#打印第二行
[root@shell ~]# sed -n '1,$'p /etc/passwd
root:x:0:0:root:/root:/bin/bash
bin:x:1:1:bin:/bin:/sbin/nologin
#打印所有行
[root@shell ~]# sed -n '1,3’p /etc/passwd
root:x:0:0:root:/root:/bin/bash
bin:x:1:1:bin:/bin:/sbin/nologin
daemon:x:2:2:daemon:/sbin:/sbin/nologin
#打印1到3行
2.含某个字符串的行
[root@shell ~]# sed -n '/^root/'p /etc/passwd
root:x:0:0:root:/root:/bin/bash
#打印以root 开头的行,和grep 类似(^,$,.,*)
3.删除某些行
[root@shell ~]# sed '1’d /etc/passwd
bin:x:1:1:bin:/bin:/sbin/nologin
#删除第一行
[root@shell ~]# sed '1,3’d /etc/passwd
adm:x:3:4:adm:/var/adm:/sbin/nologin
lp:x:4:7:lp:/var/spool/lpd:/sbin/nologin
#删除1,3行
[root@shell ~]# sed '/bash/'d /etc/passwd
bin:x:1:1:bin:/bin:/sbin/nologin
daemon:x:2:2:daemon:/sbin:/sbin/nologin
#删除包含bash 的行
4.替换字符或者字符串
[root@shell ~]# sed ‘1,2s/ot/to/g’ /etc/passwd
roto:x:0:0:roto:/roto:/bin/bash
bin:x:1:1:bin:/bin:/sbin/nologin
#将1,2行的ot 替换成to,g表示本行全局替换,不加g则只替换本行出现的第一个
[root@shell ~]# cat 1.txt
long
huilong
hou
[root@shell ~]# sed ‘s/h/t/g’ 1.txt
long
tuilong
tou
[root@shell ~]# sed ‘s/[0-9]//g’ /etc/passwd
root:x:::root:/root:/bin/bash
#删除所有的数字,如果字母的话是[a-zA-Z]
5.直接修改文件的内容
[root@shell ~]# sed -i ‘s/h/t/g’ 1.txt
[root@shell ~]# cat 1.txt
long
tuilong
tou
6.第二行后加a=b
[root@shell ~]# sed ‘2a a=b’ a.txt
DEVICE=eth0
TYPE=Ethernet
a=b
UUID=f7fff62c-ee4f-4177-962c-e76b0a09df41
7.第三行前追加a=c
[root@shell ~]# sed ‘3i a=c’ a.txt
DEVICE=eth0
TYPE=Ethernet
a=c
UUID=f7fff62c-ee4f-4177-962c-e76b0a09df41
8.包含ONBOOT的行,并在其后面添加a=c
[root@shell ~]# sed ‘/ONBOOT/a a=c’ b.txt
DEVICE=eth0
TYPE=Ethernet
UUID=f7fff62c-ee4f-4177-962c-e76b0a09df41
ONBOOT=yes
a=c
2.4 awk的使用
awk 的使用
1.截取文档中的某一段
[root@shell ~]# head -n5 /etc/passwd|awk -F ‘:’ ‘{print $1}’
root
#-F 指定分隔符,默认是空格或者tab为分隔符,print 打印$1 为第一个字段
[root@shell ~]# head -n5 /etc/passwd|awk -F ‘:’ ‘{print $0}’
root:x:0:0:root:/root:/bin/bash
#$0 表示整行
[root@shell ~]# head -n5 /etc/passwd|awk -F ‘:’ ‘{print $1"#"$2"#"$3"#"$4}’
root#x#0#0
#表示自定义的内容,必须用双引号括起来。
2.统计文档的行数
[root@shell ~]# awk ‘{print NR}’ /etc/passwd|tail -n1
3.统计每行有多少个字段
[root@shell ~]# awk -F ‘:’ ‘{print NF}’ /etc/passwd
7
[root@shell ~]# awk -F ‘:’ ‘{print $NF}’ /etc/passwd
/bin/bash
#输出每行最后一个字段
[root@shell ~]# awk -F ‘:’ ‘NR1,NR2 {print $1}’ /etc/passwd
root
bin
#匹配第一,第二行第一个字段。
4.条件操作符
[root@shell ~]# awk -F ‘:’ ‘$3>=500’ /etc/passwd
wo:x:500:500::/home/wo:/bin/bash
oldboy:x:501:501::/home/oldboy:/bin/bash
5.默认分隔符是空格
[root@python-study ~]# echo “this is a test”|awk ‘{print $0}’
this is a test
[root@python-study ~]# echo “this is a test”|awk ‘{print $1}’
This
6.显示/etc/passwd的第1列和第7列,用逗号分隔显示,所有行开始前添加列名start1,start7,最后一行添加,end1,end7
[root@python-study ~]# awk -F’:’ ‘BEGIN {print “start1,start7”} {print $1 “,” $7} END {print “end1,end7”}’ /etc/passwd
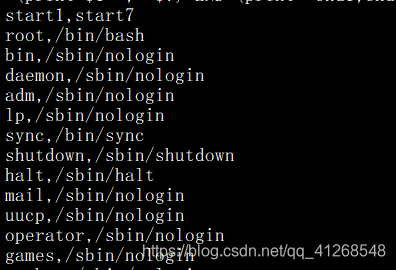

#BEGIN语句在所有文本处理动作执行之前被执行,END在所有文本处理动作执行之后被执行
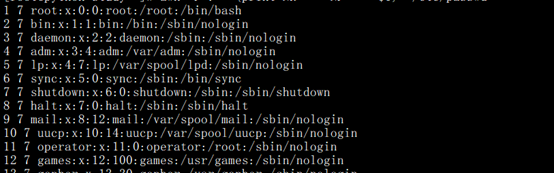
1.3 统计/etc/passwd文件中,每行的行号,每行的列数,对应的完整行内容
[root@python-study ~]# awk -F’:’ ‘{print NR " " NF " " $0}’ /etc/passwd
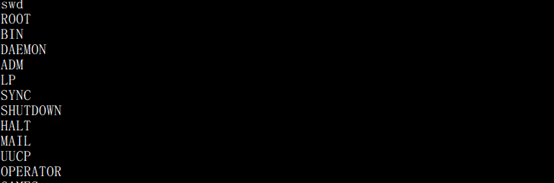
1.4将输出的内容变成大写
[root@python-study ~]# awk -F’:’ ‘{print toupper($1)}’ /etc/pass
1.5常用函数
常用函数如下
函数名 作用
toupper(s)返回s的大写
tolower(s) 返回s的小写
length(s) 返回s长度
substr(s,p) 返回字符串s中从p开始的后缀部分
[root@python-study ~]# awk -F’:’ ‘{print length($1)}’ /etc/passwd

1.6 统计文本总字段个数
[root@python-study ~]# awk ‘BEGIN{i=0}{i +=NF}END {print i}’ /etc/passwd
54
三.系统管理命令
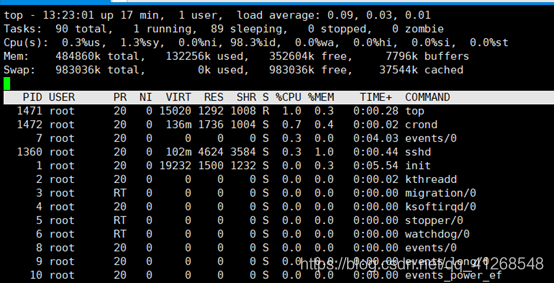
3.1 w:查看当前系统负载

#load average: 第一个数表示1分钟内系统的平均负载值,第二个数表示5分钟内系统的平均负载值,第三个数表示15分钟内的系统的平均负载值;主要注意第一个数,只要不超过cpu 的数量就没有关系(不超过1就可以了)
[root@shell ~]# grep -c ‘processor’ /proc/cpuinfo
1
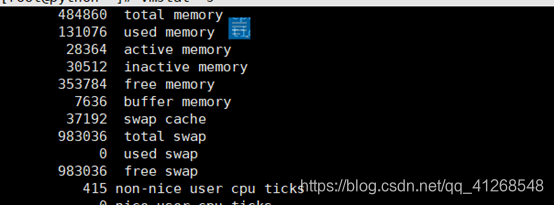
3.2 vmstat: 监控系统状态
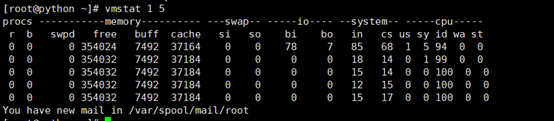
#每个1秒输出一次,输出5次。r表示运行或等待cpu的进程数。当该数值大于cpu个数时,说明cpu资源不够用。b表示等待资源的进程数。wa 表示I/O等待所占用CPU的时间百分比。
#显示内存使用的详细情况
[root@python ~]# vmstat -s
#查看/dev/sda1的读写统计信息

#reads:来自该分区的读的次数
#read sectors:来自该分区的读扇区的次数
#writes:来自该分区的写的次数
#requested writes:来自该分区的写的请求次数
3.3 top: 显示进程所占系统资源
3.4 nload:查看网卡流量
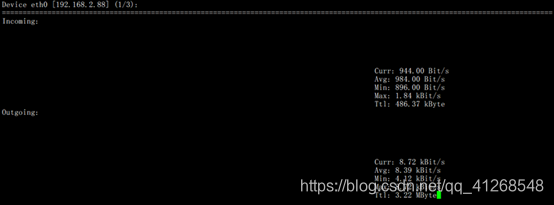
#直观的查看网卡流量,注意curr
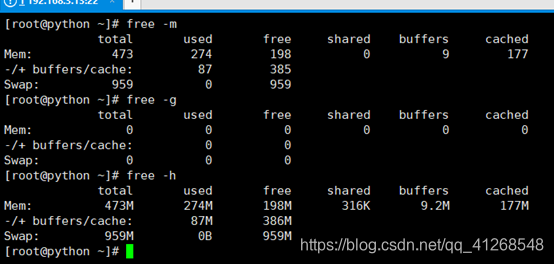
3.5 free:查看内存使用情况
3.6 netstat: 查看网络状况

#查看当前系统开启了那些端口
3.7 tcpdump:抓包工具
[root@python ~]# tcpdump -i eth1 -c 10
#指定抓包数
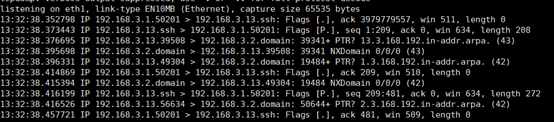
[root@python ~]# tcpdump -i eth1 port 22 -c 10
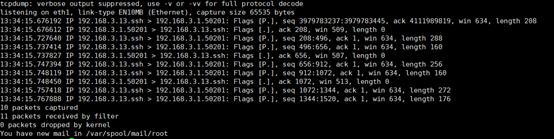
#指定抓22端口的包
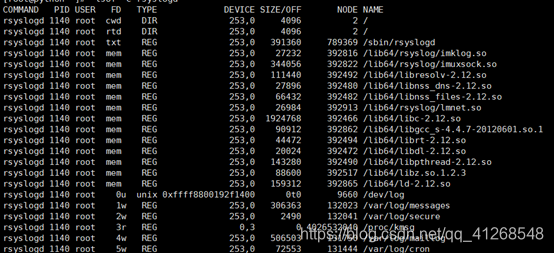
3.8 lsof:查看进程打开的文件
1.1 显示正在使用文件的进程
[root@shell ~]# lsof /var/log/messages

#FD:文件描述符(0:表示标准输出,1:表示标准输入,2:表示标准错误,u:表示该文件被打开并处于读取/写入模式,r:表示该文件被打开并处于只读模式,w:表示该文件被打开并处于写入模式。)
#TYPE:文件类型,REG表示普通文件
#NODE:索引节点
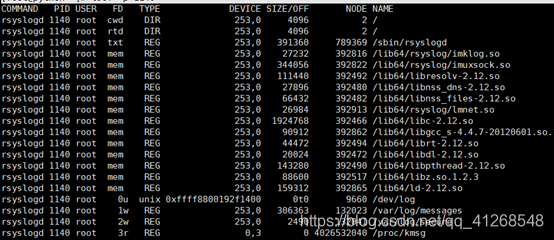
1.2 指定进程所打开的文件
[root@python ~]# lsof -c rsyslogd
1.3 显示指定进程号所打开的文件
[root@python ~]# lsof -p 1140
1.4 监听指定协议,端口和主机等信息
[root@python ~]# lsof -i tcp

#显示所有tcp网络连接的进程信息
[root@python ~]# lsof -i tcp:22

显示端口为22的进程
[root@shell ~]# lsof -u root
#显示指定用户使用的文件
3.9 mpstat:cpu信息统计
[root@shell run]# mpstat 1 1

[root@shell run]# mpstat -P 0
#显示第一个cpu的信息

3.10 iostat: I/O信息统计
#只显示磁盘统计信息
[root@shell ~]# iostat -dk
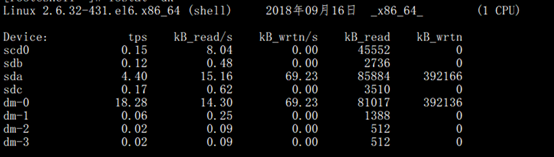
#只显示cpu的统计信息
[root@shell ~]# iostat -ck

3.11 chkconfig:管理开机服务
[root@python ~]# chkconfig –list
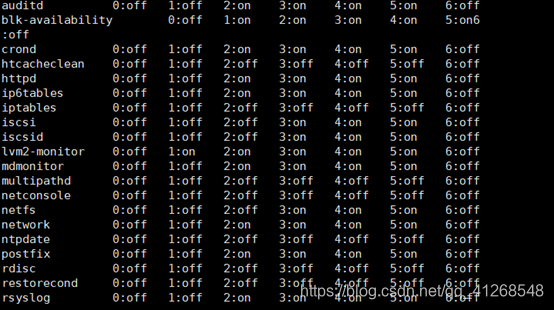
[root@shell ~]# chkconfig --level 3 sshd on
[root@shell ~]# chkconfig --list|grep sshd
sshd 0:关闭 1:关闭 2:启用 3:启用 4:启用 5:启用 6:关闭
#使用—level指定关闭sshd服务在3级别开机启动。
3.12 sar:收集系统信息
1.1 查看cpu的整体负载
[root@shell ~]# sar -u 1 1

#%user:用户进程消耗的cpu时间百分百
%nice:改变过优先级的进程占用的cpu时间百分百
%system:系统(内核)进程消耗的cpu时间百分百
%steal:虚拟机强制cpu等待的时间百分百
%idle:cpu处于空闲状态的百分百
1.2 显示运行队列的大小(与系统当前的平均负载均衡相同)
[root@shell ~]# sar -q 1 1

#runq-sz:运行队列的长度(等待运行的进程数)
#plist-sz:进程列表中进程和线程的数量
1.3 显示内存使用情况
[root@shell ~]# sar -r 1 1

1.4 显示缓冲区的使用情况
[root@shell ~]# sar -b 1 1

tps:每秒物理设备的I/O传输总量
rtps:每秒从物理设备读入的数据总量
wtps:每秒从物理设备写入的数据总量
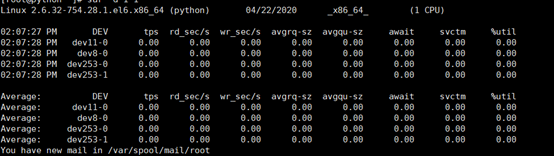
1.5 查看系统磁盘的读写性能
[root@shell ~]# sar -d 1 1
四.数组
4.1数组
数组是一个元素的集合,它把有限的元素(或变量、字符内容)用一个名字来命名。
4.2数组的定义
[root@shell ~]# long=(1 2 3)
[root@shell ~]# echo ${long[*]}
1 2 3
[root@shell ~]# echo ${long[0]}
1
[root@shell ~]# echo ${long[1]}
2
[root@shell ~]# echo ${long[2]}
3
[root@shell ~]# echo ${long[3]}
4.3打印数组元素的个数
[root@shell ~]# echo ${#long[*]}
3
[root@shell ~]# echo ${#long[1]}
1
[root@shell ~]# echo ${#long[2]}
1
[root@shell ~]#
4.4数组的删除
[root@shell ~]# unset long[1]
[root@shell ~]# echo ${long[]}
1 3
[root@shell ~]# unset long
[root@shell ~]#
[root@shell ~]# echo ${long[]}
4.5数组内容截取
[root@shell ~]# long=(1 2 3)
[root@shell ~]# echo KaTeX parse error: Expected 'EOF', got '#' at position 33: … [root@shell ~]#̲ long01=((echo {a…z}))
[root@shell ~]# echo ${long01[*]}
a b c d e f g h i j k l m n o p q r s t u v w x y z
4.6数组脚本实践
[root@shell ~]# sh 3.sh
1
2
3
4
5
[root@shell ~]# cat 3.sh
#!/bin/bash
long=(1 2 3 4 5)
for i in ${long[*]}
do
echo $i
done
五.for循环与select的应用
5.1 for循环的语法结构
#第一种
[root@shell shell]# sh 1.sh
1
2
3
4
5
[root@shell shell]# cat 1.sh
#!/bin/bash
for n in 1 2 3 4 5
do
echo $n
done
#第二种
[root@shell shell]# sh 2.sh
3
4
5
6
7
8
9
[root@shell shell]# cat 2.sh
#!/bin/bash
for ((i=3;i<=9;i++))
do
echo $i
done
#第一个i是变量的初始化,第二个是变量的范围,第三个是变量的自增自减。
5.2 for循环企业实战
5.2.1 批量更改文件的名称
[root@shell shell]# touch long_{1…100}_log.txt
#要求将_log去掉
[root@shell shell]# cat 3.sh
#!/bin/bash
cd /root/shell
for n in echo ls *.txt
do
mv $n echo $n|sed 's/_log//g'
done
5.2.2 通过脚本实现仅mysql在开机时自动启动
[root@shell shell]# cat 4.sh
#!/bin/bash
for n in chkconfig --list|grep "3:on"|awk '{print $1}'|grep -Ev 'mysqld'
do
chkconfig $n off
done
5.2.3 每隔2秒访问www.baidu.com
[root@shell shell]# cat 5.sh
#!/bin/bash
for ((i=0;i<5;i++))
do
curl http://wwww.baidu.com
sleep 2
done
5.3 select 循环(通过选择菜单实现自动化部署)
[root@shell ~]# cat 3.sh
#!/bin/bash
PS3=“please select a nmu from menu:”
select n in old young child
do
echo -e “i guess you selected the menu is:\n $REPLY) $n”
done
[root@shell ~]# sh 3.sh
- old
- young
- child
please select a nmu from menu:1
i guess you selected the menu is: - old
please select a nmu from menu:2
i guess you selected the menu is: - young
#PC3是控制select循环语句的提示符的
#REPLY是菜单对应的数字。
六.if语句
6.1例子1
[root@shell shell]# vi 1.sh
#!/bin/bash
#read password and test
echo “------------------------------”
read -p “enter a password:” good
if [ “$good” == “pass” ];
then
echo “ok”
else
echo “error”
fi
[root@shell shell]# source 1.sh
enter a password:good
error
[root@shell shell]# source 1.sh
enter a password:pass
ok
6.2 例子2
[root@shell shell]# cat 2.sh
#!/bin/bash
read -p “please enter your count:” count
if [ $count -gt 80 ];
then
echo “excellence”
elif [ $count -gt 70 ];
then
echo “fine”
elif [ $count -gt 60 ];
then
echo “pass”
else
echo “fail”
fi
[root@shell shell]# source 2.sh
please enter your count:60
fail
[root@shell shell]# source 2.sh
please enter your count:80
fine
七.case语句
7.1例子1
[root@shell shell]# cat 3.sh
#!/bin/bash
case $1 in
[a-z]|[A-Z])
echo “you shi zimu”
;;
[[:digit:]])
echo “you shi shuzi”
;;
*)
echo “error”
;;
Esac
[root@shell shell]# source 3.sh
please enter you:g
you shi zimu
[root@shell shell]# source 3.sh
please enter you:1
you shi shuzi
7.2例子2
[root@shell shell]# cat 4.sh
#!/bin/bash
case $1 in
start)
httpd &
;;
stop)
pkill httpd
;;
restart)
pkill httpd
httpd &
;;
*)
echo “useage:$0(stop|start|restart)”
;;
esac
[root@shell shell]# source 4.sh restart
八.while语句
8.1例子
[root@shell shell]# cat 6.sh
#!/bin/bash
u_num=1
while [ 	$num -le 20 ]
do
echo "1*$u_num"
u_num=$((u_num+1))
done
[root@shell shell]# source 6.sh
11
12
13
14
15
16
17
18
19
110
111
112
113
114
115
116
117
118
119
120
8.2打印网卡配置文件的每一行
[root@shell shell]# cat 7.sh
#!/bin/bash
FILE=/etc/sysconfig/network-scripts/ifcfg-eth0
while read -r line
do
echo $line
done<$FILE
[root@shell shell]# source 7.sh
DEVICE=eth0
TYPE=Ethernet
UUID=f7fff62c-ee4f-4177-962c-e76b0a09df41
ONBOOT=yes
NM_CONTROLLED=no
BOOTPROTO=static
IPADDR=192.168.1.88
PREFIX=24
8.3 例子3
[root@shell shell]# cat 11.sh
#!/bin/bash
for ip in {1..254}
do
case $ip in
	10)
	continue
;;
	15)
	break
;;
esac
	echo $ip
done
sleep 5
exit
echo "the world be printed content"
[root@shell shell]# source 11.sh
1
2
3
4
5
6
7
8
9
11
12
13
14
九.util 语句
例子
#批量删除用户
[root@shell shell]# cat 8.sh
#!/bin/bash
u_num=20
until [ $u_num -eq 0 ]
do
userdel user${u_num}
u_num=$((u_num-1))
done


 3843
3843


 被折叠的 条评论
为什么被折叠?
被折叠的 条评论
为什么被折叠?
 到【灌水乐园】发言


