


大致流程
1.创建编写注解类
2.创建不编写beans.xml
3.配置pom.xml , 配置Servlet和dom4j
4.创建编写 监听器解析用来beans.xml
5.创建编写 Servlet类,用来处理请求路径、匹配请求调用对应方法
6.配置web.xml,将监听器类、 Servlet类配置进去
7.创建实际需要打注解的controller类
8.将步骤6的类配置到beans.xml
1.创建并配置注解文件controller.java 和 RequestMapping.java
下面将RequestMapping写错了!!!
注意添加注解,分别是此注解作用在哪里和在什么时候生效
@Target({ElementType.TYPE,ElementType.METHOD})//可以将注解打在类和方法上面
@Retention(RetentionPolicy.RUNTIME)//在程序运行时依然生效

2. 配置pom.xml,配置Servlet和dom4j
<dependency>
<groupId>javax.servlet</groupId>
<artifactId>javax.servlet-api</artifactId>
<version>3.0.1</version>
<scope>provided</scope>
</dependency>
<dependency>
<groupId>dom4j</groupId>
<artifactId>dom4j</artifactId>
<version>1.6.1</version>
</dependency>
<?xml version="1.0" encoding="UTF-8"?>

<project xmlns="http://maven.apache.org/POM/4.0.0" xmlns:xsi="http://www.w3.org/2001/XMLSchema-instance"
  xsi:schemaLocation="http://maven.apache.org/POM/4.0.0 http://maven.apache.org/xsd/maven-4.0.0.xsd">
  <modelVersion>4.0.0</modelVersion>

  <groupId>cn.dmc</groupId>
  <artifactId>framework1128</artifactId>
  <version>1.0-SNAPSHOT</version>
  <packaging>war</packaging>

  <name>framework1128 Maven Webapp</name>
  <!-- FIXME change it to the project's website -->
  <url>http://www.example.com</url>

  <properties>
    <project.build.sourceEncoding>UTF-8</project.build.sourceEncoding>
    <maven.compiler.source>1.7</maven.compiler.source>
    <maven.compiler.target>1.7</maven.compiler.target>
  </properties>

  <dependencies>
      <dependency>
          <groupId>junit</groupId>
          <artifactId>junit</artifactId>
          <version>4.11</version>
          <scope>test</scope>
      </dependency>

      <dependency>
          <groupId>javax.servlet</groupId>
          <artifactId>javax.servlet-api</artifactId>
          <version>3.0.1</version>
          <scope>provided</scope>
      </dependency>

      <dependency>
          <groupId>dom4j</groupId>
          <artifactId>dom4j</artifactId>
          <version>1.6.1</version>
      </dependency>

      <dependency>
          <groupId>junit</groupId>
          <artifactId>junit</artifactId>
          <version>4.12</version>
      </dependency>
  </dependencies>

  <build>
    <finalName>framework1128</finalName>
    <pluginManagement><!-- lock down plugins versions to avoid using Maven defaults (may be moved to parent pom) -->
      <plugins>
        <plugin>
          <artifactId>maven-clean-plugin</artifactId>
          <version>3.1.0</version>
        </plugin>
        <!-- see http://maven.apache.org/ref/current/maven-core/default-bindings.html#Plugin_bindings_for_war_packaging -->
        <plugin>
          <artifactId>maven-resources-plugin</artifactId>
          <version>3.0.2</version>
        </plugin>
        <plugin>
          <artifactId>maven-compiler-plugin</artifactId>
          <version>3.8.0</version>
        </plugin>
        <plugin>
          <artifactId>maven-surefire-plugin</artifactId>
          <version>2.22.1</version>
        </plugin>
        <plugin>
          <artifactId>maven-war-plugin</artifactId>
          <version>3.2.2</version>
        </plugin>
        <plugin>
          <artifactId>maven-install-plugin</artifactId>
          <version>2.5.2</version>
        </plugin>
        <plugin>
          <artifactId>maven-deploy-plugin</artifactId>
          <version>2.8.2</version>
        </plugin>
      </plugins>
    </pluginManagement>
  </build>
</project>
3.创建编写监听器LoadListener.java 实现ServletContextListener来解析beans.xml 文件
* 1.创建SAXReader对象s
* 2.创建输入对象in,使用本类获取本路径下面的beans配置文件
* 3.使用s的read方法解析beans文件后得到domc对象
* 4.使用domc得到domc的节点对象elem
* 5.使用elem获得所有的节点后得到集合list
* 6.遍历集合list
* 7.遍历时每次得到的数据都进行o.attributeValue获得class和id字符串
* 8.使用得到的class字符串生成对象ins
* 9.将id和对象ins存入Map集合
package org.capcom.listener;
import org.dom4j.Document;
import org.dom4j.Element;
import org.dom4j.io.SAXReader;

import javax.servlet.ServletContextEvent;
import javax.servlet.ServletContextListener;
import java.io.InputStream;
import java.util.HashMap;
import java.util.List;
import java.util.Map;

public class LoadListener implements ServletContextListener{

    public static Map<String , Object> map = new HashMap<>();

    @Override
    public void contextInitialized(ServletContextEvent servletContextEvent) {
        InputStream in = null;
        try {
            /**
             * 1.创建SAXReader对象s
             * 2.创建输入对象in,使用本类获取本路径下面的beans配置文件
             * 3.使用s的read方法解析beans文件后得到domc对象
             * 4.使用domc得到domc的节点对象elem
             * 5.使用elem获得所有的节点后得到集合list
             * 6.遍历集合list
             * 7.遍历时每次得到的数据都进行o.attributeValue获得class和id字符串
             * 8.使用得到的class字符串生成对象ins
             * 9.将id和对象ins存入Map集合
             * */
            SAXReader reader = new SAXReader();
            in = LoadListener.class.getClassLoader().getResourceAsStream("beans.xml");
            //use two obj excute function
            Document document = reader.read(in);
            Element element = document.getRootElement();
            List<Element> list = element.elements("bean");
            for (Element o : list){
                String aClass = o.attributeValue("class");
                String id = o.attributeValue("id");
                Object instance = Class.forName(aClass).newInstance();
                map.put(id,instance);
            }
        }catch (Exception e){
            e.printStackTrace();
        }
    }

    @Override
    public void contextDestroyed(ServletContextEvent servletContextEvent) {

    }
}
4.创建编写DispatchServlet.java 继承HttpServlet(重要)
package org.capcom.servlet;

import org.capcom.annotation.RequstMapping;
import org.capcom.listener.LoadListener;

import javax.servlet.ServletException;
import javax.servlet.http.HttpServlet;
import javax.servlet.http.HttpServletRequest;
import javax.servlet.http.HttpServletResponse;
import java.io.IOException;
import java.lang.reflect.Method;
import java.util.Map;
import java.util.Set;

public class DispatcherServlet extends HttpServlet {
    @Override
    protected void service(HttpServletRequest rq, HttpServletResponse rp) throws ServletException, IOException {
        rp.setContentType("test/html;charset=utf-8");
        String uri = rq.getRequestURI();
        System.out.println("输入的uri"+uri);
        String[] split = uri.split("/");
        String s1 ="/" + split[1];
        String s2 ="/" + split[2];
        System.out.println("第一段"+s1);
        System.out.println("第er段"+s2);
        Object o = null;
        Object controObj = null;
        //得到另一个类的字段就是LoadListener的map字段
        Set<Map.Entry<String, Object>> entryListener = LoadListener.map.entrySet();
        for(Map.Entry<String, Object> e : entryListener){
            //得到map里面的每个数据的值和注解
            //将在map中获取的值赋值给o
            o = e.getValue();
            RequstMapping annotation = o.getClass().getAnnotation(RequstMapping.class);
            if(annotation != null){//为注解中的值自动添加/
                //获得注解中的值,如@RequestMapping("/user")中的值是/user
                String value = annotation.value();
                value = value.startsWith("/")?value:"/"+value;
                if(s1.equals(value)){
                    controObj = o;
                    //匹配到了请求后就停止
                    break;
                }
            }
        }
        if(controObj == null){
            rp.setStatus(404);
            rp.getWriter().write("没找到"+s1+"对应的controller类");
        }
        Method method = null;
        //获得contoObj里面所有的方法,使用数组接收
        Method[] methods = controObj.getClass().getDeclaredMethods();
        //Method是数据类型,就是方法的数据类型
        for(Method m :methods){
            RequstMapping mapping = m.getAnnotation(RequstMapping.class);
            if(mapping != null){
                String value = mapping.value();
                value = value.startsWith("/") ? value : "/" + value;        //三目运算符
                if(value.equals(s2)){
                    method = m;
                    break;
                }
            }
        }
        if(method == null){
            rp.setStatus(404);
            rp.getWriter().write("404:not find " + s2 + " 的Controller对象的方法");
        }
        try {
            Object o1 = method.invoke(controObj);
            String s = (String)o1;
            rq.getRequestDispatcher(s).forward(rq,rp);
        }catch (Exception e){
            e.printStackTrace();
        }
    }
}
5. 配置web.xml,需要配置监听器、Servlet
<?xml version="1.0" encoding="UTF-8"?>
<web-app xmlns:xsi="http://www.w3.org/2001/XMLSchema-instance" xmlns="http://xmlns.jcp.org/xml/ns/javaee" xsi:schemaLocation="http://xmlns.jcp.org/xml/ns/javaee http://xmlns.jcp.org/xml/ns/javaee/web-app_3_1.xsd" id="WebApp_ID" version="3.1">
<display-name>framework</display-name>
<listener>
<listener-class>org.capcom.listener.LoadListener</listener-class>
</listener>
<servlet>
<servlet-name>DispatcherServlet</servlet-name>
<servlet-class>org.capcom.servlet.DispatcherServlet</servlet-class>
</servlet>
<servlet-mapping>
<servlet-name>DispatcherServlet</servlet-name>
<url-pattern>*.do</url-pattern>
</servlet-mapping>
<welcome-file-list>
<welcome-file>index.html</welcome-file>
<welcome-file>index.jsp</welcome-file>
</welcome-file-list>
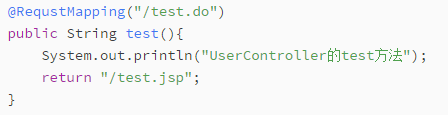
</web-app>6. 创建编写Controller类使用上面的注解
package org.capcom.controller;

import org.capcom.annotation.Controller;
import org.capcom.annotation.RequstMapping;

@Controller
@RequstMapping("/user")
public class UserController {

    @RequstMapping("/index.do")
    public String index(){
        System.out.println("UserController的index方法");
        return "/index.jsp";
    }

    @RequstMapping("/test.do")
    public String test(){
        System.out.println("UserController的test方法");
        return "/test.jsp";
    }

}
7.配置beans.xml将需要打注解的类配置进去
<?xml version="1.0" encoding="utf-8"?>
<beans>
    <bean id="UserController" class="org.capcom.controller.UserController"/>
    <bean id="StudentController" class="org.capcom.controller.StudentController"/>
</beans>
8. 添加未写出的页面test.jsp


 233
233


 被折叠的 条评论
为什么被折叠?
被折叠的 条评论
为什么被折叠?
 到【灌水乐园】发言


