


一、 session简介
- 服务器可以为每个用户浏览器创建一个会话对象(session对象),一个浏览器只能产生一个session,当新建一个窗口访问服务器时,还是原来的那个session。session中默认保存的是当前用户的信息。因此,在需要保存其他用户数据时,我们可以自己给session添加属性。session(会话)可以看为是一种标识,通过带session的请求,可以让服务器知道是谁在请求数据。
二、 session与cookie的区别和联系
1、 session是由服务器创建的,并保存在服务器上的。在session创建好之后,会把sessionId放在cookie中返回(response)给客户端。返回的代码应该是这样子的。返回的cookie是保存在客户端的。
 String sessionId = session.getId();
 Cookie cookie = new Cookie("JSESSIONID", sessionId);
 cookie.setPath(request.getContextPath());
 response.addCookie(cookie);
2、 以后的每次HTTP请求都会带着sessionId,来跟踪用户的整个会话。
3、 session的过期和超时与cookie的过期没有什么联系,都是可以分别进行设置的。但是当session或cookie中任意一方过期,那么用户就需要重新登录了。
三、 session相关
1、 session的创建
@GetMapping("demo")
public void demo(HttpServletRequest request){
HttpSession sessoin=request.getSession();//这就是session的创建
session.setAttribute("username","TOM");//给session添加属性属性name: username,属性 value:TOM
session.setAttribute("password","tommmm");//添加属性 name: password; value: tommmm
System.out.println(session.geiId);
}
其中HttpSession session=request.getSession(true);
//true表示如果这个HTTP请求中,有session,那么可以直接通过getSession获取当前的session,如果当前的请求中没有session,则会自动新建一个session
HttpSession session=request.getSession(false);//false表示只能获取当前请求中的session,如果没有也不能自动创建。
2、 session的 获取属性
session.getAttribute("username");
session.getAttribute("password");
3、 session,cookies的超时设置
1 在.yml里面或.xml配置文件里面
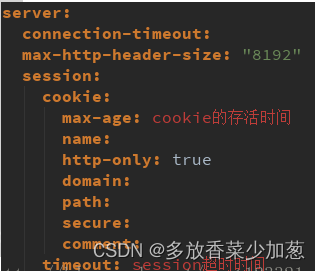
2 在创建session时
session.setMaxInactiveInterval(30*60);//以秒为单位,即在没有活动30分钟后,session将失效
四、 session的监听
监听session主要有三个接口,用这两个就够用了。
实现接口HttpSessionListener下的sessionCreated();//当session创建时。
和sessionDestroyed();//当session被销毁或超时时。
实现接口HttpSessionAttributeListener下的 attributeAdded() //当给session添加属性时
attributeRemoved();和attributeReplaced();
以下是简单的实现了在线人数统计的功能。
如果要更深刻的了解session的工作机制,多执行几次session的监听代码(可以参考一下的代码)。
@WebListener
public class SessionListener implements HttpSessionListener, HttpSessionAttributeListener{
 public static final Logger logger= LoggerFactory.getLogger(SessionListener.class);

    @Override
    public void  attributeAdded(HttpSessionBindingEvent httpSessionBindingEvent) {
        logger.info("--attributeAdded--");
        HttpSession session=httpSessionBindingEvent.getSession();
        logger.info("key----:"+httpSessionBindingEvent.getName());
        logger.info("value---:"+httpSessionBindingEvent.getValue());

    }

    @Override
    public void attributeRemoved(HttpSessionBindingEvent httpSessionBindingEvent) {
logger.info("--attributeRemoved--");
}

    @Override
    public void attributeReplaced(HttpSessionBindingEvent httpSessionBindingEvent) {
logger.info("--attributeReplaced--");
    }

    @Override
    public void sessionCreated(HttpSessionEvent event) {
        logger.info("---sessionCreated----");
        HttpSession session = event.getSession();
        ServletContext application = session.getServletContext();
        // 在application范围由一个HashSet集保存所有的session
        HashSet sessions = (HashSet) application.getAttribute("sessions");
        if (sessions == null) {
            sessions = new HashSet();
            application.setAttribute("sessions", sessions);
        }
        // 新创建的session均添加到HashSet集中
       sessions.add(session);
        // 可以在别处从application范围中取出sessions集合
        // 然后使用sessions.size()获取当前活动的session数,即为“在线人数”
    }

    @Override
    public void sessionDestroyed(HttpSessionEvent event) throws ClassCastException {
        logger.info("---sessionDestroyed----");
        HttpSession session = event.getSession();
        logger.info("deletedSessionId: "+session.getId());
        System.out.println(session.getCreationTime());
        System.out.println(session.getLastAccessedTime());
        ServletContext application = session.getServletContext();
        HashSet sessions = (HashSet) application.getAttribute("sessions");
        // 销毁的session均从HashSet集中移除
        sessions.remove(session);
    }

}


 1418
1418


 被折叠的 条评论
为什么被折叠?
被折叠的 条评论
为什么被折叠?
 到【灌水乐园】发言


