


1. 前言
最近公司要加个在线富文本编辑的功能,选型和客制化的工作都交给我了,最后在 Jodit、Quill、TinyMCE 等等里选了 Jodit,记录一下其中一些功能客制化的过程。
2. 以不修改源代码的方式修改部分 Jodit 插件
Jodit 实例上暴露了很多非侵入式修改插件功能的方法,基本上有两种方法(需要看下源码里其他插件对此插件的依赖关系,不然可能改了没用)。
2.1. 修改Jodit config里的controls[${pluginName}].exec方法
这种方法需要插件源码包含如下代码才能修改,一般 toolbar 上的大部分按钮插件都能通过这种方法来修改:
Config.prototype.controls.[`${pluginName}`] = {
	exec: (editor) => { ... }
	...
}
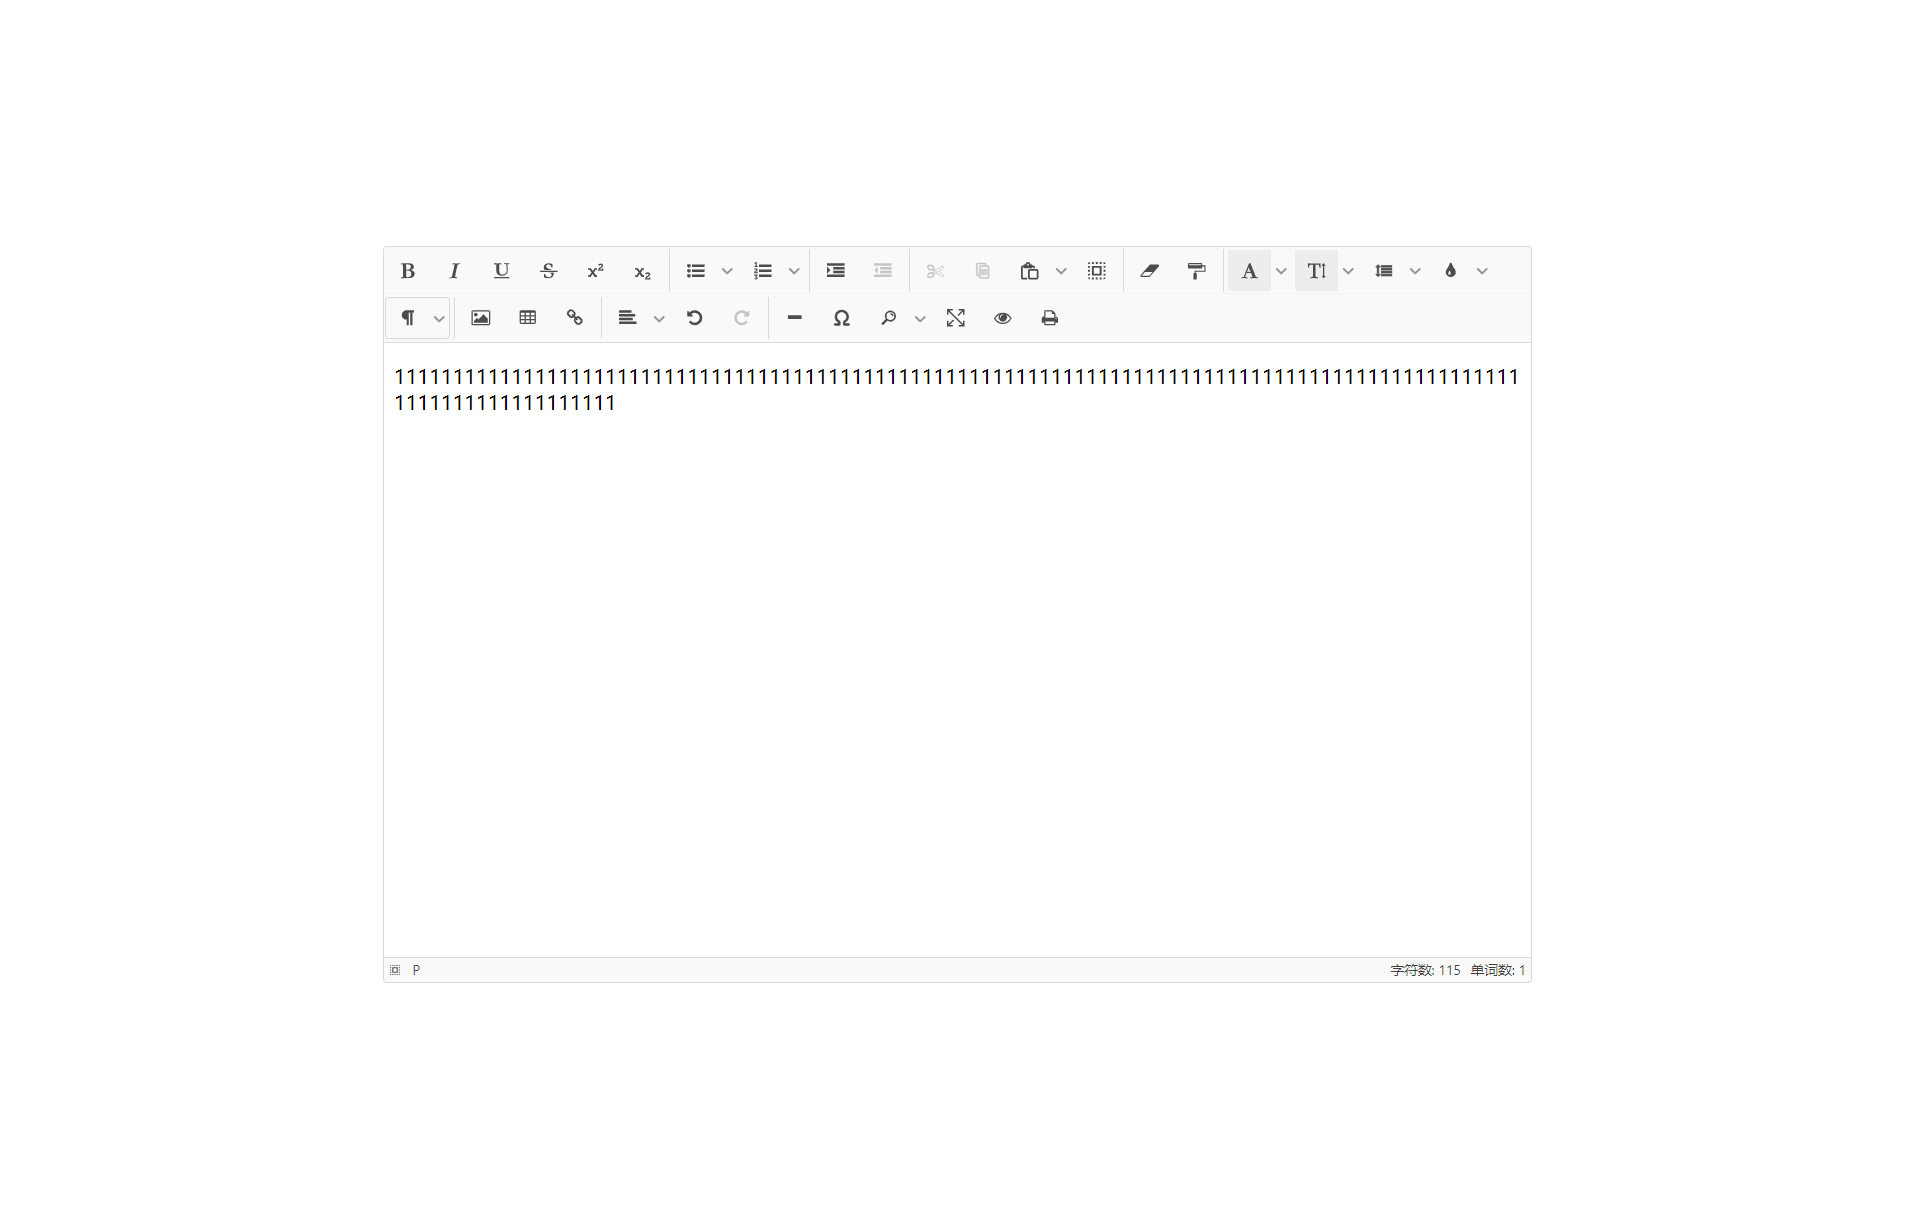
以print打印插件为例,原本的print在打印时会带出页眉页脚,且在文本超长不换行的情况下,打印会超出可视范围导致被截断,如图:
可以先去源码里把exec函数中的逻辑复制出来,放到config.controls下,然后修改需要修改的部分:
 // jodit/esm/plugins/print/print.js 源码,主要部分,其中打印内容和打印页样式是我们需要修改的地方

 exec: (editor) => {
     const iframe = editor.create.element('iframe');
     ...
     const myWindow = iframe.contentWindow;
     if (myWindow) {
         editor.e
             .on(myWindow, 'onbeforeunload onafterprint', afterFinishPrint)
             .on(editor.ow, 'mousemove', afterFinishPrint);
         if (editor.o.iframe) {
             editor.e.fire('generateDocumentStructure.iframe', myWindow.document, editor);
             myWindow.document.body.innerHTML = editor.value;
         }
         else {
             // 打印内容
             myWindow.document.write('<!doctype html><html lang="' +
                 defaultLanguage(editor.o.language) +
                 '"><head><title></title></head><style>' +
                 generateCriticalCSS(editor) +
                 '</style><body></body></html>');
             myWindow.document.close();
             previewBox(editor, undefined, 'px', myWindow.document.body);
         }
         const style = myWindow.document.createElement('style');
         // 打印页样式
         style.innerHTML = `@media print {
   			body {
     			-webkit-print-color-adjust: exact;
   			}
		 }`;
         myWindow.document.head.appendChild(style);
         myWindow.focus();
         myWindow.print();
     }
 }


 // config.controls.print 修改的部分,以修复无法换行、删除页眉页脚为例

 const config = {
     ...
     controls: {
         ...
         print: {
             exec: (editor: any) => {
 				const iframe = editor.create.element('iframe');
				...
    			const myWindow = iframe.contentWindow;
    			if (myWindow) {
        			...
        			style.innerHTML = `
            			@media print {
                			@page {
                				margin-top: 0;
                				margin-bottom: 0;
              				}
							body {
								word-break: break-word;
								-webkit-print-color-adjust: exact;
								margin: 1.6cm;
							}
			 			}
					`;
        			myWindow.document.head.appendChild(style);
        			console.log(myWindow.document.head)
        			myWindow.focus();
        			myWindow.print();
    			}
 			}
         }
     }
 }
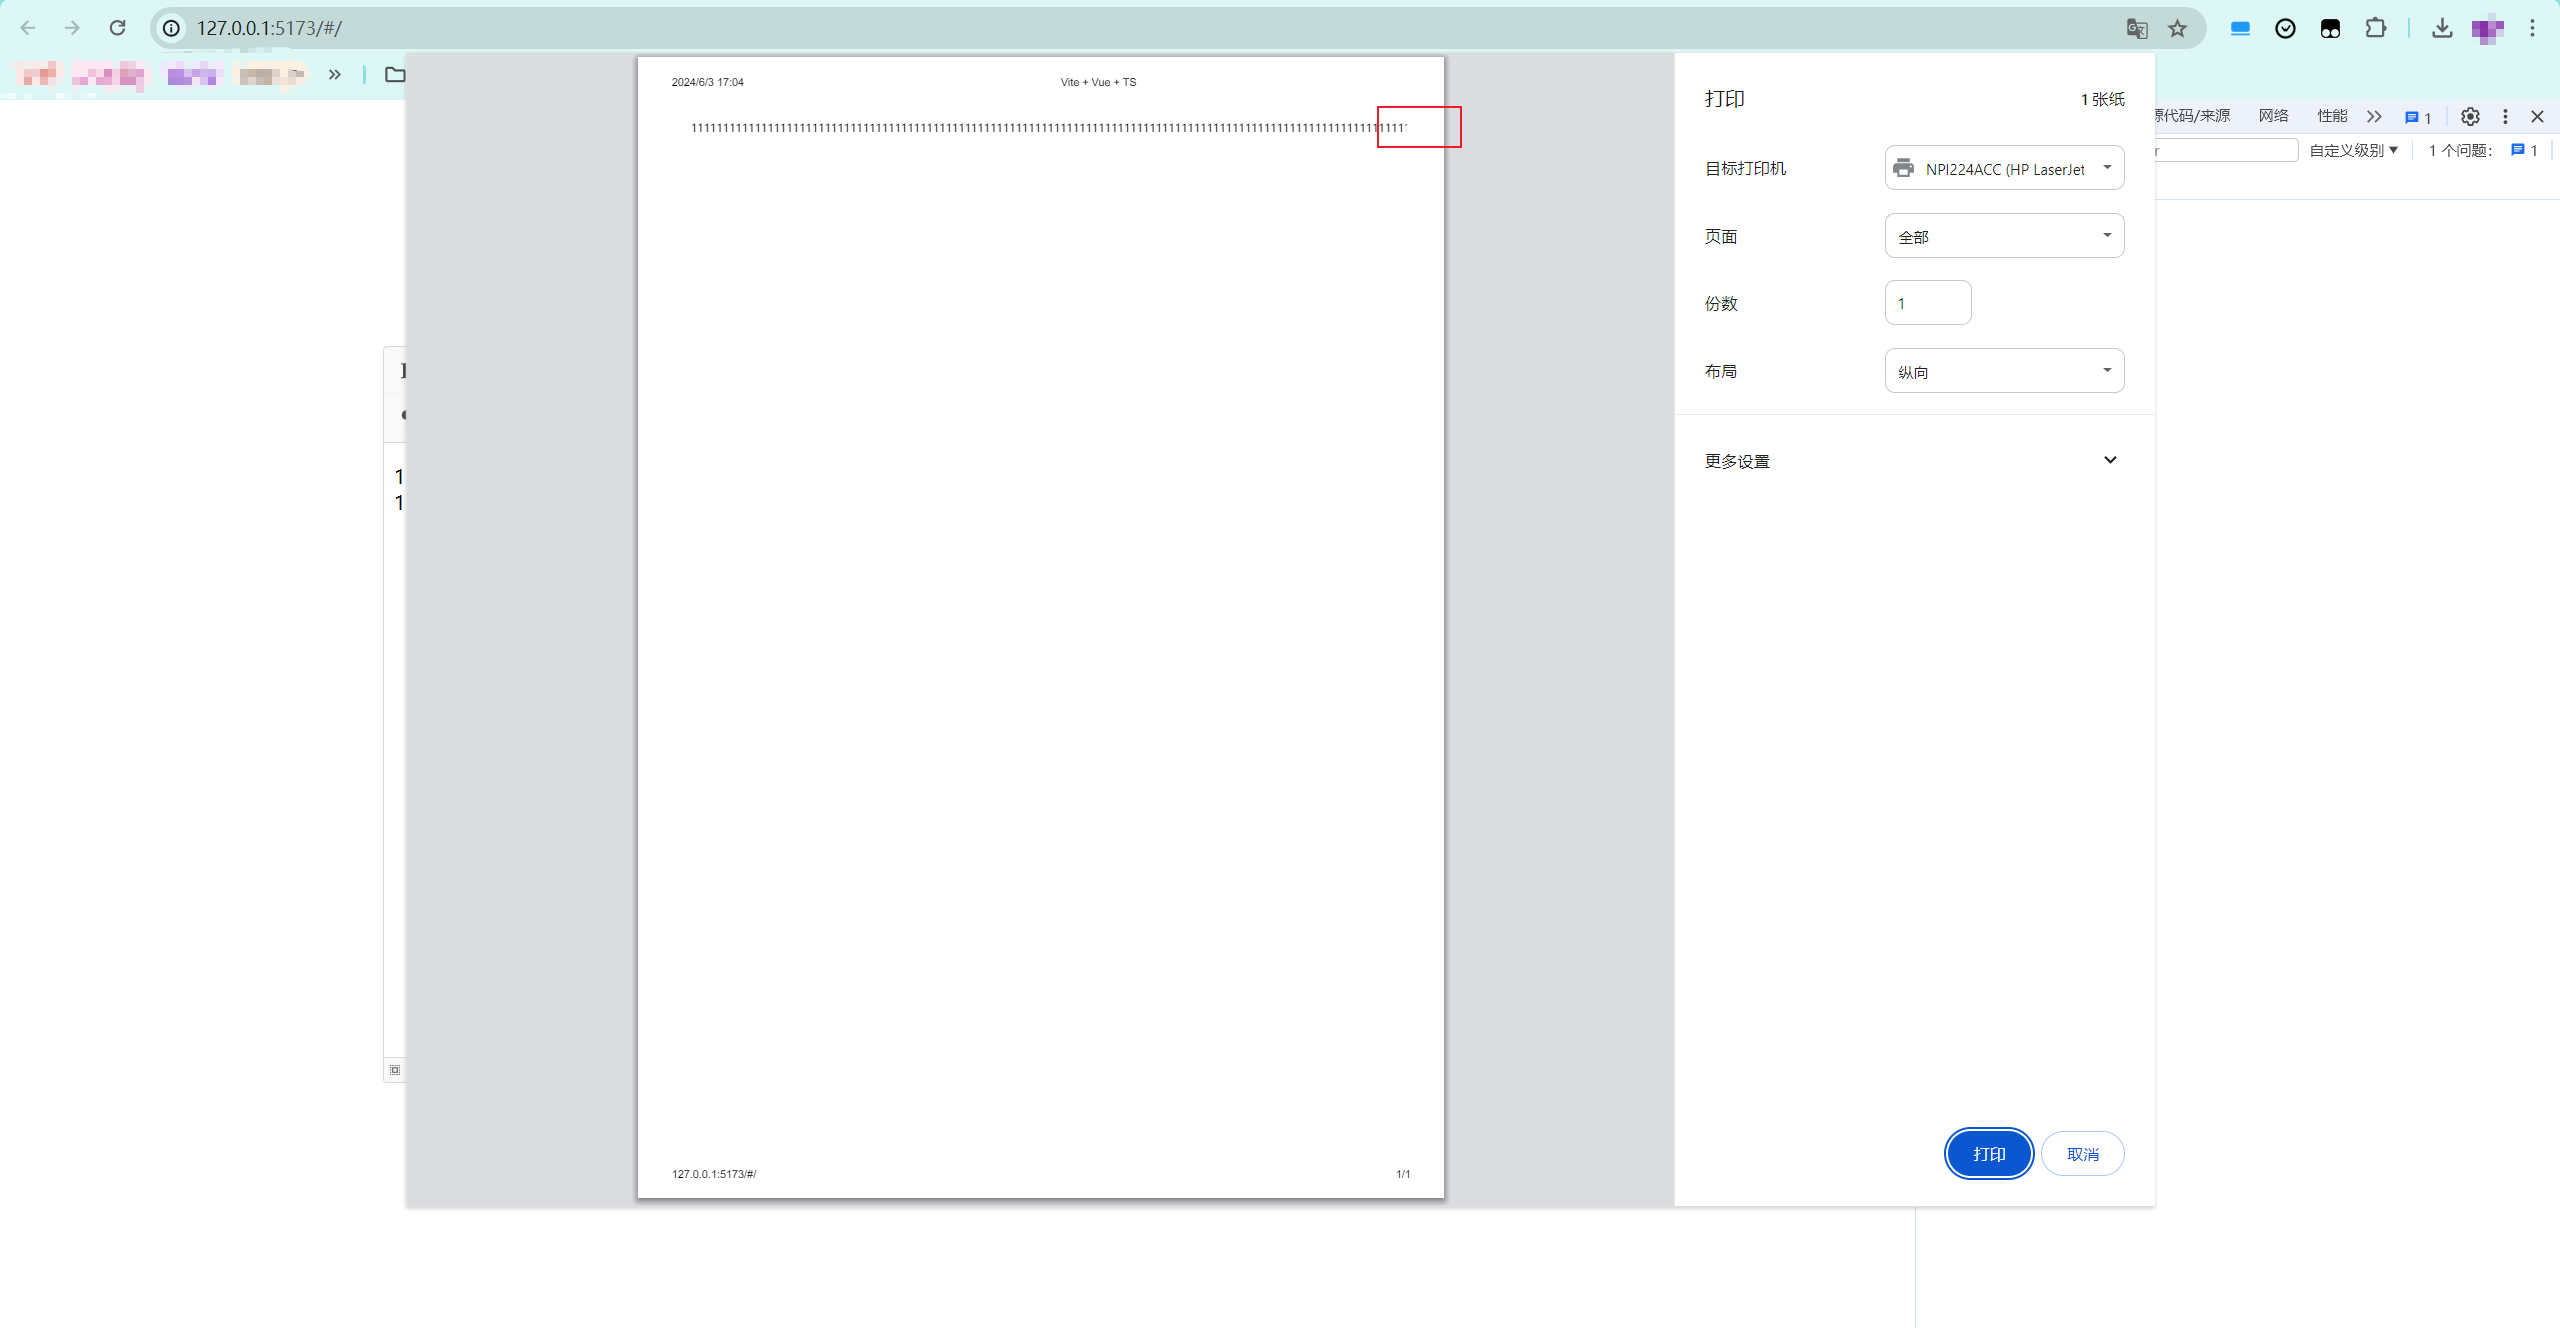
这样修改完之后再打印就不会出现这个问题了:
2.2 通过 Jodit 的PluginSystem插件系统修改
Jodit 里大部分插件(富文本编辑器运行周期只需要一个实例的插件,例如stat 文本状态统计插件)的类都被注册在 Jodit 实例的 pluginSystem上,它是一个Map(想看定义的话就自己去看源码吧,这里就不给了),因为pluginSystem是暴露的,因此可以通过重新挂载的方式来覆盖原先的plugin class 定义,以stat为例,操作如下。
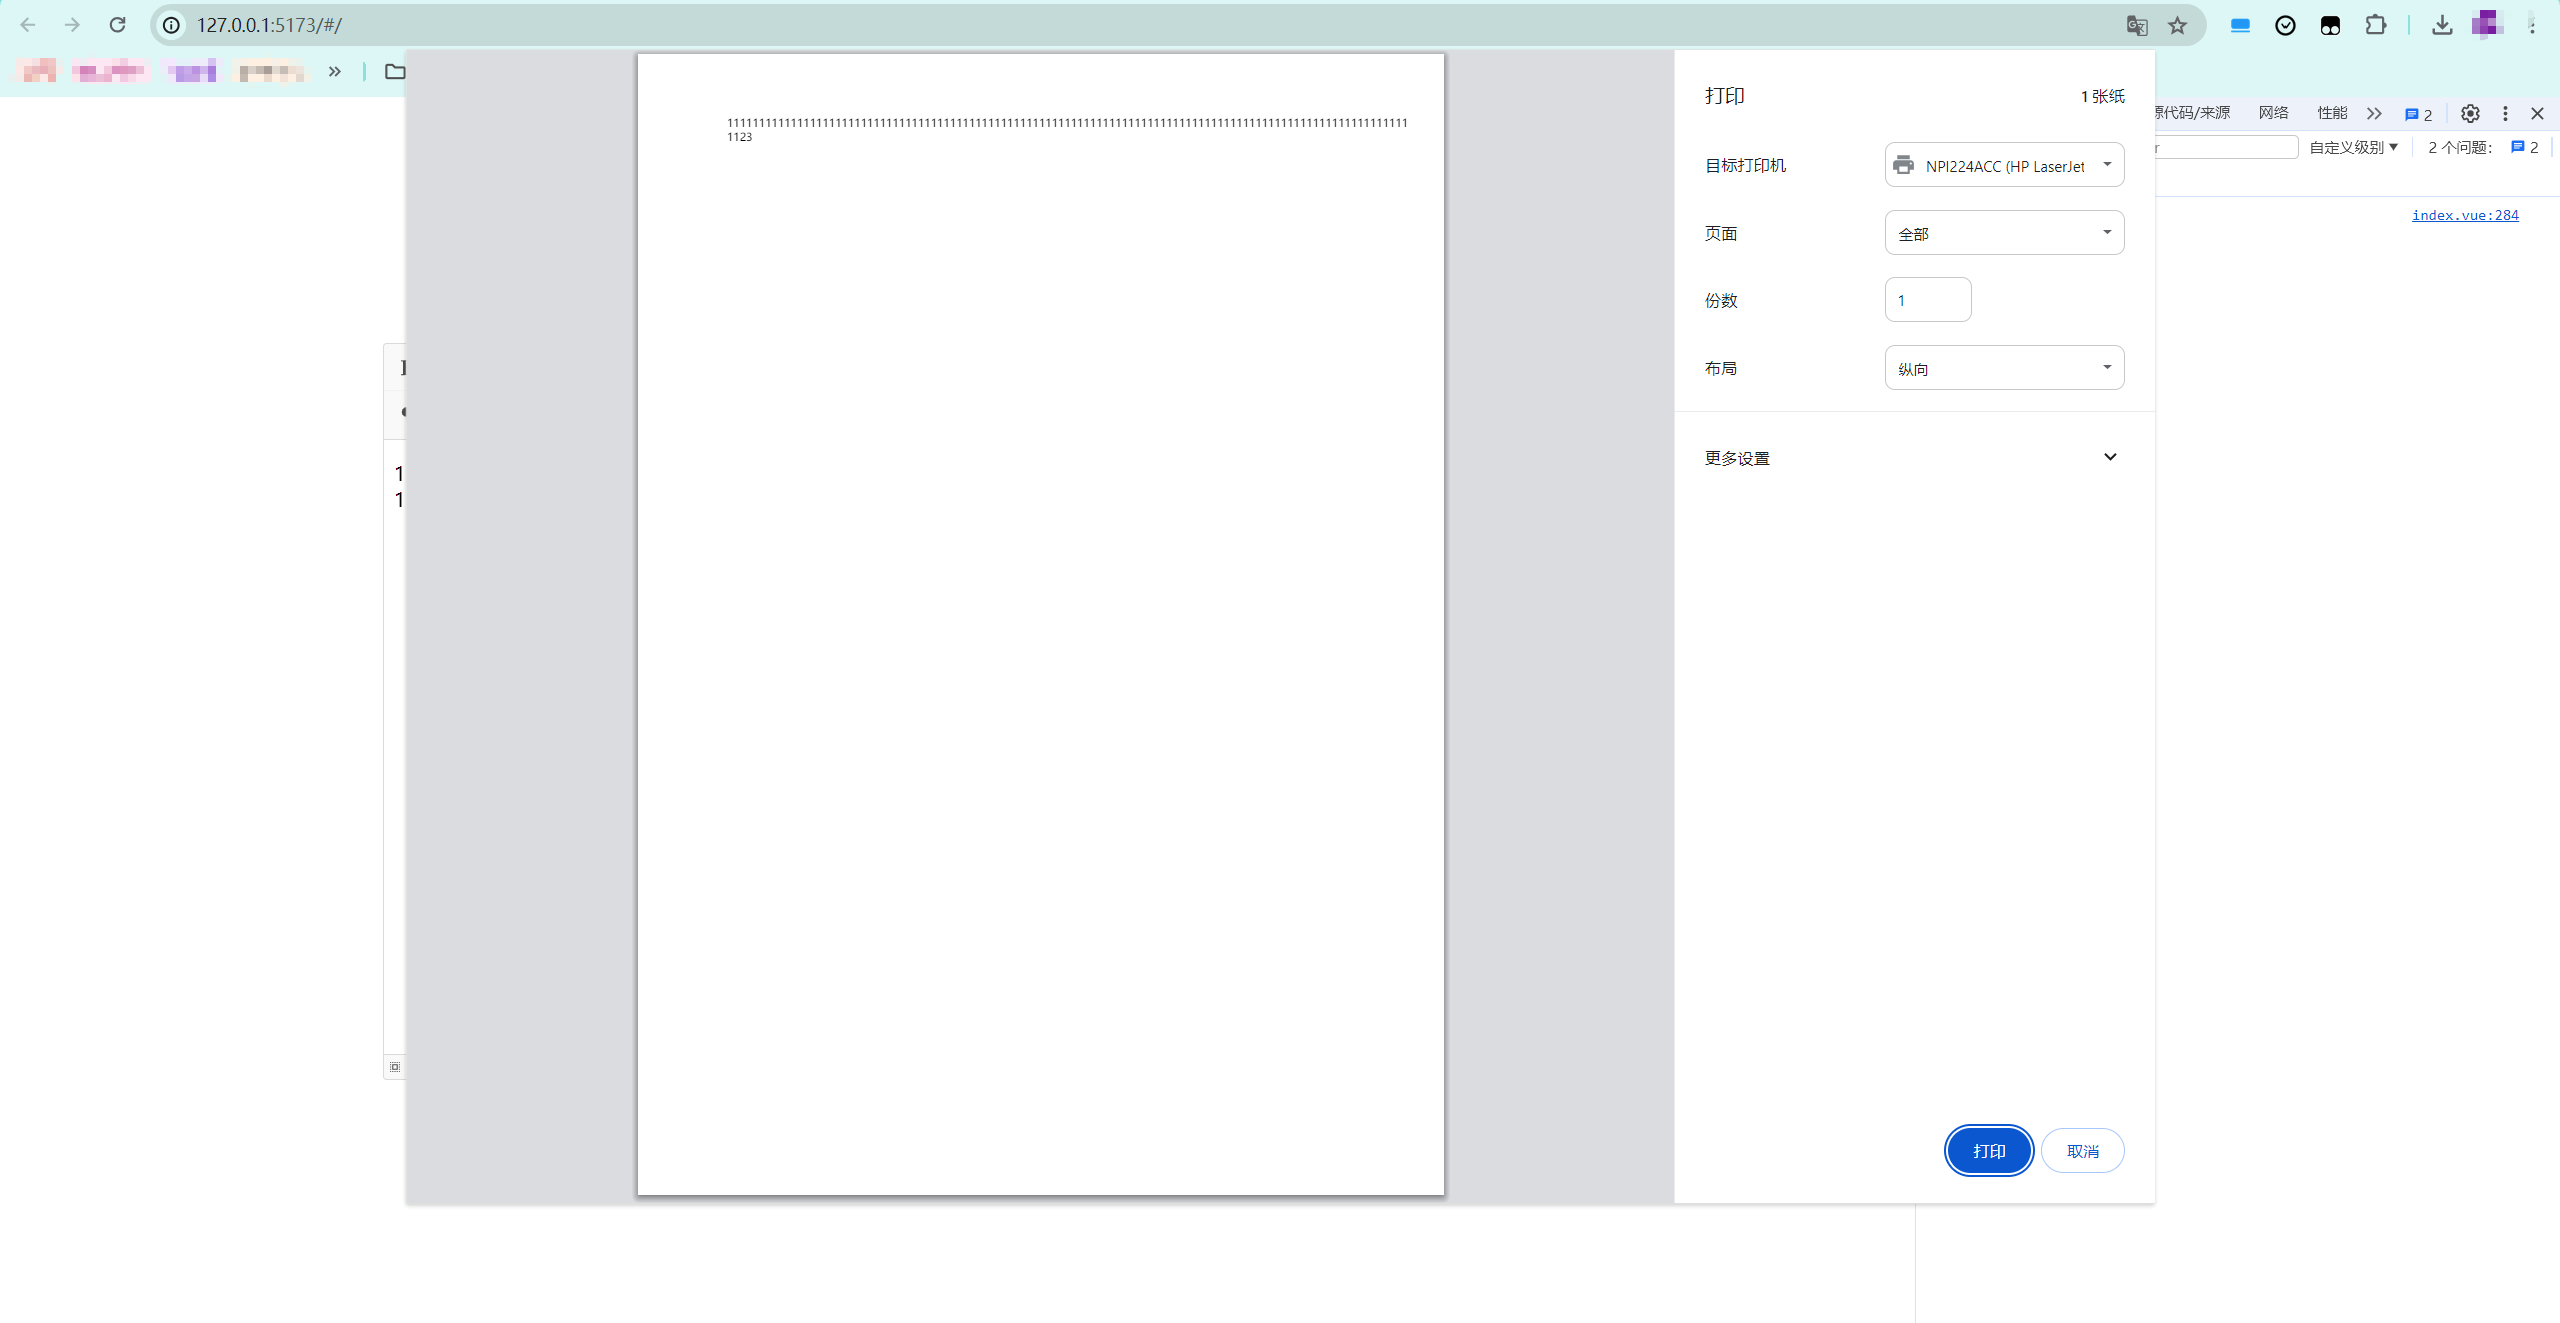
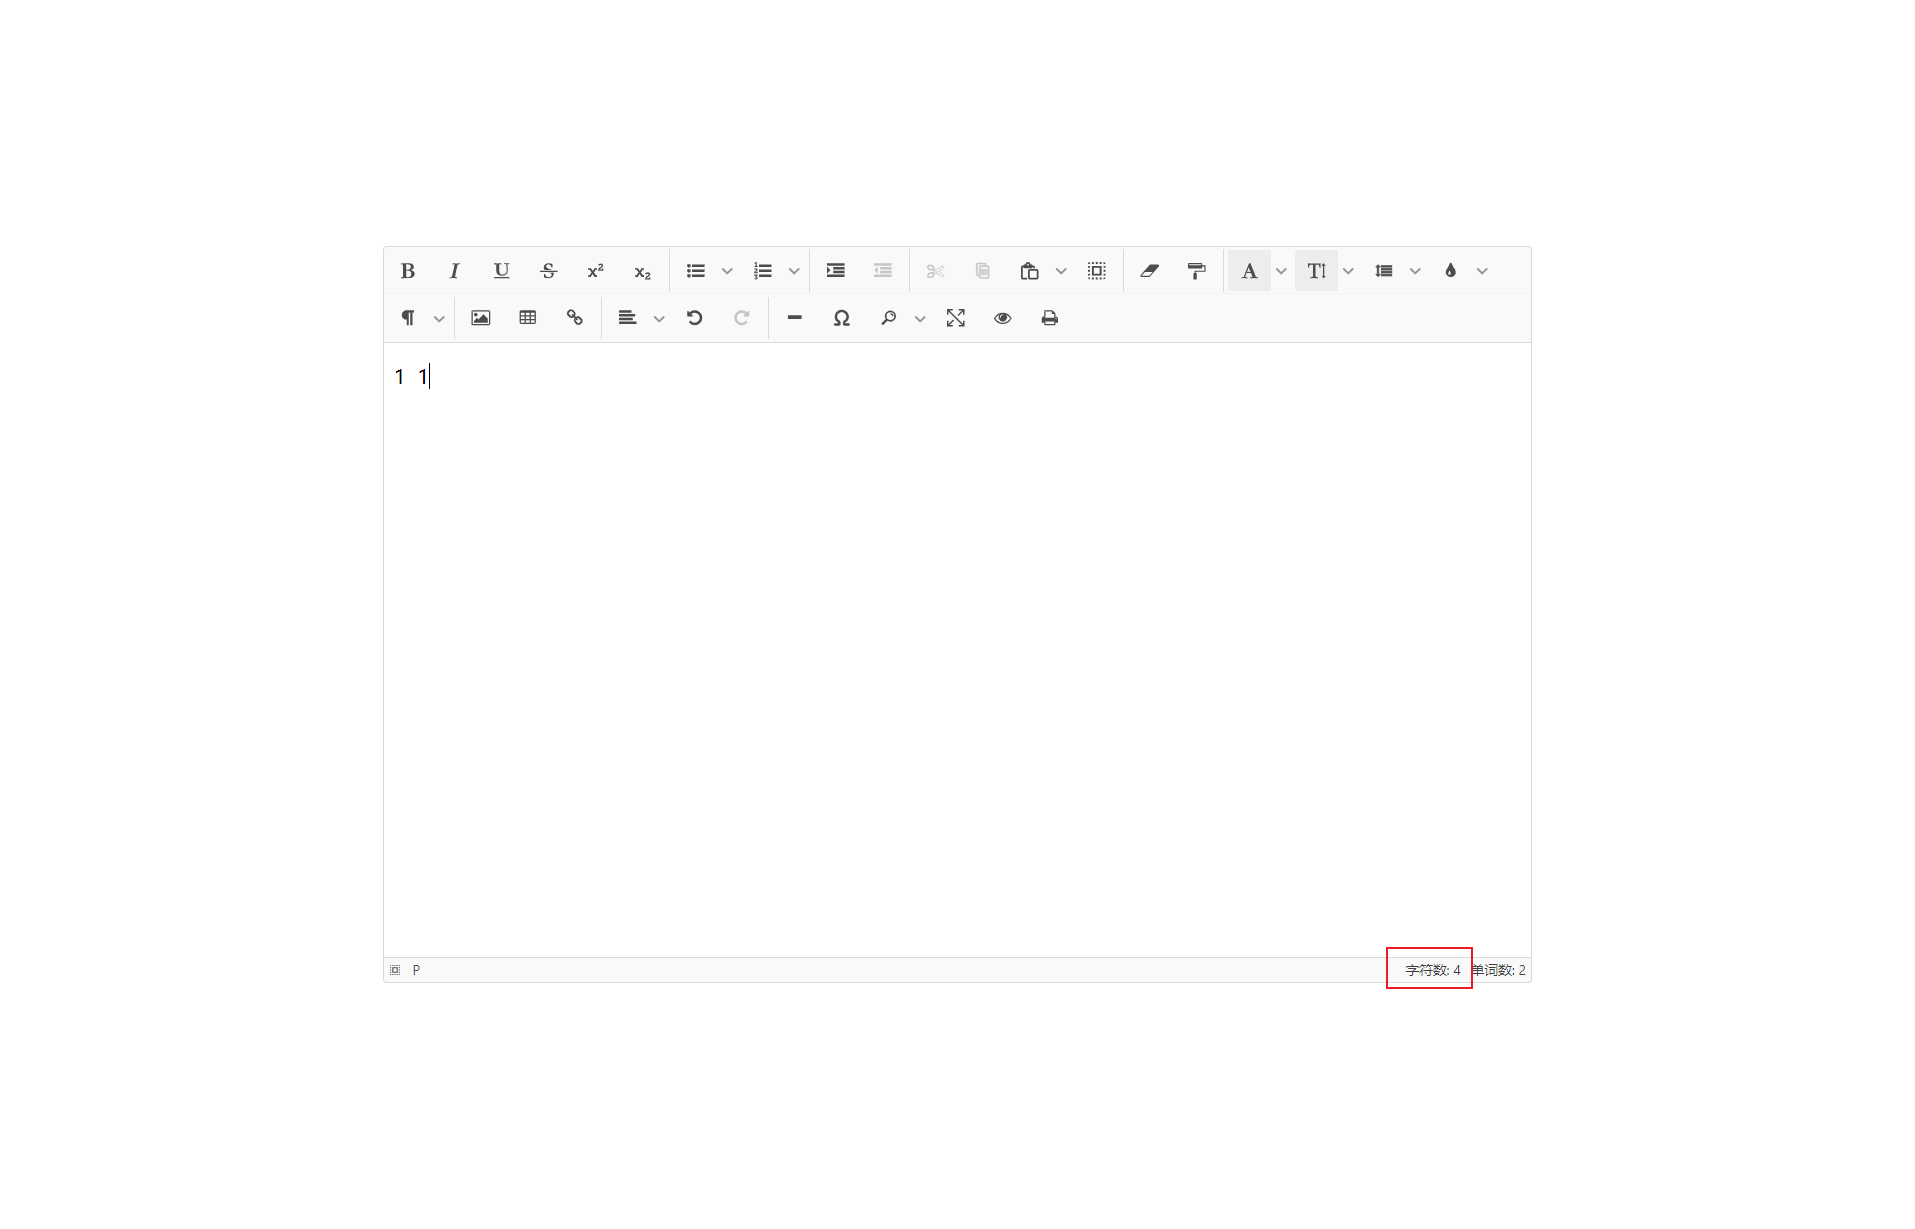
原本的stat统计字符数是不计算空格的,如图:
原因在于源代码里的这一段:
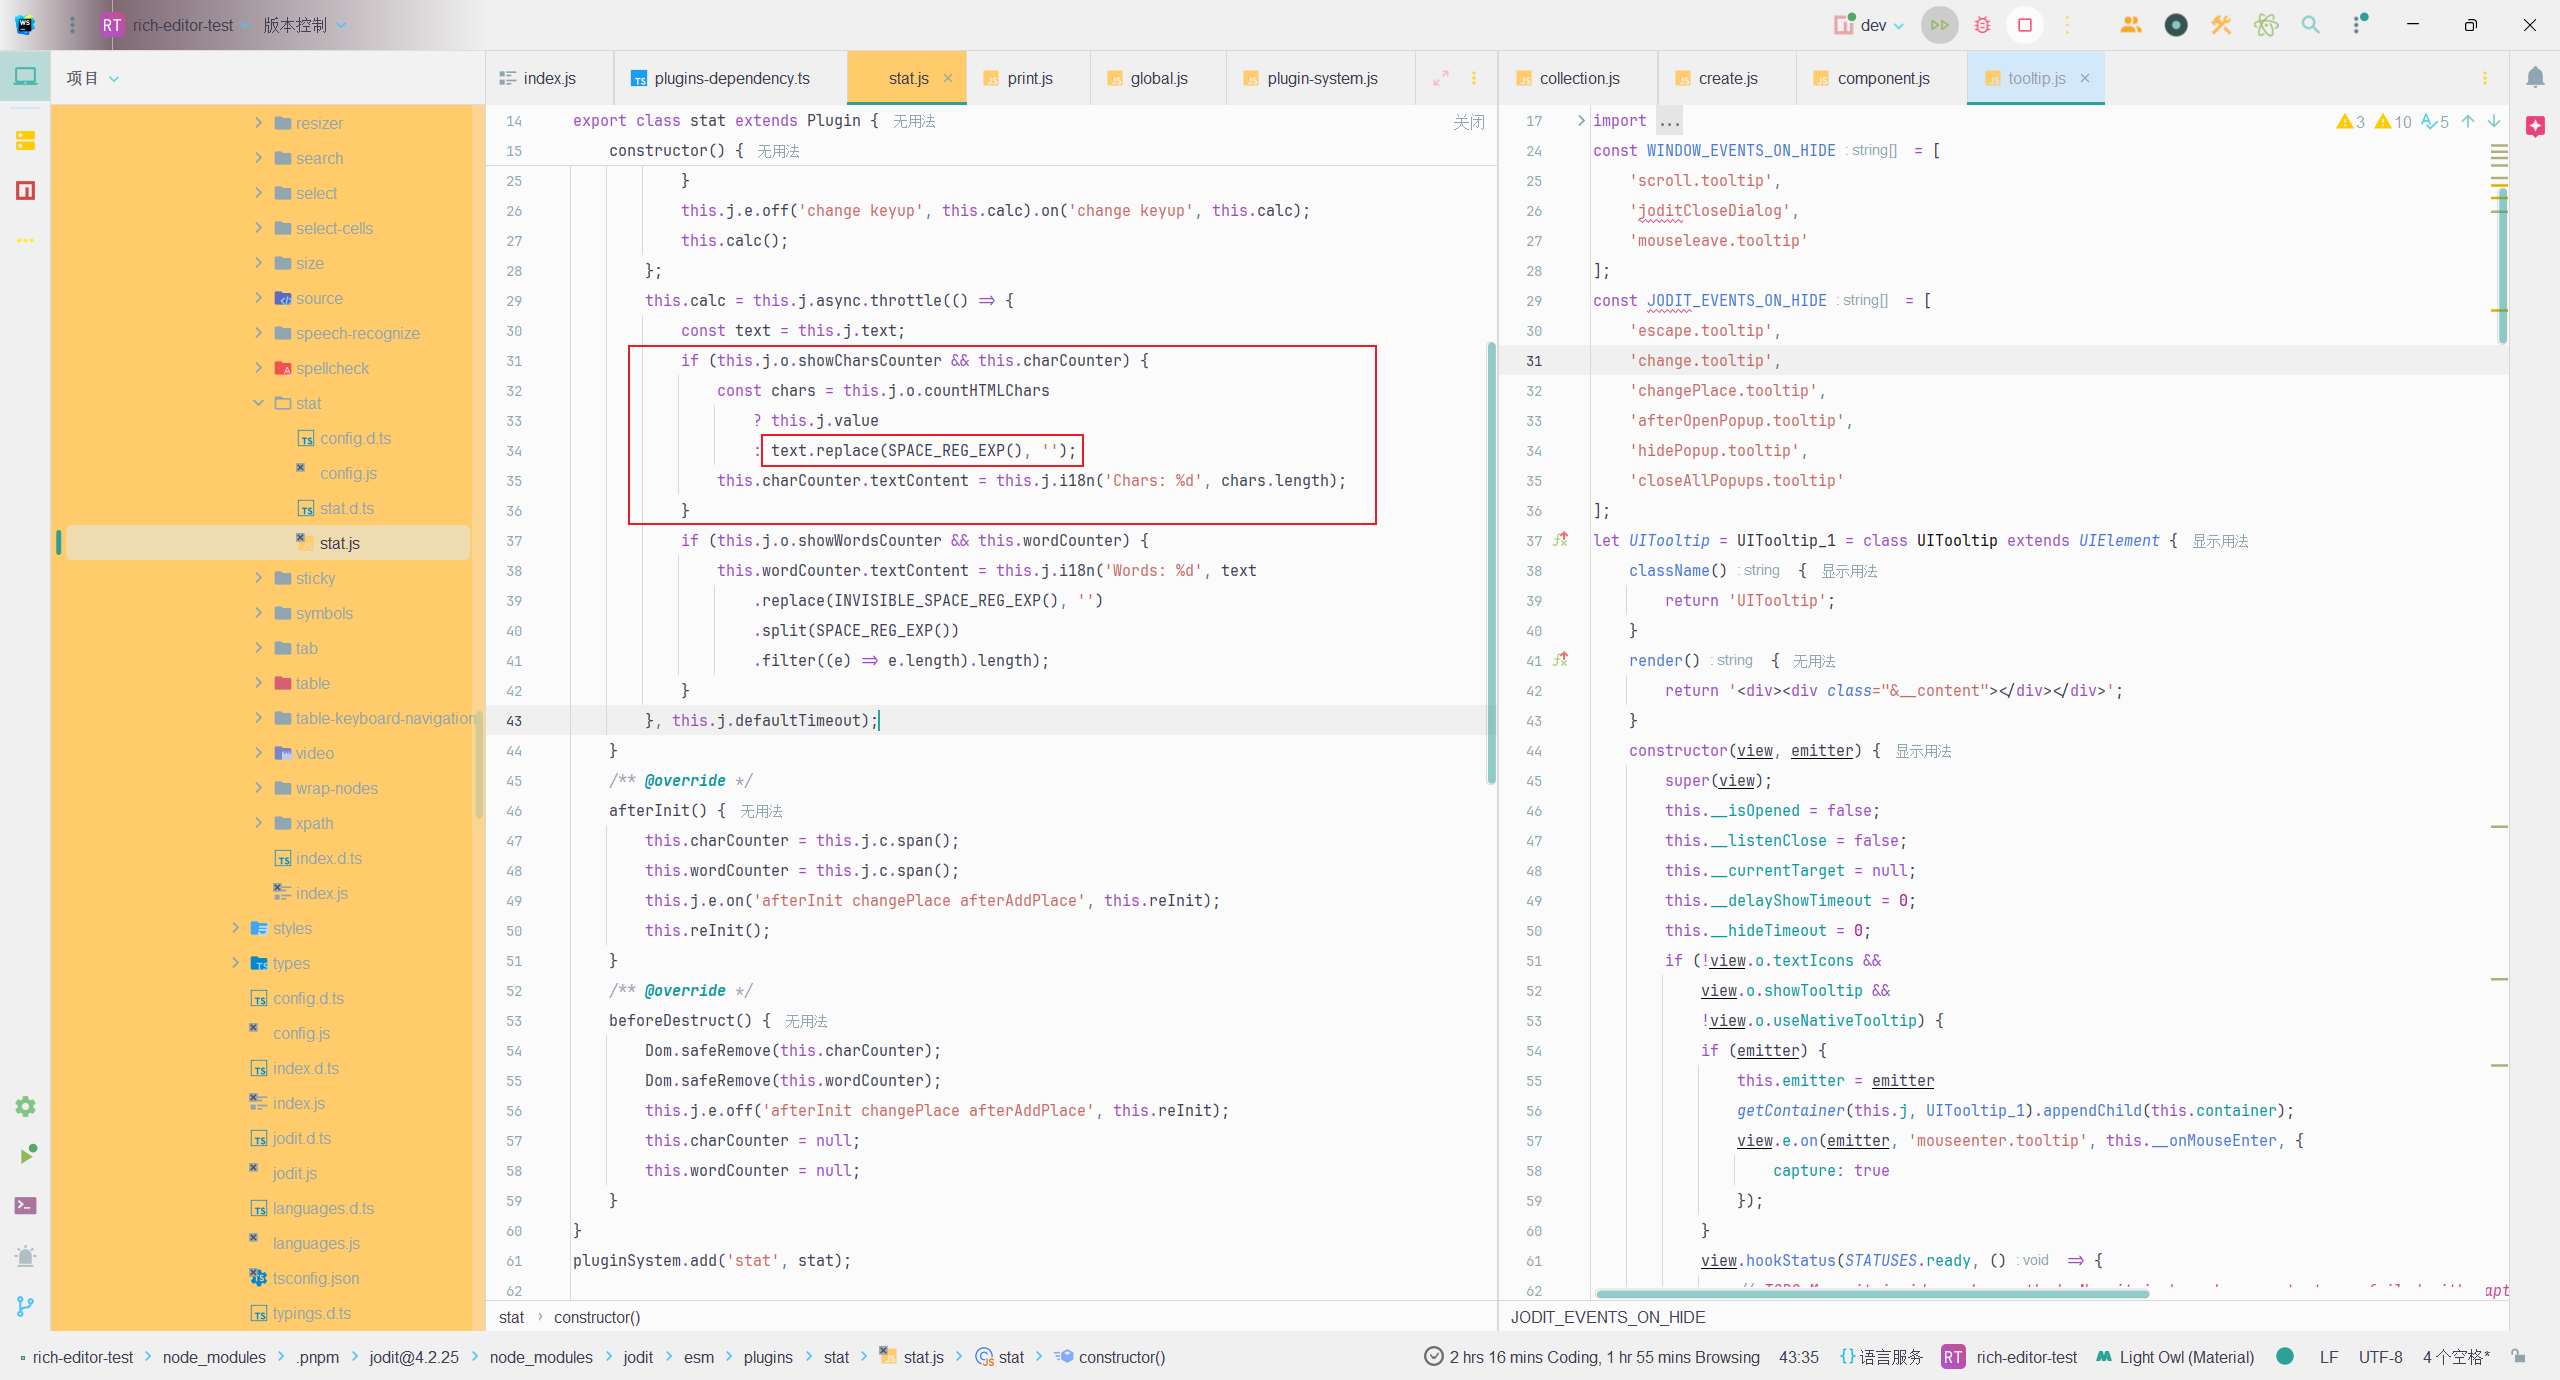
其中SPACE_REG_EXP的定义如下,过滤了\s即空格:
export const SPACE_REG_EXP = () => /[\s\n\t\r\uFEFF\u200b]+/g;
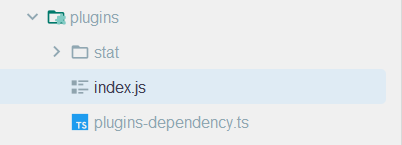
通过覆盖pluginSystem修改的话同样先复制一份源码出来,然后把上述SPACE_REG_EXP里的\s去除,形成类似下图的文件结构(别忘了改复制出来的源码的 import 路径):
然后在 Jodit 类引入时覆盖定义:
import { Jodit } from "jodit";
import './plugins-dependency';
import { stat } from './stat/stat.js'

Jodit.plugins.remove('stat')
Jodit.plugins.add('stat', stat)

export { Jodit };
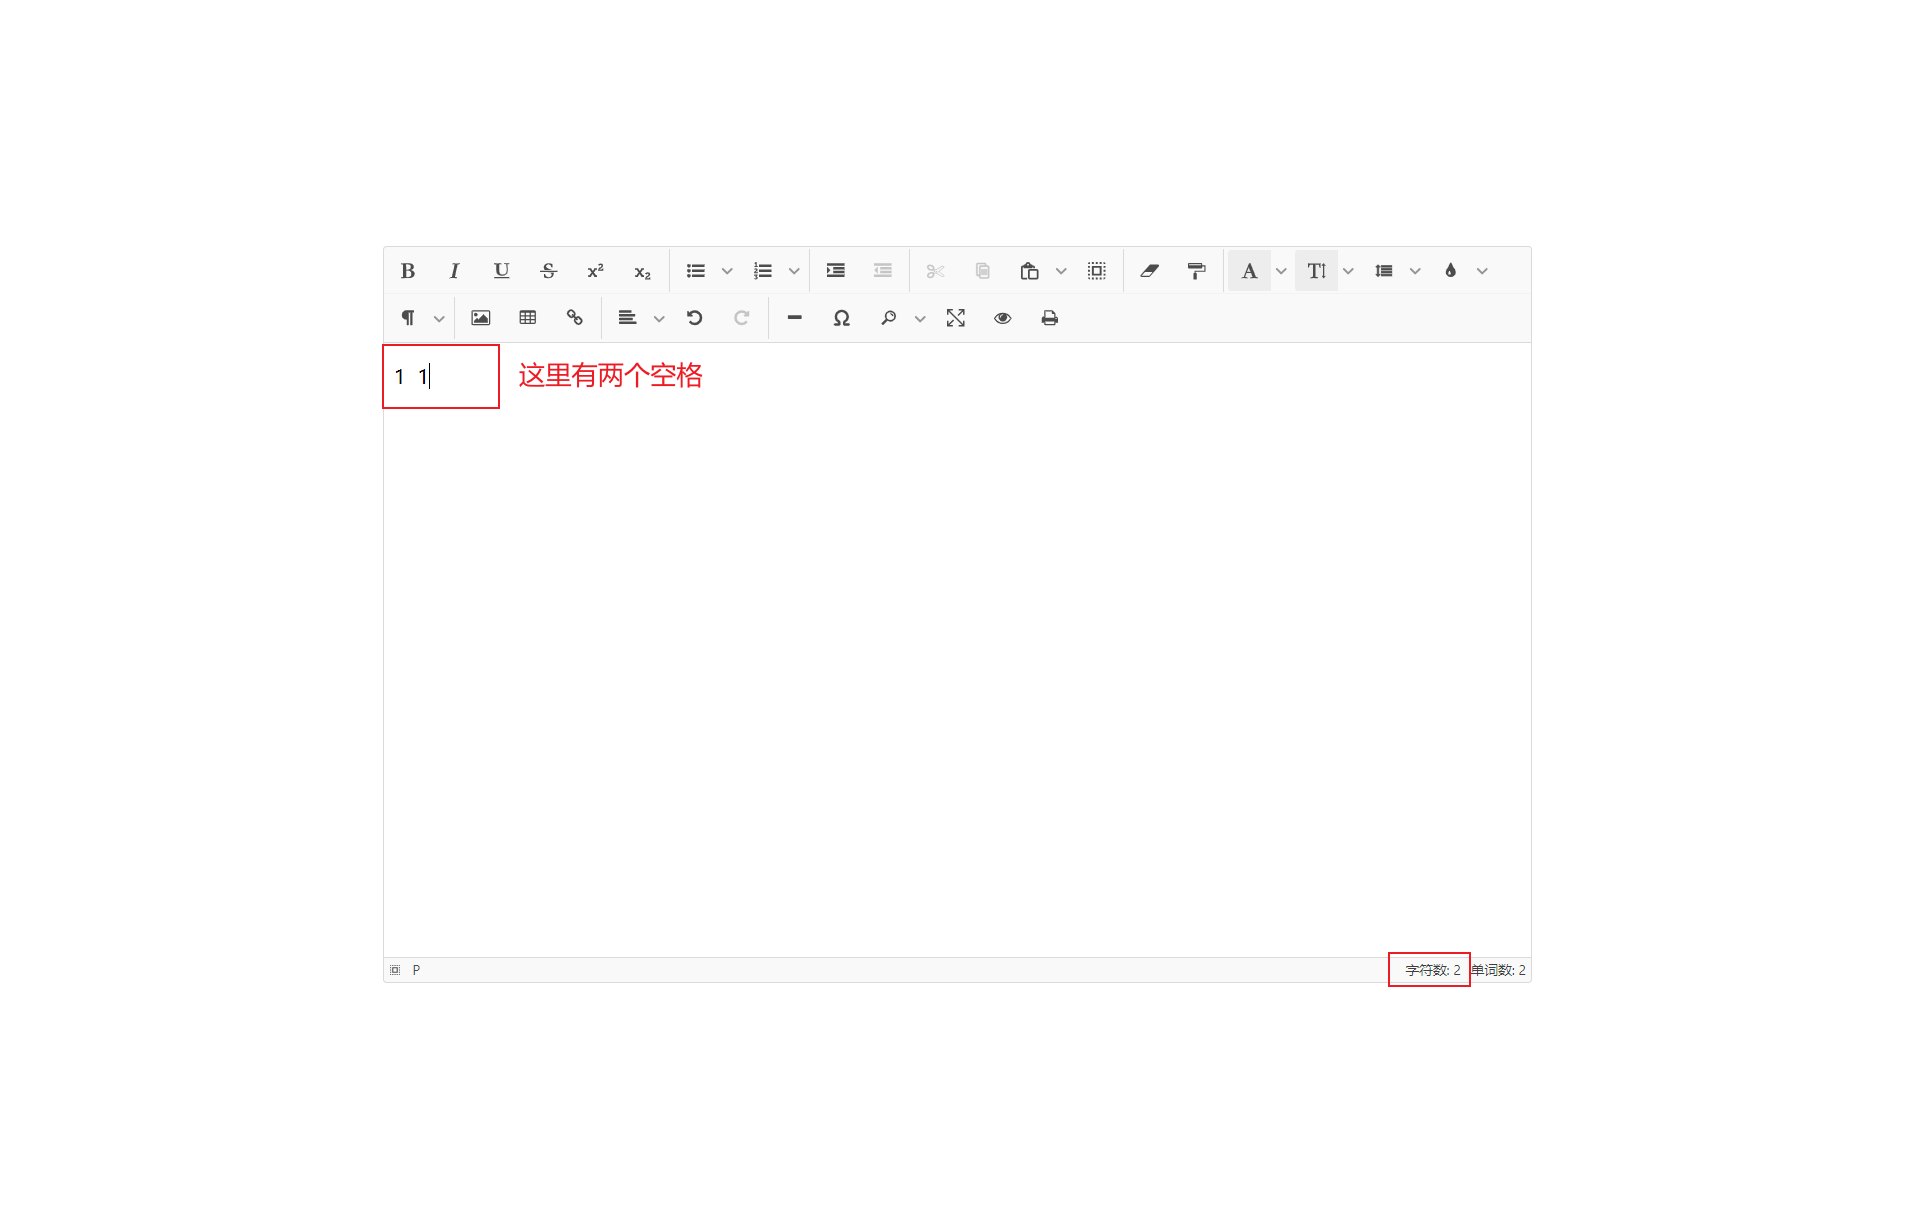
可以看见成功修改了。
3. 修改 Jodit 源代码(以增加 popup 内部 iconBtn 的 tooltip 为例)
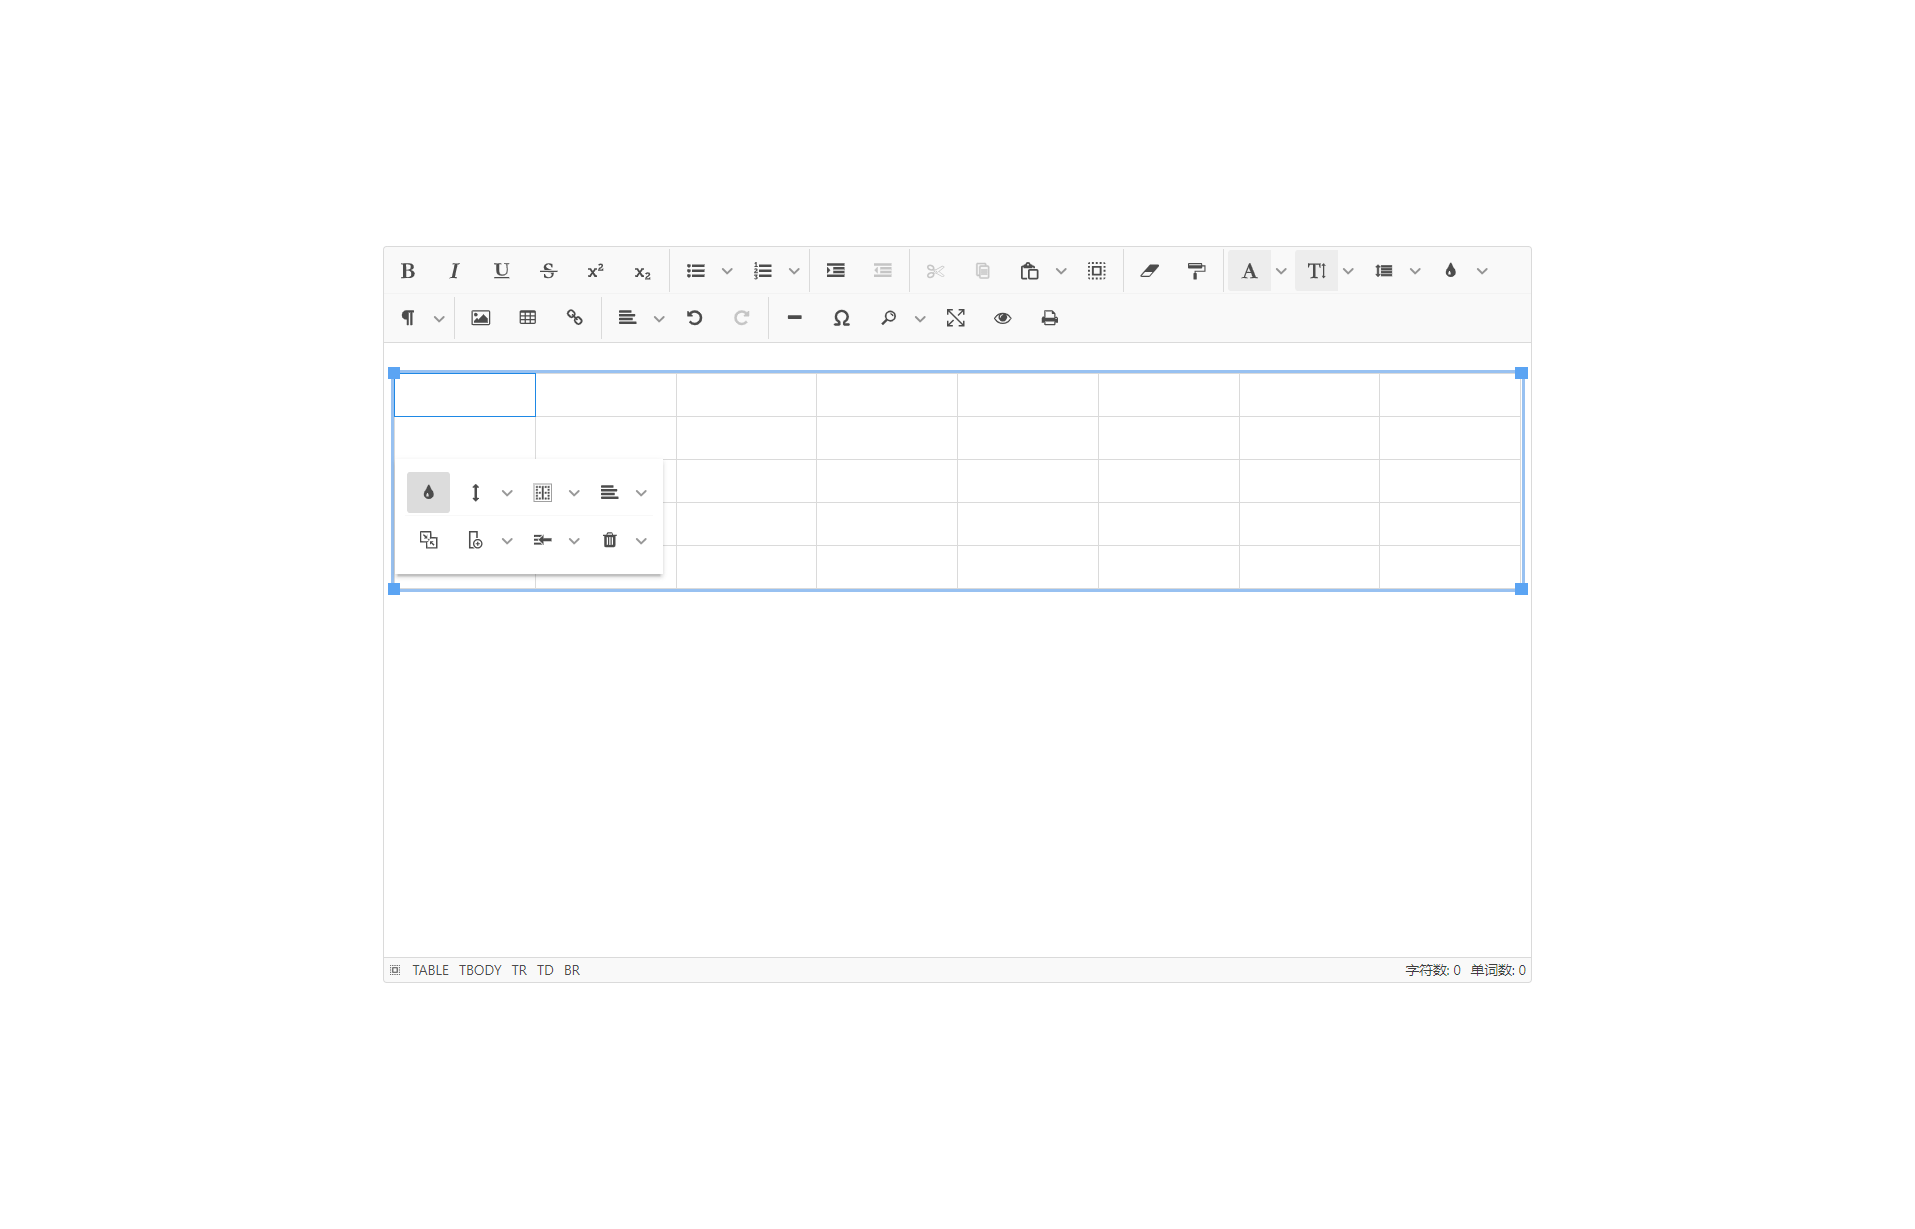
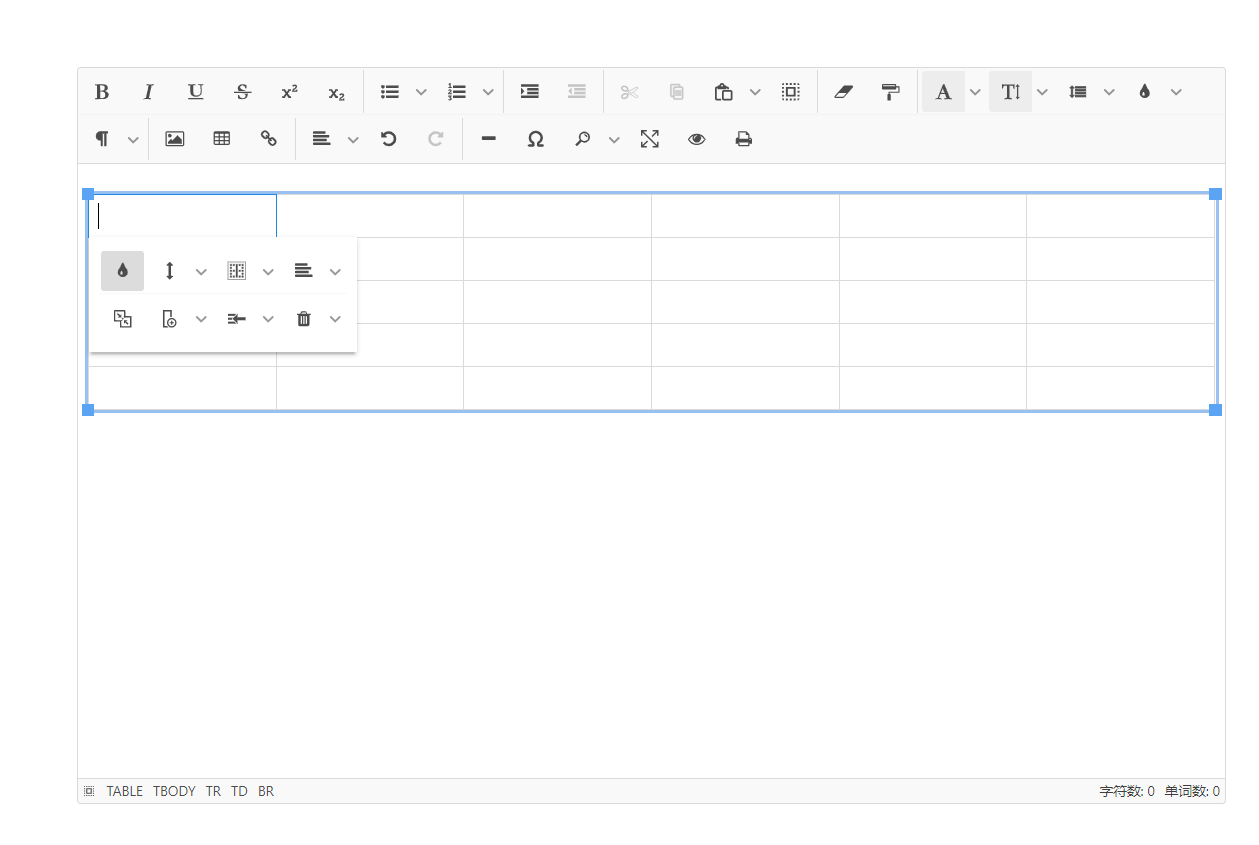
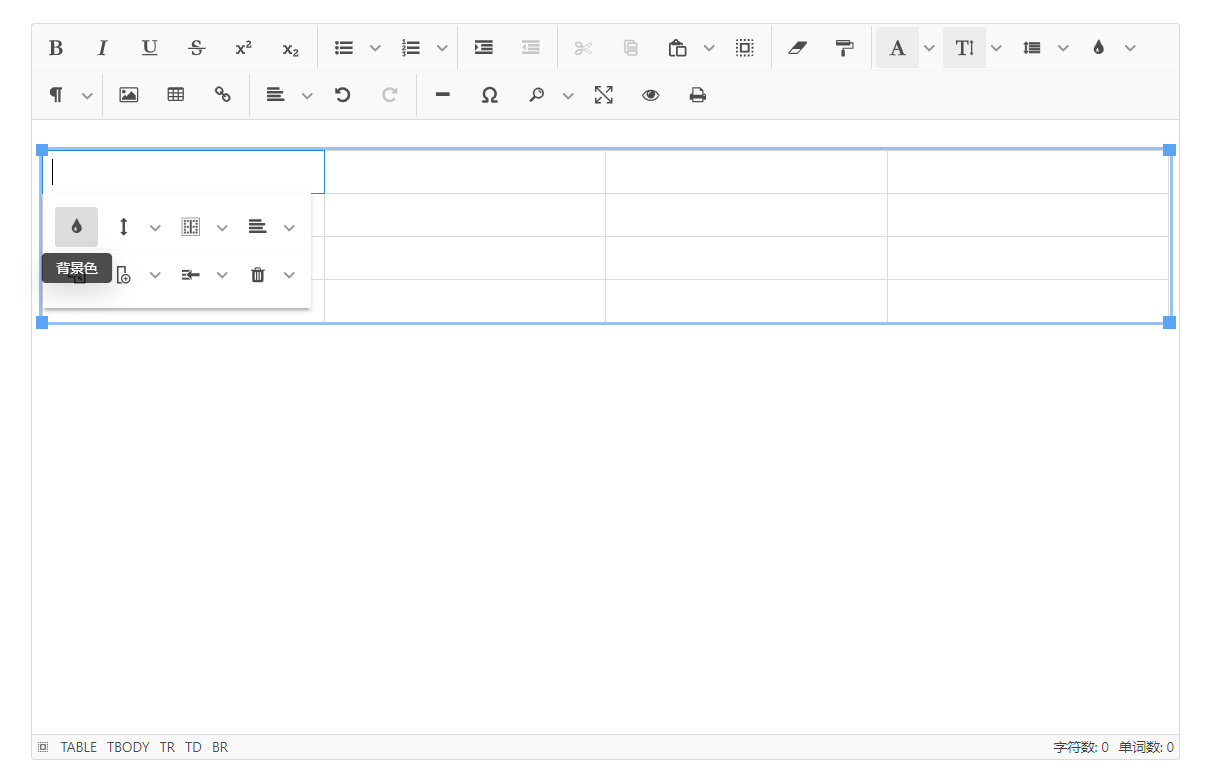
Jodit 里在inline-popup插件构筑的 popup 内部的所有 iconBtn 是无法显示其 tooltip 的,如图:
而正常的内置 iconBtn 都应该是有 tooltip 的,如图:
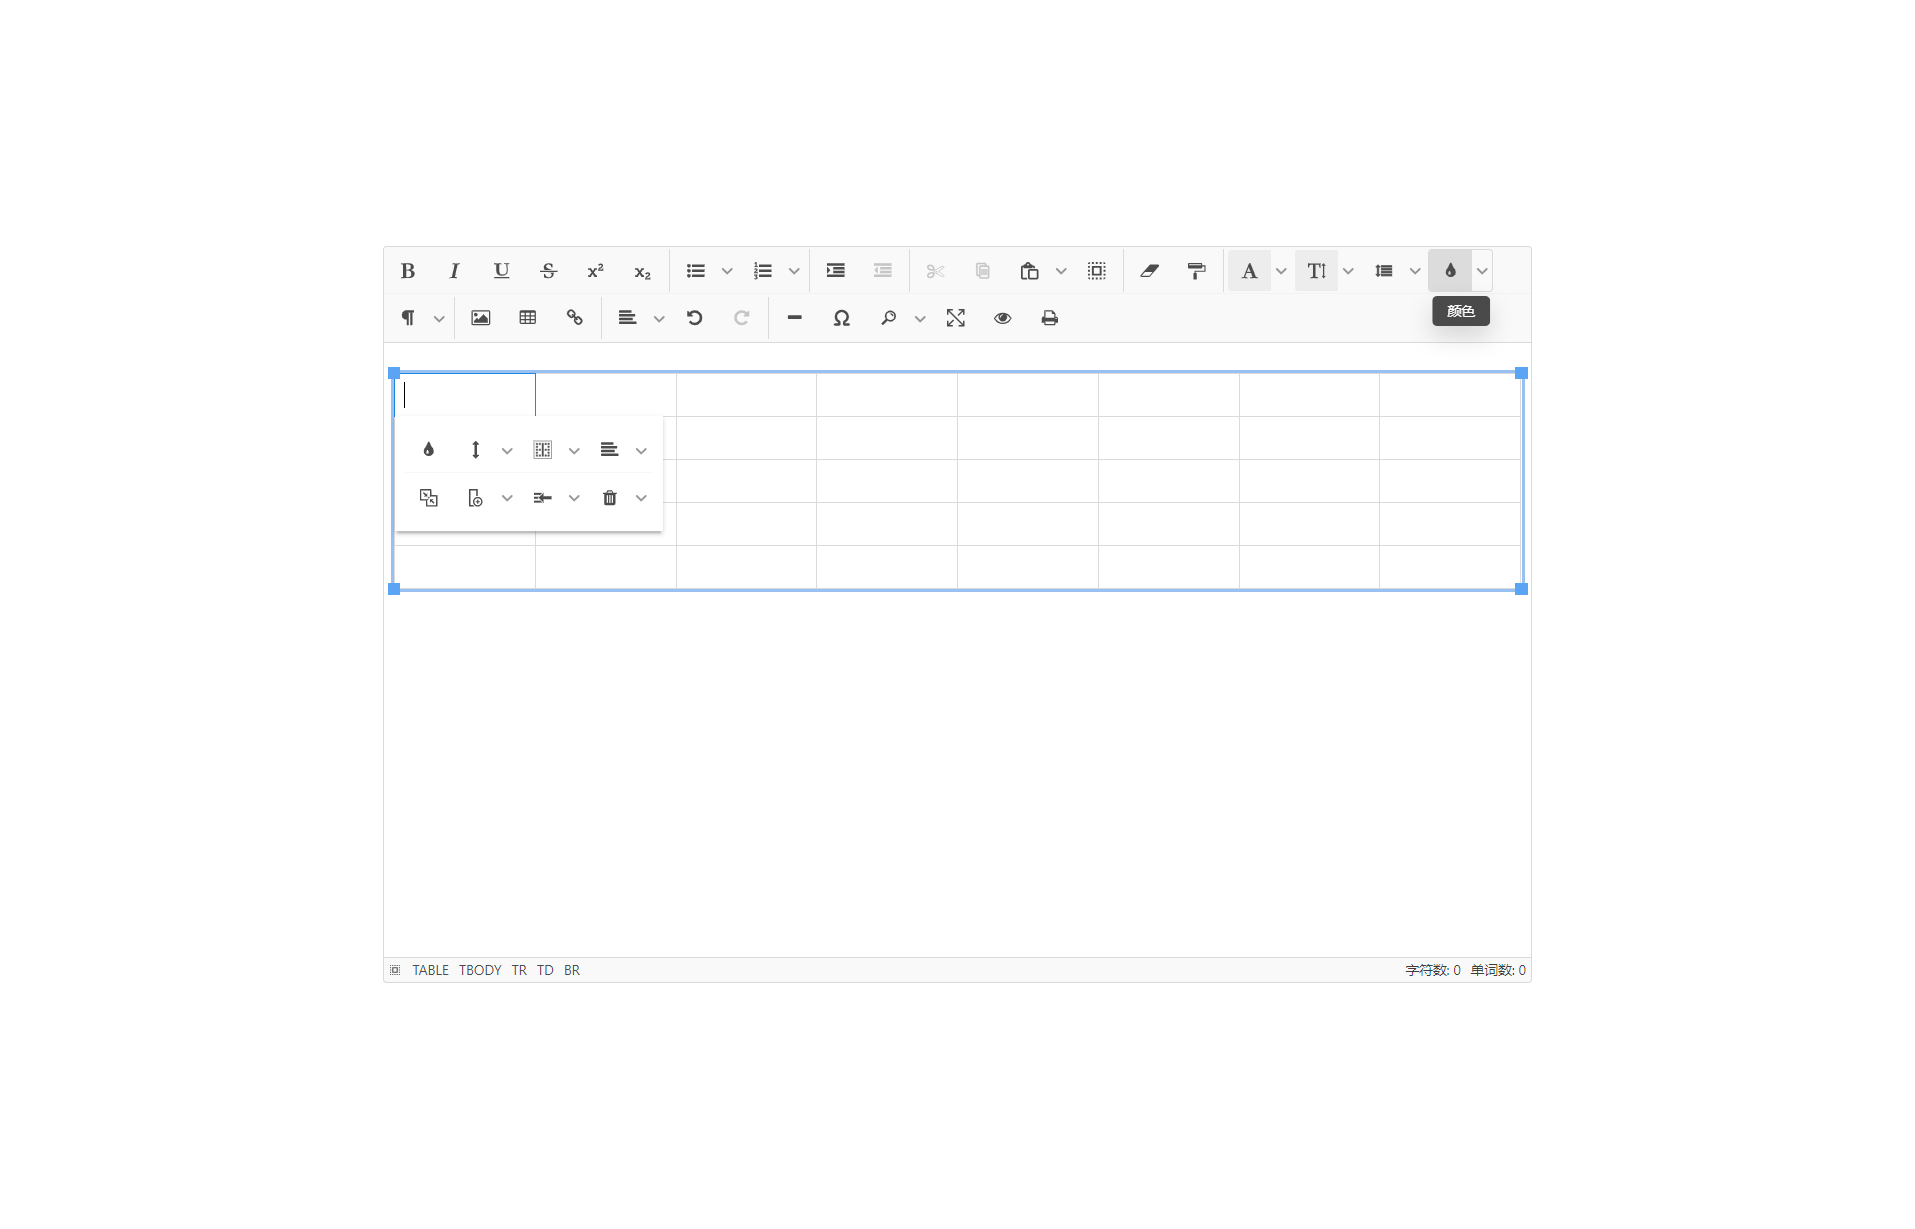
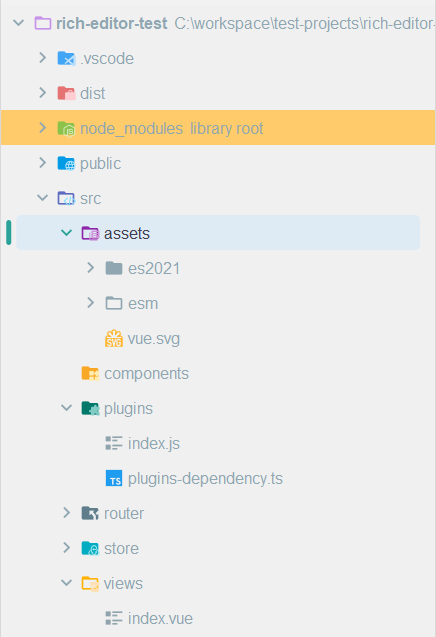
这个插件由于在 Jodit 运行过程中生成了多次实例,而且每次实例可能由不同的插件触发,因此没有挂载在pluginSystem上,所以如果要修改就只能改源码了。首先复制一份源码出来,类似下图的文件结构(Jodit 里很多文件是用不到的,只要复制 esm 和任意一个版本的 css 文件就可以了),其中源代码都在 esm 文件夹里:
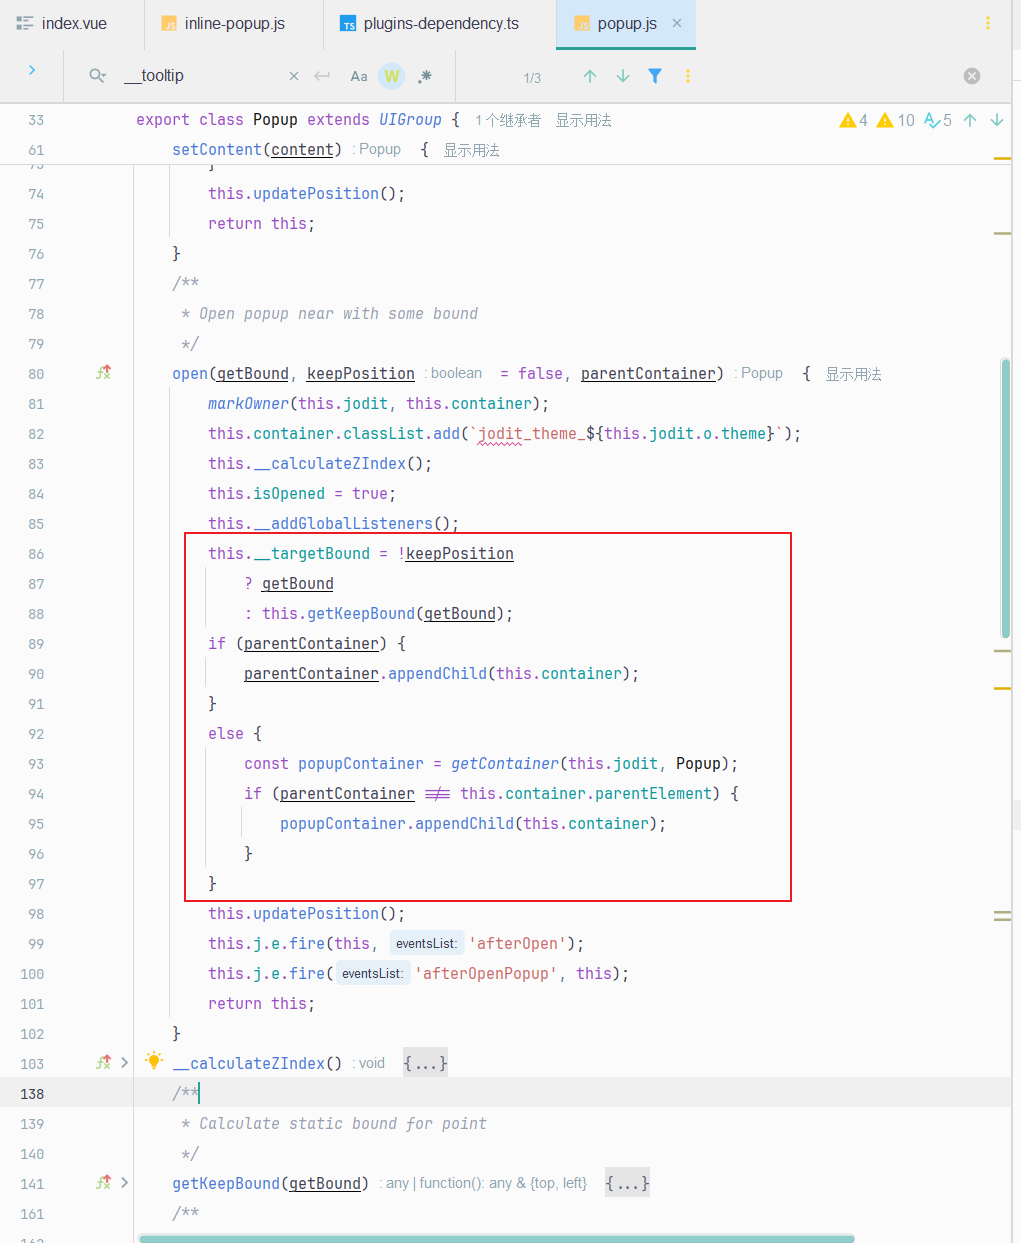
接下来就是解析inline-popup的相关代码了,首先打开@/assets/esm/plugins/inline-popup/inline-popup.js,可以看出比较重要的是以下部分:

可以看出inline-popup其实是一个特殊的popup,只是触发位置不在toolbar上。因此继续打开@/assets/esm/plugins/popup/popup.js,在这个文件里是没有任何关于tooltip的逻辑的,因此需要我们自己补上对应的逻辑,而正好 Jodit 里是有对应的 tooltip 组件的,位于@/assets/esm/core/ui/button/tooltip/tooltip.js中,使用方法可以参考@/assets/esm/modules/toolbar/collection/collection.js,其中主要代码如下:
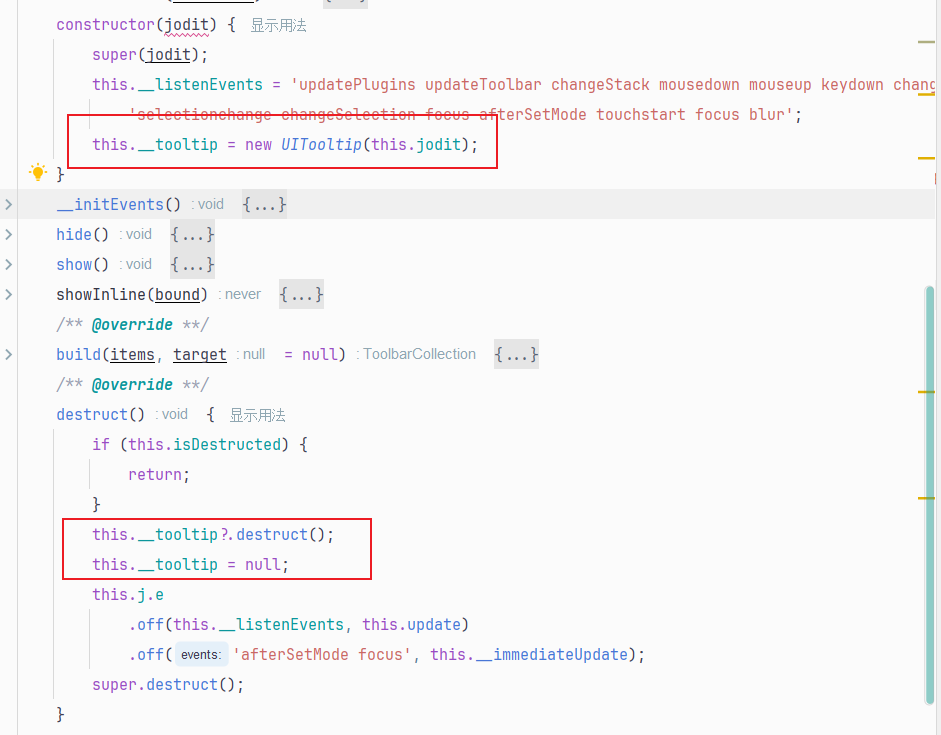
tooltip内部实现了事件监听等,在使用时我们不必关心,至于具体实现可以自己去看源码,这里就不给了。
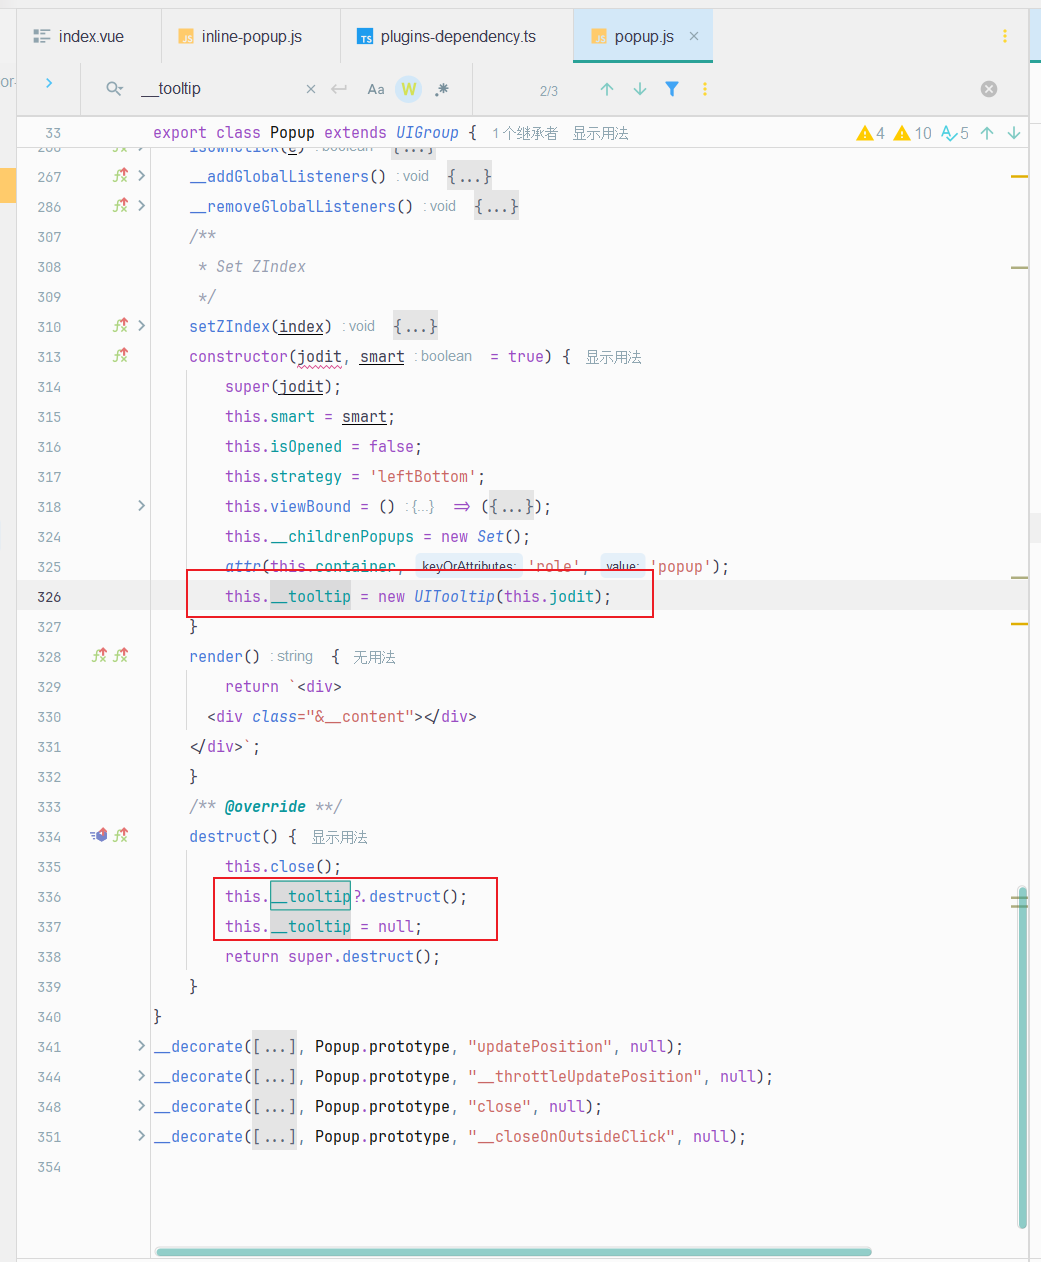
于是我们把对用的逻辑加到popup里:
但在重新编译后可以看出,并不生效:
原因在于tooltip内部的实现,主要是这一块:
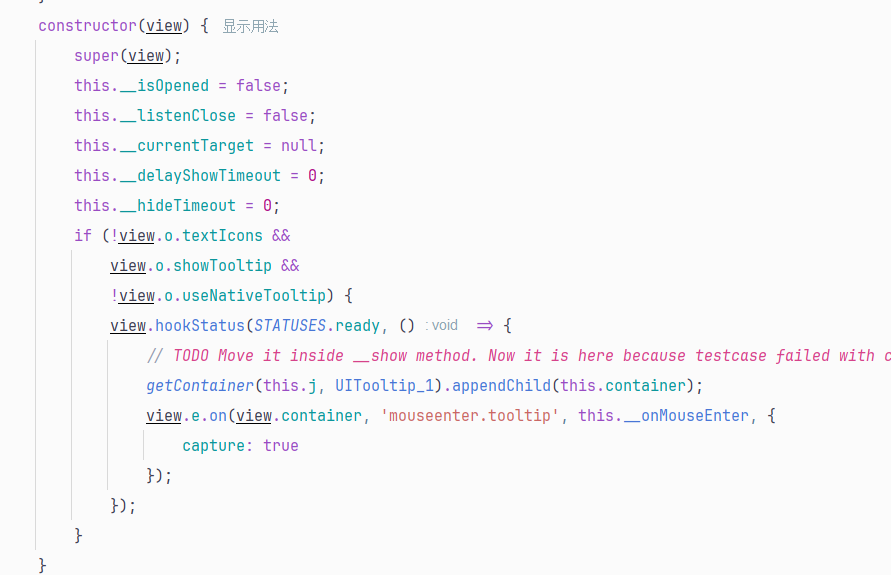
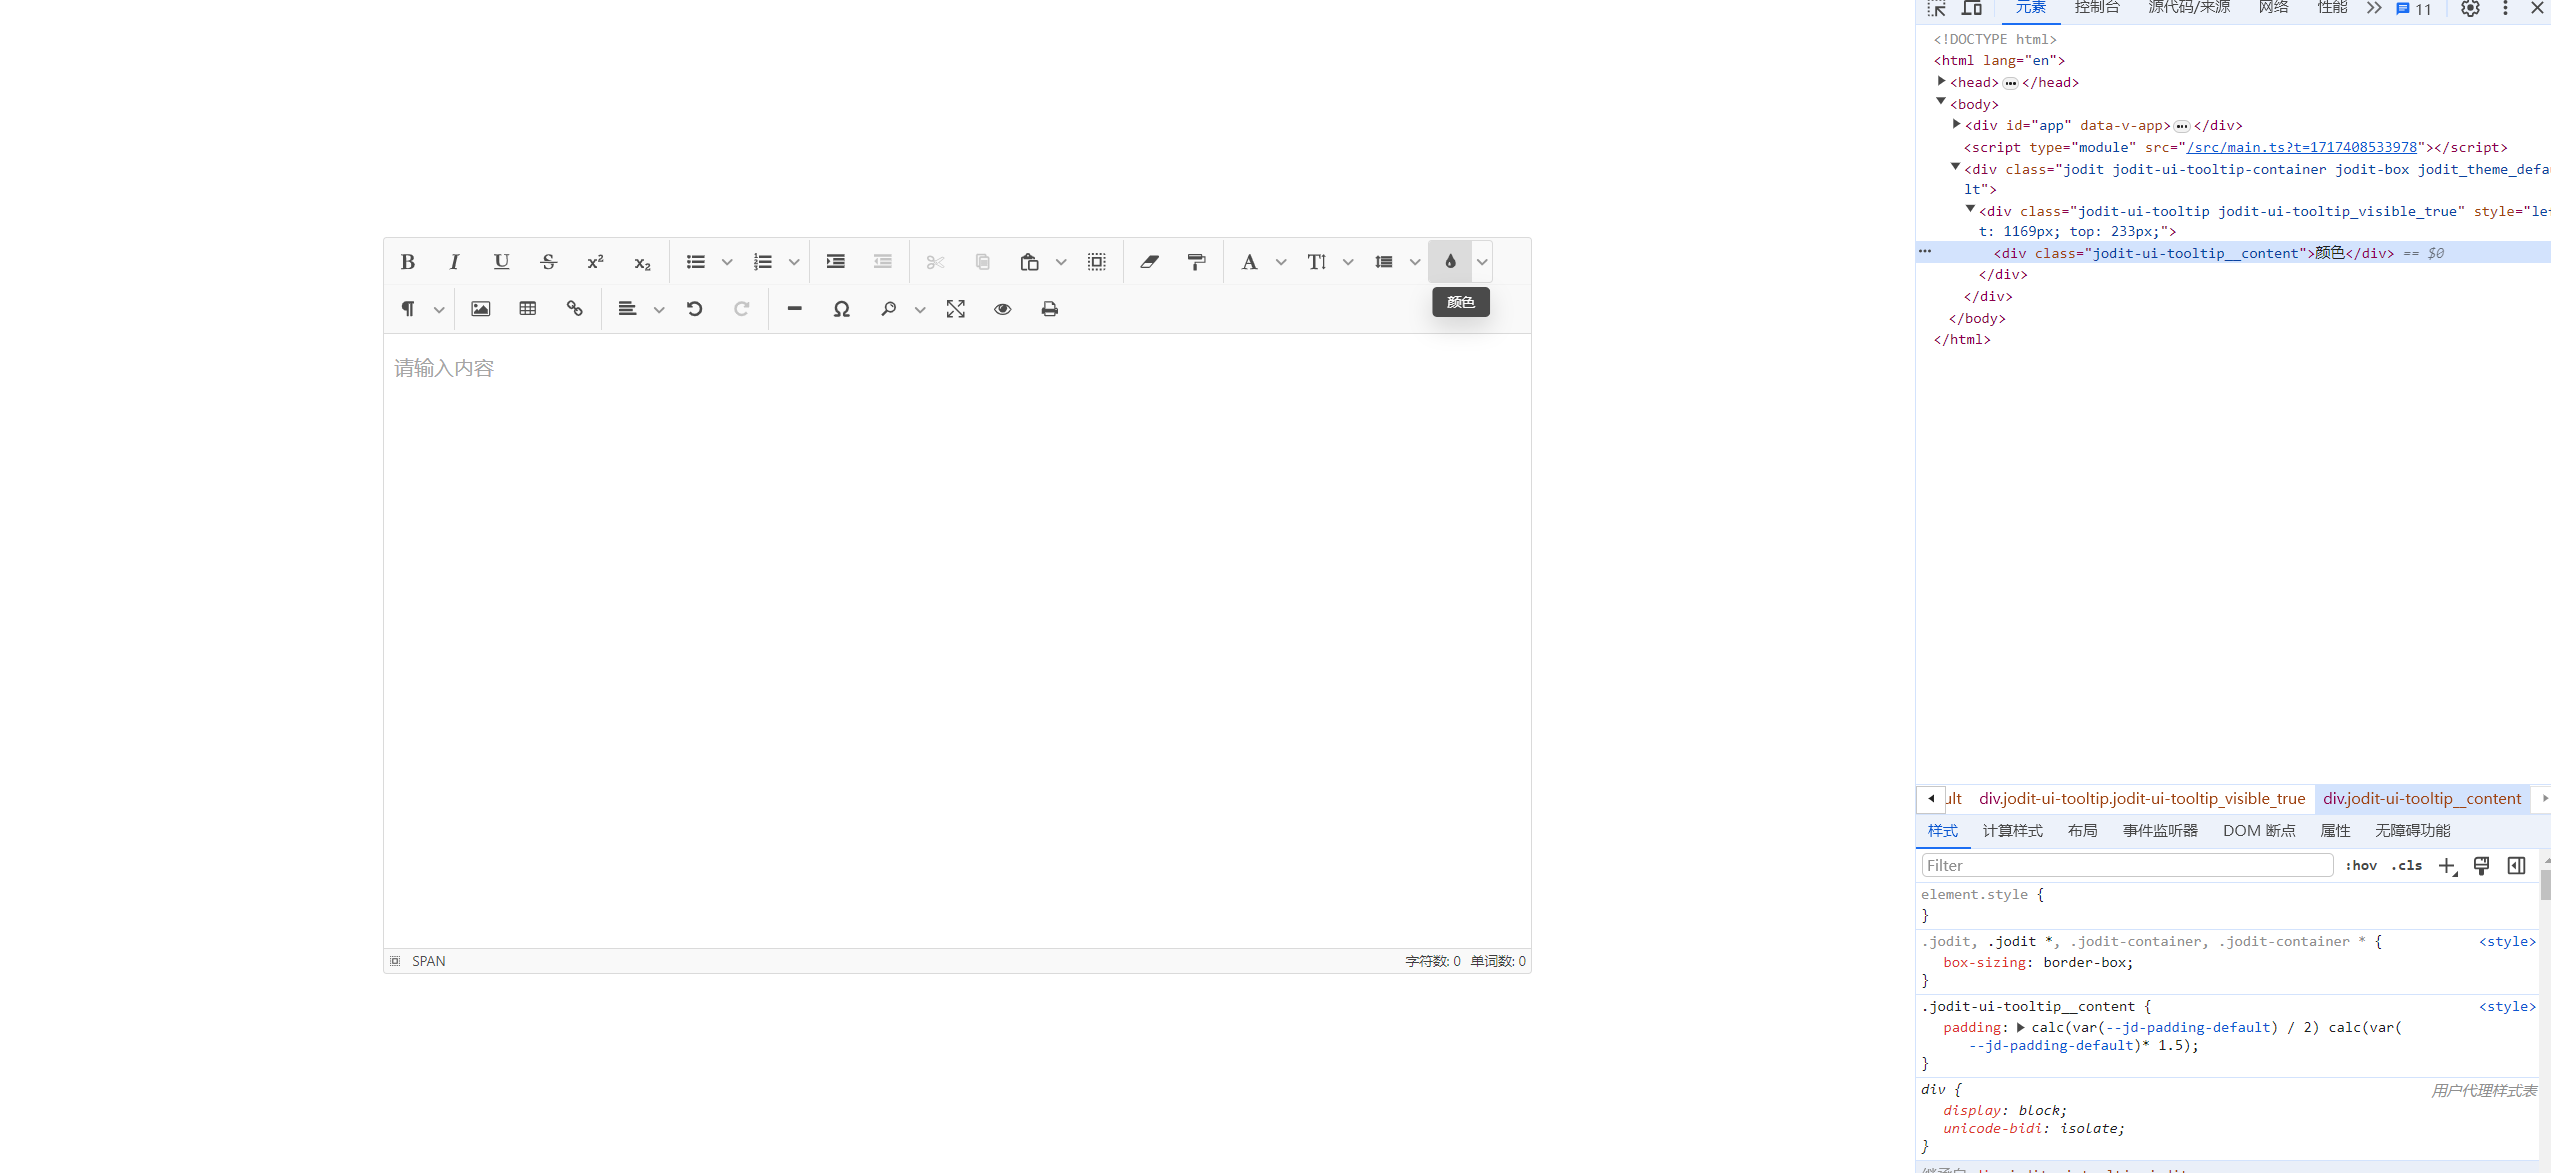
可以看出这里的view只能是Jodit对象,因为只有Jodit对象有e(events)属性,而这段代码就是监听Jodit.container上鼠标移入tooltip绑定对象时触发__onMouseEnter方法显示组件,但因为popup是append 到 HTML body 上的,事件捕获不到,因此tootip显示不出,具体情况如下图:
因此我们可以这样改一下tooltip的constractor:
// tooltip.js

constructor(view, emitter) { // 增加一个 emitter: HTMLElement 用来绑定事件
    super(view);
    this.__isOpened = false;
    this.__listenClose = false;
    this.__currentTarget = null;
    this.__delayShowTimeout = 0;
    this.__hideTimeout = 0;
    if (!view.o.textIcons &&
        view.o.showTooltip &&
        !view.o.useNativeTooltip) {
        // 存在 emitter 的情况下将事件绑定到 emitter 上
        if (emitter) {
            this.emitter = emitter
            getContainer(this.j, UITooltip_1).appendChild(this.container);
            view.e.on(emitter, 'mouseenter.tooltip', this.__onMouseEnter, {
                capture: true
            });
        }
        view.hookStatus(STATUSES.ready, () => {
            // TODO Move it inside __show method. Now it is here because testcase failed with capturing
            getContainer(this.j, UITooltip_1).appendChild(this.container);
            view.e.on(view.container, 'mouseenter.tooltip', this.__onMouseEnter, {
                capture: true
            });
        });
    }

    ...
    __addListenersOnEnter() {
        if (this.__listenClose) {
            return;
        }
        this.__listenClose = true;
        const view = this.j;
        // 同样的,移出事件也要绑定到 emiiter 上
        view.e
            .on(view.ow, WINDOW_EVENTS_ON_HIDE, this.__hide)
            .on(JODIT_EVENTS_ON_HIDE, this.__hide)
            .on(this.emitter ?? view.container, 'mouseleave.tooltip', this.__onMouseLeave, {
            capture: true
        });
    }
}
然后再在popup里使用:
constructor(jodit, smart = true) {
    super(jodit);
    this.smart = smart;
    this.isOpened = false;
    this.strategy = 'leftBottom';
    this.viewBound = () => ({
        left: 0,
        top: 0,
        width: this.ow.innerWidth,
        height: this.ow.innerHeight
    });
    this.__childrenPopups = new Set();
    attr(this.container, 'role', 'popup');
    this.__tooltip = new UITooltip(this.jodit, this.container); // 指定事件绑定对象为 popover 的 container
}

...

destruct() {
    this.close();
    this.__tooltip?.destruct();
    this.__tooltip = null;
    return super.destruct();
}
这样就大功告成了:


 2391
2391


 被折叠的 条评论
为什么被折叠?
被折叠的 条评论
为什么被折叠?
 到【灌水乐园】发言


