


老规矩pom文件第一
<dependencies>
        <dependency>
            <groupId>org.springframework.boot</groupId>
            <artifactId>spring-boot-starter-data-redis</artifactId>
        </dependency>
        <dependency>
            <groupId>org.springframework.boot</groupId>
            <artifactId>spring-boot-starter-web</artifactId>
        </dependency>
        <dependency>
            <groupId>org.mybatis.spring.boot</groupId>
            <artifactId>mybatis-spring-boot-starter</artifactId>
            <version>1.3.2</version>
        </dependency>

        <dependency>
            <groupId>mysql</groupId>
            <artifactId>mysql-connector-java</artifactId>
            <scope>runtime</scope>
        </dependency>
        <dependency>
            <groupId>org.springframework.boot</groupId>
            <artifactId>spring-boot-starter-test</artifactId>
            <scope>test</scope>
        </dependency>

        <dependency>
            <groupId>org.springframework.boot</groupId>
            <artifactId>spring-boot-starter-jdbc</artifactId>
        </dependency>

        <dependency>
            <groupId>mysql</groupId>
            <artifactId>mysql-connector-java</artifactId>
            <scope>runtime</scope>
        </dependency>

        <dependency>
            <groupId>org.apache.commons</groupId>
            <artifactId>commons-pool2</artifactId>
            <version>2.5.0</version>
        </dependency>
    </dependencies>
设置application.properties文件
#redis
spring.redis.host=127.0.0.1
spring.redis.port=6379
spring.redis.timeout=60s
# 数据库连接超时时间,2.0 中该参数的类型为Duration,这里在配置的时候需要指明单位
#spring.redis.timeout=60s
# 连接池配置,2.0中直接使用jedis或者lettuce配置连接池
# 最大活跃连接数,负数为不限制
spring.redis.lettuce.pool.max-active=500
# 等待可用连接的最大时间,负数为不限制
spring.redis.lettuce.pool.max-wait=-1ms
# 最大空闲连接数
spring.redis.lettuce.pool.max-idle=100
# 最小空闲连接数
spring.redis.lettuce.pool.min-idle=20
然后示例servers层的实现类 解释下:
注解@Cacheable标记在一个方法上时表示该方法是支持缓存的,当标记在一个类上时则表示该类所有的方法都是支持缓存的,Spring会在其被调用后将其返回值缓存起来,以保证下次利用同样的参数来执行该方法时可以直接从缓存中获取结果,而不需要再次执行该方法
@CacheEvict则是在redis删除这个缓存
package com.hw.services.impl;

import com.hw.entity.Student;
import com.hw.mapper.StudentsMapper;
import com.hw.services.StudentsServices;

import org.springframework.beans.factory.annotation.Autowired;
import org.springframework.cache.annotation.CacheEvict;
import org.springframework.cache.annotation.Cacheable;
import org.springframework.stereotype.Service;

import java.util.List;

/**
 * @program: Maven
 * @description:
 * @author: hw
 **/
@Service
public class StudentsServicesImpl implements StudentsServices {
    @Autowired
    private StudentsMapper studentsMapper;


    @Cacheable(value = "student", key = "#root.targetClass", unless = "#result eq null")
    @Override
    public List<Student> getAllStudents() {
        return studentsMapper.getAllStudents();
    }

    @CacheEvict(value = "student",key = "#root.targetClass", condition ="#result gt 0")
    @Override
    public int addStudent(Student student){
        return studentsMapper.addStudent(student);
    }
}
随便贴上controller层的代码,以便等会做演示
package com.hw.controller;

import com.hw.entity.Student;
import com.hw.services.StudentsServices;

import org.springframework.beans.factory.annotation.Autowired;
import org.springframework.web.bind.annotation.RequestMapping;
import org.springframework.web.bind.annotation.ResponseBody;
import org.springframework.web.bind.annotation.RestController;

import java.util.List;
import java.util.UUID;

/**
 * @program: Maven
 * @description:
 * @author: hw
 **/
@RestController
public class selectStudentController {
    @Autowired  //注入    完成自动装配
    private StudentsServices studentsServices;

    @RequestMapping("/getStudents")
    public List<Student> getAllStudents(){
        System.out.println("集合长度:"+studentsServices.getAllStudents().size());
        return studentsServices.getAllStudents();
    }

    @RequestMapping("/hello")
    public String hello(){
        return "你好,boot-ssm";
    }

    @RequestMapping("/add")
    public String addStudent(){
        Student student=new Student(UUID.randomUUID().toString(),1);
        studentsServices.addStudent(student);
        return "添加成功";
    }
}
演示缓存过程:
第一次查询

然后我把数据库中的数据改动一下:

再次访问

数据依然没有发生变化说明缓存成功,我上方的代码中有一个添加的链接,能够删除缓存,所以我们试试添加之后再查询
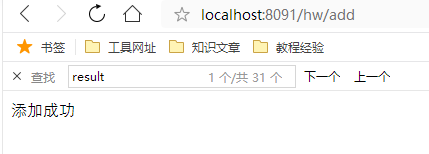

发现数据已经刷新,使用redis缓存成功
最后一点就是我在测试用出现了一个错误,如下图:

这个错的原因是因为实体类的序列号的原因,如果你没有给定实体类固定的序列号,那么每次项目启动的时候序列号将会改变,但是你缓存在redis的数据没有发生改变,所以会导致序列号不同,idea是默认不提示生成序列号的,我这里有篇教程,大家可以看看: https://blog.csdn.net/qq_41594146/article/details/85885334


 183
183

 被折叠的 条评论
为什么被折叠?
被折叠的 条评论
为什么被折叠?
 到【灌水乐园】发言


