


课程管理模块
第七天主要实现的功能如下。
1 课程分类模块的前端实现
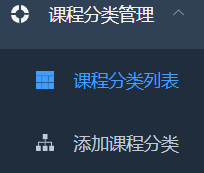
(1)添加路由
router/index.js.
  {
    path: '/subject',
    component: Layout,
    redirect: '/subject/list', //在页面中访问'/teacher'会被重定向到'/teacher/table'
    name: '课程分类管理',
    meta: { title: '课程分类管理', icon: 'example' },
    children: [
      {
        path: 'list',
        name: '课程分类列表',
        component: () => import('@/views/edu/subject/list'),
        meta: { title: '课程分类列表', icon: 'table' }
      },
      {
        path: 'save',
        name: '添加课程分类',
        component: () => import('@/views/edu/subject/save'),
        meta: { title: '添加课程分类', icon: 'tree' }
      }
    ]
  }
效果如下。
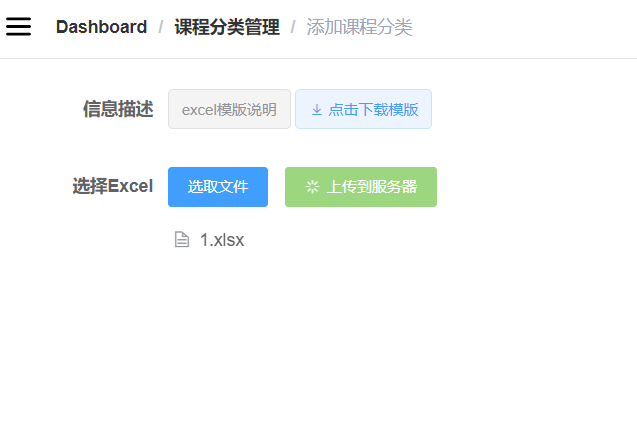
(2)实现
/views/edu/subject/save.vue写个上传按钮组件。注意下面代码注释,在本地存放模板文件。
  <template>
        <div class="app-container">
            <el-form label-width="120px">
            <el-form-item label="信息描述">
                <el-tag type="info">excel模版说明</el-tag>
                <el-tag>
                <i class="el-icon-download" />
                <!-- 注意把模板放在项目对应的本地路径 -->
                <a :href="'/static/1.xlsx'">点击下载模版</a>
                </el-tag>
            </el-form-item>
            <el-form-item label="选择Excel">
                <el-upload
                ref="upload"
                :auto-upload="false"
                :on-success="fileUploadSuccess"
                :on-error="fileUploadError"
                :disabled="importBtnDisabled"
                :limit="1"
                :action="BASE_API + '/eduservice/edu-subject/addSubject'"
                name="file"
                accept="application/vnd.ms-excel"
                >
                <el-button slot="trigger" size="small" type="primary"
                    >选取文件</el-button
                >
                <el-button
                    :loading="loading"
                    style="margin-left: 10px"
                    size="small"
                    type="success"
                    @click="submitUpload"
                    >上传到服务器</el-button
                >
                </el-upload>
            </el-form-item>
            </el-form>
        </div>
  </template>
实现script。
 <script>
  export default {
        data() {
            return {
                BASE_API: process.env.BASE_API, // 接口API地址
                importBtnDisabled: false, // 按钮是否禁用,
                loading: false,
            };
         },
         created() {

         },
         methods:{
             // 上传文件
             submitUpload() {
                this.importBtnDisabled = true,
                this.loading = true,
                this.$refs.upload.submit()
             },
             fileUploadSuccess() {
                this.loading = false;
                this.$message({
                type: "success",
                message: "上传成功",
                });
             },
             fileUploadError() {
                 this.loading = false;
                 this.$message({
                 type: "error",
                 message: "上传失败",
                });
             }

         }

  }
  </script>
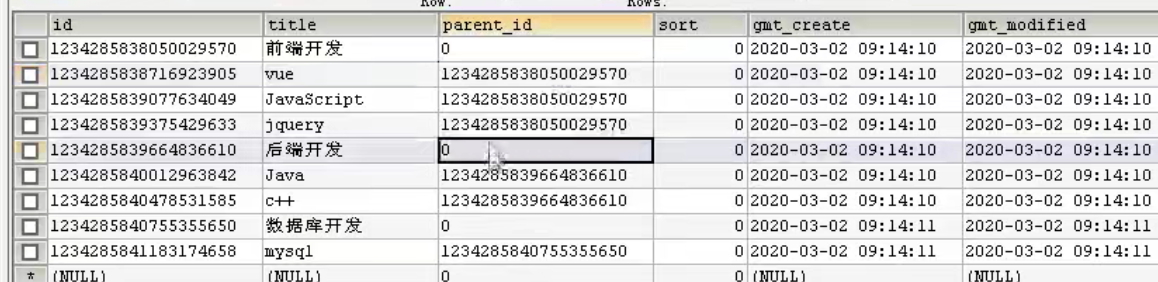
测试下,将数据库中数据清空。
DELETE FROM `edu_subject`

上传。
结果如下。
2 课程列表模块
2.1 前端静态页面
直接复制tree/index.vue到list.vue.
<template>
  <div class="app-container">
    <el-input v-model="filterText" placeholder="Filter keyword" style="margin-bottom:30px;" />

    <el-tree
      ref="tree2"
      :data="data2"
      :props="defaultProps"
      :filter-node-method="filterNode"
      class="filter-tree"
      default-expand-all
    />

  </div>
</template>

<script>
export default {

  data() {
    return {
      filterText: '',
      data2: [{
        id: 1,
        label: 'Level one 1',
        children: [{
          id: 4,
          label: 'Level two 1-1',
          children: [{
            id: 9,
            label: 'Level three 1-1-1'
          }, {
            id: 10,
            label: 'Level three 1-1-2'
          }]
        }]
      }, {
        id: 2,
        label: 'Level one 2',
        children: [{
          id: 5,
          label: 'Level two 2-1'
        }, {
          id: 6,
          label: 'Level two 2-2'
        }]
      }, {
        id: 3,
        label: 'Level one 3',
        children: [{
          id: 7,
          label: 'Level two 3-1'
        }, {
          id: 8,
          label: 'Level two 3-2'
        }]
      }],
      defaultProps: {
        children: 'children',
        label: 'label'
      }
    }
  },
  watch: {
    filterText(val) {
      this.$refs.tree2.filter(val)
    }
  },

  methods: {
    filterNode(value, data) {
      if (!value) return true
      return data.label.indexOf(value) !== -1
    }
  }
}
</script>
效果如下。
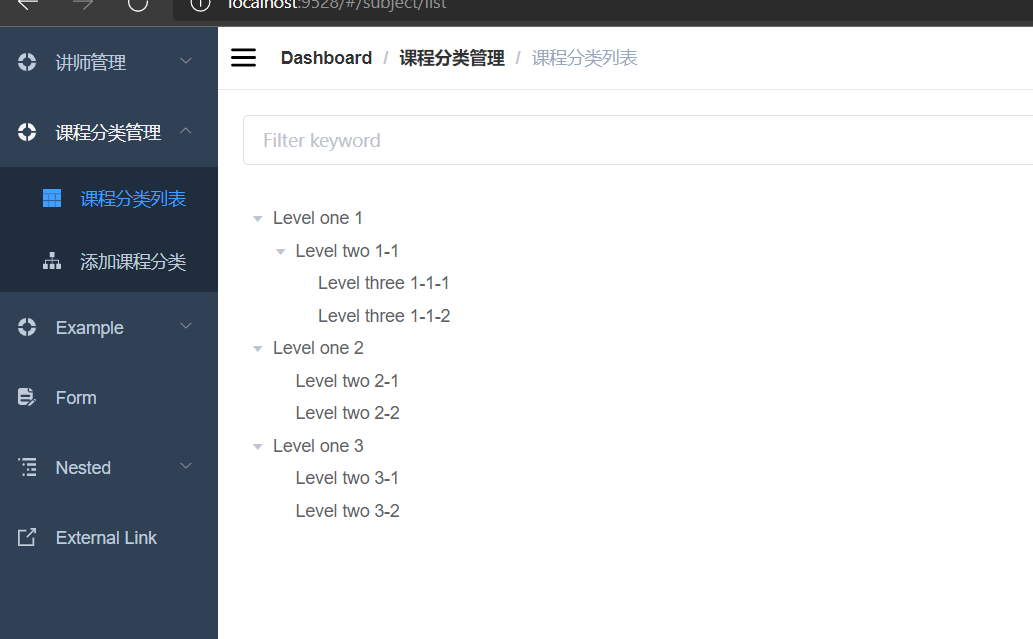
我们需要做的是实现后端接口,将数据按照前端需要的格式进行返回展示。
2.2 后端实现
建立实体类。
@Data
public class OneSubject {
    private String id;
    private String title;

    private List<TwoSubject> children = new ArrayList<>();
}
@Data
public class TwoSubject {
    private String id;
    private String title;
}
controller。
    public R getAllSubject() {
        // 一级分类中已经包含了二级分类
        List<OneSubject> list = eduSubjectService.getAllSubject();
        return R.ok();
    }
serviceImpl。
  @Override
    public List<OneSubject> getAllSubject() {
        // 1.查询一级分类
       QueryWrapper<EduSubject> wrapperOne = new QueryWrapper<>();
       wrapperOne.eq("parentid", "0");
       List<EduSubject> firstList = baseMapper.selectList(wrapperOne);
        // 2.查询二级分类
        QueryWrapper<EduSubject> wrapperTwo = new QueryWrapper<>();
        wrapperTwo.ne("parentid", "0");
        List<EduSubject> secondList = baseMapper.selectList(wrapperTwo);

        List<OneSubject> finalSubject = new ArrayList();
        // 3.封装一级分类


        // 4.封装二级分类

        return null;
    }
上面的代码我们还没有对数据进行封装(把数据库对应的类型Edusubject封装到前端需要的类型Onesubject中)。如何封装?第一种方法是遍历取出需要的值。
// 最终返回的数据类型,泛型中存储的数据类型是OneSubject,这个数据类型与前端展示的列表要求的结构一致
List<OneSubject> finalSubject = new ArrayList();
// 3.封装一级分类
// 我们需要把firstList封装到finalSubject中。
// 法1:遍历取值、传值
for (int i = 0; i < firstList.size(); i++) {
     EduSubject eduSubject = firstList.get(i);
     OneSubject oneSubject = new OneSubject();
     oneSubject.setId(eduSubject.getId());
     oneSubject.setTitle(eduSubject.getTitle());
     finalSubject.add(oneSubject);
}
但是如果需要的属性不止id,title,而是很多,那操作不是很麻烦吗?
 //法2:BeanUtils
for (int i = 0; i < firstList.size(); i++) {
     EduSubject eduSubject = firstList.get(i);
     OneSubject oneSubject = new OneSubject();
     BeanUtils.copyProperties(eduSubject, oneSubject);
     finalSubject.add(oneSubject);
}
return finalSubject;
在controller增加注解,返回数据。
@GetMapping("/getAllSubject")
public R getAllSubject() {
	// 一级分类中已经包含了二级分类
	List<OneSubject> list = eduSubjectService.getAllSubject();
    return R.ok().data("list", list);
}
swagger-ui测试如下.

把二级分类封装。
  for (int i = 0; i < firstList.size(); i++) {
            EduSubject eduSubject = firstList.get(i);
            OneSubject oneSubject = new OneSubject();
            BeanUtils.copyProperties(eduSubject, oneSubject);

            // 4.封装二级分类
            List<TwoSubject> twoFinalSubject = new ArrayList<>();
            // 在一级分类中遍历二级分类,找到parent_id与当前一级分类对应的二级分类
            for (int j = 0; j < secondList.size(); j++) {
                EduSubject tSubject = secondList.get(j);
                if(tSubject.getId().equals(eduSubject.getId())) {
                    TwoSubject twoSubject = new TwoSubject();
                    BeanUtils.copyProperties(tSubject, twoSubject);
                    twoFinalSubject.add(twoSubject);
                }
            }
            oneSubject.setChildren(twoFinalSubject);
            finalSubject.add(oneSubject);
}
测试结果如下。

2.3 前端获取后端数据
src/api/edu/subject.js实现前端接口。
import request from '@/utils/request'

export default {
  // 课程分类:查询所有课程分类
  getAllSubject() {
    return request({
      url: `/eduservice/edu-subject/getAllSubject`,
      method: 'get'
    })
  }
}
edu/subject/list.vue.
<script>
import subject from "@/api/edu/subject.js"
export default {

  data() {
    return {
      filterText: '',
      data2: [],
      defaultProps: {
        children: "children",
        label: "title", // 这里的title与后端的属性名保持一致
      },
    }
  },
  watch: {
    filterText(val) {
      this.$refs.tree2.filter(val)
    }
  },
  created() {
    this.getAllSubject()
  },
  methods: {
    getAllSubject() {
      subject.getAllSubject()
      .then(Response => {
        this.data2 = Response.data.list
      })
    },
    // 课程分类的搜索索
     filterNode(value, data) {
      if (!value) return true;
      return data.title.indexOf(value) !== -1;
    },
  }
}
</script>
效果如下图。
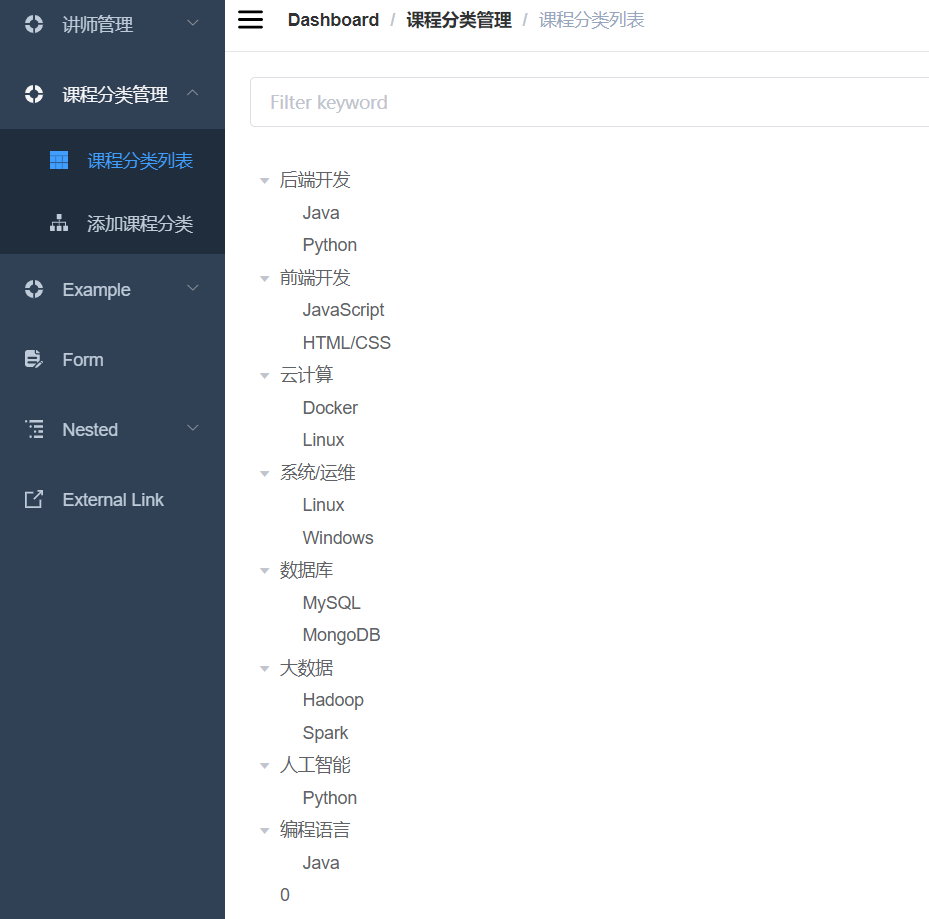
上面的检索功能是可用的,不过,它严格区分大小写,为了提高用户体验,我们继续完善下检索方法:不管用户输入什么值,我们都转换为小写进行比较。
 // 课程分类的搜索索
     filterNode(value, data) {
      if (!value) return true;
      return data.title.toLowerCase().indexOf(value) !== -1;
    }
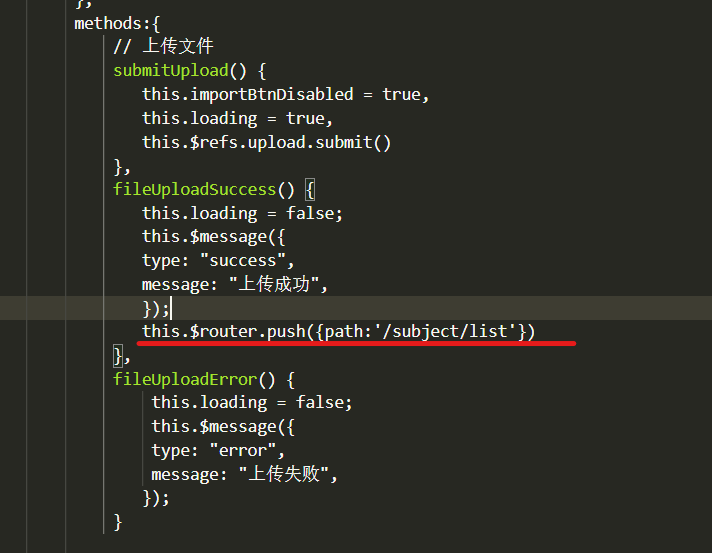
最后回过头完善下save.vue,让课程分类添加成功后实现自动跳转到课程列表。
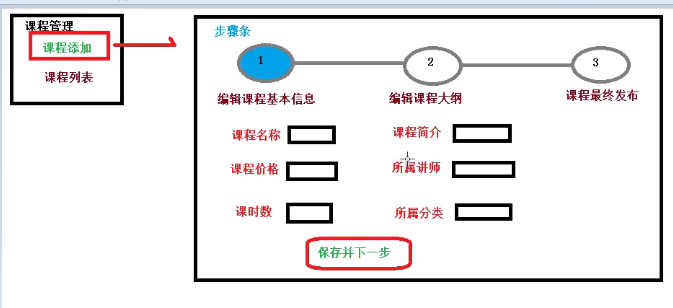
3 课程添加
3.1需求分析
3.2数据库设计
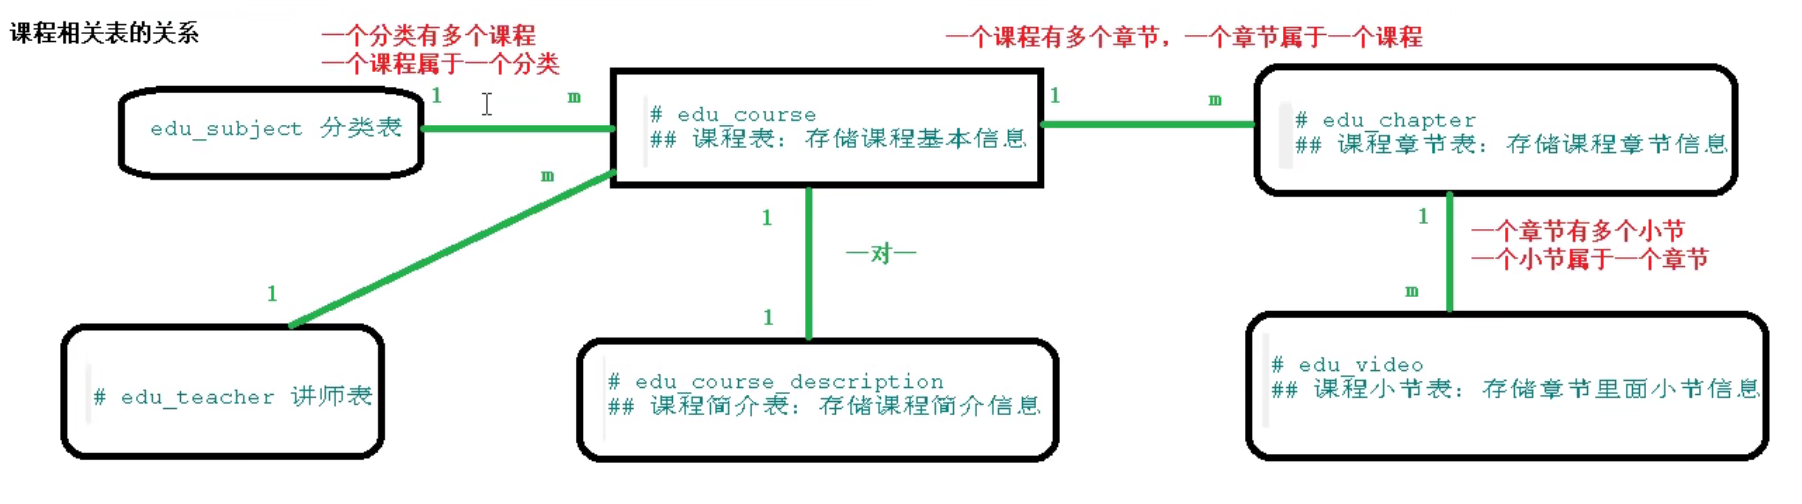
数据建表过程如下。
CREATE TABLE `edu_course_description` (
  `id` char(19) NOT NULL COMMENT '课程ID',
  `description` text COMMENT '课程简介',
  `gmt_create` datetime NOT NULL COMMENT '创建时间',
  `gmt_modified` datetime NOT NULL COMMENT '更新时间',
  PRIMARY KEY (`id`)
) ENGINE=InnoDB DEFAULT CHARSET=utf8mb4 COMMENT='课程简介';

#
# Data for table "edu_course_description"
#

INSERT INTO `edu_course_description` VALUES ('1104870479077879809','<p>11</p>','2019-03-11 06:23:44','2019-03-11 06:23:44'),('1192252213659774977','<p>测试</p>','2019-11-07 09:27:33','2019-11-13 16:21:28'),('14','','2019-03-13 06:04:43','2019-03-13 06:05:33'),('15','','2019-03-13 06:03:33','2019-03-13 06:04:22'),('18','<p>本套Java视频完全针对零基础学员,课堂实录,自发布以来,好评如潮!Java视频中注重与学生互动,讲授幽默诙谐、细致入微,覆盖Java基础所有核心知识点,同类Java视频中也是代码量大、案例多、实战性强的。同时,本Java视频教程注重技术原理剖析,深入JDK源码,辅以代码实战贯穿始终,用实践驱动理论,并辅以必要的代码练习。</p>\n<p>------------------------------------</p>\n<p>视频特点:</p>\n<p>通过学习本Java视频教程,大家能够真正将Java基础知识学以致用、活学活用,构架Java编程思想,牢牢掌握\"源码级\"的Javase核心技术,并为后续JavaWeb等技术的学习奠定扎实基础。<br /><br />1.通俗易懂,细致入微:每个知识点高屋建瓴,深入浅出,简洁明了的说明问题<br />2.具实战性:全程真正代码实战,涵盖上百个企业应用案例及练习<br />3.深入:源码分析,更有 Java 反射、动态代理的实际应用等<br />4.登录尚硅谷官网,技术讲师免费在线答疑</p>','2019-03-06 18:06:36','2019-10-30 19:58:36');
CREATE TABLE `edu_video` (
  `id` char(19) NOT NULL COMMENT '视频ID',
  `course_id` char(19) NOT NULL COMMENT '课程ID',
  `chapter_id` char(19) NOT NULL COMMENT '章节ID',
  `title` varchar(50) NOT NULL COMMENT '节点名称',
  `video_source_id` varchar(100) DEFAULT NULL COMMENT '云端视频资源',
  `video_original_name` varchar(100) DEFAULT NULL COMMENT '原始文件名称',
  `sort` int(10) unsigned NOT NULL DEFAULT '0' COMMENT '排序字段',
  `play_count` bigint(20) unsigned NOT NULL DEFAULT '0' COMMENT '播放次数',
  `is_free` tinyint(1) unsigned NOT NULL DEFAULT '0' COMMENT '是否可以试听:0收费 1免费',
  `duration` float NOT NULL DEFAULT '0' COMMENT '视频时长(秒)',
  `status` varchar(20) NOT NULL DEFAULT 'Empty' COMMENT 'Empty未上传 Transcoding转码中  Normal正常',
  `size` bigint(20) unsigned NOT NULL DEFAULT '0' COMMENT '视频源文件大小(字节)',
  `version` bigint(20) unsigned NOT NULL DEFAULT '1' COMMENT '乐观锁',
  `gmt_create` datetime NOT NULL COMMENT '创建时间',
  `gmt_modified` datetime NOT NULL COMMENT '更新时间',
  PRIMARY KEY (`id`),
  KEY `idx_course_id` (`course_id`),
  KEY `idx_chapter_id` (`chapter_id`)
) ENGINE=InnoDB DEFAULT CHARSET=utf8mb4 ROW_FORMAT=COMPACT COMMENT='课程视频';

#
# Data for table "edu_video"
#

INSERT INTO `edu_video` VALUES ('1182499307429339137','18','32','第一节','','',0,0,0,0,'',0,1,'2019-10-11 11:32:59','2019-10-11 11:57:38'),('1185312444399071234','14','1','12','','',0,0,0,0,'Empty',0,1,'2019-10-19 05:51:23','2019-10-19 05:51:33'),('1189434737808990210','18','44','测试','','',1,0,0,0,'Empty',0,1,'2019-10-30 14:51:55','2019-10-30 14:51:55'),('1189471423678939138','18','1181729226915577857','test','2b887dc9584d4dc68908780ec57cd3b9','视频',1,0,0,0,'Empty',0,1,'2019-10-30 17:17:41','2019-10-30 17:17:41'),('1189476403626409986','18','1181729226915577857','22','5155c73dc112475cbbddccf4723f7cef','视频.mp4',0,0,0,0,'Empty',0,1,'2019-10-30 17:37:29','2019-10-30 17:37:29'),('1192252824606289921','1192252213659774977','1192252428399751169','第一课时','756cf06db9cb4f30be85a9758b19c645','eae2b847ef8503b81f5d5593d769dde2.mp4',0,0,0,0,'Empty',0,1,'2019-11-07 09:29:59','2019-11-07 09:29:59'),('1192628092797730818','1192252213659774977','1192252428399751169','第二课时','2a02d726622f4c7089d44cb993c531e1','eae2b847ef8503b81f5d5593d769dde2.mp4',0,0,1,0,'Empty',0,1,'2019-11-08 10:21:10','2019-11-08 10:21:22'),('1192632495013380097','1192252213659774977','1192252428399751169','第三课时','4e560c892fdf4fa2b42e0671aa42fa9d','eae2b847ef8503b81f5d5593d769dde2.mp4',0,0,1,0,'Empty',0,1,'2019-11-08 10:38:40','2019-11-08 10:38:40'),('1194117638832111617','1192252213659774977','1192252428399751169','第四课时','4e560c892fdf4fa2b42e0671aa42fa9d','eae2b847ef8503b81f5d5593d769dde2.mp4',0,0,0,0,'Empty',0,1,'2019-11-12 13:00:05','2019-11-12 13:00:05'),('1196263770832023554','1192252213659774977','1192252428399751169','第五课时','27d21158b0834cb5a8d50710937de330','eae2b847ef8503b81f5d5593d769dde2.mp4',5,0,0,0,'Empty',0,1,'2019-11-18 11:08:03','2019-11-18 11:08:03'),('17','18','15','第一节:Java简介','196116a6fee742e1ba9f6c18f65bd8c1','1',1,1000,1,100,'Draft',0,1,'2019-01-01 13:08:57','2019-10-11 11:26:39'),('18','18','15','第二节:表达式和赋值语句','2d99b08ca0214909899910c9ba042d47','7 - How Do I Find Time for My ',2,999,1,100,'Draft',0,1,'2019-01-01 13:09:02','2019-03-08 03:30:27'),('19','18','15','第三节:String类','51120d59ddfd424cb5ab08b44fc8b23a','eae2b847ef8503b81f5d5593d769dde2.mp4',3,888,0,100,'Draft',0,1,'2019-01-01 13:09:05','2019-11-12 12:50:45'),('20','18','15','第四节:程序风格','2a38988892d84df598752226c50f3fa3','00-day10总结.avi',4,666,0,100,'Draft',0,1,'2019-01-01 13:09:05','2019-10-11 09:20:09');
CREATE TABLE `edu_course` (
  `id` char(19) NOT NULL COMMENT '课程ID',
  `teacher_id` char(19) NOT NULL COMMENT '课程讲师ID',
  `subject_id` char(19) NOT NULL COMMENT '课程专业ID',
  `subject_parent_id` char(19) NOT NULL COMMENT '课程专业父级ID',
  `title` varchar(50) NOT NULL COMMENT '课程标题',
  `price` decimal(10,2) unsigned NOT NULL DEFAULT '0.00' COMMENT '课程销售价格,设置为0则可免费观看',
  `lesson_num` int(10) unsigned NOT NULL DEFAULT '0' COMMENT '总课时',
  `cover` varchar(255) CHARACTER SET utf8 NOT NULL COMMENT '课程封面图片路径',
  `buy_count` bigint(10) unsigned NOT NULL DEFAULT '0' COMMENT '销售数量',
  `view_count` bigint(10) unsigned NOT NULL DEFAULT '0' COMMENT '浏览数量',
  `version` bigint(20) unsigned NOT NULL DEFAULT '1' COMMENT '乐观锁',
  `status` varchar(10) NOT NULL DEFAULT 'Draft' COMMENT '课程状态 Draft未发布  Normal已发布',
  `is_deleted` tinyint(3) DEFAULT NULL COMMENT '逻辑删除 1(true)已删除, 0(false)未删除',
  `gmt_create` datetime NOT NULL COMMENT '创建时间',
  `gmt_modified` datetime NOT NULL COMMENT '更新时间',
  PRIMARY KEY (`id`),
  KEY `idx_title` (`title`),
  KEY `idx_subject_id` (`subject_id`),
  KEY `idx_teacher_id` (`teacher_id`)
) ENGINE=InnoDB DEFAULT CHARSET=utf8mb4 ROW_FORMAT=COMPACT COMMENT='课程';

#
# Data for table "edu_course"
#

INSERT INTO `edu_course` VALUES ('1192252213659774977','1189389726308478977','1178214681139539969','1178214681118568449','java基础课程:test',0.01,2,'https://guli-file-190513.oss-cn-beijing.aliyuncs.com/cover/default.gif',4,387,1,'Normal',0,'2019-11-07 09:27:33','2019-11-18 13:35:03'),('14','1189389726308478977','1101348944971091969','1101348944920760321','XHTML CSS2 JS整站制作教程课程学习',0.00,3,'http://guli-file.oss-cn-beijing.aliyuncs.com/cover/2019/03/13/d0086eb0-f2dc-45f7-bba1-744d95e5be0f.jpg',3,44,15,'Normal',0,'2018-04-02 18:33:34','2019-11-16 21:21:45'),('15','1189389726308478977','1101348944971091969','1101348944920760321','HTML5入门课程学习',0.00,23,'http://guli-file.oss-cn-beijing.aliyuncs.com/cover/2019/03/13/22997b8e-3606-4d2e-9b4f-09f48418b6e4.jpg',0,51,17,'Normal',0,'2018-04-02 18:34:32','2019-11-12 10:19:20'),('18','1189389726308478977','1178214681139539969','1178214681118568449','Java精品课程',0.01,20,'http://guli-file.oss-cn-beijing.aliyuncs.com/cover/2019/03/06/866e9aca-b530-4f71-a690-72d4a4bfd1e7.jpg',151,737,6,'Normal',0,'2018-04-02 21:28:46','2019-11-18 11:14:52');
CREATE TABLE `edu_chapter` (
  `id` char(19) NOT NULL COMMENT '章节ID',
  `course_id` char(19) NOT NULL COMMENT '课程ID',
  `title` varchar(50) NOT NULL COMMENT '章节名称',
  `sort` int(10) unsigned NOT NULL DEFAULT '0' COMMENT '显示排序',
  `gmt_create` datetime NOT NULL COMMENT '创建时间',
  `gmt_modified` datetime NOT NULL COMMENT '更新时间',
  PRIMARY KEY (`id`),
  KEY `idx_course_id` (`course_id`)
) ENGINE=InnoDB DEFAULT CHARSET=utf8mb4 ROW_FORMAT=COMPACT COMMENT='课程';

#
# Data for table "edu_chapter"
#

INSERT INTO `edu_chapter` VALUES ('1','14','第一章:HTML',0,'2019-01-01 12:27:40','2019-01-01 12:55:30'),('1181729226915577857','18','第七章:I/O流',70,'2019-10-09 08:32:58','2019-10-09 08:33:20'),('1192252428399751169','1192252213659774977','第一章节',0,'2019-11-07 09:28:25','2019-11-07 09:28:25'),('15','18','第一章:Java入门',0,'2019-01-01 12:27:40','2019-10-09 09:13:19'),('3','14','第二章:CSS',0,'2019-01-01 12:55:35','2019-01-01 12:27:40'),('32','18','第二章:控制台输入和输出',0,'2019-01-01 12:27:40','2019-01-01 12:27:40'),('44','18','第三章:控制流',0,'2019-01-01 12:27:40','2019-01-01 12:27:40'),('48','18','第四章:类的定义',0,'2019-01-01 12:27:40','2019-01-01 12:27:40'),('63','18','第五章:数组',0,'2019-01-01 12:27:40','2019-01-01 12:27:40'),('64','18','第六章:继承',61,'2019-01-01 12:27:40','2019-10-09 08:32:47');
3.3.后端实现
(1)生成mvc模板代码
修改codeGenerator中的表。
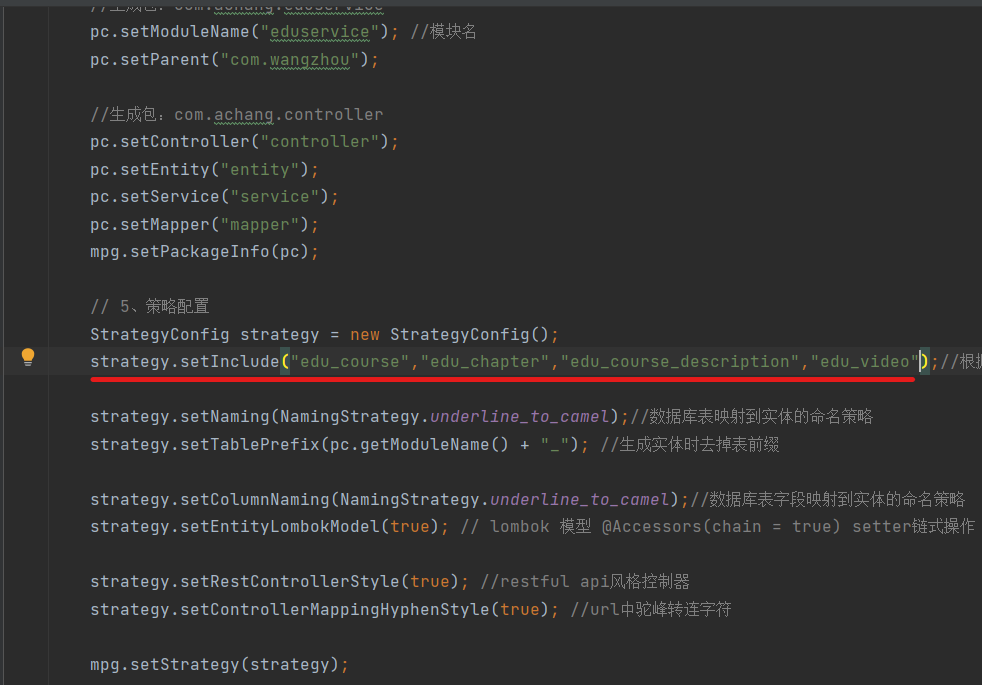
生成代码。
由于课程简介不需要单独提供接口访问,而是在配合课程使用,我们可以将EduCourseDescriptionController删除。EduCourseController增加注解@CrossOrigin。
(2) 功能分析
课程管理模块的主要功能和数据库建表都完成了,不过在实现功能前还需要考虑以下问题。
1)数据怎么封装?
根据之前的经验,前端添加的数据可以通过json数据传递给后端,不过传递的数据类型是什么?传递EduCourse可以满足大部分课程信息的传递,不过无法传递课程简介,因此我们需要创建一个vo类专门用于前后端数据的传递。
2)数据怎么添加到数据库
可能一个数据对应多张数据表,比如课程信息和课程简介。
3)二级联动问题
选择课程分类时,通过下拉列表实现,选择一级课程分类,二级课程分类的下拉框要属于前面选择的课程分类。
(3)实现vo类
@ApiModel(value = "课程基本信息", description = "编辑课程基本信息的表单对象")
@Data
public class CourseInfoForm implements Serializable {

    private static final long serialVersionUID = 1L;

    @ApiModelProperty(value = "课程ID")
    private String id;

    @ApiModelProperty(value = "课程讲师ID")
    private String teacherId;

    @ApiModelProperty(value = "课程专业ID")
    private String subjectId;

    @ApiModelProperty(value = "课程标题")
    private String title;

    @ApiModelProperty(value = "课程销售价格,设置为0则可免费观看")
    private BigDecimal price;

    @ApiModelProperty(value = "总课时")
    private Integer lessonNum;

    @ApiModelProperty(value = "课程封面图片路径")
    private String cover;

    @ApiModelProperty(value = "课程简介")
    private String description;

}
(4)controller
@RestController
@RequestMapping("/eduservice/edu-course")
@CrossOrigin
public class EduCourseController {
    @Autowired
    EduCourseService eduCourseService;

    @PostMapping("/addCourse")
    public R addCourse(@RequestBody CourseInfoForm courseInfoForm) {
        eduCourseService.saveCourse(courseInfoForm);
        return R.ok();
    }
}
(5)service
接口部分省略,后面不再赘述。
@Service
public class EduCourseServiceImpl extends ServiceImpl<EduCourseMapper, EduCourse> implements EduCourseService {
    @Autowired
    EduCourseDescriptionService eduCourseDescriptionService;

    @Override
    public void saveCourse(CourseInfoForm courseInfoForm) {
        // 1.存储EduCourse
        EduCourse eduCourse = new EduCourse();
        BeanUtils.copyProperties(courseInfoForm, eduCourse);
        baseMapper.insert(eduCourse);
        // 2.存储EduCourseDescription
        // 这是EduCourseServiceImpl,baseMapper无法直接把数据EduCourseDescription存到数据库
        EduCourseDescription eduCourseDescription = new EduCourseDescription();
        eduCourseDescription.setDescription(courseInfoForm.getDescription());
        eduCourseDescriptionService.save(eduCourseDescription);
    }
}
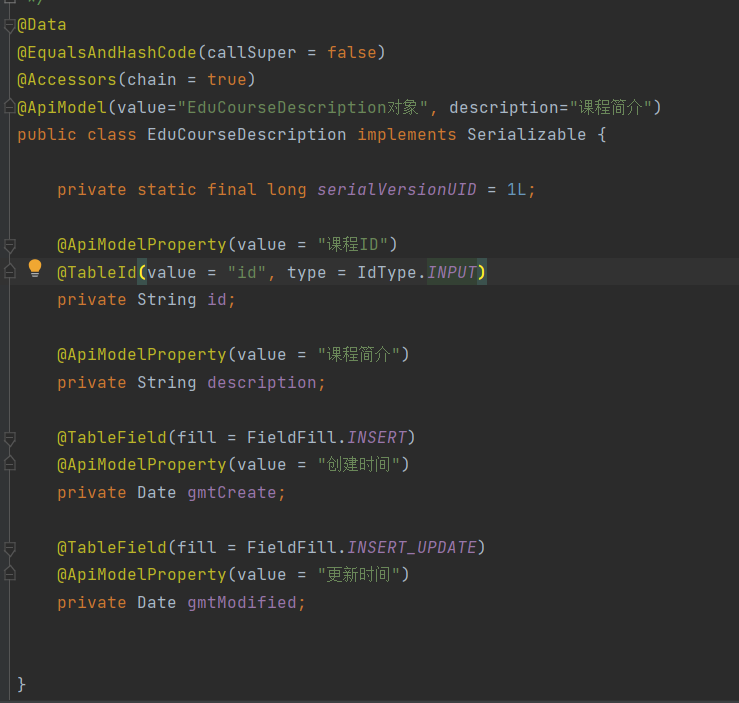
另:
- 实体类的时间属性记得加
@TableField注解,EduCourseDescription示例如下,EduCourse同理。
public class EduCourseDescription implements Serializable {

    //...

    @TableField(fill = FieldFill.INSERT)
    @ApiModelProperty(value = "创建时间")
    private Date gmtCreate;

    @TableField(fill = FieldFill.INSERT_UPDATE)
    @ApiModelProperty(value = "更新时间")
    private Date gmtModified;


}
- 数据库``EduCourse
中subjectParentId`默认值设置为null。
添加课程功能的后端实现就完成了,请读者用swagger进行自测。
(6) 建立课程信息与详情一对一关系
不过我们前面提过,课程信息EduCourse与课程细节EduCourseDescription两个表应该是一对一的关系,而目前它们还没有任何关系。如何做到呢?让它们的id一致即可,之前它们的id都是自动生成的,现在在service中手动设置eduCourseDescription的id,使其与eduCourse保持一致。
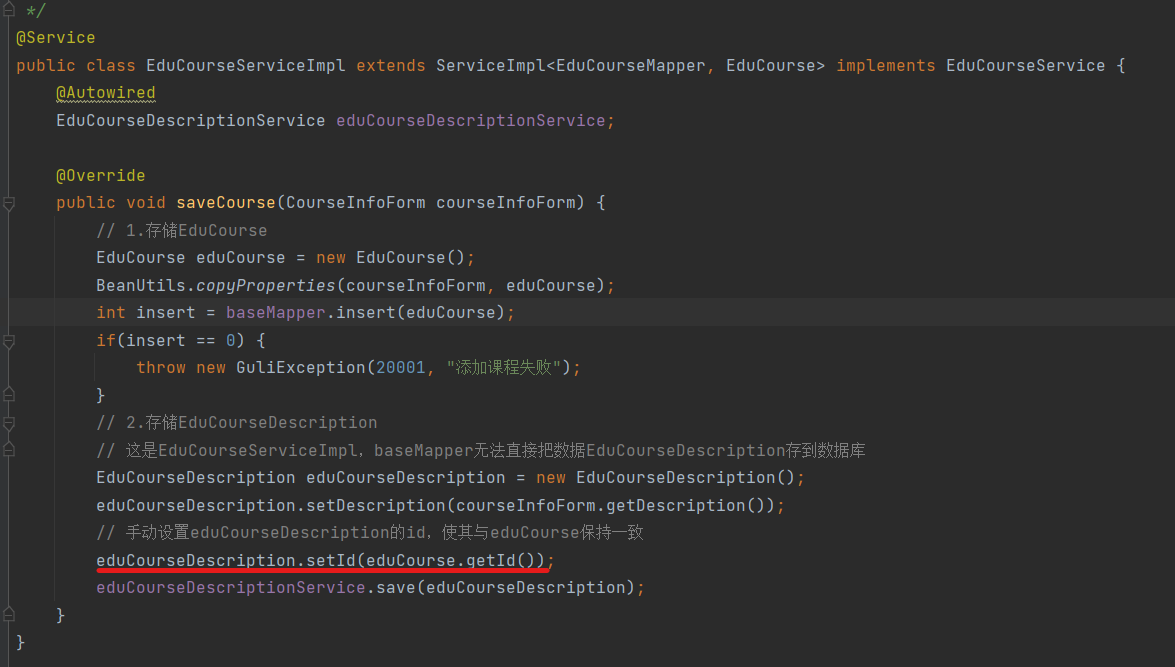
// 手动设置eduCourseDescription的id,使其与eduCourse保持一致
eduCourseDescription.setId(eduCourse.getId());
然后将主键策略设置为input。
3.4 前端实现
(1) 在router/index.js中添加路由。
  {
    path: '/subject',
    component: Layout,
    redirect: '/subject/list', //在页面中访问'/teacher'会被重定向到'/teacher/table'
    name: '课程管理',
    meta: { title: '课程管理', icon: 'example' },
    children: [
      {
        path: 'list',
        name: '课程列表',
        component: () => import('@/views/edu/subject/list'),
        meta: { title: '课程列表', icon: 'table' }
      },
      {
        path: 'save',
        name: '添加课程',
        component: () => import('@/views/edu/subject/save'),
        meta: { title: '添加课程', icon: 'tree' }
      }
    ]
  }
(2)创建页面
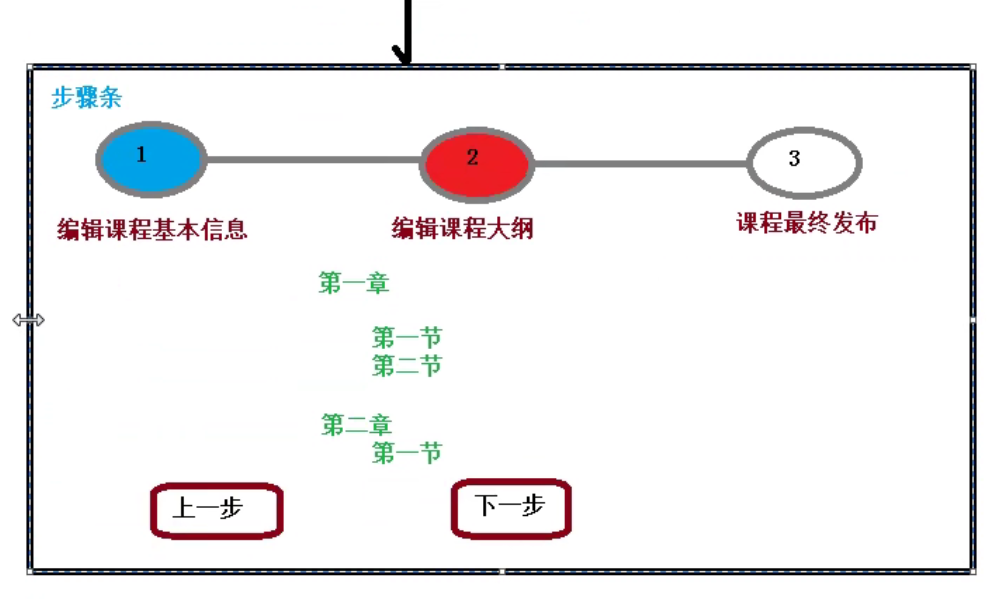
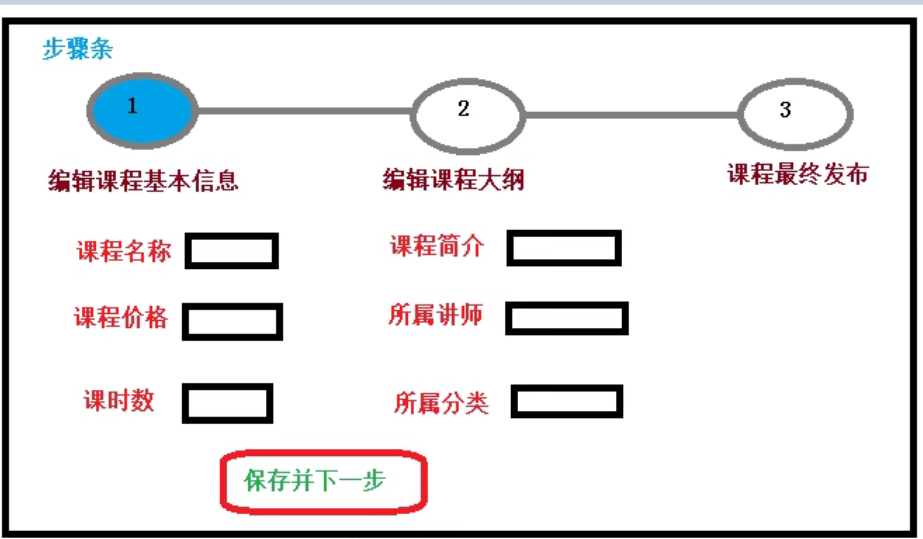
前面的需求分析提到我们课程添加的过程中需要展示三个页面。
下面我们创建三个页面对应的vue文件。
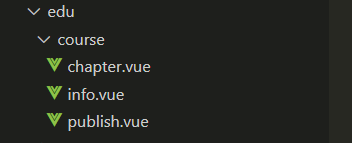
参考element-ui官方文档实现。
info.vue.
.<template>
  <div class="app-container">
    <h2 style="text-align: center">发布新课程</h2>
    <el-steps
      :active="1"
      process-status="wait"
      align-center
      style="margin-
bottom: 40px;"
    >
      <el-step title="填写课程基本信息" />
      <el-step title="创建课程大纲" />
      <el-step title="最终发布" />
    </el-steps>
    <el-form label-width="120px">
      <el-form-item>
        <el-button :disabled="saveBtnDisabled" type="primary" @click="next"
          >保 存并下一步</el-button
        >
      </el-form-item>
    </el-form>
  </div>
</template>

<script>
export default {
  data() {
    return {
      saveBtnDisabled:false,
    };
  },
  methods: {
    next() {
        //跳转到第二步
      this.$router.push({path:'/course/chapter/1'})
    },
  },
  created(){

  }
};
</script>

<style></style>
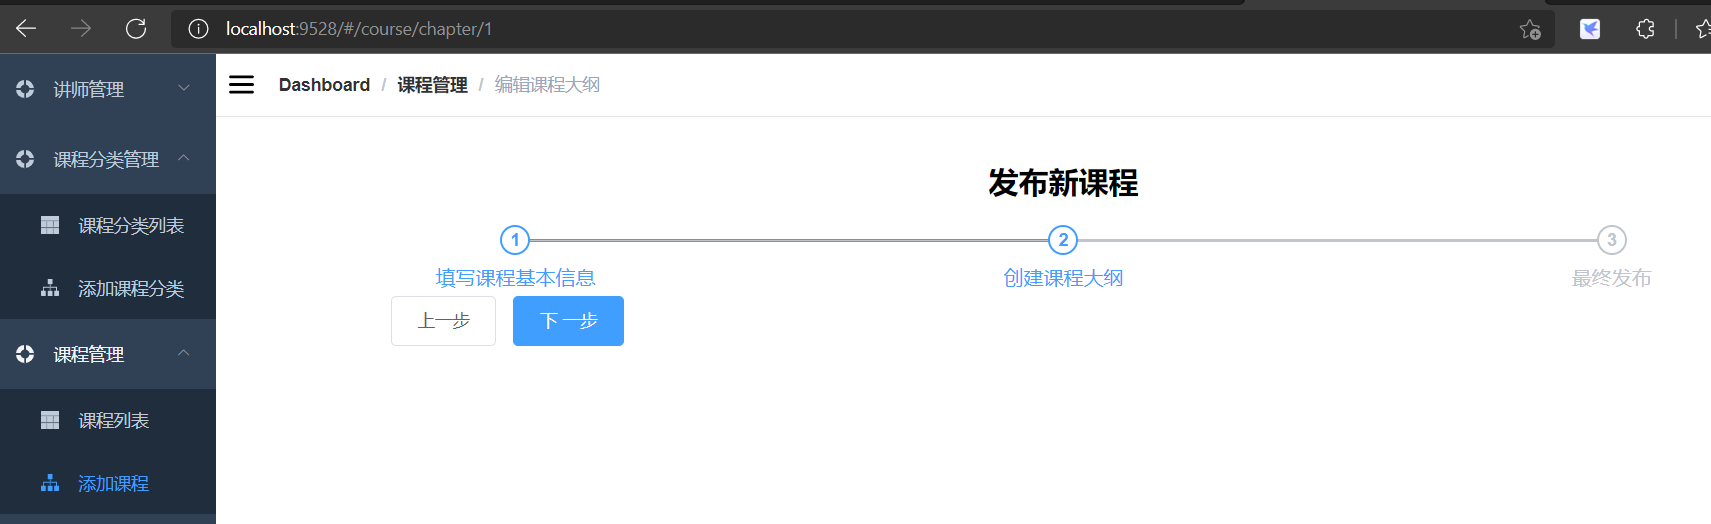
chapter.vue.
.<template>
  <div class="app-container">
    <h2 style="text-align: center">发布新课程</h2>
    <el-steps
      :active="2"
      process-status="wait"
      align-center
      style="margin-
bottom: 40px;"
    >
      <el-step title="填写课程基本信息" />
      <el-step title="创建课程大纲" />
      <el-step title="最终发布" />
    </el-steps>
    <el-form label-width="120px">
      <el-form-item>
        <el-button @click="previous">上一步</el-button>
        <el-button :disabled="saveBtnDisabled" type="primary" @click="next"
          >下 一步</el-button
        >
      </el-form-item>
    </el-form>
  </div>
</template>

<script>
export default {
  data() {
    return {
      saveBtnDisabled: false,
    };
  },
  methods: {
    //跳转到上一步
    previous() {
      this.$router.push({ path: "/course/info/1" });
    },
    next() {
      //跳转到第三步
      this.$router.push({ path: "/course/publish/1" });
    },
  },
  created() {},
};
</script>

<style>
</style>
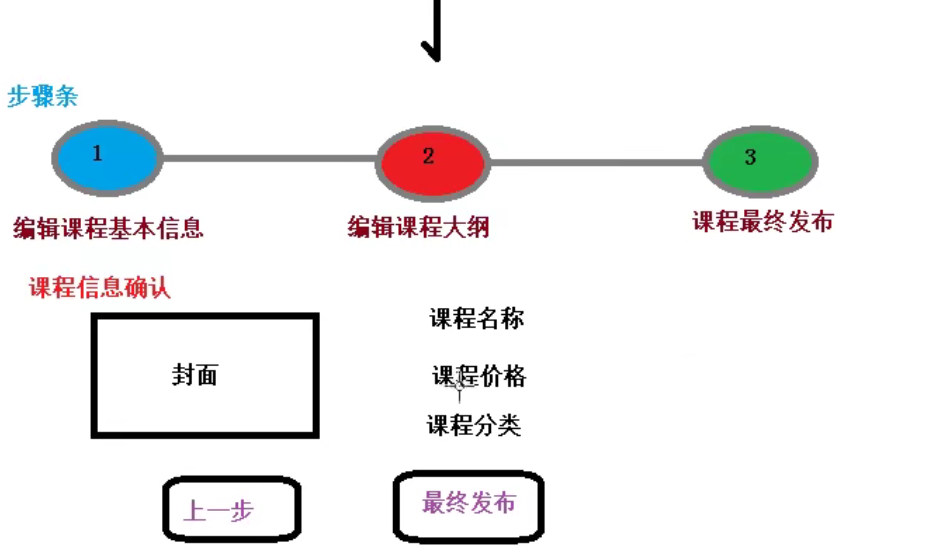
publish.vue.
.<template>
  <div class="app-container">
    <h2 style="text-align: center">发布新课程</h2>
    <el-steps
      :active="3"
      process-status="wait"
      align-center
      style="margin-
bottom: 40px;"
    >
      <el-step title="填写课程基本信息" />
      <el-step title="创建课程大纲" />
      <el-step title="最终发布" />
    </el-steps>
    <el-form label-width="120px">
      <el-form-item>
        <el-button @click="previous">返回修改</el-button>
        <el-button :disabled="saveBtnDisabled" type="primary" @click="publish"
          >发布课程</el-button
        >
      </el-form-item>
    </el-form>
  </div>
</template>

<script>
export default {
  data() {
    return {
      saveBtnDisabled: false,
    };
  },
  methods: {
    //跳转到上一步
    previous() {
      this.$router.push({ path: "/course/chapter/1" });
    },
    publish(){
      this.$router.push({ path: "/course/list" });
    }

  },
};
</script>

<style>
</style>
上面最后pubish.vue页面保存后会跳转到list.vue,因此记得在相同目录下创建list.vue。
(3)隐藏路由
修改前面的路由,并添加隐藏路由。
{
    path: '/course',
    component: Layout,
    redirect: '/course/list',
    name: '课程管理',
    meta: { title: '课程管理', icon: 'example' },
    children: [
      {
        path: 'list',
        name: '课程列表',
        component: () => import('@/views/edu/course/list'),
        meta: { title: '课程列表', icon: 'table' }
      },
      {
        path: 'save',
        name: '添加课程',
        component: () => import('@/views/edu/course/info'),
        meta: { title: '添加课程', icon: 'tree' }
      },
      // 通过隐藏路由访问添加课程的三个页面
      {
        path: 'info/:id',
        name: 'EduCourseInfoEdit',
        component: () => import('@/views/edu/course/info.vue'),
        meta: { title: '编辑课程基本信息', noCache: true },
        hidden: true
        },
        {
        path: 'chapter/:id',
        name: 'EduCourseChapterEdit',
        component: () => import('@/views/edu/course/chapter.vue'),
        meta: { title: '编辑课程大纲', noCache: true },
        hidden: true
        },
        {
        path: 'publish/:id',
        name: 'EduCoursePublishEdit',
        component: () => import('@/views/edu/course/publish.vue'),
        meta: { title: '发布课程', noCache: true },
        hidden: true
        }
    ]
  }
展示下目前的效果吧。
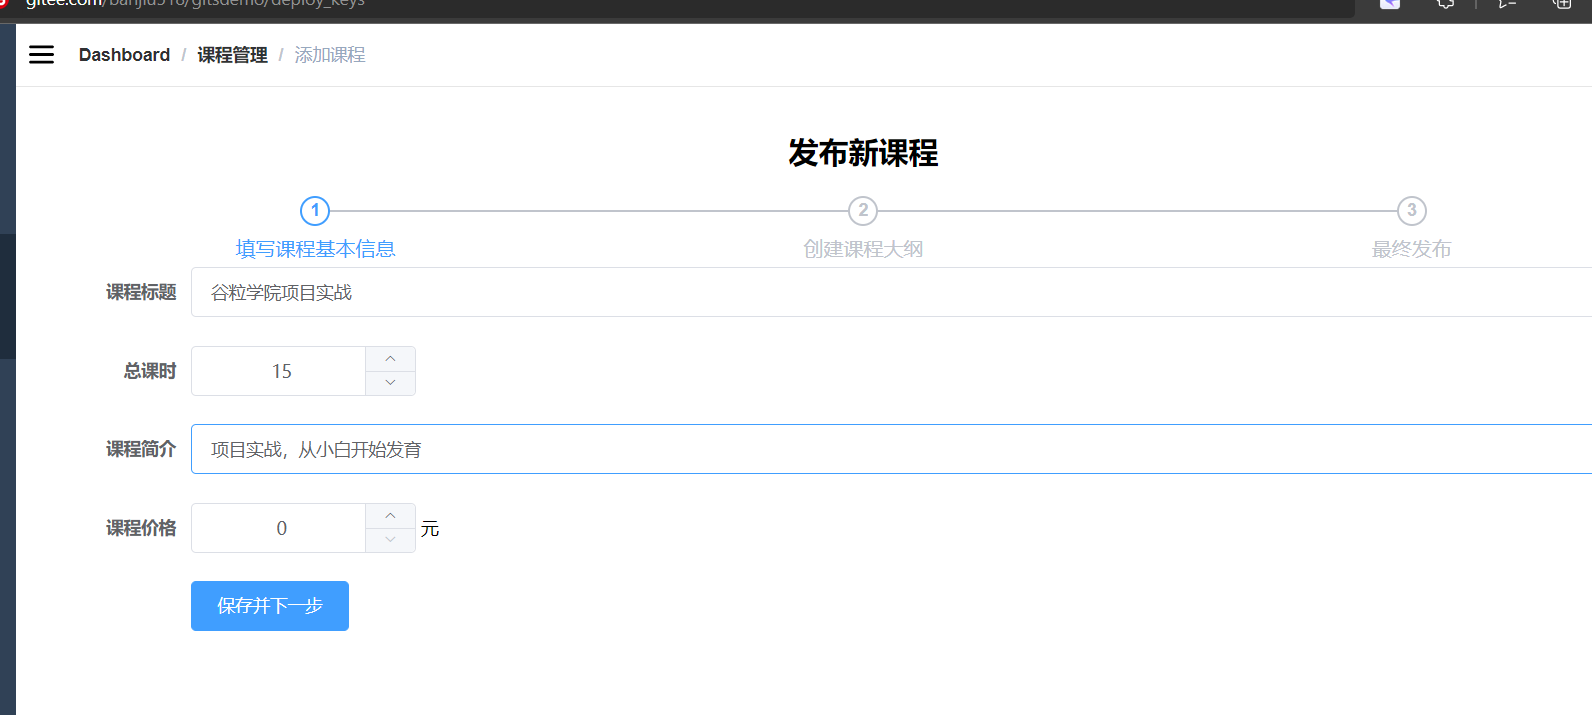
(4)实现添加基本信息表单
完善ui组件如下(info.vue)。
.<template>
<div class="app-container">
<h2 style="text-align: center">发布新课程</h2>
<el-steps
:active="1"
process-status="wait"
align-center
style="margin-
bottom: 40px;"
>
<el-step title="填写课程基本信息" />
<el-step title="创建课程大纲" />
<el-step title="最终发布" />
</el-steps>
<el-form label-width="120px">
<el-form-item label="课程标题">
<el-input
v-model="courseInfo.title"
placeholder=" 示例:机器学习项目课:从基础到搭建项目视频课程。专业名称注意大小写"
/>
</el-form-item>
<!-- 所属分类 TODO -->
<!-- 课程讲师 TODO -->
<el-form-item label="总课时">
<el-input-number
:min="0"
v-model="courseInfo.lessonNum"
controls-position="right"
placeholder="请填写课程的总课时数"
/>
</el-form-item>
<!-- 课程简介 TODO -->
<el-form-item label="课程简介">
<el-input v-model="courseInfo.description" placeholder="" />
</el-form-item>
<!-- 课程封面 TODO -->
<el-form-item label="课程价格">
<el-input-number
:min="0"
v-model="courseInfo.price"
controls-position="right"
placeholder="免费课程请设置为0元"
/>
元
</el-form-item>
<el-form-item>
<el-button
:disabled="saveBtnDisabled"
type="primary"
@click="saveOrUpdate"
>保存并下一步</el-button
>
</el-form-item>
</el-form>
</div>
</template>
<script>
import course from "@/api/edu/course.js";
export default {
data() {
return {
saveBtnDisabled: false,
courseInfo:
{
title: "",
subjectId: "",
teacherId: "",
lessonNum: 0,
description: "",
cover: "",
price: 0,
},
};
},
methods: {
saveOrUpdate() {
course.addCourseInfo(this.courseInfo).then(resp => {
this.$message({
message: "添加课程信息成功",
type: "success",
})
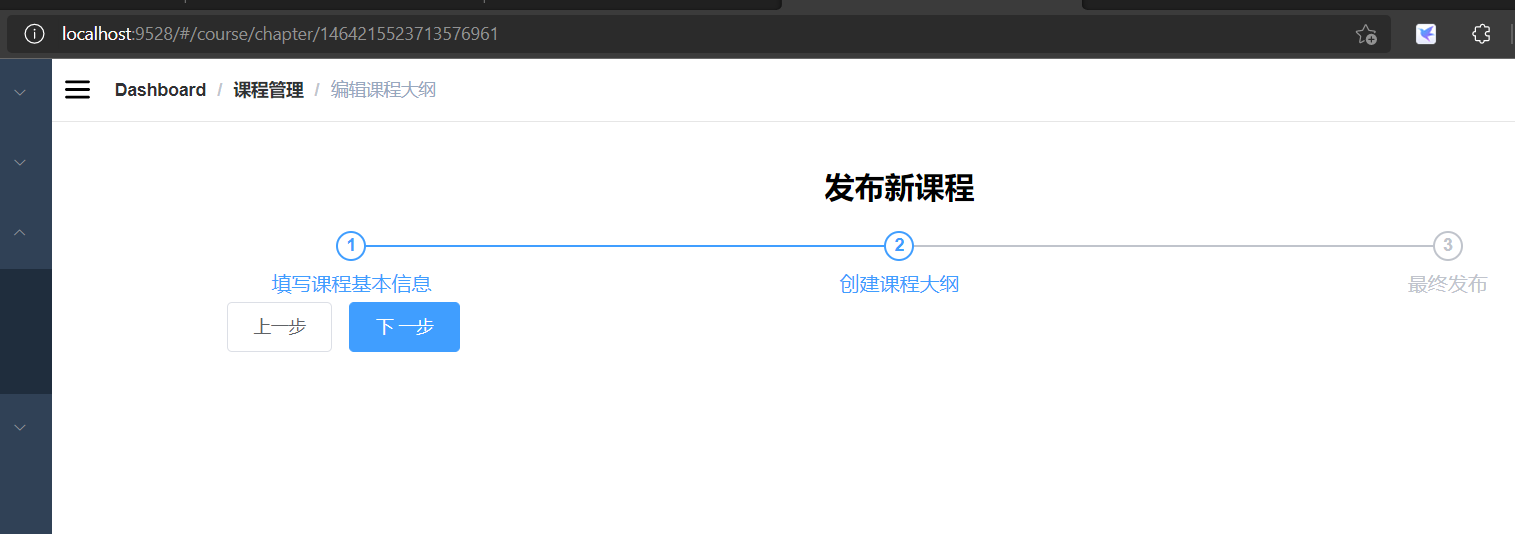
//跳转到第二步,并带着这个课程生成的id
this.$router.push({ path: "/course/chapter/"+resp.data.courseId });
});
},
},
created() {},
};
</script>
<style>
</style>
新建course.js.
import request from '@/utils/request'

export default {
  // 添加课程信息
  addCourseInfo(courseInfo) {
    return request({
      url: `/eduservice/edu-course/addCourse`,
      method: 'post',
      data: courseInfo
    })
  }
}
测试下。
注意到标红部分代码,为什么要传课程id?
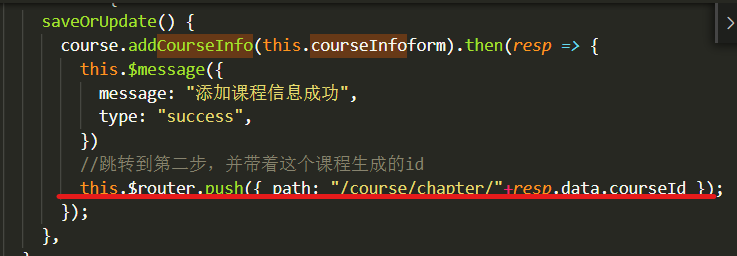
还记得我们的需求吗,第二部时创建课程大纲,而这个课程大纲的页面需要用到第一部的课程id,因此我们把这个id值通过路由传递给第二部的页面。
这个id从何而来?当然是后端传过来咯。对后端进行修改。
public class EduCourseController {
    @Autowired
    EduCourseService eduCourseService;

    @PostMapping("/addCourse")
    public R addCourse(@RequestBody CourseInfoForm courseInfoForm) {
        String id = eduCourseService.saveCourse(courseInfoForm);
        return R.ok().data("courseId",id);
    }
}
public interface EduCourseService extends IService<EduCourse> {

    String saveCourse(CourseInfoForm courseInfoForm);
}
@Service
public class EduCourseServiceImpl extends ServiceImpl<EduCourseMapper, EduCourse> implements EduCourseService {
    @Autowired
    EduCourseDescriptionService eduCourseDescriptionService;

    @Override
    public String saveCourse(CourseInfoForm courseInfoForm) {
       ...

        return eduCourse.getId();
    }
}
测试下。注意下面路径中的路由。
3.5 功能完善
下面把功能进一步完善,使之与实际业务需求相符合。
(1)实现讲师、课程分类的下拉框选择功能
info.vue实现组件。
<!--课程讲师-->
<el-form-item label="课程讲师">
    <el-select v-model="courseInfo.teacherId" placeholder="请选择">
        <el-option
                   v-for="teacher in teacherLists"
                   :key="teacher.id"
                   :label="teacher.name"
                   :value="teacher.id"
                   ></el-option>
    </el-select>
</el-form-item>
.course.js编写查找讲师的接口。
//查询所有讲师
getAllTeacher(){
    return request({
        url:"/eduservice/edu-teacher/findAll",
        method: 'get'
    })
}
在info.vue调用接口。
data() {
    return {
        ...
      teacherLists: [], //封装所有讲师数据

    };
},
methods: {
    ...
     //查询所有讲师
    getListTeacher() {
      course.getAllTeacher().then((resp) => {
        this.teacherLists = resp.data.items;
      });
     }
  },
created() {
   this.getListTeacher();
}
在之前写的ui中,已经对于后端传过来的数据进行了遍历,这里摘录下。

测试下功能。

(2)实现课程一、二级分类的联动
info.vue
.<template>
  		...

      <!-- 一级分类 -->
      <el-form-item label="课程分类">
          <el-select v-model="courseInfo.subjectParentId" placeholder="一级分类" @change="subjectOneChanged">
            <!-- 课程分类信息的遍历 -->
              <el-option
                        v-for="subject in subjectOneList"
                        :key="subject.id"
                        :label="subject.title"
                        :value="subject.id"
                        ></el-option>
          </el-select>
      </el-form-item>

       <!-- 二级分类 -->
      <el-form-item label="课程分类">
          <el-select v-model="courseInfo.subjectId" placeholder="二级分类">
            <!-- 课程分类信息的遍历 -->
              <el-option
                        v-for="subject in subjectTwoList"
                        :key="subject.id"
                        :label="subject.title"
                        :value="subject.id"
                        ></el-option>
          </el-select>
      </el-form-item>


</template>

<script>
......
import subject from "@/api/edu/subject.js";

export default {
  data() {
    return {
    ......
      subjectOneList: [], //封装一级课程分类
      subjecTwoList: [] //封装二级课程分类

    };
  },
  methods: {
  ......
     getOneSubject() {
        subject.getAllSubject().then((resp) => {
          this.subjectOneList = resp.data.list;
        })
     },
     // 点击某个一级分类时,触发显示二级分类
     subjectOneChanged(value) { //value就是一级分类的id,是框架帮我们做到的
       //value就是一级分类的id值
    for (let i = 0; i < this.subjectOneList.length; i++) {
        if (this.subjectOneList[i].id === value) {
            this.subjectTwoList = this.subjectOneList[i].children;
            this.courseInfo.subjectId = ""; //清空,避免选择新的以及分类后二级分类时仍然有值,读者可以去掉自测
        }
    }

  }

  },
  created() {
      ...
      this.getOneSubject()
  }
}
</script>

<style>
</style>
效果如下。
[外链图片转存失败,源站可能有防盗链机制,建议将图片保存下来直接上传(img-LqySEfpE-1637946746593)(C:/Users/24724/AppData/Roaming/Typora/typora-user-images/image-20211127005318905.png)]


 1万+
1万+


 被折叠的 条评论
为什么被折叠?
被折叠的 条评论
为什么被折叠?
 到【灌水乐园】发言


