


学习springboot2的第2天(2021-12-01)4-基础入门-springboot的HelloWorld
使用springboot来写一个helloworld程序。
需求:
浏览器发送/hello请求。
服务器响应Hello,Spring Boot 2
第一步:创建maven项目。


点击finish

第二步:导入parent
在pom文件里面导入parent
 <parent>
        <groupId>org.springframework.boot</groupId>
        <artifactId>spring-boot-starter-parent</artifactId>
        <version>2.3.4.RELEASE</version>
    </parent>

当前的pom文件:
<?xml version="1.0" encoding="UTF-8"?>
<project xmlns="http://maven.apache.org/POM/4.0.0"
         xmlns:xsi="http://www.w3.org/2001/XMLSchema-instance"
         xsi:schemaLocation="http://maven.apache.org/POM/4.0.0 http://maven.apache.org/xsd/maven-4.0.0.xsd">
    <modelVersion>4.0.0</modelVersion>
    <groupId>com.rtl</groupId>
    <artifactId>boot-01-helloworld</artifactId>
    <version>1.0-SNAPSHOT</version>
    <properties>
        <maven.compiler.source>8</maven.compiler.source>
        <maven.compiler.target>8</maven.compiler.target>
    </properties>
    <parent>
        <groupId>org.springframework.boot</groupId>
        <artifactId>spring-boot-starter-parent</artifactId>
        <version>2.3.4.RELEASE</version>
    </parent>

</project>
第三步:添加系统依赖。
之前学习ssm的时候,都需要添加很多依赖。现在这一个依赖就够了。
<dependencies>
    <dependency>
        <groupId>org.springframework.boot</groupId>
        <artifactId>spring-boot-starter-web</artifactId>
    </dependency>
</dependencies>

当前的pom文件:
<?xml version="1.0" encoding="UTF-8"?>
<project xmlns="http://maven.apache.org/POM/4.0.0"
         xmlns:xsi="http://www.w3.org/2001/XMLSchema-instance"
         xsi:schemaLocation="http://maven.apache.org/POM/4.0.0 http://maven.apache.org/xsd/maven-4.0.0.xsd">
    <modelVersion>4.0.0</modelVersion>
    <groupId>com.rtl</groupId>
    <artifactId>boot-01-helloworld</artifactId>
    <version>1.0-SNAPSHOT</version>
    <properties>
        <maven.compiler.source>8</maven.compiler.source>
        <maven.compiler.target>8</maven.compiler.target>
    </properties>
    <parent>
        <groupId>org.springframework.boot</groupId>
        <artifactId>spring-boot-starter-parent</artifactId>
        <version>2.3.4.RELEASE</version>
    </parent>

    <dependencies>
        <dependency>
            <groupId>org.springframework.boot</groupId>
            <artifactId>spring-boot-starter-web</artifactId>
        </dependency>
    </dependencies>

</project>
第四步:写你的测试代码。
4.1、新建包:com.rtl.boot


4.2、在这个包里面创建主程序类:MainApplication

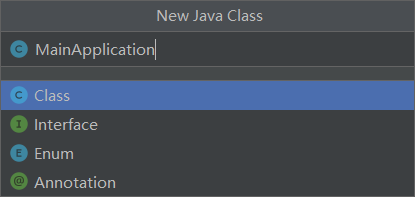

4.3、给MainApplication添加注解@SpringBootApplication
加上这个注解,标志着这个类就是一个springboot应用。

这个类MainApplication就变成了主程序类。是后面写的所有程序的入口。
4.4、编写主程序类里面的main方法。
固定写法:

4.5、编写你的业务逻辑代码。
4.5.1、有一个子包controller

4.5.2、在子包下面新建HelloController类。

在这个类上面加上注解@Controller

4.5.3、在类HelloController里面写控制器方法处理/hello请求。
因为返回的数据要以字符串的形式给浏览器。
所以还需要加上注解@ResponseBody。

【注意】:
假设未来HelloController这个控制器类,里面的所有方法的返回值都是直接返回给浏览器的,而不是返回一个页面。
那么我们就需要在HelloController类体上加注解@ResponseBody。
省的每个方法都加上,很麻烦。
之前写法:

现在写法:

【注意】:
这两个注解@Controller @ResponseBody同时写在类体上的时候,可以通过注解@RestController来代替他俩。
实际上@RestController就是@Controller @ResponseBody他俩的合体。

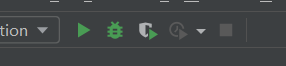
第五步:运行程序。

启动之后idea打印日志:


第六步:浏览器访问url来测试请求。
发送请求:http://localhost:8080/hello
发现访问不到。
【问题】:
之前写的controller包是在com.rt.controller
启动类:com.rtl.boot
两个人是并行关系。
这个是不行的。
正确的写法是:

com.rtl.boot包下面有主程序类和controller包
在com.rtl.boot.controller下面有类HelloController
现在重新启动之后,发送请求:http://localhost:8080/hello


测试成功!!!
第7步:在resources下面有个配置文件
文件固定名字:application.properties
未来所有的配置信息都写在这一个配置文件里面。


1、在这个配置文件里面修改Tomcat的端口号。
之前默认是8080,现在修改为8888
 重启:
重启:

现在浏览器需要访问的是:
http://localhost:8888/hello
而不是8080了

问:application.properties这个配置文件到底可以写哪些配置呢?
https://docs.spring.io/spring-boot/docs/current/reference/html/index.html


ctrl+F server.port

所以以后写配置的时候,如果不会写。就来到这个网址搜。
https://docs.spring.io/spring-boot/docs/current/reference/html/application-properties.html#application-properties
第8步:学习使用springboot进行项目部署,创建一个可执行的jar包
https://docs.spring.io/spring-boot/docs/current/reference/html/getting-started.html#getting-started.first-application.executable-jar

先在pom里面说明准备把程序打成jar包形式

需要使用springboot 提供的一个插件:

这个复制到pom文件里面的dependencies的下面
<build>
    <plugins>
        <plugin>
            <groupId>org.springframework.boot</groupId>
            <artifactId>spring-boot-maven-plugin</artifactId>
        </plugin>
    </plugins>
</build>

当前的pom文件:
<?xml version="1.0" encoding="UTF-8"?>
<project xmlns="http://maven.apache.org/POM/4.0.0"
         xmlns:xsi="http://www.w3.org/2001/XMLSchema-instance"
         xsi:schemaLocation="http://maven.apache.org/POM/4.0.0 http://maven.apache.org/xsd/maven-4.0.0.xsd">
    <modelVersion>4.0.0</modelVersion>
    <groupId>com.rtl</groupId>
    <artifactId>boot-01-helloworld</artifactId>
    <version>1.0-SNAPSHOT</version>
    <properties>
        <maven.compiler.source>8</maven.compiler.source>
        <maven.compiler.target>8</maven.compiler.target>
    </properties>
    <parent>
        <groupId>org.springframework.boot</groupId>
        <artifactId>spring-boot-starter-parent</artifactId>
        <version>2.3.4.RELEASE</version>
    </parent>

    <dependencies>
        <dependency>
            <groupId>org.springframework.boot</groupId>
            <artifactId>spring-boot-starter-web</artifactId>
        </dependency>
    </dependencies>

    <build>
        <plugins>
            <plugin>
                <groupId>org.springframework.boot</groupId>
                <artifactId>spring-boot-maven-plugin</artifactId>
            </plugin>
        </plugins>
    </build>
</project>
然后对项目进行打包:

进入target文件:


在idea里面把应用给停止了。


在jar所在的路径下执行命令:
java -jar boot-01-helloworld-1.0-SNAPSHOT.jar


去浏览器测试:
http://localhost:8888/hello

还是可以部署成功。
【注意点】
1、取消掉cmd里面的快速编辑模式。

2、右键打包好的jar文件,使用压缩文件打开。


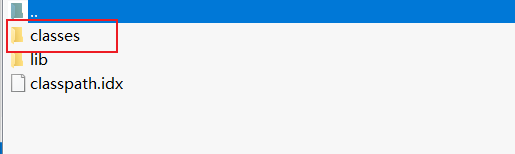
我们自己写的类在这里面:

classes里面就是我们自己写的类的字节码文件
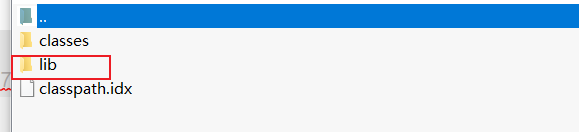
lib包下,我们看到内置的Tomcat


 被折叠的 条评论
为什么被折叠?
被折叠的 条评论
为什么被折叠?
 到【灌水乐园】发言


