


Redis安装
上传安装文件

解压redis
tar -zxvf redis-5.0.5.tar.gz
修改redis文件目录

安装Redis
1.make 2.make install

修改redis配置文件
命令:vim redis.conf
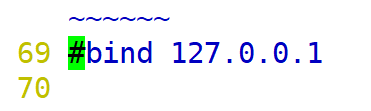
1.关闭IP绑定
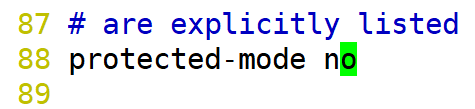
2.关闭保护模式
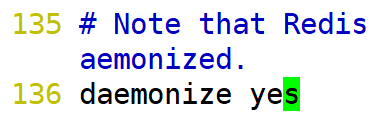
3.开启后台启动
Redis服务器操作命令
1.redis-server redis.conf 默认条件下 前台启动
2.redis-cli  -p   6379   进入客户端        exit/quit/ctrl+c   退出客户端

3.redis-cli  -p   6379  shutdown   或者  ps -ef    |grep   redis     kill    -9   PID号      关闭redis服务器.
Redis入门案例
添加jar包文件
<!--spring整合redis -->
        <dependency>
            <groupId>redis.clients</groupId>
            <artifactId>jedis</artifactId>
        </dependency>
        <dependency>
            <groupId>org.springframework.data</groupId>
            <artifactId>spring-data-redis</artifactId>
        </dependency>
操作String类型
public class TestRedis {

    /**
     * 测试String数据类型
     * 1.链接redis服务器    192.168.126.129:6379
     * 2.通过命令操作redis.
     *
     * 问题说明:程序链接不通   检查redis配置文件 是否修改3项.
     * 修改之后重启redis服务器.
     */
    private Jedis jedis;

    @BeforeEach     //当执行test测试方式时,首先执行该操作
    public void init() {

        //jedis对象实例化
        jedis = new Jedis("192.168.126.129", 6379);
    }

    @Test
    public void testString() {
        //Jedis jedis = new Jedis("192.168.126.129", 6379);

        //1.利用set方法实现redis赋值
        jedis.set("jedis","天天都需要爱,心思由你猜!!!!!");
        String value = jedis.get("jedis");
        System.out.println(value);

        //2.测试是否还有某个key
        Boolean flag = jedis.exists("a");
        System.out.println(flag);

        //3.动态获取value的长度.
        System.out.println(jedis.strlen("jedis"));

        //4.动态获取所有key
        Set<String>   sets = jedis.keys("*");
        System.out.println(sets);
    }

    /**
     * 需求:
     *  1.如果key存在则不允许修改数据.
     */
    @Test
    public void testString_NX() {
        jedis.flushAll();   //清空redis
        //测试1:
        //jedis.set("a","100");
        //jedis.set("a","1000");  redis对同样的数据进行操作时,其实做的是修改操作

        //测试2:
        //jedis.set("a", "100");
        /*if(!jedis.exists("a")) {
            jedis.set("a", "2000");
        }*/

        //测试3: jedis.setNX();   只有数据不存在时,才能赋值成功!!
        jedis.setnx("a","100");     //成功
        jedis.setnx("a","1000");    //失败
        System.out.println(jedis.get("a"));
    }


    /**
     * 需求:赋值同时为数据添加超时时间
     * @throws InterruptedException
     * 说明:如果将赋值操作和超时的设定分开写,则丧失了操作的原子性.
     * 原子性: 要求数据同时生效/同时不生效.
     */
    @Test
    public void testString_EX_PX() throws InterruptedException {
        /*jedis.set("b", "100");
        //int a = 1/0;  //程序报错了.
        jedis.expire("b", 10);  //为key添加10秒超时时间
        Thread.sleep(2000);
        System.out.println("剩余超时时间:"+jedis.ttl("b")+"秒");*/

        //ex方法时间单位 秒
        jedis.setex("b", 10, "100");    //要么同时成功,要么同时失败
        //赋值毫秒
        jedis.psetex("c", 2000, "100");

    }


    /**
     * 需求3:
     *  1.要求赋值同时添加超时时间    操作满足原子性要求
     *  2.如果key不存在时才能赋值.
     *  目标:  ex  nx方法同时操作
     *
     * XX: 只有key存在时才会赋值.
     * NX: 如果key不存在时才会赋值
     * EX: 添加超时时间 单位秒
     * PX: 添加超时时间单位毫秒
     */
    @Test
    public void testStringSet() {
        SetParams setParams = new SetParams();
        setParams.xx().ex(10);
        jedis.set("c", "200", setParams);
        jedis.set("c", "2000", setParams);
        System.out.println(jedis.get("c"));
    }

}
操作Hash类型
//一般hash方式使用与业务数据的调用 {item:  item详情 ,商品规格信息}
    //如果业务数据需要嵌套可以采用hash方式进行存储.
    @Test
    public void  testHash() {
        Map<String,String> hashMap = new HashMap<String, String>();
        hashMap.put("id", "101");       //更新操作
        hashMap.put("name", "人类");
        Long result = jedis.hset("person", hashMap);
        System.out.println(result);

        jedis.hset("dog", "id", "101");
        jedis.hset("dog", "name", "jerry");
        jedis.hset("dog", "age", "2");
        System.out.println(jedis.hgetAll("dog"));
    }
操作List类型
/**
     * 操作list集合
     *
     */
    @Test
    public void testList() {

        jedis.lpush("myList", "1","2","3","4");
        String value = jedis.rpop("myList");
        System.out.println(value);
    }
事务控制
@Test
    public void testTx() {
        Transaction transaction = jedis.multi();    //开启事务
        try {
            transaction.set("a", "a");
            transaction.set("b", "b");
            int a = 1/0;
            transaction.exec(); //事务提交
            System.out.println("事务提交成功");
        } catch (Exception e) {
            e.printStackTrace();
            transaction.discard();  //事务回滚
            System.out.println("事务提交失败");
        }
    }
SpringBoot整合Redis
编辑properties文件
#配置第一个台Redis
redis.node=192.168.126.129:6379
配置类实现
@Configuration  //标识配置类
@PropertySource("classpath:/properties/redis.properties") //spring容器去加载配置文件
public class RedisConfig {

    @Value("${redis.node}")
    private String node;    //标识redis节点    host:port

    @Bean   //方法名称当作key,返回值结果当作value 存储到Spring容器中
    public Jedis jedis() {

        String[] array = node.split(":");
        String host = array[0]; //动态获取IP地址
        int port = Integer.parseInt(array[1]);  //获取端口号
        return new Jedis(host, port);
    }
}
Redis实现商品分类缓存
JAVA对象和JSON串转化
public class TestObjectMapper {

    private static final ObjectMapper objectMapper = new ObjectMapper();

    /**
     * 该测试类,主要解决了对象与JSON串之间的转化的问题
     * 1.对象转化为JSON
     * @throws JsonProcessingException
     */
    @Test
    public void ObjectToJSON() throws JsonProcessingException {
        ItemDesc itemDesc = new ItemDesc();
        itemDesc.setItemId(1000L).setItemDesc("测试对象转化!!!")
                .setCreated(new Date()).setUpdated(new Date());
        ObjectMapper objectMapper = new ObjectMapper();
        //将对象转化为JSON
        String json = objectMapper.writeValueAsString(itemDesc);
        System.out.println(json);

        //将JSON转化为对象
        ItemDesc itemDesc2 = objectMapper.readValue(json, ItemDesc.class);
        System.out.println(itemDesc2);
    }


    /**
     * list集合与JSON转化
     * @throws JsonProcessingException
     */
    @SuppressWarnings("unchecked")
    @Test
    public void listToJSON() throws JsonProcessingException{
        ItemDesc itemDesc = new ItemDesc();
        itemDesc.setItemId(1000L).setItemDesc("测试对象转化!!!")
                .setCreated(new Date()).setUpdated(new Date());
        ItemDesc itemDesc2 = new ItemDesc();
        itemDesc2.setItemId(1000L).setItemDesc("测试对象转化!!!")
                .setCreated(new Date()).setUpdated(new Date());

        List<ItemDesc> list = new ArrayList<ItemDesc>();
        list.add(itemDesc);
        list.add(itemDesc2);

        String json = objectMapper.writeValueAsString(list);
        System.out.println(json);

        List<ItemDesc> list2 =
                objectMapper.readValue(json, list.getClass());
        System.out.println(list2);
    }

}
编辑ObjectMapperUtil工具API
public class ObjectMapperUtil {

    private static final ObjectMapper MAPPER = new ObjectMapper();

    //1.java对象转化为json
    public static String toJSON(Object object) {

        try {
            return MAPPER.writeValueAsString(object);
        } catch (JsonProcessingException e) {
            e.printStackTrace();
            throw new RuntimeException(e);
        }
    }


    //2.json串转化为对象 要求:用户传递什么类型,则可以动态的返回什么对象
    //问题:能否确定用户传递什么类型的数据??????   确定不了的数据可以使用泛型
    //<T> 定义一个泛型对象     T:泛型引用
    public static <T> T toObject(String json,Class<T> targetClass) {

        if(StringUtils.isEmpty(json)) {
            //如果为null返回空指针异常
            System.out.println("json参数为null,请检查数据!!!!");
            throw new NullPointerException();
        }
        try {
            return MAPPER.readValue(json,targetClass);
        } catch (JsonProcessingException e) {

            e.printStackTrace();
            throw new RuntimeException(e);
        }
    }
}
商品分类缓存实现
编辑ItemCatController
@RequestMapping("/list")
    public List<EasyUITree> findItemCatListByParentId
    (@RequestParam(name="id",defaultValue="0")Long parentId){
        //根据parentId查询数据库.
        //return itemCatService.findItemCatListByParentId(parentId);

        //执行缓存的业务操作
        return itemCatService.findItemCatCache(parentId);
    }
编辑ItemCatService
/**
     * 具体实现步骤:
     *  1.动态的拼接key=类名.方法名::参数列表
     *  2.根据key查询redis服务器.
     *  3.判断返回值是否有值.
     *  4.如果查询的结果为null,则表示redis服务器没有数据.应该查询数据库.
     *      5.将数据库记录通过工具API实现json转化.之后保存到redis中.
     *  6.如果查询的结果不为null,则表示redis服务器中有数据.可以将JSON直接转化为对象.
     */
    @Override
    public List<EasyUITree> findItemCatCache(Long parentId) {
        Long start = System.currentTimeMillis();    //记录开始时间
        //1.动态生成KEY
        String key = "ItemCatServiceImpl.findItemCatCache::"+parentId;
        //2.根据key获取缓存数据
        String value = jedis.get(key);
        List<EasyUITree> treeList = new ArrayList<EasyUITree>();
        //3.判断value的有效性.
        if(StringUtils.isEmpty(value)) {
            //4.如果为null,则表示应该查询数据库.
            treeList = findItemCatListByParentId(parentId);
            Long end = System.currentTimeMillis();
            //5.将数据保存到redis中
            String json = ObjectMapperUtil.toJSON(treeList);
            jedis.set(key, json);
            System.out.println("第一次查询,执行数据库操作耗时:"+(end-start)+"毫秒");
        }else {
            //6.redis中有缓存记录,需要将redis中的数据转化之后返回.
            treeList = ObjectMapperUtil.toObject(value,treeList.getClass());
            Long end = System.currentTimeMillis();
            System.out.println("redis实现缓存查询!!!! 耗时:"+(end-start)+"毫秒");
        }

        return treeList;
    }
缓存优化AOP策略
自定义注解CacheFind
@Target(ElementType.METHOD)         //表示当前注解对方法有效
@Retention(RetentionPolicy.RUNTIME) //运行时有效
public @interface CacheFind {
    //1.可以由用户自己指定     2.动态生成key
    String key() default "";
    //2.指定key的超时时间   默认条件下 当前key永不超时
    int secondes() default 0;
}
编辑缓存AOP
//主要目的实现Redis缓存
@Component      //将该对象交给spring容器管理
@Aspect         //表示该类是一个切面
public class CacheAOP {

    @Autowired
    private Jedis jedis;
    /**
     * 通知选择: 控制目标方法执行  选用环绕通知.
     * 切入点表达式定义:   拦截CacheFind注解
     * 规则:ProceedingJoinPoint 必须位于第一位
     */

    @Around("@annotation(cacheFind)")       //动态获取注解的参数
    public Object around(ProceedingJoinPoint joinPoint,CacheFind cacheFind) {
        //1.动态生成key
        String key = getKey(joinPoint,cacheFind);

        //2.根据key查询redis服务器
        String value = jedis.get(key);

        //3.判断value是否有数据
        Object result = null;
        if(StringUtils.isEmpty(value)) {
            //用户第一次查询缓存,则需要执行目标方法
            try {
                result = joinPoint.proceed();
                //将result转化为JSON数据.
                String json = ObjectMapperUtil.toJSON(result);
                //将数据保存到redis缓存中
                if(cacheFind.secondes()>0) {
                    //动态获取缓存超时时间
                    int seconds = cacheFind.secondes();
                    jedis.setex(key, seconds, json);
                }else {
                    jedis.set(key, json);//不需要设定超时时间
                }
                System.out.println("redis查询数据库成功!!!!");
            } catch (Throwable e) {
                e.printStackTrace();
                throw new RuntimeException();
            }
        }else {
            //表示redis中有数据 应该通过缓存动态的获取数据.
            //targetClass:方法返回值的参数类型???? JAVA基础中反射概念 用法
            //利用SpringAOP中的工具API动态获取返回值类型
            MethodSignature methodSignature =
                            (MethodSignature) joinPoint.getSignature();
            Class<?> returnType = methodSignature.getReturnType();
            result = ObjectMapperUtil.toObject(value, returnType);
            System.out.println("查询redis缓存成功!!!!");
        }

        return result;
    }

    /**
     * 策略:
     *  1.如果用户自己指定了key,则使用用户的.
     *  2.如果用户没有指定key ,则动态生成.
     *    类名.方法名::参数值
     * @param joinPoint
     * @param cacheFind
     * @return
     */
    private String getKey(ProceedingJoinPoint joinPoint, CacheFind cacheFind) {
        //1.检查用户是否指定key
        String key = cacheFind.key();
        if(!StringUtils.isEmpty(key)) {
            //说明用户自己指定
            return key;
        }

        //2.用户自己没有指定,需要动态生成.
        String className = joinPoint.getSignature().getDeclaringTypeName();
        //获取方法名称
        String methodName = joinPoint.getSignature().getName();
        //获取方法中的参数
        Object[] args = joinPoint.getArgs();
        //将整个参数转化为字符串,之后当做key
        String strArgs = Arrays.toString(args);

        return className+"."+methodName+"::"+strArgs;
    }
}
SpringBoot整合Redis集群
测试API
@Test
    public void test01() {
        Set<HostAndPort> nodes = new HashSet<HostAndPort>();
        nodes.add(new HostAndPort("192.168.126.129",7000));
        nodes.add(new HostAndPort("192.168.126.129",7001));
        nodes.add(new HostAndPort("192.168.126.129",7002));
        nodes.add(new HostAndPort("192.168.126.129",7003));
        nodes.add(new HostAndPort("192.168.126.129",7004));
        nodes.add(new HostAndPort("192.168.126.129",7005));
        //操作redis集群的API
        JedisCluster jedisCluster = new JedisCluster(nodes);
        jedisCluster.set("redis", "redis集群配置!!!!!");
        String value = jedisCluster.get("redis");
        System.out.println("动态获取redis结果信息:"+value);
    }
编辑properties文件
redis.nodes=192.168.126.129:7000,192.168.126.129:7001,192.168.126.129:7002,192.168.126.129:7003,192.168.126.129:7004,192.168.126.129:7005
编辑RedisConfig配置类
@Configuration  //标识配置类
@PropertySource("classpath:/properties/redis.properties") //spring容器去加载配置文件
public class RedisConfig {

    @Value("${redis.nodes}")
    private String nodes;       //node,node,node

    /**
     * SpringBoot整合redis集群
     * 1.为redis的节点动态赋值.
     * 2.编辑配置类 返回JedisCluster对象
     */
    @Bean
    @Scope("prototype")
    public JedisCluster jedisCluster() {
        Set<HostAndPort> setNodes = new HashSet<HostAndPort>();
        String[] nodeArray = nodes.split(",");
        for (String node : nodeArray) {
            String[] hNode = node.split(":");
            String host = hNode[0];
            int port = Integer.parseInt(hNode[1]);
            setNodes.add(new HostAndPort(host, port));
        }
        return new JedisCluster(setNodes);
    }

}
编辑CacheAOP
修改AOP中的属性注入


 3618
3618


 被折叠的 条评论
为什么被折叠?
被折叠的 条评论
为什么被折叠?
 到【灌水乐园】发言


