


文章目录
还没更完//需要整合时再去用一下。。。
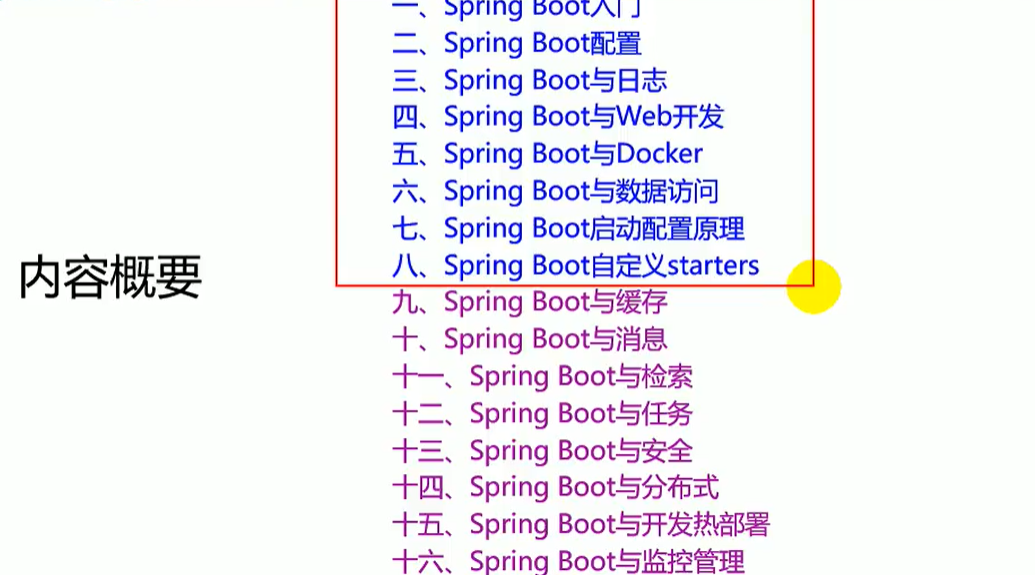
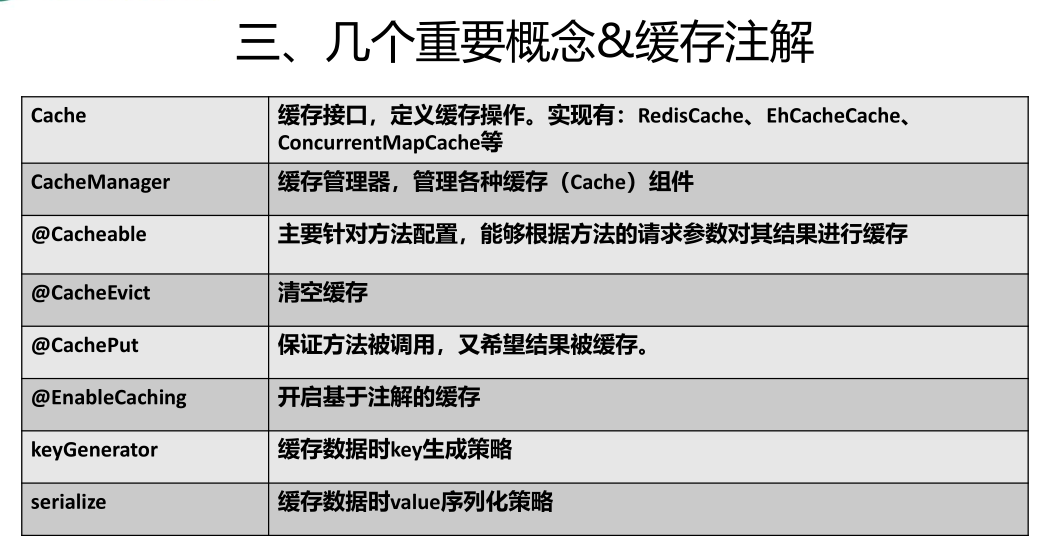
一、SpringBoot与缓存
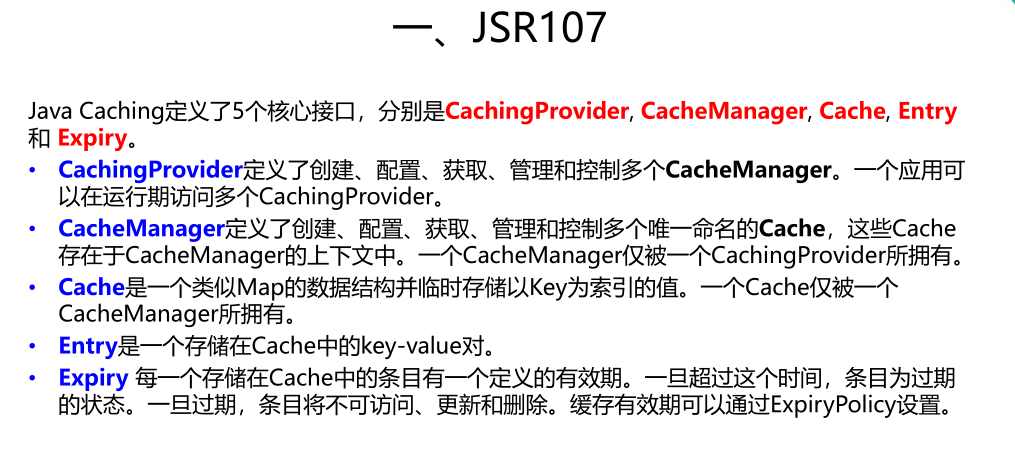
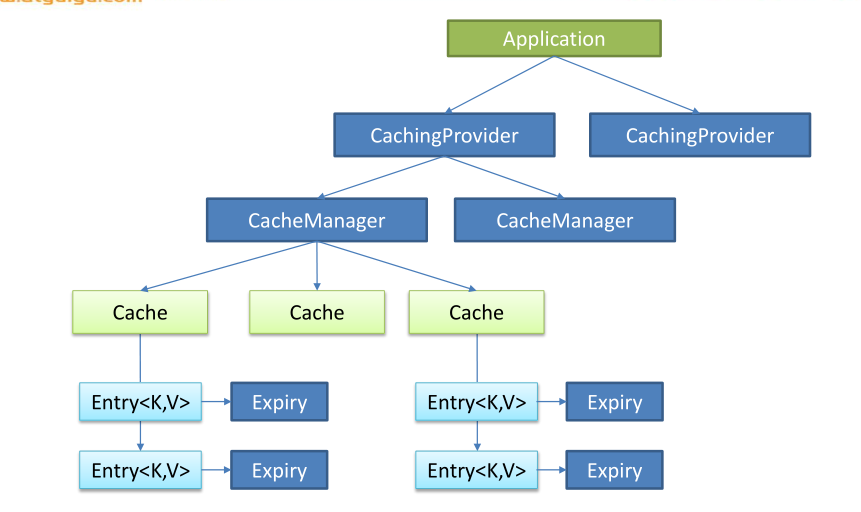
1.1 JSR-107
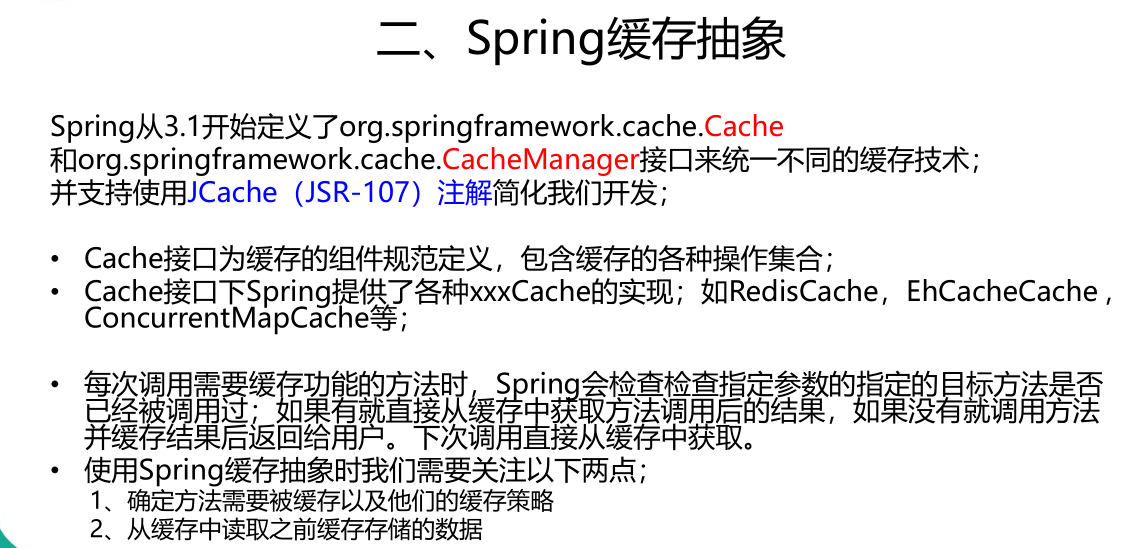
1.2 SpringBoot缓存抽象
1.2.1 使用缓存-环境搭建
搭建环境
使用 web、mybatis、mysql、Cache构建springboot新项目
首先,整合好SSM
spring.datasource.url=jdbc:mysql://192.168.40.132:3306/db01
spring.datasource.username=root
spring.datasource.password=123456
spring.datasource.driver-class-name=com.mysql.cj.jdbc.Driver

# Mybatis 驼峰命名法
mybatis.configuration.map-underscore-to-camel-case=true
@Mapper
public interface EmployeeMapper {

    @Select("select * from employee where id=#{id}")
    public Employee findById(Integer id);

    @Update("update employee set lastName=#{lastName},email=#{email},gender=#{gender},d_id=#{dId} where id=#{id}")
    public void update(Employee employee);

    @Delete("delete from employee where id=#{id}")
    public void delete(Employee employee);

    @Insert("insert into employee(lastName,email,gender,d_id) values(#{lastName},#{email},#{gender},#{d_id})")
    public void insert(Employee employee);

}
@Service
public class EmployeeService {

    @Autowired
    EmployeeMapper employeeMapper;

    public Employee findById(Integer id){

        return employeeMapper.findById(id);
    }
}
@RestController
public class EmployeeController {

    @Autowired
    EmployeeService employeeService;


    @GetMapping("/emp/{id}")
    public Employee findById(@PathVariable("id") Integer id){

        return employeeService.findById(id);
    }

}
1.2.2 使用缓存-快速入门
第一步:@EnableCaching 注解放在主配置类上
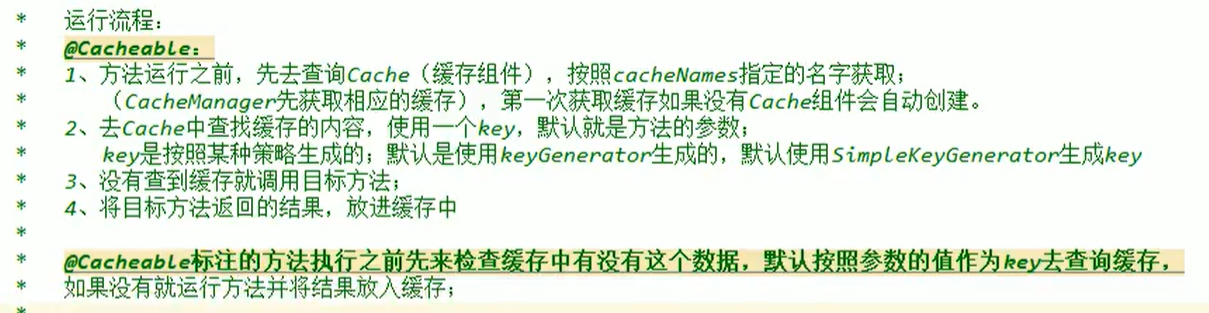
第二:@Cacheable 注解,表示可缓存的。将方法的运行结果进行缓存,再次访问该方法时直接使用缓存结果。
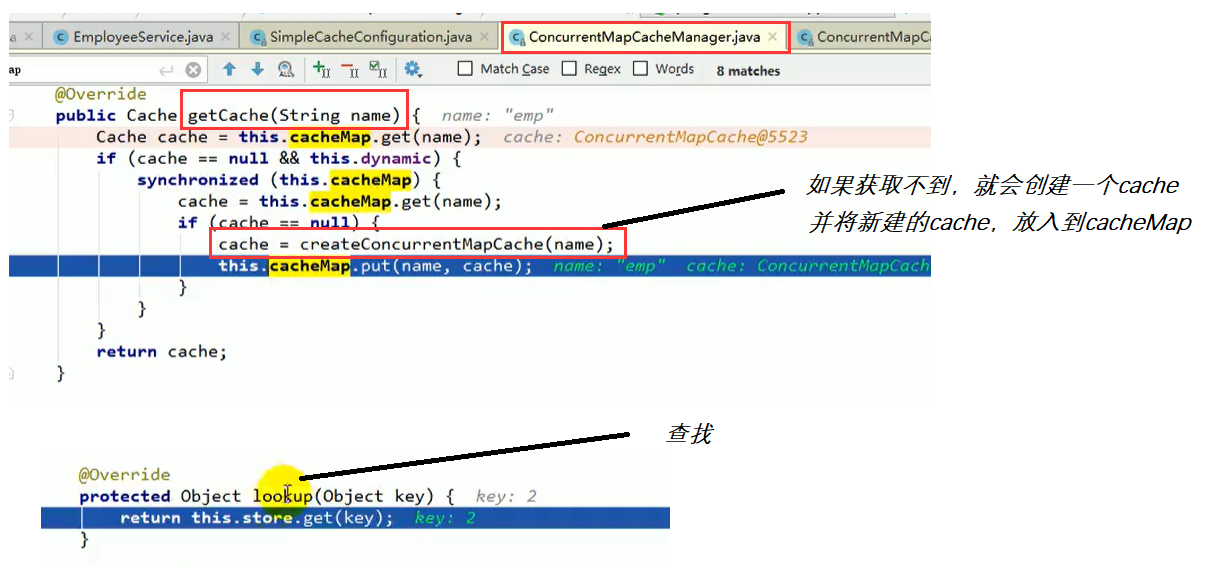
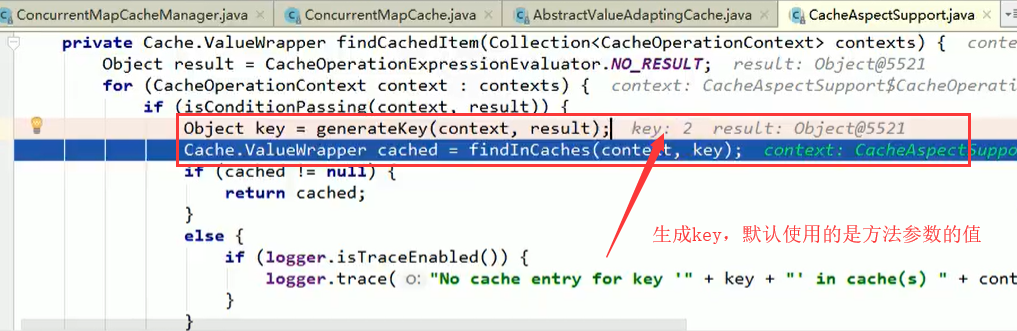
1.2.3 Cache 原理


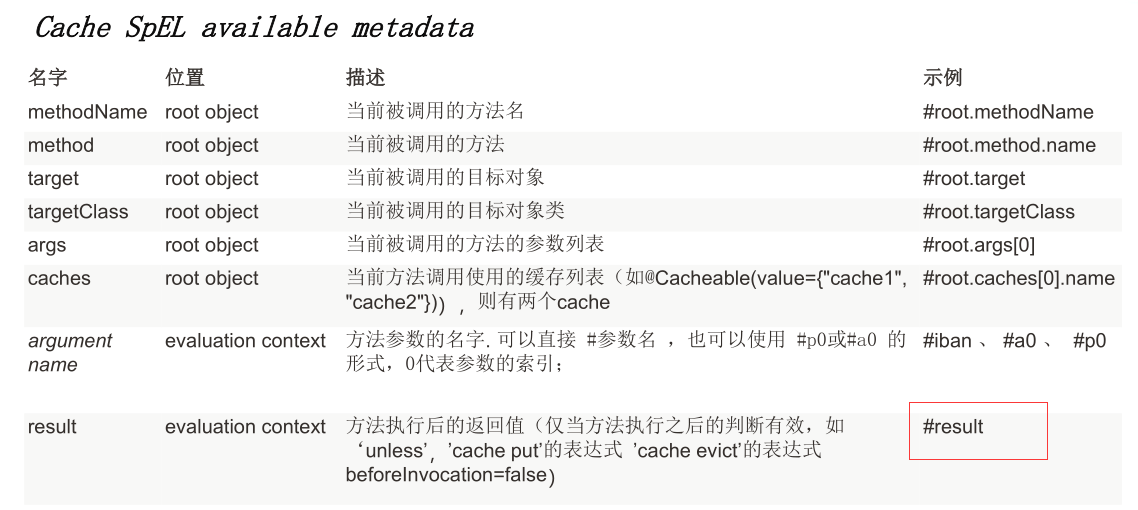
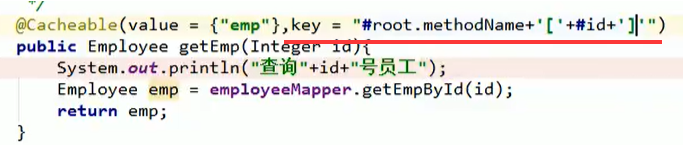
1.2.4 @Cacheable 查询缓存
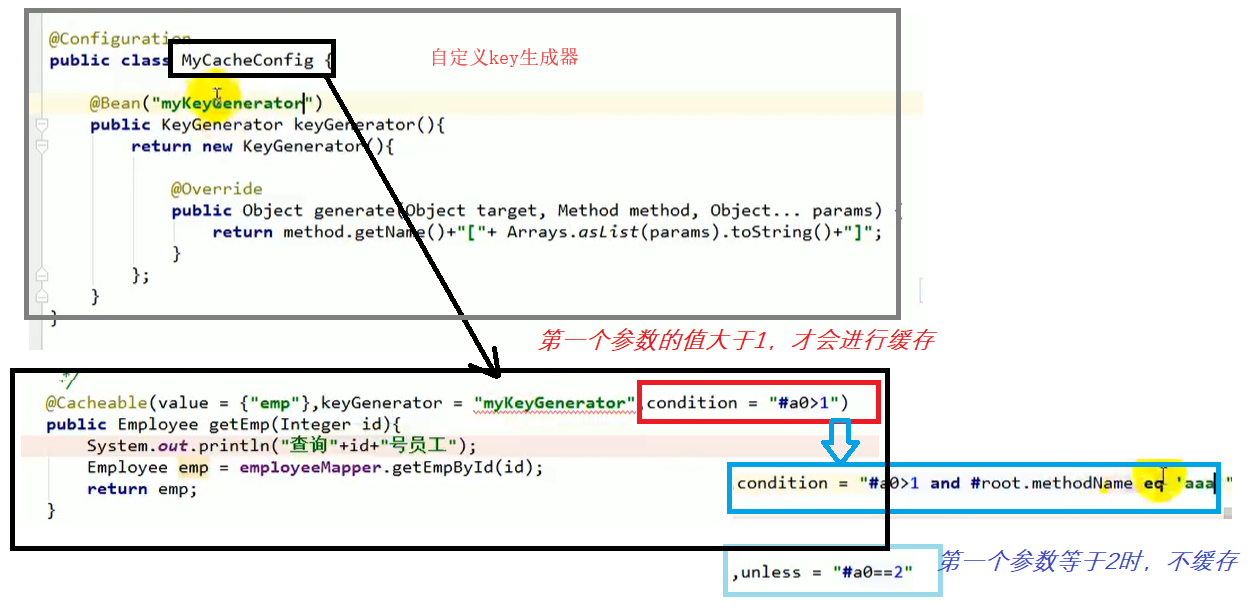
@Configuration
public class MyCacheConfig {

    public KeyGenerator keyGenerator(){
        return new org.springframework.cache.interceptor.KeyGenerator(){

            @Override
            public Object generate(Object o, Method method, Object... objects) {
                return method.getName()+"["+ Arrays.asList(objects).toString() +"]";
            }
        };
    }
}
1.2.5 @CachePut 更新缓存
注意:更新后放进缓存的 key ,和使用 @Cacheable 查询时查找的 key ,必须相同!!
@Service
public class EmployeeService {
@Autowired
EmployeeMapper employeeMapper;
/**
* @Cacheable : 在调用dao层方法之前,先去缓存寻找有没有数据
* 如果缓存中有该数据,直接走缓存
* 如果缓存中没该数据,创建CacheMap,再执行dao方法,得到结果再放进缓存以备下次获取
*/
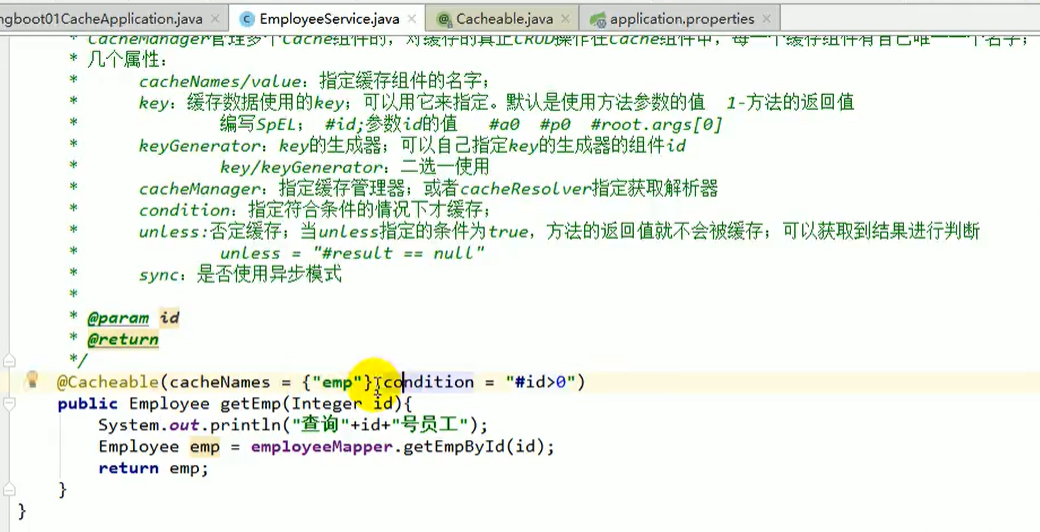
@Cacheable(cacheNames = {"emp"},condition = "#id>0")
public Employee findById(Integer id){
System.out.println("查询"+ id +"号员工");
return employeeMapper.findById(id);
}
/**
* @CachePut : 即调用dao层方法修改数据库,又会更新缓存数据
* 运行时机:先调用dao层方法,再将结果更新到缓存
* key = "#result.id" :由于查询时使用 key:id值/value:employee对象
* 所以,在更新完后将结果刷新到缓存应该更改缓存下对应的数据,以备下次用id查询该数据
* 注意:@Cacheable 注解不可以使用 #result获取方法结果,因为 @Cacheable 的执行顺序是先去缓存中判断取值,不会先走dao层
*/
@CachePut(value = "emp",key = "#result.id")
public Employee update(Employee employee){
employeeMapper.update(employee);
return employee;
}
}
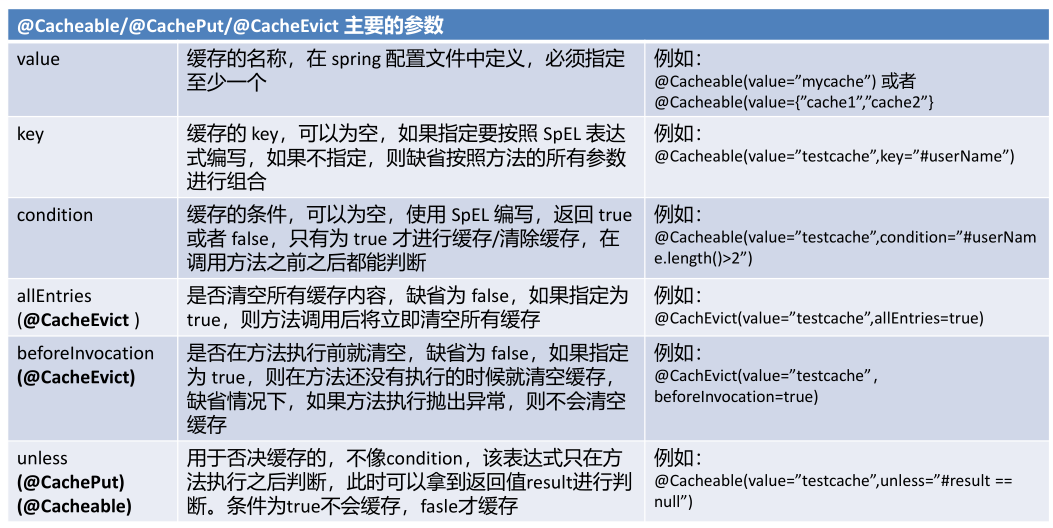
1.2.6 @CacheEvict 清除缓存
 /**
     *  @CacheEvict : 清除缓存中指定数据
     *  allEntries = false :是否删除该缓存名称下的所有键值对
     *  beforeInvocation = false :缓存清除工作是否在方法执行之前
     */
    @CacheEvict(value = "emp",key = "#employee.id",allEntries = false,beforeInvocation = false)
    public void deleteCache(Employee employee){
        System.out.println("只清除缓存数据。。。成功");

    }
1.2.7 @Caching 复杂缓存条件
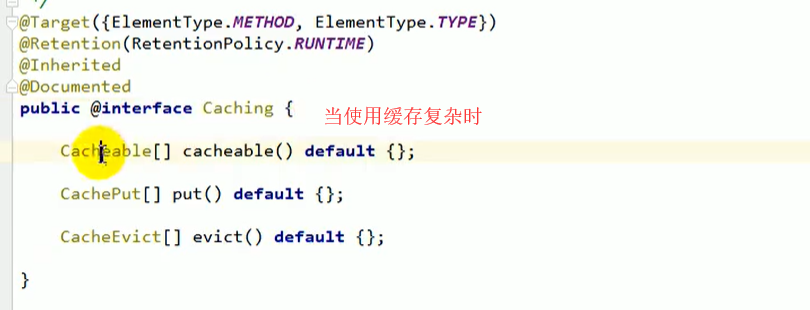
  @Caching(
            cacheable = {
                    @Cacheable(value = "emp",key = "#lastName")
            },
            put = {
                    //@CachePut(value = "emp",key = "#result.lastName"),
                    @CachePut(value = "emp",key = "#result.id"),
                    @CachePut(value = "emp",key = "#result.email")

            },
            evict ={

            }
    )
    public Employee findByLastName(String lastName){
        Employee emp = employeeMapper.findByLastName(lastName);
        return emp;
    }
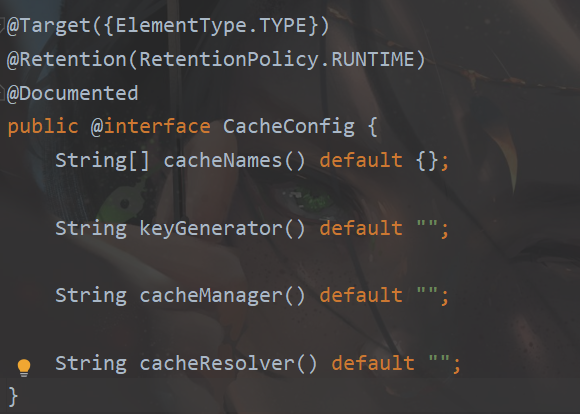
1.2.8 @CacheConfig 缓存公共配置

1.3 整合Redis
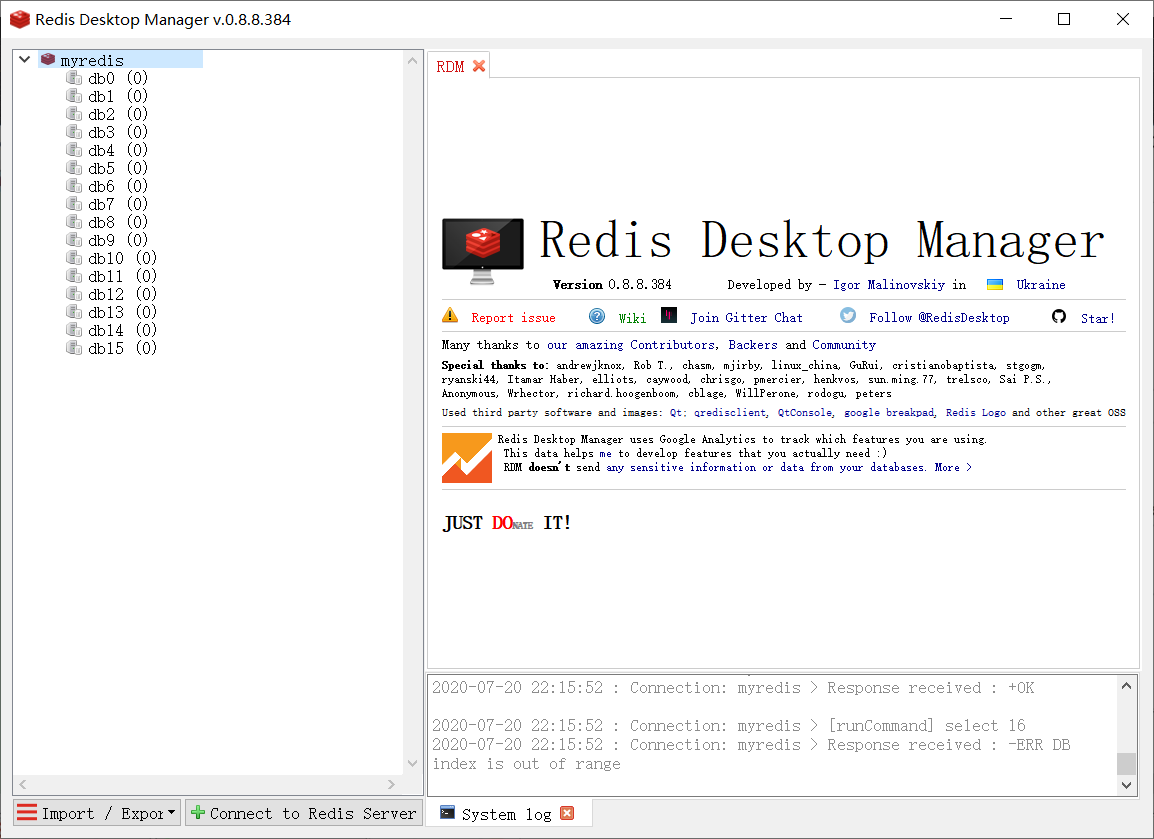
1.3.1 Redis安装环境
上节,我们使用的缓存是存储在哪里的?
- 根据源码分析,默认底层使用的是 ConcurrentMapCacheManager==ConcurrentMapCache,将数据保存在 ConcurrentMap 集合中。
- redis中文网站:http://www.redis.cn/commands.html
docker run -d -p 6379:6379 --name myredis redis:latest
# 启动 redis 容器
使用本地的工具连接docker中的redis容器
1.3.2 Redis整合
第一步:引入Redis场景启动器。该启动器会自动帮我们引入 Jedis 客户端
<!--        引入 redis-->
        <dependency>
            <groupId>org.springframework.boot</groupId>
            <artifactId>spring-boot-starter-data-redis</artifactId>
        </dependency>
第二步:配置 reids参数属性
# Redis 配置
spring.redis.host=192.168.40.132
第三步:测试redis的连通性
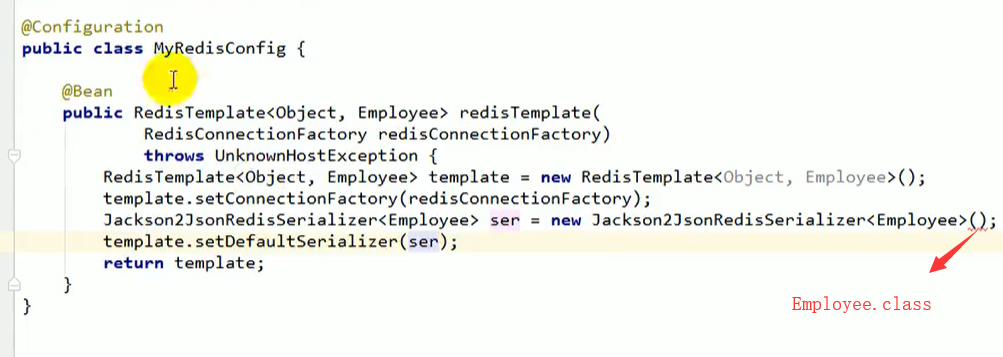
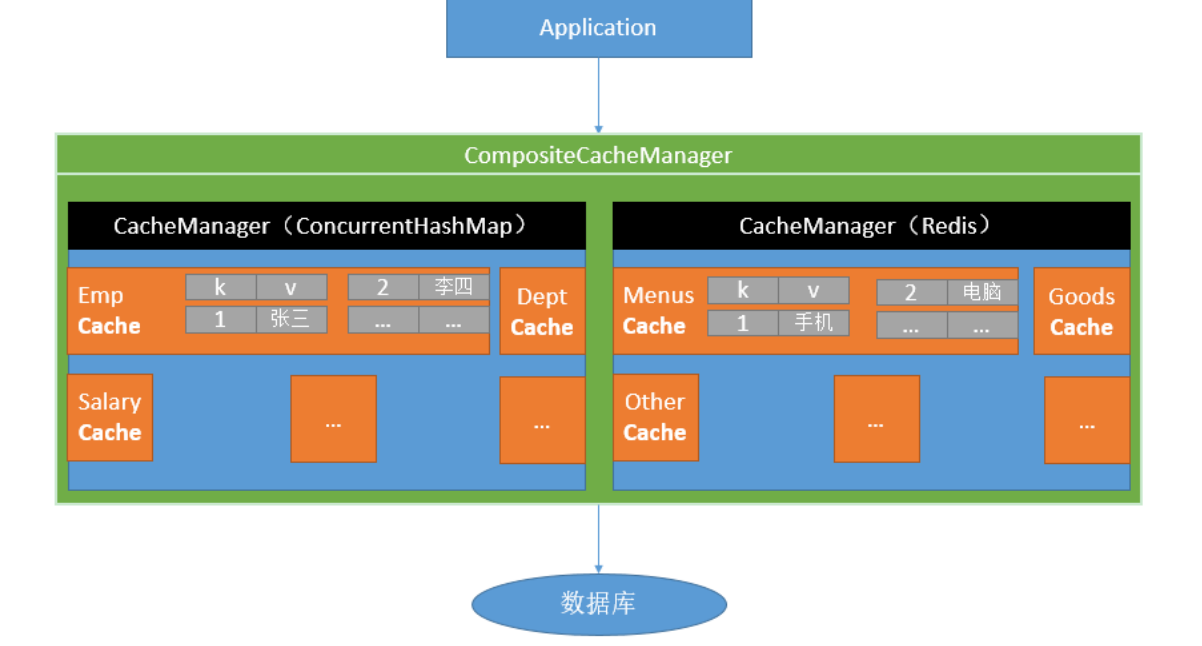
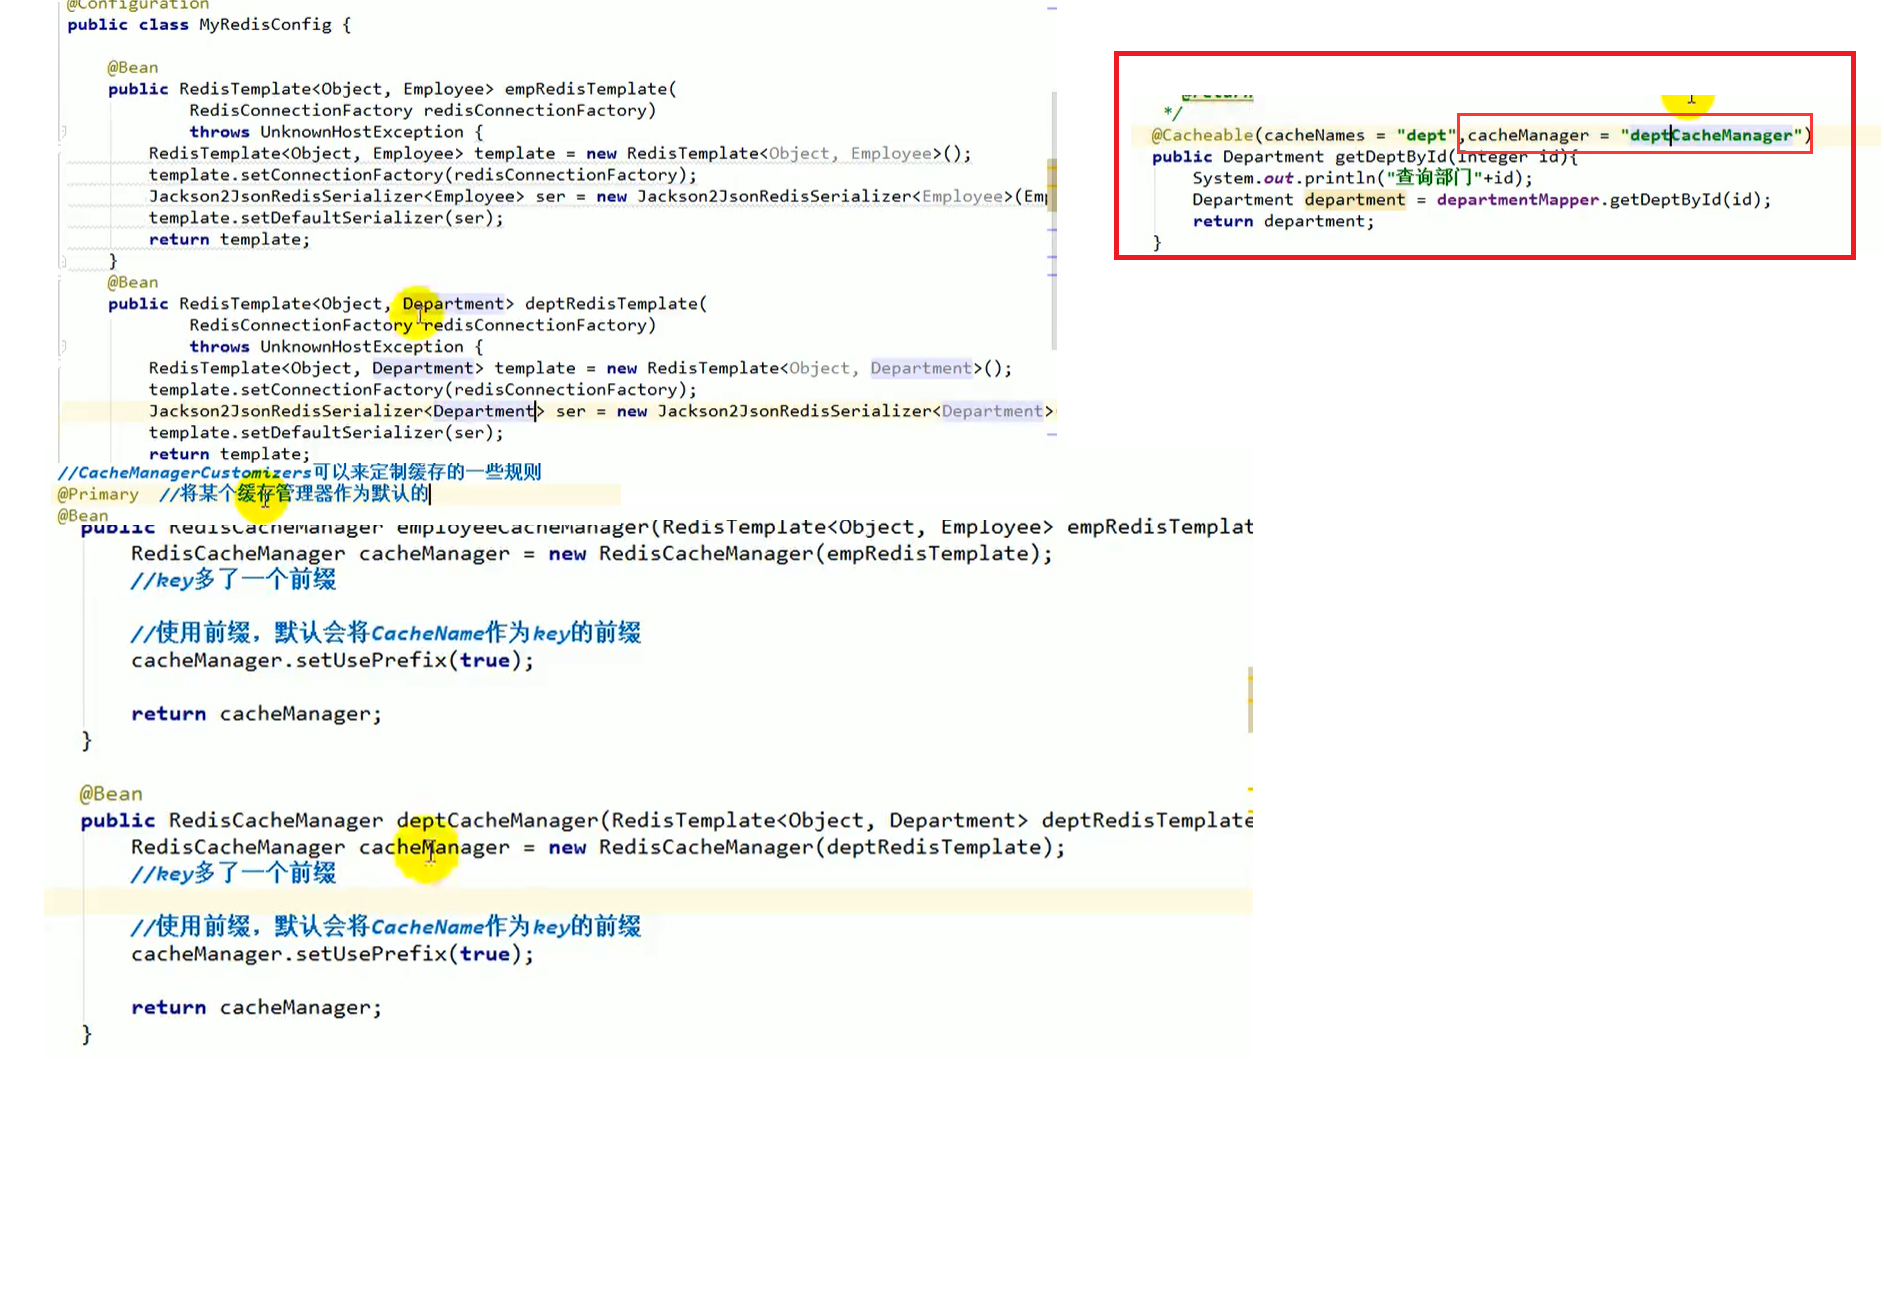
1.4 自定义 CacheManager
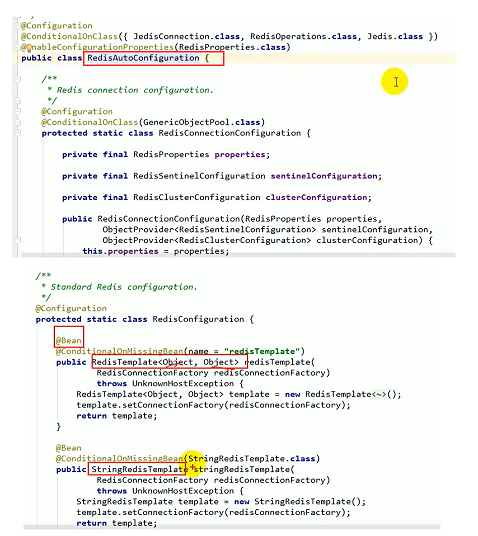
我们整合完Redis之后,之的SimpleCacheManager就失效了,改用 RedisCacheManager 这个管理器帮我们控制、管理 RedisCache组件操作缓存数据。
下面是,RedisCacheManager管理器的注入源码。随着Reids的自动配置注入进SpringBoot应用中。
问题:
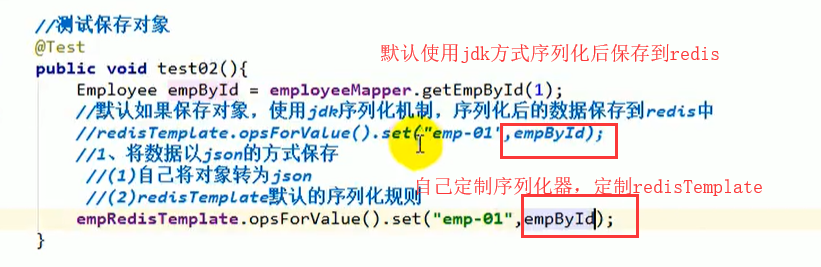
- RedisCacheManager —> RedisCache —>使用 RedisTemplate<Obeject,Obeject> 操作数据,使用的JDK的序列化对象方式
- 我们想使用对象序列化为json格式的数据,怎么办呢?
- 解决:我们自定义一个 CacheManager


 286
286

 被折叠的 条评论
为什么被折叠?
被折叠的 条评论
为什么被折叠?
 到【灌水乐园】发言


