


SpringBoot深入简出之篇二
讲解一下默认生成的SpringBoot项目各目录结构
- 主程序已经生成好了,我们只要创建我们自己的业务逻辑代码
- resources 文件夹中的目录结构:
templates:保存所有的物理视图view,(SpringBoot默认jar包使用嵌入式Tomcat,默认不支持jsp页面);可以使用模板引擎(freemarker、thymeleaf);
static:保存所有的静态资源;js、css、images
application.properties:SpringBoot 应用的配置文件;可以修改一些默认设置
1、配置文件
SpringBoot 使用一个全局的配置文件,配置文件的名称是固定的;
- application.propertiees:这是以前经常使用的key=value 形式
- application.yml:这个是SpringBoot特有的配置文件
配置文件的使用:修改SpringBoot的自动配置的默认值;SpringBoot 在底层都给我们自动配置好;
我们重点讲解一下YAML(YAML AInt Marup language) YAML A Marup Language:是一个标记语言 YAML isnt Marup language:不是一个标记语言
标记语言:
以前的配置文件;大多是使用xxx.xml文件;
比较一下application.properties、application.yml、application.xml 三种配置文件的语法区别(以修改端口号为例)
1、application.properties
server.port = 8200
2、application.xml
<server>
	<port>8200</port>
</server>
3、application.yml
server:
	port: 8200//注意冒号后面要有空格
这里也主要是讲解.yml 格式的配置文件值的写法:
- 字面量:普通的值(数字、字符串、布尔)
key:(空格)value 字面上直接写出来
字符串默认不用加上单引号或者双引号;
“”:双引号不会转义被双引号标记的字符串中的特殊字符(转义符合),特殊字符会作为本身想表达的意思。如:name:“zhangsan\n lisi”:会直接输出双引号中的内容:
zhangsan
lisi
‘’:单引号;回转仪特殊字符,特殊字符最终只是作为一个普通字符被输出
name:‘zhangsan\n lisi’:会直接输出双引号中的内容:
zhangsan\n lisi - 对象、Map(属性和值)(键值对):(值为字符串默认不需要引号)
key:value在下一行来写对象的属性和值的关系;注意缩进(冒号后面要有空格)
##普通写法
person:
	name: zhangsan
	age: 30
##行内写法
person: {name: zhangsan, age: 20}
- 数组(List、Set)
用(-value)标识数组中的一个元素
##普通写法
animal:
	- cat
	- dog
	- pig
##行内写法
animal: {cat, dog, pig}
接下来我们可以通过一个JavaBean 来详细讲解配置文件和JavaBean之间的关联
1、使用@ConfigurationProperties(prefic = “映射对象”)属性值批量注入到JavaBean
package cn.zdxh.lcy.demo01.model;

import org.springframework.boot.context.properties.ConfigurationProperties;
import org.springframework.stereotype.Component;

import java.util.List;
import java.util.Map;

/**
 * 将配置文件中设置的每个属性的值都映射到这个组件中的属性
 * @ConfigurationProperties:告诉SpringBoot将本类中的所有属性与配置文件中设置的属性进行绑定;
 *         prefix = "person":就是指明这是与配置文件中的person对象中的属性进行一一映射
 *
 * 只有这个组件是Spring容器中的组件,容器才能提供@ConfigurationProperties 注解的功能
 */

@Component
@ConfigurationProperties(prefix = "people")
public class Person {
    private String name;
    private Integer age;
    private List<Object> animal;
    private Map<String, String> map;
    private Friend friend;

    public Map<String, String> getMap() {
        return map;
    }

    public void setMap(Map<String, String> map) {
        this.map = map;
    }

    public String getName() {
        return name;
    }

    public void setName(String name) {
        this.name = name;
    }

    public Integer getAge() {
        return age;
    }

    public void setAge(Integer age) {
        this.age = age;
    }

    public List<Object> getAnimal() {
        return animal;
    }

    public void setAnimal(List<Object> animal) {
        this.animal = animal;
    }

    public Friend getFriend() {
        return friend;
    }

    public void setFriend(Friend friend) {
        this.friend = friend;
    }

    @Override
    public String toString() {
        return "Person{" +
                "name='" + name + '\'' +
                ", age=" + age +
                ", animal=" + animal +
                ", map=" + map +
                ", friend=" + friend +
                '}';
    }
}
2、使用@Value("${映射属性}") 单个属性映射(Spring框架下的用法)
import org.springframework.stereotype.Component;

import java.util.List;
import java.util.Map;

/**
 * 将配置文件中设置的每个属性的值都映射到这个组件中的属性
 * @ConfigurationProperties:告诉SpringBoot将本类中的所有属性与配置文件中设置的属性进行绑定;
 *         prefix = "people":就是指明这是与配置文件中的person对象中的属性进行一一映射
 *
 * 只有这个组件是Spring容器中的组件,容器才能提供@ConfigurationProperties 注解的功能
 */

@Component
//@ConfigurationProperties(prefix = "people")
public class Person {
    @Value("${people.name}")
    private String name;
    @Value("${people.age}")
    private Integer age;
    private List<Object> animal;
    private Map<String, String> map;
    private Friend friend;

    public Map<String, String> getMap() {
        return map;
    }

    public void setMap(Map<String, String> map) {
        this.map = map;
    }

    public String getName() {
        return name;
    }

    public void setName(String name) {
        this.name = name;
    }

    public Integer getAge() {
        return age;
    }

    public void setAge(Integer age) {
        this.age = age;
    }

    public List<Object> getAnimal() {
        return animal;
    }

    public void setAnimal(List<Object> animal) {
        this.animal = animal;
    }

    public Friend getFriend() {
        return friend;
    }

    public void setFriend(Friend friend) {
        this.friend = friend;
    }

    @Override
    public String toString() {
        return "Person{" +
                "name='" + name + '\'' +
                ", age=" + age +
                ", animal=" + animal +
                ", map=" + map +
                ", friend=" + friend +
                '}';
    }
}
package cn.zdxh.lcy.demo01.model;

public class Friend {
    private String name;
    private String sex;

    public String getName() {
        return name;
    }

    public void setName(String name) {
        this.name = name;
    }

    public String getSex() {
        return sex;
    }

    public void setSex(String sex) {
        this.sex = sex;
    }

    @Override
    public String toString() {
        return "Friend{" +
                "name='" + name + '\'' +
                ", sex='" + sex + '\'' +
                '}';
    }
}
配置文件
##application.yml文件下设置的属性
people:
  name: 张三
  age: 30
  animal:
    - cat
    - dog
    - pig
  friend:
    name: 李四
    sex: 男
  map: {key1: value1, key2: value2}
测试类
package cn.zdxh.lcy.demo01;

import cn.zdxh.lcy.demo01.model.Person;
import org.junit.Test;
import org.junit.runner.RunWith;
import org.springframework.beans.factory.annotation.Autowired;
import org.springframework.boot.test.context.SpringBootTest;
import org.springframework.test.context.junit4.SpringRunner;

/**
 * SpringBoot 单元测试
 * 可以在测试期间很方便的类似编码一样进行自动注入等容器的功能
 */
@RunWith(SpringRunner.class)
@SpringBootTest
public class Demo01ApplicationTests {

    @Autowired
    Person person;

    @Test//输出到控制台
    public void contextLoads() {
        System.out.println(person);
    }

}
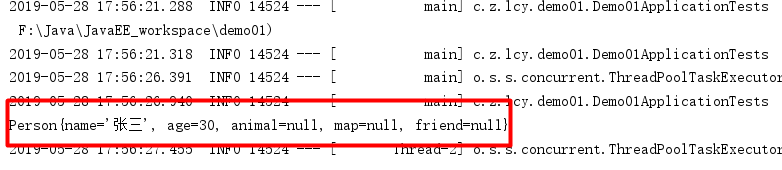
1、使用@ConfigurationProperties(prefix = “people”)的结果图

2、 @Value("${people.name}")的结果图
可以通过在pom 中导入配置文件处理器,以后在配置文件中设置属性值的时候就有提示了
	<!-- 设置配置文件可自动提示场景启动器 -->
    <dependency>
         <groupId>org.springframework.boot</groupId>
         <artifactId>spring-boot-configuration-processor</artifactId>
         <optional>true</optional>
     </dependency>
比较@Value获取值和@ConfigurationProperties获取值各自的优缺点
| @ConfigurationProperties | @Value | |
|---|---|---|
| 功能 | 批量注入配置文件中的属性 | 单个注入属性值 |
| 松散绑定 | 支持 | 不支持 |
| sqEL | 不支持 | 支持 |
| JSR303数据校验 | 支持 | 不支持 |
| 复杂类型封装 | 支持 | 不支持 |
配置文件yml还是properties都能获取其中的属性值
使用场景:
1、如果说我们只是在某个业务逻辑中需要获取配置文件中的某个值,使用@Value
2、如果说我们专业编写了一个JavaBean来和配置文件中的属性进行映射,我们就可以直接使用@ConfigurationProperties (默认只能从全局的配置文件中读取属性值)
讲解一下JSR303数据检验(前提需要在需校验的JavaBean类名上加上@Validated表单校验注解)
空检查
@Null 验证对象是否为null
@NotNull 验证对象是否不为null, 无法查检长度为0的字符串
@NotBlank 检查约束字符串是不是Null还有被Trim的长度是否大于0,只对字符串,且会去掉前后空格.
@NotEmpty 检查约束元素是否为NULL或者是EMPTY.
Booelan检查
@AssertTrue 验证 Boolean 对象是否为 true
@AssertFalse 验证 Boolean 对象是否为 false
长度检查
@Size(min=, max=) 验证对象(Array,Collection,Map,String)长度是否在给定的范围之内
@Length(min=, max=) Validates that the annotated string is between min and max included.
日期检查
@Past 验证 Date 和 Calendar 对象是否在当前时间之前,验证成立的话被注释的元素一定是一个过去的日期
@Future 验证 Date 和 Calendar 对象是否在当前时间之后 ,验证成立的话被注释的元素一定是一个将来的日期
@Pattern 验证 String 对象是否符合正则表达式的规则,被注释的元素符合制定的正则表达式,regexp:正则表达式 flags: 指定 Pattern.Flag 的数组,表示正则表达式的相关选项。
数值检查
建议使用在Stirng,Integer类型,不建议使用在int类型上,因为表单值为“”时无法转换为int,但可以转换为Stirng为”“,Integer为null
@Min 验证 Number 和 String 对象是否大等于指定的值
@Max 验证 Number 和 String 对象是否小等于指定的值
@DecimalMax 被标注的值必须不大于约束中指定的最大值. 这个约束的参数是一个通过BigDecimal定义的最大值的字符串表示.小数存在精度
@DecimalMin 被标注的值必须不小于约束中指定的最小值. 这个约束的参数是一个通过BigDecimal定义的最小值的字符串表示.小数存在精度
@Digits 验证 Number 和 String 的构成是否合法
@Digits(integer=,fraction=) 验证字符串是否是符合指定格式的数字,interger指定整数精度,fraction指定小数精度。
@Range(min=, max=) 被指定的元素必须在合适的范围内
@Range(min=10000,max=50000,message=”range.bean.wage”)
@Valid 递归的对关联对象进行校验, 如果关联对象是个集合或者数组,那么对其中的元素进行递归校验,如果是一个map,则对其中的值部分进行校验.(是否进行递归验证)
@CreditCardNumber信用卡验证
@Email 验证是否是邮件地址,如果为null,不进行验证,算通过验证。
@ScriptAssert(lang= ,script=, alias=)
package cn.zdxh.lcy.demo01.model;

import org.springframework.boot.context.properties.ConfigurationProperties;
import org.springframework.context.annotation.PropertySource;
import org.springframework.stereotype.Component;
import org.springframework.validation.annotation.Validated;

import javax.validation.constraints.Email;
import javax.validation.constraints.NotNull;
import javax.validation.constraints.Size;
import java.util.List;
import java.util.Map;

@Component
@PropertySource(value = {"classpath:people.properties"})//引入局部的配置文件资源
@ConfigurationProperties(prefix = "people")
@Validated//为JavaBean添加属性校验功能的注解
public class Person {
    @Email//被此注解标记的属性值必须是邮箱
    private String name;
    @Size(min = 3, max = 10)//此属性长度在3~10位之间
    private Integer age;
    @NotNull//此属性的值不能空
    private List<Object> animal;
    private Map<String, String> map;
    private Friend friend;

    public Map<String, String> getMap() {
        return map;
    }

    public void setMap(Map<String, String> map) {
        this.map = map;
    }

    public String getName() {
        return name;
    }

    public void setName(String name) {
        this.name = name;
    }

    public Integer getAge() {
        return age;
    }

    public void setAge(Integer age) {
        this.age = age;
    }

    public List<Object> getAnimal() {
        return animal;
    }

    public void setAnimal(List<Object> animal) {
        this.animal = animal;
    }

    public Friend getFriend() {
        return friend;
    }

    public void setFriend(Friend friend) {
        this.friend = friend;
    }

    @Override
    public String toString() {
        return "Person{" +
                "name='" + name + '\'' +
                ", age=" + age +
                ", animal=" + animal +
                ", map=" + map +
                ", friend=" + friend +
                '}';
    }
}
@PropertySource(value = {“classpath:people.properties”})//引入局部的配置文件资源
@ImportResource(locations = {“classpath;beans.xml”})//导入Spring的配置文件,让配置文件里面的内容在容器中生效;SpringBoot里面没有Spring的配置文件,我们自己编写的配置文件,也不能自动识别;
想让Spring的配置文件在SpringBoot中生效,就使用@ImportResource 注解的功能(把@ImportResource(locations = {“classpath:person.xml”})标注到配置类上),把配置文件加载到容器中。
<?xml version="1.0" encoding="UTF-8"?>
<beans xmlns="http://www.springframework.org/schema/beans"
       xmlns:xsi="http://www.w3.org/2001/XMLSchema-instance"
       xsi:schemaLocation="http://www.springframework.org/schema/beans http://www.springframework.org/schema/beans/spring-beans.xsd">

    <bean id="helloService" class="cn.zdxh.lcy.demo01.service.HelloService"></bean>
</beans>
package cn.zdxh.lcy.demo01.service;

public class HelloService {
}
package cn.zdxh.lcy.demo01;

import cn.zdxh.lcy.demo01.model.Person;
import org.junit.Test;
import org.junit.runner.RunWith;
import org.springframework.beans.factory.annotation.Autowired;
import org.springframework.boot.test.context.SpringBootTest;
import org.springframework.context.ApplicationContext;
import org.springframework.test.context.junit4.SpringRunner;

/**
 * SpringBoot 单元测试
 * 可以在测试期间很方便的类似编码一样进行自动注入等容器的功能
 */
@RunWith(SpringRunner.class)
@SpringBootTest
public class Demo01ApplicationTests {


    @Autowired//注入ioc 容器的当前上下文
    ApplicationContext ioc;


    @Test
    public void TestBeanService(){
        boolean b = ioc.containsBean("helloService");
        if (b == false){
            System.out.println("helloService 组件没有进入到容器中!");
        } else {
            System.out.println("helloService 组件进入到容器中!");
        }
    }
}
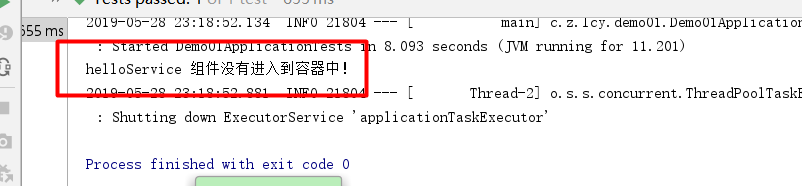
结果图:(没有在主程序中使用@ImportResource(locations = {“classpath;beans.xml”})注解)
@RestController//@Controller + @ResponseBody
@ImportResource(locations  = {"classpath:beans.xml"})//把Spring配置文件中的bean容器中
@SpringBootApplication(exclude = {DataSourceAutoConfiguration.class})//spring boot 主程序标识注解,说明这是一个spring boot 主程序
public class Demo01Application {
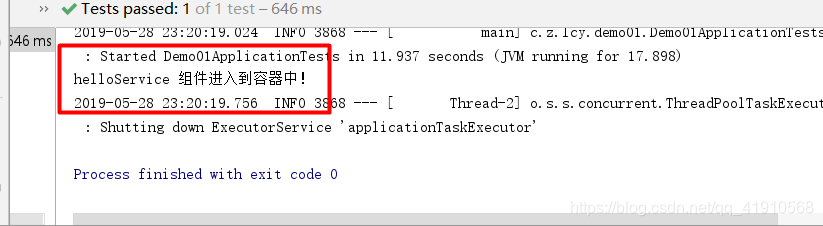
结果图:(在主程序中使用了@ImportResource(locations = {“classpath;beans.xml”})注解)
SpringBoot推荐给容器中添加组件的方式
把上面的xml配置文件换成下面的类配置方式
package cn.zdxh.lcy.demo01.config;
import cn.zdxh.lcy.demo01.service.HelloService;
import org.springframework.context.annotation.Bean;
import org.springframework.context.annotation.Configuration;
/**
* @Configuration:指明当前类是一个配置类;就是来替代之前的Spring配置文件
* 在xml配置文件中用<bean></bean>标签添加组件
*/
@Configuration
public class MyAppConfig {
@Bean//将发放的返回值添加到容器中;容器中这个组件默认的id 就是方法名
public HelloService helloService() {
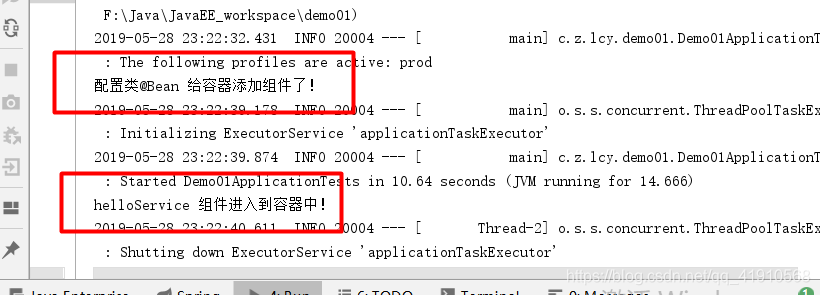
System.out.println("配置类@Bean 给容器添加组件了!");
return new HelloService();
}
}
结果图:
四、配置文件中使用占位符
- 设置随机数
${random.value}
${random.int}
${random.long}
${random.int(10)}
$random.uuid}
${random.int[1024,65536]}
- 占位符获取之前配置的值,如果没有可以是用:指定默认值
people.name = 张三${random.uuid}
people.age = ${random.int}
people.map.key1 = value1
people.map.key2 = value2
people.animal = cat, dog, pig
people.friend.name = 李四
people.friend.sex = ${person.sex:男}
五、Profile
- 多Profile文件
我们在主配置文件编写的时候,文件名可以是 application-{profile}.properties/yml
默认使用application.properties的配置;
###设置spring boot 内嵌Tomcat端口号和访问路径
server.port=8200
server.servlet.context-path=/helloboot

###激活生产环境下的配置
spring.profiles.active=prod
- yml支持多文档块方式
---
server:
   port: 8200
##默认环境8200
spring:
##自定义运行环境
  profiles:
    active: prod

---
##生产环境
server:
     port: 8080
spring:
  profiles: prod

---
##开发环境
server:
  port: 8900
spring:
  profiles: dev
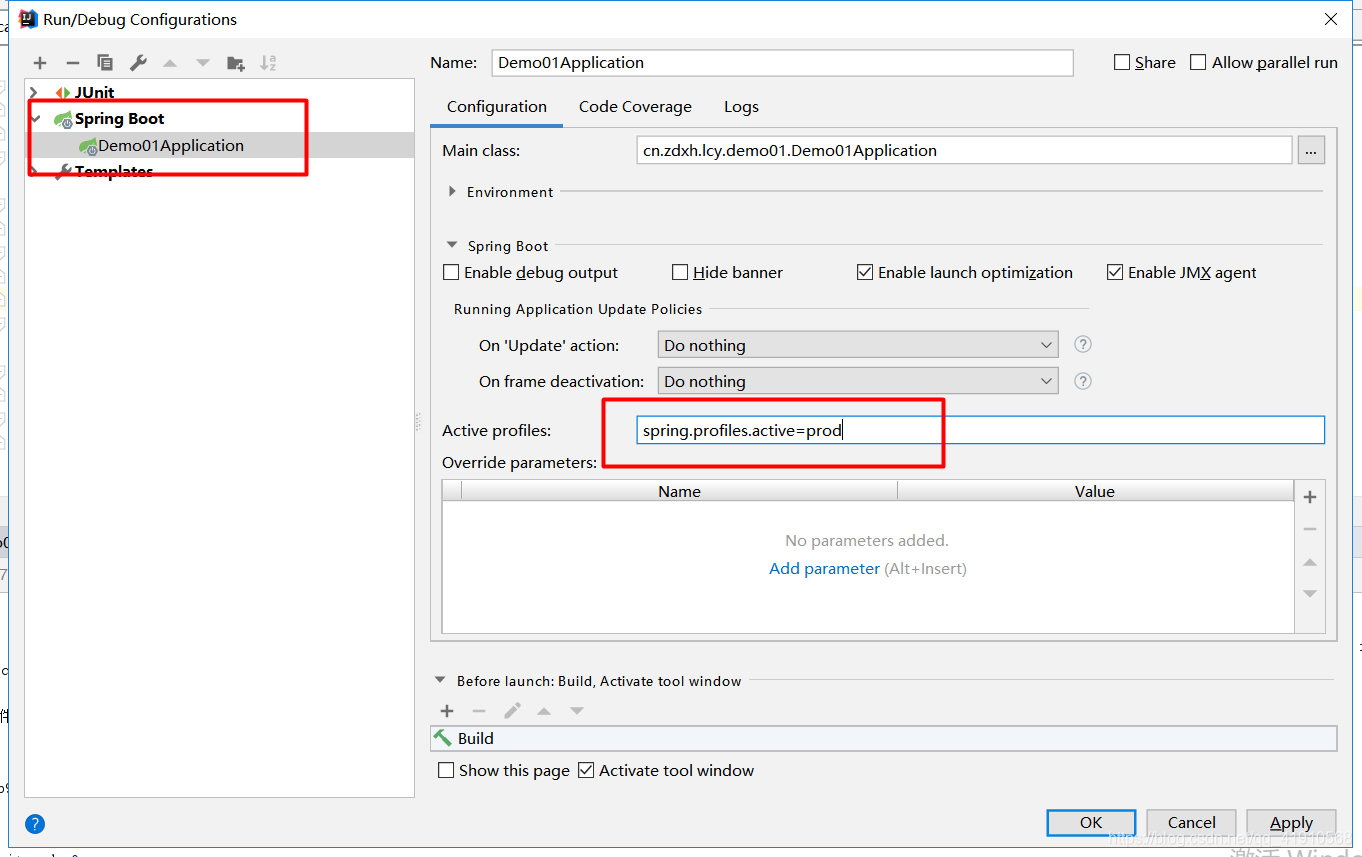
3. 激活指定Profile
1、在配置文件中指定 spring.profile.active=运行环境(spring.profiles.active=prod)
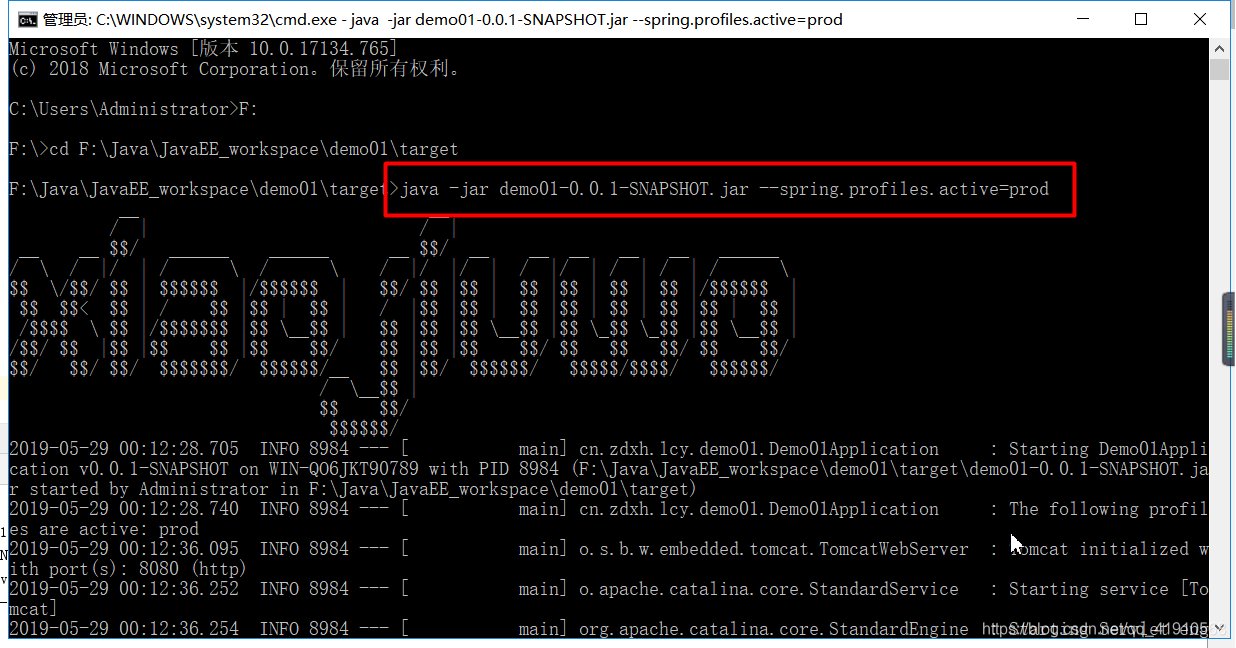
2、命令行:
(1)
(2)
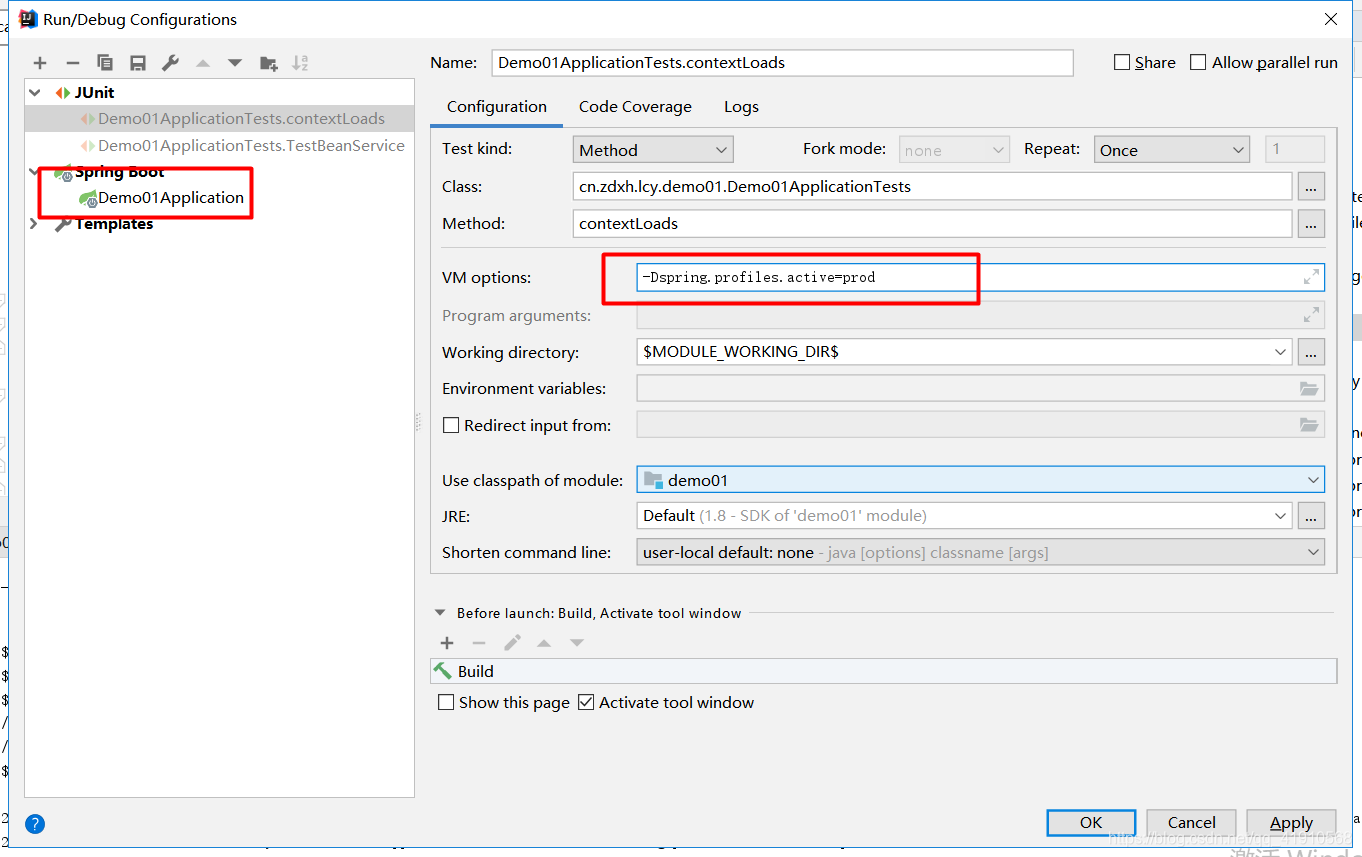
3、虚拟机设置参数
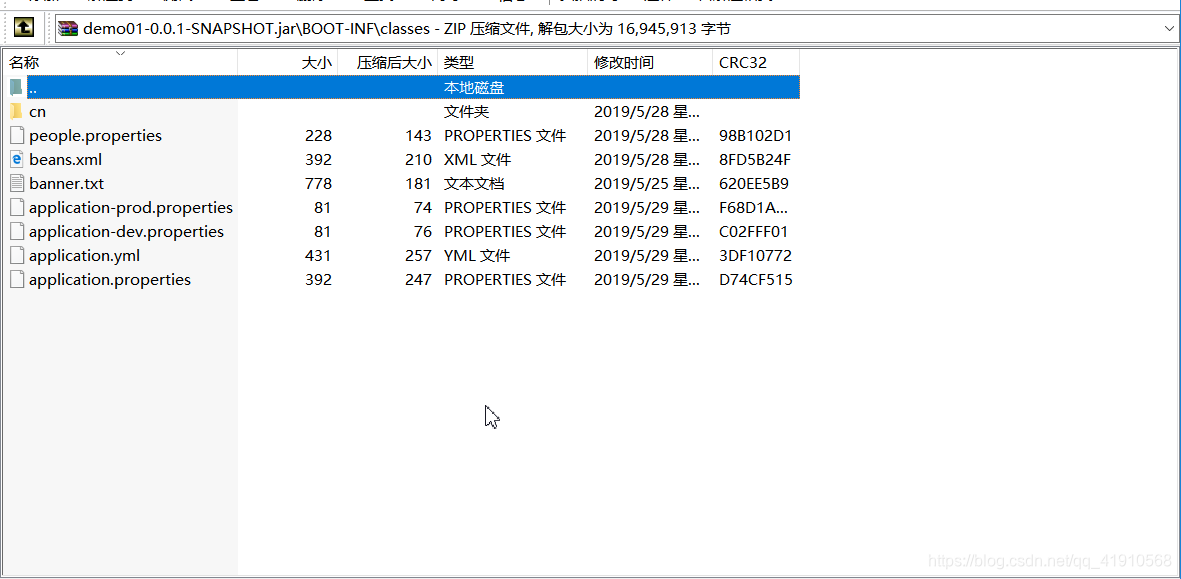
六、配置文件加载位置
SpringBoot启动会扫描一下位置的application.properties 或者 application.yml 文件作为SpringBoot的默认配置文件
-file:./config/
-file:./
-classpath:/config/
-classpath:/
优先级由高到低,高优先级的配置内容会覆盖低优先级的配置内容;
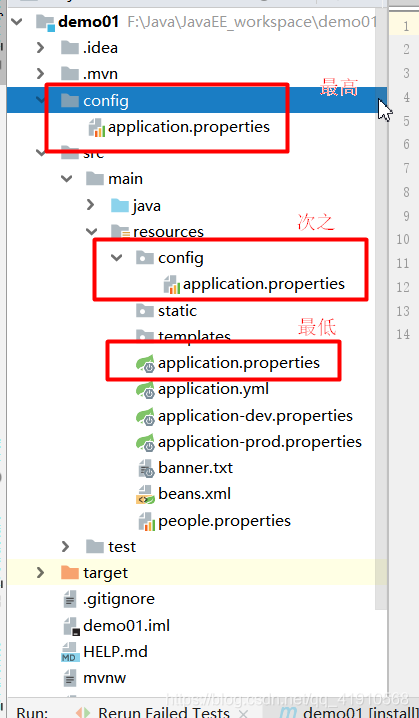
SpringBoot会从这四个位置全部加载主配置文件;互补配置;
我们还可以通过spring.config.localtion来改变默认的配置文件位置
项目打包好了以后,我们可以使用命令行参数形式,启动项目的时候来指定配置文件的位置;指定配置文件和默认加载的这些配置文件共同起作用形成互补配置;
七、外部配置加载顺序
SpringBoot 支持多种外部配置方式;优先级从高到低;高优先级的配置内容覆盖低优先级的配置内容,所有的配置会形成互补配置
- 命令行参数

- 来自java:comp/env的JNDI属性
- java系统属性(System.getProperties())
- 操作系统环境变量
- RandomValuePropertySource 配置的random.*属性值
由jar包外向jar包内进行寻找(优先级加载带profile)
8. jar 包外部的application-{profile}.properties 或 application.yml(带spring.profile)配置文件


9. jar 包内部的application-{profile}.properties 或 application.yml(带spring.profile)配置文件
再来加载不带profile
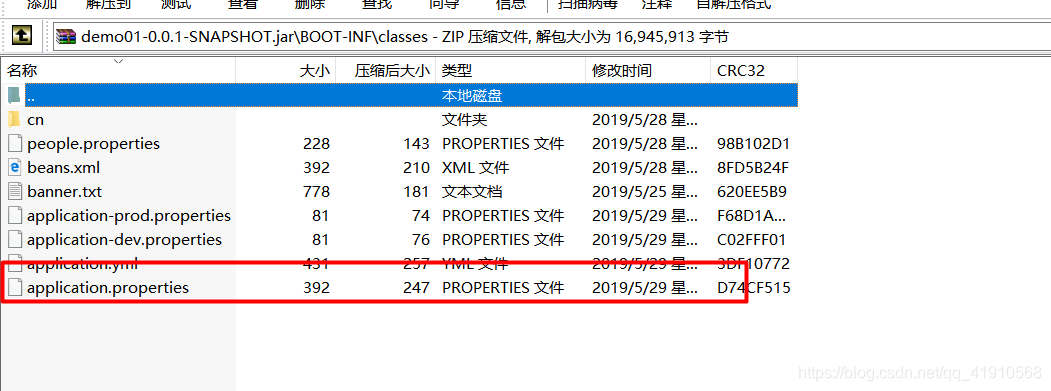
10. jar 包外部的application.properties 或 application.yml(不带spring.profile)配置文件

11. jar 包内部的application.properties 或 application.yml(不带spring.profile)配置文件
13. @Configuration 注解类上@PropertySource
14. 通过SpringApplication.setDefaulteProperties指定的属性
详细信息可以到SpringBoot的官方文档中查看官方文档


 1万+
1万+


 被折叠的 条评论
为什么被折叠?
被折叠的 条评论
为什么被折叠?
 到【灌水乐园】发言


