


前提 什么是 Angular?
官网:https://angular.cn/guide/what-is-angular
Angular 是一个基于 TypeScript 构建的开发平台。它包括:
- 一个基于组件的框架,用于构建可伸缩的 Web 应用
- 一组完美集成的库,涵盖各种功能,包括路由、表单管理、客户端-服务器通信等
- 一套开发工具,可帮助你开发、构建、测试和更新代码
1、搭建Angular开发环境
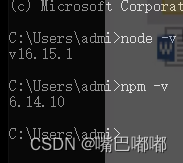
前提:NG需要Node.js V10.9以上
我的电脑node和npm环境
①下载并安装脚手架工具
npm install -g @angular/cli
②运行脚手架工具创建空白项目
ng new my-app
③进入空白项目并运行开发服务器
cd my-app
ng serve --open

Angular项目启动过程分析:
   (1)angular.json:NG项目的配置
		index:./src/index.html <app-root></app-root>
		main:./src/main.ts  打包入口文件
	(2)main.js > bootstrapModule(AppModule) 主模块,引导启动
	(3)app.module.ts > bootstrap:[AppComponet]
	(4)app.components.ts > selector:'app-root' 选择器
						 > templateUrl:'app.component.html' 模板
	(5)app.component.html > HTML片段...  放到<app-root></app-root>
2、核心概念之一:模块
Module:不同Node.js或ES6中的模块的模块,NG中的模块就是一个抽象的容器,用于对组件的进行分组
整个一个用初始时有且只有一个主模块:AppMoDULE
3、核心概念之二:组件
组件
提示:NG中,任何一个组件都必须声明在一个模块中!
自定义步骤:
体验版
①创建组件class
import { Component } from "@angular/core";

// 组件 = 模板 + 脚本 + 样式
// 装饰器(Decorator)--用于指定class的用途
@Component({
  template: '<h2>myc01</h2>',
  selector: 'app-myc01'
})
export class MyC01Component {

}
②在某个模块中注册class
import { BrowserModule } from '@angular/platform-browser';
import { NgModule } from '@angular/core';

import { AppRoutingModule } from './app-routing.module';
import { AppComponent } from './app.component';
import { MyC01Component } from './myc01.component';

// 装饰器中的元数据来实现
@NgModule({
  // 声明
  declarations: [
    AppComponent,
    MyC01Component
  ],
  // 导入
  imports: [
    BrowserModule,
    AppRoutingModule
  ],
  // 依赖注入提供程序的列表。
  providers: [],
  // 自动引导的组件列表。
  bootstrap: [AppComponent]
})
export class AppModule { }
③使用组件
app.component.html
<app-myc01></app-myc01>
> angular提供组件化的简化工具
> ng generate  component 组件名
> npx ng generate component组件名
简化:generate g
4、Angular核心概念之三:数据绑定
1.数据绑定
- HTML绑定:{{ NG表达式}}
import { Component } from '@angular/core';

@Component({
  selector: 'app-myc02',
  templateUrl: './myc02.component.html',
  styleUrls: ['./myc02.component.scss']
})
export class Myc02Component {
  message = 'Hello word'
}
html
<p>{{message}}</p>
算术运算、比较运算、逻辑运算、三目运算、调用函数
2)属性绑定
形式一:<p title="{{message}}">这是一个数据</p>
形式二:<p [title]="message">这也是一个数据</p>
3)指令绑定
(1)HTML绑定
<p>{{age?18:20}}</p>
(2) 属性绑定 []
注意:属性绑定通常赋值为变量,如果赋值为常量(如字符串常量)必须用引号括起来,如<img [src]=“‘…/assets/’+imgUrl”>
(3) 双向绑定
4)事件绑定
<button (click)="handleBtn()">点击事件</button>**加粗样式**
 handleBtn() {
    console.log('点击事件')
  }
5)双向数据绑定
<input/select/textarea [(ngModel)]="" />
<input type="text" [(ngModel)]="userName" placeholder="输入数据" />
<p>当前用户输入{{userName}}</p>
2.指令系统
1)循环绑定:*ngFor
<ul>
  <li *ngFor="let e of emList">
    {{e}}
  </li>
  <li *ngFor="let e of emList;let i =index">
    {{e}}---{{i}}
  </li>
  <li *ngFor="let e of emList; index as i">
    {{e}}---{{i}}
  </li>
</ul>
2)选择绑定:*ngIf
<p *ngIf="isPayIngUer">
  会员用户可见
</p>
说明:如果布尔表达式为false,则元素从DOM树上删除
<p *ngIf="isPayIngUer;else elseBlock">会员用户可见</p>
<ng-template #elseBlock>普通用户</ng-template>
3)样式绑定:[ngStyle]
说明:ngStyle绑定的值必须是一个对象!对象属性就是CSS样式名
<div [ngStyle]="myStyleObj">样式绑定</div>

  myStyleObj = {
    background: 'red',
    color: '#eff'
  }
4)样式绑定:[ngClass]
说明:ngClass绑定的值必须是一个对象!对象属性就是CSS class名,属性值为true/false,true的话class就出现,否则class不出现
<div [ngClass]="myClassObj">样式绑定</div>

  myClassObj = {
    btn: true,
    'btn-color': true
  }
5)了解:特殊的选择绑定:
<ANY [ngSwitch]="表达式">
	<ANY *ngSwitchCase="值1"></ANY>
	...
	<ANY *ngSwitchDefault></ANY>
</ANY>
- 双向数据绑定:ngModel——重点
[()]
方向1:Model => View 模型变则视图变 用[]绑定
方向2:View => Model 视图变则模型变 用()绑定
<input/select/textarea [(ngModel)]="" />
<input type="text" [(ngModel)]="userName" placeholder="输入数据" />
<p>当前用户输入{{userName}}</p>
注意 ngModel指令不在CommonModule模块中,而在FormsModule中,使用之前必须在主模块中导入该模块
import { FormsModule } from "@angular/forms";

@NgModule({
  // 导入
  imports: [
    FormsModule
  ]
})
export class AppModule { }
结论
指令分为三类
1)组件指令:NG中Components 继承Directive
2)结构型指令 会影响DOM树的结构 必须使用*开头
3)属性型指令 不会影响DOM结构,只是影响元素外观或行为必须使用[]
3.拓展 自定义指令
提示 创建指令的加单工具:ng g directive 指令名
自定义指令都是作为元素的属性来使用,selector应该是:[指令名]
<ANY xuYaoQiangDiao>...</ANY>
myc01.component.ts
import { Directive, ElementRef } from '@angular/core'

@Directive({
  selector: '[appXuYaoQiangDiao]'
})
export class XuYaoQiangDiao {
  // 构造方法
  constructor(el: ElementRef) {
    console.log(el)
    el.nativeElement.style.background = '#fcc'
  }
}
app.module.ts
import { BrowserModule } from '@angular/platform-browser';
import { NgModule } from '@angular/core';
import { XuYaoQiangDiao } from './xu-yao-qiang-diao.directive';

// 装饰器中的元数据来实现
@NgModule({
  // 声明
  declarations: [
    XuYaoQiangDiao
  ]
})
export class AppModule { }
5、Angular核心概念之四:过滤器
Filter:过滤器,用于在View中呈现数据时显示为另有一种格式;过滤器的本质是一个函数,接收原函数转换为新的格式进行输出:
function(oldVal){ 处理 newVal}
使用过滤器:{{e.salary | 过滤器 }}
自定义管道的步骤:
1)创建管道class,实现转换功能
创建app文件夹下面的 文件 sex.pipe.ts
import { Pipe } from "@angular/core";

@Pipe({
  name: "sex" // 过滤器/管道名
})

export class SexPipe {
  // 管道到执行的过滤任务的是一个固定的函数
  transform(value, lang = 'zh') {
    if (lang === 'zh') {
      if (value === 1) {
        return '男'
      } else {
        return '女'
      }
    } else if (lang === 'en') {
      if (value === 1) {
        return 'man'
      } else {
        return 'woman'
      }
    }

  }
}
2)在模块中注册管道
在app.module.ts 声明
import { BrowserModule } from '@angular/platform-browser';
import { SexPipe } from './sex.pipe';

// 装饰器中的元数据来实现
@NgModule({
  // 声明
  declarations: [
    AppComponent,
    SexPipe
  ],
})
export class AppModule { }
3)在模板视图中使用管道
html
<p>
  {{0 | sex}}
</p>
<!-- 使用冒号给管道传递参数 -->
<p>
  {{1 | sex:'en'}}
</p>
创建管道对象的简便工具:ng g pipe 管道名称
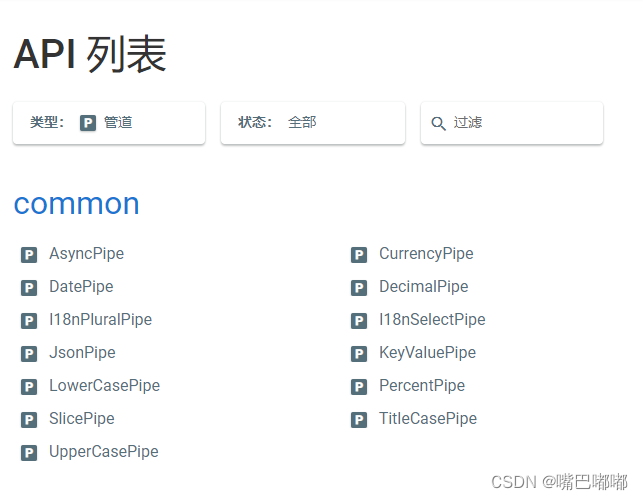
Angular 提供了预定义管道
2.创建对象的两种方式
方式1:手工创建 自己创建 let c = new Car()
方式2:依赖注入 无需手工创建new,只需要声明依赖
6、Angular核心概念之五:服务和依赖注入——抽象&重点
Service:服务,Angular认为:组件是与用户交互的一种对象,其中的内容都应该与用户操作有关系的;而与用户操作无关的内容都应该剥离出去,放在“服务对象”中,为组件服务;例如:日志记录、计时统计…
创建服务对象的步骤:
1)创建服务对象并指定服务提供者
log.servive.ts
import { Injectable } from '@angular/core'

// 所有的服务对象都是“可被注入的” 创建服务单例的
@Injectable({
  providedIn: 'root' // 指定当前服务对象在根模块中执行(根模块)
})
// 服务对象
export class LogService {
  // 执行日志服务
  doLog(action) {
    let uname = ''
    let time = new Date().getTime()
    console.log(`管理员:${uname}时间:${time}事件:${action}`)
  }
}
2)在组件中声明依赖,服务提供者就会自动注入进来,组件直接使用服务对象即可
modules.ts
import { Component, OnInit } from '@angular/core';
import { LogService } from '../log.service';

@Component({
  selector: 'app-ngc04',
  templateUrl: './ngc04.component.html',
  styleUrls: ['./ngc04.component.scss']
})
export class Ngc04Component implements OnInit {
  // 服务使用者,必须声明依赖
  log = null
  // 声明依赖
  constructor(logs: LogService) {
    this.log = logs
  }
  doAdd() {
    this.log.doLog('增添')
  }
  doDelete() {
    this.log.doLog('删除')
  }

  ngOnInit() {
  }
}
每个组件对应的服务(都是新建)
组件名
import { Component, OnInit } from '@angular/core';
import { LoginService } from '../login.service';

@Component({
  selector: 'app-user-login',
  templateUrl: './user-login.component.html',
  styleUrls: ['./user-login.component.scss'],
  providers: [LoginService]  //仅给当前组件的服务提供
})
export class UserLoginComponent implements OnInit {
  timerLog = null
  constructor(timerLog: LoginService) {
    this.timerLog = timerLog
  }

  ngOnInit() {
  }
  doRegister() {
    this.timerLog.start()
    console.log('向服务器提交注册信息')
    console.log('服务器返回响应消息:success')
    this.timerLog.end('注册')
  }
}
服务
import { Injectable } from '@angular/core';

// @Injectable({
//   providedIn: 'root'
// })
@Injectable()
export class LoginService {
  startTime = 0
  endTime = 0
  constructor() {
    console.log('创建服务')
   }
  start() {
    this.startTime = new Date().getTime()
  }
  end(action) {
    setTimeout(() => {
      this.endTime = new Date().getTime()
      console.log(action + '耗时', this.endTime - this.startTime)
    }, 200)
  }
}
- 服务对象的作用范围
方式1:根模块中提供服务对象——整个应用中服务是单例
方式2:在组件中提供服务对象——每个组件中服务都是一个实例
注意:项目中只要服务对象中有属性,只能用方式2,否则使用方式1
简化工具:ng g service 服务名


 734
734


 被折叠的 条评论
为什么被折叠?
被折叠的 条评论
为什么被折叠?
 到【灌水乐园】发言


