


一、自定义模块
[root@server1 ~]# mkdir /srv/salt/_modules
[root@server1 ~]# cd /srv/salt/_modules
[root@server1 _modules]# vim my_disk.py
[root@server1 _modules]# cat my_disk.py
def df():
    cmd = 'df -h'
    return __salt__['cmd.run'](cmd)

[root@server1 _modules]# salt server3 saltutil.sync_modules
server3:
    - modules.my_disk


[root@server3 ~]# cd /var/cache/salt/
[root@server3 salt]# tree minion/

[root@server1 _modules]# salt server3 my_disk.df

二、API
- 利用api接口来实现SaltStack推送,管理集群是非常方便的手段,下面我们尝试利用API来实现Salt的功能
- 在server1上安装salt api
[root@server1 _modules]# yum install -y salt-api-2018.3.3-1.el7.noarch.rpm
- 配置自签名证书
[root@server1 private]# pwd
/etc/pki/tls/private
[root@server1 private]# openssl genrsa 1024
[root@server1 private]# openssl genrsa 1024 > localhost.key
localhost.key
[root@server1 private]# cd ..
[root@server1  tls]# cd certs
[root@server1  certs]# make testcert

3. cd /etc/salt
vim master #发现只支持以.conf结尾的文件

- 编辑api.conf和auth.conf
[root@server1 certs]# cd /etc/salt/master.d/
[root@server1 master.d]# vim api.conf
rest_cherrypy:
  port: 8000
  ssl_crt: /etc/pki/tls/certs/localhost.crt
  ssl_key: /etc/pki/tls/private/localhost.key

[root@server1 master.d]# vim auth.conf
external_auth:
  pam:
    saltapi:
      - .*
- 创建用户并设置密码
[root@server1 master.d]# useradd saltapi
[root@server1 master.d]# passwd saltapi       ##设置密码我这里设置的是westos
- 打开salt-api,重启salt-master,并查看是否监听8000端口
[root@server1 master.d]# systemctl start salt-api
[root@server1 master.d]# systemctl restart salt-master
[root@server1 master.d]# netstat -antlp | grep 8000
- 验证服务并获得token
[root@server1 master.d]# curl -sSk https://localhost:8000/login -d username=saltapi -d password=westos -d eauth=pam
{"return": [{"perms": [".*"], "start": 1553939157.266992, "token": "197b97778d768a8e135518e5b9e7043ef591b9d0", "expire": 1553982357.266994, "user": "saltapi", "
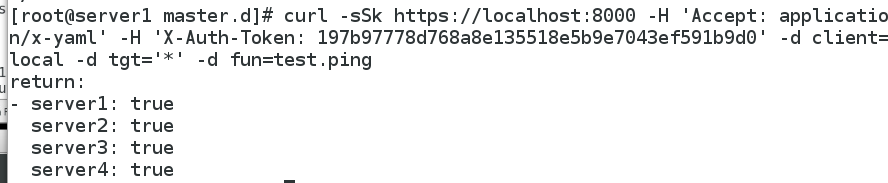
- 利用token号测试四台minion是否通
[root@server1 master.d]# curl -sSk https://localhost:8000 -H 'Accept: application/x-yaml' -H 'X-Auth-Token: 197b97778d768a8e135518e5b9e7043ef591b9d0' -d client=local -d tgt='*' -d fun=test.ping
9. 调用api,给server3推送nginx服务
[root@server1 master.d]# curl -sSk https://localhost:8000 -H 'Accept: application/x-yaml' -H 'X-Auth-Token: 197b97778d768a8e135518e5b9e7043ef591b9d0' -d client=local -d tgt='server3' -d fun=state.sls -d arg='nginx.service'
三、syndic
- 将server4从salt-minion中分离出来,单独做一个Topmaster
[root@server1 ~]# salt-key -L
Accepted Keys:
server1
server2
server3
server4
Denied Keys:
Unaccepted Keys:
Rejected Keys:
[root@server1 ~]# salt-key -d server4
The following keys are going to be deleted:
Accepted Keys:
server4
Proceed? [N/y] y
Key for minion server4 deleted.
[root@server1 ~]# salt-key -L
Accepted Keys:
server1
server2
server3
Denied Keys:
Unaccepted Keys:
Rejected Keys:

[root@server4 ~]# systemctl stop salt-minion
[root@server4 ~]# systemctl disable salt-minion
[root@server4 ~]# yum install salt-master -y
[root@server4 ~]# vim /etc/salt/master
1054 order_masters: True
[root@server4 ~]# systemctl start salt-master


[root@server1 ~]# yum install -y salt-syndic
[root@server1 ~]# systemctl start salt-syndic
[root@server1 ~]# vim /etc/salt/master
1057 syndic_master: 172.25.19.4
[root@server1 ~]# systemctl restart salt-master
- 将server1的钥匙传给server4
[root@server4 ~]# salt-key -L
Accepted Keys:
Denied Keys:
Unaccepted Keys:
server1
Rejected Keys:
[root@server4 ~]# salt-key -A
The following keys are going to be accepted:
Unaccepted Keys:
server1
Proceed? [n/Y] Y
Key for minion server1 accepted.
[root@server4 ~]# salt-key -L
Accepted Keys:
server1
Denied Keys:
Unaccepted Keys:
Rejected Keys:
- 测试
server4没有连接salt-master,但是却可以ping通,是因为server1和server4相连,而server4是一个最顶端的master
[root@server4 ~]# salt '*' test.ping
server2:
    True
server3:
    True
server1:
    True

推送成功
[root@server4 ~]# salt server2 state.sls httpd.service
四、ssh模块
[root@server1 ~]# yum install salt-ssh -y
[root@server1 ~]# cd /etc/salt/
[root@server1 salt]# vim roster
server2:
  host: 172.25.19.2

server3:
  host: 172.25.19.3


[root@server1 salt]# salt-ssh '*' test.ping -i   ##-i则是默认选择yes
Permission denied for host server2, do you want to deploy the salt-ssh key? (password required):
[Y/n] y
Password for root@server2:
Password for root@server3:
server2:
    True
server3:
    True


 2869
2869


 被折叠的 条评论
为什么被折叠?
被折叠的 条评论
为什么被折叠?
 到【灌水乐园】发言


