


1. 显示所有员工信息
1.1. 根据以下步骤创建 springmvc 工程
1. 创建 springmvc - 2 动态 web 工程
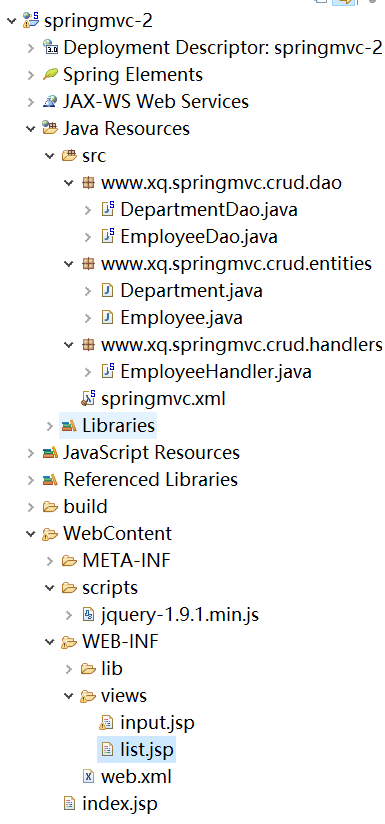
最终的工程目录:
2. 导入 jar 包
具体 jar 包如下图

3. 配置 web.xml 文件
<?xml version="1.0" encoding="UTF-8"?>
<web-app xmlns:xsi="http://www.w3.org/2001/XMLSchema-instance"
	xmlns="http://java.sun.com/xml/ns/javaee"
	xsi:schemaLocation="http://java.sun.com/xml/ns/javaee http://java.sun.com/xml/ns/javaee/web-app_3_0.xsd"
	id="WebApp_ID" version="3.0">

	<!-- 配置 org.springframework.web.filter.HiddenHttpMethodFilter: 可以把 POST
		请求转为 DELETE 或 POST 请求 -->
	<filter>
		<filter-name>HiddenHttpMethodFilter</filter-name>
		<filter-class>org.springframework.web.filter.HiddenHttpMethodFilter</filter-class>
	</filter>

	<filter-mapping>
		<filter-name>HiddenHttpMethodFilter</filter-name>
		<url-pattern>/*</url-pattern>
	</filter-mapping>


	<!-- 配置 DispatcherServlet -->
	<servlet>
		<servlet-name>dispatcherServlet</servlet-name>
		<servlet-class>org.springframework.web.servlet.DispatcherServlet</servlet-class>
		<!-- 配置 DispatcherServlet 的一个初始化参数: 配置 SpringMVC 配置文件的位置和名称 -->
		<!-- 实际上也可以不通过 contextConfigLocation 来配置 SpringMVC 的配置文件, 而使用默认的. 默认的配置文件为:
			/WEB-INF/<servlet-name>-servlet.xml -->
		<init-param>
			<param-name>contextConfigLocation</param-name>
			<param-value>classpath:springmvc.xml</param-value>
		</init-param>
		<load-on-startup>1</load-on-startup>
	</servlet>

	<servlet-mapping>
		<servlet-name>dispatcherServlet</servlet-name>
		<url-pattern>/</url-pattern>
	</servlet-mapping>


</web-app>
4. 配置 SpringMVC 配置文件 springmvc.xml(勾上 beans,context,mvc 三个命名空间)
<?xml version="1.0" encoding="UTF-8"?>
<beans xmlns="http://www.springframework.org/schema/beans"
	xmlns:xsi="http://www.w3.org/2001/XMLSchema-instance"
	xmlns:context="http://www.springframework.org/schema/context"
	xmlns:mvc="http://www.springframework.org/schema/mvc"
	xsi:schemaLocation="http://www.springframework.org/schema/beans http://www.springframework.org/schema/beans/spring-beans.xsd
		http://www.springframework.org/schema/context http://www.springframework.org/schema/context/spring-context-4.0.xsd
		http://www.springframework.org/schema/mvc http://www.springframework.org/schema/mvc/spring-mvc-4.0.xsd">

	<!-- 配置自动扫描的包 -->
	<context:component-scan base-package="www.xq.springmvc"></context:component-scan>

	<!-- 配置视图解析器 -->
	<bean class="org.springframework.web.servlet.view.InternalResourceViewResolver">
		<property name="prefix" value="/WEB-INF/views/"></property>
		<property name="suffix" value=".jsp"></property>
	</bean>

</beans>
5. 创建视图 index.jsp 以及 views 文件夹
1.2. 实现具体功能
1. 创建实体类
Employee.java
package www.xq.springmvc.crud.entities;

import java.util.Date;

import javax.validation.constraints.Past;

import org.hibernate.validator.constraints.Email;
import org.hibernate.validator.constraints.NotEmpty;
import org.springframework.format.annotation.DateTimeFormat;
import org.springframework.format.annotation.NumberFormat;

public class Employee {

	private Integer id;
	@NotEmpty
	private String lastName;

	@Email
	private String email;
	//1 male, 0 female
	private Integer gender;

	private Department department;

	@Past
	@DateTimeFormat(pattern="yyyy-MM-dd")
	private Date birth;

	@NumberFormat(pattern="#,###,###.#")
	private Float salary;

	public Integer getId() {
		return id;
	}

	public void setId(Integer id) {
		this.id = id;
	}

	public String getLastName() {
		return lastName;
	}

	public void setLastName(String lastName) {
		this.lastName = lastName;
	}

	public String getEmail() {
		return email;
	}

	public void setEmail(String email) {
		this.email = email;
	}

	public Integer getGender() {
		return gender;
	}

	public void setGender(Integer gender) {
		this.gender = gender;
	}

	public Department getDepartment() {
		return department;
	}

	public void setDepartment(Department department) {
		this.department = department;
	}

	public Date getBirth() {
		return birth;
	}

	public void setBirth(Date birth) {
		this.birth = birth;
	}

	public Float getSalary() {
		return salary;
	}

	public void setSalary(Float salary) {
		this.salary = salary;
	}

	@Override
	public String toString() {
		return "Employee [id=" + id + ", lastName=" + lastName + ", email="
				+ email + ", gender=" + gender + ", department=" + department
				+ ", birth=" + birth + ", salary=" + salary + "]";
	}

	public Employee(Integer id, String lastName, String email, Integer gender,
			Department department) {
		super();
		this.id = id;
		this.lastName = lastName;
		this.email = email;
		this.gender = gender;
		this.department = department;
	}

	public Employee() {
		// TODO Auto-generated constructor stub
	}
}
Department.java
package www.xq.springmvc.crud.entities;

public class Department {

	private Integer id;
	private String departmentName;

	public Department() {
		// TODO Auto-generated constructor stub
	}

	public Department(int i, String string) {
		this.id = i;
		this.departmentName = string;
	}

	public Integer getId() {
		return id;
	}

	public void setId(Integer id) {
		this.id = id;
	}

	public String getDepartmentName() {
		return departmentName;
	}

	public void setDepartmentName(String departmentName) {
		this.departmentName = departmentName;
	}

	@Override
	public String toString() {
		return "Department [id=" + id + ", departmentName=" + departmentName
				+ "]";
	}

}
2. 创建 dao 接口
EmployeeDao
package www.xq.springmvc.crud.dao;

import java.util.Collection;
import java.util.HashMap;
import java.util.Map;

import org.springframework.beans.factory.annotation.Autowired;
import org.springframework.stereotype.Repository;

import www.xq.springmvc.crud.entities.Department;
import www.xq.springmvc.crud.entities.Employee;

@Repository
public class EmployeeDao {

	private static Map<Integer, Employee> employees = null;

	@Autowired
	private DepartmentDao departmentDao;

	static{
		employees = new HashMap<Integer, Employee>();

		employees.put(1001, new Employee(1001, "E-AA", "aa@163.com", 1, new Department(101, "D-AA")));
		employees.put(1002, new Employee(1002, "E-BB", "bb@163.com", 1, new Department(102, "D-BB")));
		employees.put(1003, new Employee(1003, "E-CC", "cc@163.com", 0, new Department(103, "D-CC")));
		employees.put(1004, new Employee(1004, "E-DD", "dd@163.com", 0, new Department(104, "D-DD")));
		employees.put(1005, new Employee(1005, "E-EE", "ee@163.com", 1, new Department(105, "D-EE")));
	}

	private static Integer initId = 1006;

	public void save(Employee employee){
		if(employee.getId() == null){
			employee.setId(initId++);
		}

		employee.setDepartment(departmentDao.getDepartment(employee.getDepartment().getId()));
		employees.put(employee.getId(), employee);
	}

	public Collection<Employee> getAll(){
		return employees.values();
	}

	public Employee get(Integer id){
		return employees.get(id);
	}

	public void delete(Integer id){
		employees.remove(id);
	}
}
DepartmentDao
package www.xq.springmvc.crud.dao;

import java.util.Collection;
import java.util.HashMap;
import java.util.Map;

import org.springframework.stereotype.Repository;

import www.xq.springmvc.crud.entities.Department;

@Repository
public class DepartmentDao {

	private static Map<Integer, Department> departments = null;

	static{
		departments = new HashMap<Integer, Department>();

		departments.put(101, new Department(101, "D-AA"));
		departments.put(102, new Department(102, "D-BB"));
		departments.put(103, new Department(103, "D-CC"));
		departments.put(104, new Department(104, "D-DD"));
		departments.put(105, new Department(105, "D-EE"));
	}

	public Collection<Department> getDepartments(){
		return departments.values();
	}

	public Department getDepartment(Integer id){
		return departments.get(id);
	}

}
3. 创建请求处理器类 EmployeeHandler
package www.xq.springmvc.crud.handlers;

import java.util.Map;

import org.springframework.beans.factory.annotation.Autowired;
import org.springframework.stereotype.Controller;
import org.springframework.web.bind.annotation.RequestMapping;

import www.xq.springmvc.crud.dao.EmployeeDao;

@Controller
public class EmployeeHandler {

	@Autowired
	private EmployeeDao employeeDao;

	@RequestMapping("/emps")
	public String list(Map<String, Object> map){
		map.put("employees", employeeDao.getAll());
		return "list";
	}

}
4. 添加视图
indx.jsp
<%@ page language="java" contentType="text/html; charset=UTF-8"
    pageEncoding="UTF-8"%>
<!DOCTYPE html PUBLIC "-//W3C//DTD HTML 4.01 Transitional//EN" "http://www.w3.org/TR/html4/loose.dtd">
<html>
<head>
<meta http-equiv="Content-Type" content="text/html; charset=UTF-8">
<title>Insert title here</title>
</head>
<body>

	<a href="emps">List All Employees</a>
	<br><br>

</body>
</html>
list.jsp
<%@ page language="java" contentType="text/html; charset=UTF-8"
    pageEncoding="UTF-8"%>
<%@ taglib prefix="c" uri="http://java.sun.com/jsp/jstl/core" %>
<!DOCTYPE html PUBLIC "-//W3C//DTD HTML 4.01 Transitional//EN" "http://www.w3.org/TR/html4/loose.dtd">
<html>
<head>
<meta http-equiv="Content-Type" content="text/html; charset=UTF-8">
<title>Insert title here</title>
</head>
<body>

	<c:if test="${empty requestScope.employees }">
		没有任何员工信息.
	</c:if>
	<c:if test="${!empty requestScope.employees }">
		<table border="1" cellpadding="10" cellspacing="0">
			<tr>
				<th>ID</th>
				<th>LastName</th>
				<th>Email</th>
				<th>Gender</th>
				<th>Department</th>
				<th>Edit</th>
				<th>Delete</th>
			</tr>

			<c:forEach items="${requestScope.employees }" var="emp">
				<tr>
					<td>${emp.id }</td>
					<td>${emp.lastName }</td>
					<td>${emp.email }</td>
					<td>${emp.gender == 0 ? 'Female' : 'Male' }</td>
					<td>${emp.department.departmentName }</td>
					<td><a href="emp/${emp.id}">Edit</a></td>
					<td><a class="delete" href="emp/${emp.id}">Delete</a></td>
				</tr>
			</c:forEach>
		</table>
	</c:if>

	<br><br>

</body>
</html>
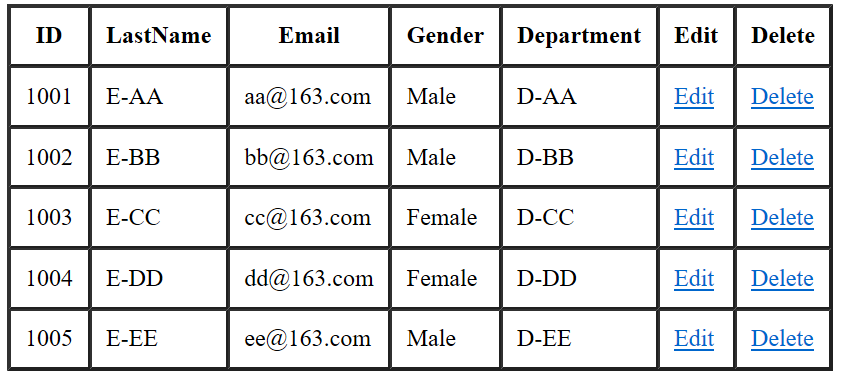
1.3. 运行结果
2. 添加操作 & 表单标签
2.1. 添加操作
1. 视图设计
list.jsp 添加
<br><br>
	<a href="emp">Add New Employee</a>
input.jsp
<%@page import="java.util.HashMap"%>
<%@page import="java.util.Map"%>
<%@ page language="java" contentType="text/html; charset=UTF-8"
	pageEncoding="UTF-8"%>
<%@ taglib prefix="form" uri="http://www.springframework.org/tags/form"%>
<%@ taglib prefix="c" uri="http://java.sun.com/jsp/jstl/core"%>

<!DOCTYPE html PUBLIC "-//W3C//DTD HTML 4.01 Transitional//EN" "http://www.w3.org/TR/html4/loose.dtd">
<html>
<head>
<meta http-equiv="Content-Type" content="text/html; charset=UTF-8">
<title>Insert title here</title>
</head>
<body>

	<!--
		1. WHY 使用 form 标签呢 ?
		可以更快速的开发出表单页面, 而且可以更方便的进行表单值的回显
		2. 注意:
		可以通过 modelAttribute 属性指定绑定的模型属性,
		若没有指定该属性,则默认从 request 域对象中读取 command 的表单 bean
		如果该属性值也不存在,则会发生错误。
	-->
	<br>
	<form:form action="emp" method="POST" modelAttribute="employee">
		<!-- path 属性对应 html 表单标签的 name 属性值 -->
		LastName: <form:input path="lastName" />
		<br>
		Email: <form:input path="email" />
		<br>
		<%
			Map<String, String> genders = new HashMap();
			genders.put("1", "Male");
			genders.put("0", "Female");

			request.setAttribute("genders", genders);
		%>
		<br>
		Gender:
		<br>
		<form:radiobuttons path="gender" items="${genders }" delimiter="<br>" />
		<br>
		Department:
		<form:select path="department.id" items="${departments }"
			itemLabel="departmentName" itemValue="id"></form:select>
		<br>
		<input type="submit" value="Submit" />
	</form:form>
</body>
</html>
2. 请求处理器 EmployeeHandler 添加业务方法
@Autowired
	private DepartmentDao departmentDao;

	@RequestMapping(value="/emp",method=RequestMethod.POST)
	public String save(Employee employee) {
		employeeDao.save(employee);
		return "redirect:/emps";
	}

	@RequestMapping(value="/emp", method=RequestMethod.GET)
	public String input(Map<String, Object> map){
		map.put("departments", departmentDao.getDepartments());
		map.put("employee", new Employee());
		return "input";
	}
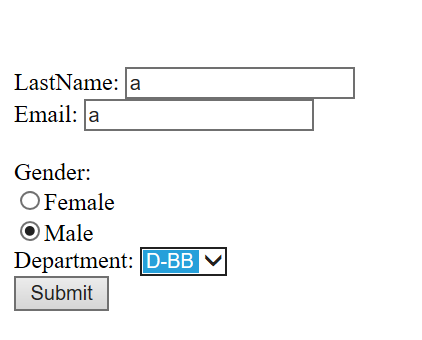
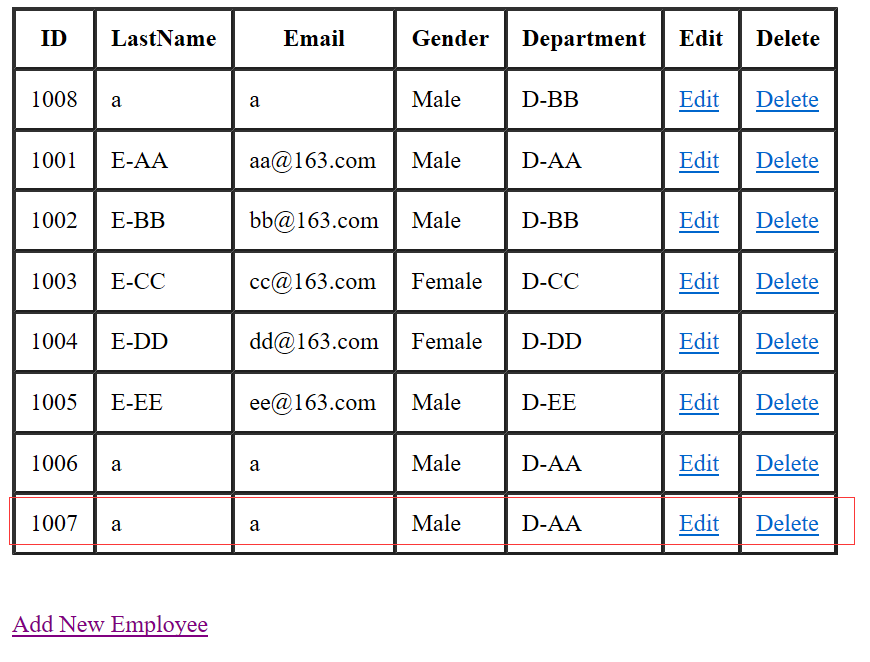
3. 运行结果
|
2.2. 表单标签
- 使用 Spring 的表单标签
- 通过 SpringMVC 的表单标签可以实现将模型数据中的属性和 HTML 表单元素相绑定,以实现表单数据更便捷编辑和表单值的回显
- form 标签
- 一般情况下,通过 GET 请求获取表单页面,而通过 POST 请求提交表单页面,因此获取表单页面和提交表单页面的 URI 是相同的。只需要满足该最佳条件的契约,form:form 标签就无需通过 action 属性指定表单提交 URL
- 可以通过 modelAttribute 属性指定绑定的模型属性,若没有指定该属性,则默认从== request 域==对象中读取 command 的表单 bean,如果该属性值也不存在,则会发生错误。
- 表单标签
- SpringMVC 提供了多个表单组件标签,如 form:inout/、form:select/ 等,用以绑定表单字段的属性值,它们的共有属性如下:
- path:表单字段,对应 html 元素的 name 属性,支持级联属性
- htmlEscape:是否表单值的 HTML 特殊字符进行转换,默认值为 true
- cssClass:表单组件对应的 CSS 样式类名
- cssErrorClass:表单组件的数据存在错误时,采取的 CSS 样式
- form:input、form:password、form:hidden、form:textarea:对应 HTML 表单的 text、password、hidden、textarea 标签
- form:radiobutton:单选框组件标签,当表单 bean 对应的属性值和 value 值相等时,单选框被选中
- form:radiobuttons:单选框组标签,用于构造多个单选框
- items:可以是一个 List、String[] 或 Map
- itemValue:指定 radio 的 value 值。可以是集合中 bean 的一个属性值
- itemLabel:指定 radio 的 Label 值
- delimiter:多个单选框可以通过 delimiter 指定分隔符
- form:errors:显示表单组件或数据校验所对应的错误
- <form:errors path="*"/>:显示表单所有的错误
- <form:errors path=“user*”/>:显示所有以 user 为前缀的属性对应的错误
- <form:errors path=“username”/>:显示特定表单对象属性的错误
- SpringMVC 提供了多个表单组件标签,如 form:inout/、form:select/ 等,用以绑定表单字段的属性值,它们的共有属性如下:


 491
491

 被折叠的 条评论
为什么被折叠?
被折叠的 条评论
为什么被折叠?
 到【灌水乐园】发言


