


SpringBoot通过Thymeleaf实现一个简单的分页
之前没有接触过分页,今天想实现一下,当中还有一些问题还需谅解。代码中只做实现,还没来得及做优化
环境:JDK 1.8 IDEA
由于如何创建工程比较简单,这里不做讲解!
步骤
1. 工程目录

2.pom.xml配置
        <dependency>
            <groupId>org.springframework.boot</groupId>
            <artifactId>spring-boot-starter-jdbc</artifactId>
        </dependency>
        <dependency>
            <groupId>org.springframework.boot</groupId>
            <artifactId>spring-boot-starter-web</artifactId>
        </dependency>
        <dependency>
            <groupId>org.mybatis.spring.boot</groupId>
            <artifactId>mybatis-spring-boot-starter</artifactId>
            <version>2.1.3</version>
        </dependency>

        <dependency>
            <groupId>mysql</groupId>
            <artifactId>mysql-connector-java</artifactId>
            <scope>runtime</scope>
        </dependency>

        <!-- 导入阿里的数据库连接池技术-->
        <dependency>
            <groupId>com.alibaba</groupId>
            <artifactId>druid</artifactId>
            <version>1.1.17</version>
        </dependency>
        <!-- thymeleaf依赖 -->
        <dependency>
            <groupId>org.springframework.boot</groupId>
            <artifactId>spring-boot-starter-thymeleaf</artifactId>
        </dependency>
3.创建于数据表对应的entity实体类
- 数据表:
CREATE TABLE `account` (
  `id` int(11) NOT NULL AUTO_INCREMENT,
  `name` varchar(20) DEFAULT NULL,
  `money` double DEFAULT NULL,
  PRIMARY KEY (`id`)
) ENGINE=InnoDB AUTO_INCREMENT=17 DEFAULT CHARSET=utf8;
- 实体类:
public class Account {
    private Integer id;
    private String name;
    private Double money;

    //getter setter....
}
3.application.yml配置文件
spring:
  datasource:
    username: root
    password:
    url: jdbc:mysql://localhost:3306/ssm?serverTimezone=UTC&useUnicode=true&characterEncoding=utf-8
    driver-class-name: com.mysql.cj.jdbc.Driver
    type: com.alibaba.druid.pool.DruidDataSource

  thymeleaf:
    cache: false #关闭模板引擎缓存

mybatis:
  type-aliases-package: cn.jack.entity
  mapper-locations: classpath:mapper/*.xml
4.编写AccountMapper接口
@Mapper
@Repository
public interface AccountMapper {
    /**
     * 获取总记录数
     * @return
     */
    public Integer queryTotalRecords();

    /**
     * 查询指定范围的记录数
     * @param map
     * @return
     */
    public List<Account> queryLimitAccounts(Map<String,Integer> map);
}
5.编写AccountServer接口和Impl实现类
- AccountServer
public interface AccountService {

    public Integer queryTotalRecords();

    public List<Account> queryLimitAccounts(Map<String,Integer> map);
}- AccountServerImpl
@Service
public class AccountServiceImpl implements AccountService {

    @Autowired
    private AccountMapper accountMapper;

    @Override
    public Integer queryTotalRecords() {
        return accountMapper.queryTotalRecords();
    }

    @Override
    public List<Account> queryLimitAccounts(Map<String, Integer> map) {
        return accountMapper.queryLimitAccounts(map);
    }
}
6.编写AccountMapper.xml配置文件
<?xml version="1.0" encoding="UTF-8" ?>
<!DOCTYPE mapper
PUBLIC "-//mybatis.org//DTD Mapper 3.0//EN"
"http://mybatis.org/dtd/mybatis-3-mapper.dtd">
<mapper namespace="cn.jack.mapper.AccountMapper">
<!-- 获取总记录数 -->
<select id="queryTotalRecords" resultType="java.lang.Integer">
select count(*) from account;
</select>
<!-- 查询指定条数用户 -->
<select id="queryLimitAccounts" resultType="Account" parameterType="java.util.Map">
select * from account limit #{start}, #{pages};
</select>
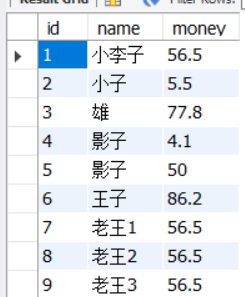
</mapper>7.测试是否能够操作查询数据表

成功!
8.编写AccountController
@Controller
public class AccountController {

    /**
     * 这里这样子写不好,还需优化
     */
    private static Integer totalRecords;//获取记录总数
    private static Integer pageSize = 3;//每页显示的记录数
    private static Integer pageCount;//总页数
    private static Integer currentPage;//待显示页码

    @Autowired
    private AccountService accountService;

    @RequestMapping("/queryAccounts")
    public String queryAccounts(HttpServletRequest request, Model model){
        totalRecords = accountService.queryTotalRecords();
        pageCount = (totalRecords%pageSize == 0)?(totalRecords/pageSize) : (totalRecords/pageSize+1);
        //获取当前页数
        String strCurrentPage;
        if ((strCurrentPage = (String) request.getParameter("pageNum")) == null){
            currentPage = 1;
        }else{
            currentPage = Integer.parseInt(strCurrentPage);
            //设置当前访问页面超出页数的大小
            if(currentPage >= pageCount) currentPage = pageCount;
            else if (currentPage < 1) currentPage = 1;
        }

        //查询数据
        Map<String, Integer> map = new HashMap<>();
        map.put("start", (currentPage - 1) * pageSize); //从哪一条记录开始查询
        map.put("pages", pageSize);
        List<Account> accounts = accountService.queryLimitAccounts(map);

        model.addAttribute("pageSize",pageSize);
        model.addAttribute("pageCount",pageCount);
        model.addAttribute("currentPage",currentPage);
        model.addAttribute("totalRecords",totalRecords);
        model.addAttribute("accounts",accounts);

        return "home";
    }
}
9.主页面home.html
<!DOCTYPE html>
<html lang="en" xmlns:th="http://www.thymeleaf.org">
<head>
    <meta charset="UTF-8">
    <title>人员信息</title>
    <style>
        table{ width: 300px;}

        div{ width: 300px;height: 500px;margin: 0 auto;}
    </style>
</head>
<body>
    <div>
        <table border="1" cellspacing="0" cellpadding="0">
            <tr>
                <th>ID</th>
                <th>姓名</th>
                <th>年龄</th>
            </tr>
            <tr th:if="${accounts != null}" th:each="account:${accounts}">
                <td th:text="${account.getId()}"></td>
                <td th:text="${account.getName()}"></td>
                <td th:text="${account.getMoney()}"></td>
            </tr>
        </table>


        <span><a th:href="@{/queryAccounts(pageNum=1)}">首页</a></span>
        <span th:switch="${currentPage}">
            <a th:case="1" th:href="@{/queryAccounts(pageNum=1)}">上一页</a>
            <a th:case="*" th:href="@{/queryAccounts(pageNum=${currentPage - 1})}">上一页</a>
        </span>
        <span th:switch="${currentPage}">
            <a th:case="pageCount" th:href="@{/queryAccounts(pageNum=${pageCount})}">下一页</a>
            <a th:case="*" th:href="@{/queryAccounts(pageNum=${currentPage + 1})}">下一页</a>
        </span>
        <span><a th:href="@{/queryAccounts(pageNum=${pageCount})}">尾页</a></span>
    </div>

</body>
</html>
10.测试运行

测试成功!
总结
通过一个简单分页的实现,懂得了分页的一些基本实现方式,当然代码还需要优化,由于小白的我感觉我自己写的代码是有点low的,但就算差还需要努力向前走,加油!同时也希望我写的内容能够对你们有所帮助!


 被折叠的 条评论
为什么被折叠?
被折叠的 条评论
为什么被折叠?
 到【灌水乐园】发言


