


SpringBoot之RabbitMQ入门学习
在学习RabbitMQ知识,我也是小白一枚,什么都不懂,通过网上看其他博主写的文章自学,还是有一定的收获!下面的内容如有不足之处,还请指点!
目录
在学习RabbitMQ之前,先要了解一些基本概念
-
消息:消息可以认为是应用程序间传递的数据
-
消息队列:队列是一种先进先出的数据结构,消息队列是把消息存放在队列中,获取消息时,是先获取最先存放的消息。发送者只需把消息存放在队列中,不必考虑消息是否到达接收者,接收者获取消息,只需往队列获取就可以了。
-
交换机:
-
Direct(直连)交换机:Direct交换机会根据消息中的RoutingKey的内容精准匹配将消息发送给与RoutingKey完全一致的Queue的BindingKey内容。只能一对一传输,也就是一个消息只能传给一个Receiver接收者。
-
Fanout(扇型)交换机:每个发到fanout类型的交换器的消息都会分发到所有绑定的队列上。fanout交换器不处理路由键。和广播相似,一对多。
-
-
Topic(主题)交换机:基本概念和使用与Fanout是相同的,但是Topic需要指定BindingKey,消息中也需要携带RoutingKey,但是Topic中的BindingKey是可以使用通配符,* 表示必须要匹配一个单词,#表示匹配0个或任意多个单词,单词和单词之间需要使用 . 进行分割。
-
RabbitMQ安装
RabbitMQ的安装我是在Docker进行的,关于Docker安装我这里不进行讲解
- 首先启动docker:service docker start

- 直接安装:docker pull docker.io/rabbitmq:3-management

- 查看镜像:docker images

- 启动:docker run -d -p 5672:5672 -p 15672:15672 --name rabbitmq rabbitmq:management

- 浏览器访问,显示如下界面说明rabbitmq启动成功

登入成功的界面

我这里就不操作如何在界面上创建交换机和队列了,直接干代码
首先创建一个SpringBoot项目
目录结构

pom.xml配置所需依赖
        <dependency>
            <groupId>org.springframework.boot</groupId>
            <artifactId>spring-boot-starter-amqp</artifactId>
        </dependency>
        <dependency>
            <groupId>org.springframework.boot</groupId>
            <artifactId>spring-boot-starter-web</artifactId>
        </dependency>
application.yml配置
spring:
  #配置rabbitMq服务器
  rabbitmq:
    host: 192.168.159.135 #主机ip
    port: 5672  #端口
    username: guest
    password: guest
代码编写测试流程
1. DirectExchange直连型交换机
在config包下创建DirectRabbitConfig配置文件
/**
 * 直连型交换机配置
 */
@Configuration
public class DirectRabbitConfig {

    //创建一个Direct交换机
    @Bean
    public DirectExchange directEx(){
        /**
         * 参数1:交换机名
         * 参数2:是否持久化
         * 参数3:是否自动删除
         */
        return new DirectExchange("directEx", true, false);
    }

    //创建一个队列
    @Bean
    public Queue DirectQu1(){
        /**
         * 参数1:队列名
         * 参数2:是否持久化
         */
        return new Queue("DirectQu1", true);
    }

    //绑定队列与交换机
    @Bean
    public Binding bindingDirect(){
        /**
         * 参数1:需要绑定某一个队列
         * 参数2:需要将队列绑定到哪一个交换机上
         * 参数3:执行路由键RoutingKey
         */
        return BindingBuilder.bind(DirectQu1()).to(directEx()).with("DirectRK1");
    }
}
通过controller实现消息的推送,在controller包下创建一个SendMsgController
@RestController
public class SendMsgController {

    @Autowired
    private RabbitTemplate rabbitTemplate; //具备发送和接收操作

    @RequestMapping("/sendDirectMsg")
    public String sendDirectMsg(){
        //将消息推送到哪一个交换机上,交换机根据RoutingKey将数据发送到哪一个队列中
        /**
         * 参数1:传递给哪一个交换机
         * 参数2:路由键RoutingKey
         * 参数3:具体的消息
         */
        rabbitTemplate.convertAndSend("directEx","DirectRK1","my is direct : " + UUID.randomUUID());
        return "success";
    }
}
这时候启动应用程序,扫描到DirectRabbitConfig配置文件会自动创建对应的交换机和队列,通过浏览器访问实现消息的推送至队列DirectQu1中。
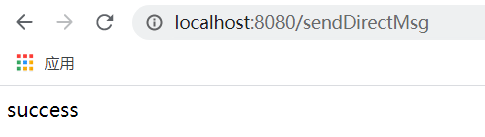
查看是否推送成功


消息发送到队列没有问题
创建一个接收者来读取队列中的信息,在direct包下创建DirectReceiver1
@Component
public class DirectReceiver1 {

    /**
     * 开启异步监听,不断监听队列
     * 当有消息时就会直接获取
     * @param msg
     */
    @RabbitListener(queues = {"DirectQu1"})
    public void directReceive(String msg){
        System.out.println("Direct 1 接收的消息:" + msg + UUID.randomUUID());
    }
}
在次运行程序

设想一下,如果说当有两个接收者监听同一个队列,那么两者获取消息又是怎么样的呢?
在direct下再创建一个接收者,也是监听DirectQu1队列
@Component
public class DirectReceiver2 {
    @RabbitListener(queues = {"DirectQu1"})
    public void directReceive(String msg){
        System.out.println("Direct 2 接收的消息:" + msg + UUID.randomUUID());
    }
}
再次运行程序,多次刷新浏览器(将消息多次推送到队列中)

从结果上看,是以轮询的方式进行获取消息。
那再来一个接收者是不是也以轮询的方式??(也是轮询的方式)

2.FanoutExchange扇型交换机
在config包下创建FanoutRabbitConfig配置文件
@Configuration
public class FanoutRabbitConfig {

    //创建交换机-----------
    @Bean
    public FanoutExchange fanoutExchange(){
        return new FanoutExchange("fanoutExchange", true,false);
    }

    //创建队列(3个队列)-------------
    @Bean
    public Queue fanoutQu1(){
        return new Queue("fanoutQu1");
    }
    @Bean
    public Queue fanoutQu2(){
        return new Queue("fanoutQu2.2");
    }
    @Bean
    public Queue fanoutQu3(){
        return new Queue("fanoutQu3.3.3");
    }

    //交换机与队列进行绑定---------------
    //fanout不会处理路由键,所以不用设置RoutingKey
    //fanout会将消息推送到所有绑定到自身的队列中
    @Bean
    public Binding bindingFanout1(){
        return BindingBuilder.bind(fanoutQu1()).to(fanoutExchange());
    }
    @Bean
    public Binding bindingFanout2(){
        return BindingBuilder.bind(fanoutQu2()).to(fanoutExchange());
    }
    @Bean
    public Binding bindingFanout3(){
        return BindingBuilder.bind(fanoutQu3()).to(fanoutExchange());
    }
}
在SendMsgController中继续添加关于fanout的推送信息
    @RequestMapping("/sendFanoutMsg")
    public String sendFanoutMsg(){
        rabbitTemplate.convertAndSend("fanoutExchange", null,"my is fanout!" + UUID.randomUUID());
        return "success";
    }
运行程序

发现一次消息的推送,会将消息都推送到绑定的所有队列中
编写接收者,更加明了的知道fanout的特点
在fanout包下,分别创建三个接收者,分别监听不同的队列
@Component
public class FanoutReceiver1 {
    @RabbitListener(queues = {"fanoutQu1"})
    public void topicReceive(String msg){
        System.out.println("fanout 1 接收的消息:" + msg);
    }
}
@Component
public class FanoutReceiver2 {
@RabbitListener(queues = {"fanoutQu2.2"})
public void topicReceive(String msg){
System.out.println("fanout 2 接收的消息:" + msg);
}
}@Component
public class FanoutReceiver3 {
@RabbitListener(queues = {"fanoutQu3.3.3"})
public void topicReceive(String msg){
System.out.println("fanout 3 接收的消息:" + msg);
}
}再次运行程序,刷新了两次浏览器,两次推送消息

从显示的结果可以证明:所有队列与fanout交换机绑定时,推送消息都会到所有队列中
3.TopicExchange主题交换机
在config包下创建TopicRabbitConfig配置文件
@Configuration
public class TopicRabbitConfig {

    //创建一个交换机
    @Bean
    public TopicExchange topicExchange(){
        /**
         * 参数1:交换机名
         * 参数2:是否持久化
         * 参数3:是否自动删除
         */
        return new TopicExchange("topicExchange",true,false);
    }

    //创建队列
    @Bean
    public Queue TopicQu(){
        return new Queue("topic");
    }

    @Bean
    public Queue TopicQu2(){
        return new Queue("topic.Qu2");
    }

    @Bean
    public Queue TopicQu3(){
        return new Queue("topic.Qu3.cn");
    }

    /**
     * 将TopicQu队列和topicExchange交换机进行绑定
     * 绑定参数为topic
     * 只有携带topic路由键才会分发到该队列
     */
    @Bean
    public Binding bindingTopic(){
        return BindingBuilder.bind(TopicQu()).to(topicExchange()).with("topic");
    }

    /**
     * 消息写带topic.开头,以一个单词为结尾都会推送到队列中
     * @return
     */
    @Bean
    public Binding bindingTopic2(){
        return BindingBuilder.bind(TopicQu2()).to(topicExchange()).with("topic.*");
    }
    /**
     * 消息写带topic开头,以0个或多个个单词为结尾都会推送到队列中
     * @return
     */
    @Bean
    public Binding bindingTopic3(){
        return BindingBuilder.bind(TopicQu3()).to(topicExchange()).with("topic.#");
    }
}
创建三个接收者,分别监听topic队列
@Component
public class TopicReceiver1 {
    @RabbitListener(queues = {"topic"})
    public void topicReceive(String msg){
        System.out.println("Topic 1 接收的消息:" + msg);
    }
}
@Component
public class TopicReceiver2 {
@RabbitListener(queues = {"topic.Qu2"})
public void topicReceive(String msg){
System.out.println("Topic 2 接收的消息:" + msg);
}
}@Component
public class TopicReceiver3 {
@RabbitListener(queues = {"topic.Qu3.cn"})
public void topicReceive(String msg){
System.out.println("Topic 3 接收的消息:" + msg);
}
}在SendMsgController中继续添加关于Topic的推送信息,下面有三个不同的RoutingKey推送消息,用浏览器依次运行查看结果的变化
    @RequestMapping("/sendTopicMsg1")
    public String sendTopicMsg1(){
        rabbitTemplate.convertAndSend("topicExchange","topic","hello topic!" + UUID.randomUUID());
        return "success";
    }

    @RequestMapping("/sendTopicMsg2")
    public String sendTopicMsg2(){
        rabbitTemplate.convertAndSend("topicExchange","topic.33","hello topic!" + UUID.randomUUID());
        return "success";
    }

    @RequestMapping("/sendTopicMsg3")
    public String sendTopicMsg3(){
        rabbitTemplate.convertAndSend("topicExchange","topic.Qu3.3333","hello topic!" + UUID.randomUUID());
        return "success";
    }
运行程序
- 访问sendTopicMsg1

接收者1和接收者3成功接收到,说明消息的RoutingKey: topic会推送到与它绑定队列相等的RoutingKey和推送到 topic.#队列中
- 访问sendTopicMsg2

- 访问sendTopicMsg3

4.回调函数的编写
application.yml配置文件
spring:
  #配置rabbitMq服务器
  rabbitmq:
    host: 192.168.159.135 #主机ip
    port: 5672  #端口
    username: guest
    password: guest

    #消息确认配置
    #确认消息已发送到交换机
    publisher-confirm-type: correlated
    #确认消息已发送到队列
    publisher-returns: true
在config包下创建RabbitConfig配置文件
@Configuration
public class RabbitConfig {

    @Bean
    public RabbitTemplate createRabbitTemplate(ConnectionFactory connectionFactory){
        RabbitTemplate rabbitTemplate = new RabbitTemplate();
        rabbitTemplate.setConnectionFactory(connectionFactory);
        //设置开启Mandatory,才能触发回调函数
        rabbitTemplate.setMandatory(true);

        //将消息推送到交换机触发该回调函数,无论是否推送成功都会触发
        rabbitTemplate.setConfirmCallback(new RabbitTemplate.ConfirmCallback() {
            @Override
            public void confirm(CorrelationData correlationData, boolean ack, String cause) {
                System.out.println("CorrelationData data:" + correlationData);
                System.out.println("CorrelationData condition:" + ack);
                System.out.println("CorrelationData cause:" + cause);
            }
        });

        //消息推送到队列,当推送不成功时触发,成功不触发
        rabbitTemplate.setReturnCallback(new RabbitTemplate.ReturnCallback() {
            @Override
            public void returnedMessage(Message message, int replyCode, String replyText, String exchange, String routingKey) {
                System.out.println("ReturnCallback message:" + message);
                System.out.println("ReturnCallback replyCode:" + replyCode);
                System.out.println("ReturnCallback replyText:" + replyText);
                System.out.println("ReturnCallback exchange:" + exchange);
                System.out.println("ReturnCallback routingKey:" + routingKey);
            }
        });
        return rabbitTemplate;
    }
}
运行测试
- 找不到交换机
2020-09-05 22:25:04.123 ERROR 2928 --- [68.159.135:5672] o.s.a.r.c.CachingConnectionFactory       : Channel shutdown: channel error; protocol method: #method<channel.close>(reply-code=404, reply-text=NOT_FOUND - no exchange 'directEx33' in vhost '/', class-id=60, method-id=40)
CorrelationData data:null
CorrelationData condition:false
CorrelationData cause:channel error; protocol method: #method<channel.close>(reply-code=404, reply-text=NOT_FOUND - no exchange 'directEx33' in vhost '/', class-id=60, method-id=40)- 找不到队列

- 两个都找不到
2020-09-05 22:28:17.824 ERROR 20884 --- [68.159.135:5672] o.s.a.r.c.CachingConnectionFactory       : Channel shutdown: channel error; protocol method: #method<channel.close>(reply-code=404, reply-text=NOT_FOUND - no exchange 'directEx33' in vhost '/', class-id=60, method-id=40)
CorrelationData data:null
CorrelationData condition:false
CorrelationData cause:channel error; protocol method: #method<channel.close>(reply-code=404, reply-text=NOT_FOUND - no exchange 'directEx33' in vhost '/', class-id=60, method-id=40)
- 消息发送成功

总结
RabbitMQ学习我是通过B站视频和浏览一些博客来学习的,如果光给我看视频学我是学不下的,当然这次学习还有很多值得改进的地方,毕竟是第一次学习RabbitMQ,参照有点多,还需见谅。路子还很长,还需努力,加油!
B站视频连接
这篇博客内容非常好,值得参照学习


 293
293


 被折叠的 条评论
为什么被折叠?
被折叠的 条评论
为什么被折叠?
 到【灌水乐园】发言


