


vue电商项目005:分类管理模块、参数管理模块
1.分类管理模块
1.1新建分支goods_cate
新建分支goods_cate并推送到码云
git checkout -b goods_cate
git push -u origin goods_cate
1.2创建子级路由
import Cate from '../components/goods/Cate.vue'

path: '/home', component: Home, redirect: '/welcome', children: [
    { path: "/welcome", component: Welcome },
    { path: "/users", component: Users },
    { path: "/rights", component: Rights },
    { path: "/roles", component: Roles  },
    { path: "/categories", component: Cate  }
]
1.3添加组件基本布局
在Cate.vue组件中添加面包屑导航以及卡片视图中的添加分类按钮
<template>
    <div>
        <h3>商品分类</h3>
        <!-- 面包屑导航 -->
        <el-breadcrumb separator="/">
            <el-breadcrumb-item :to="{ path: '/home' }">首页</el-breadcrumb-item>
            <el-breadcrumb-item>商品管理</el-breadcrumb-item>
            <el-breadcrumb-item>商品分类</el-breadcrumb-item>
        </el-breadcrumb>
        <!-- 卡片视图区域 -->
        <el-card>
            <!-- 添加分类按钮区域 -->
            <el-row>
                <el-col>
                    <el-button type="primary">添加分类</el-button>
                </el-col>
            </el-row>
            <!-- 分类表格  -->

            <!-- 分页 -->
        </el-card>
    </div>
</template>
1.4请求分类数据
请求分类数据并将数据保存在data中
<script>
export default {
  data() {
    return {
      // 商品分类数据列表
      cateList: [],
      //查询分类数据的条件
      queryInfo: {
        type: 3,
        pagenum: 1,
        pagesize: 5
      },
      //保存总数据条数
      total: 0
    }
  },
  created() {
    this.getCateList()
  },
  methods: {
    async getCateList() {
      //获取商品分类数据
      const { data: res } = await this.$http.get('categories', {
        params: queryInfo
      })

      if (res.meta.status !== 200) {
        return this.$message.error('获取商品列表数据失败')
      }
      //将数据列表赋值给cateList
      this.cateList = res.data.result
      //保存总数据条数
      this.total = res.data.total
      //   console.log(res.data);
    }
  }
}
</script>
1.5安装vue-table-with-tree-grid依赖
在vue 控制台中点击依赖->安装依赖->运行依赖->输入vue-table-with-tree-gird->点击安装
打开main.js,导入vue-table-with-tree-grid
import TreeTable from 'vue-table-with-tree-grid'

Vue.component('tree-table',TreeTable)
1.6vue-table-with-tree-grid的页面以及数据列
- :data(设置数据源)
- :columns(设置表格中列配置信息)
- :selection-type(是否有复选框)
- :expand-type(是否展开数据)
- show-index(是否设置索引列)
- index-text(设置索引列头)
- border(是否添加纵向边框)
- :show-row-hover(是否鼠标悬停高亮)
<!-- 表格 -->
			<tree-table class="treeTable" :data="catelist" :columns="columns" :selection-type="false" :expand-type="false" show-index index-text="#" border :show-row-hover="false">
				<!-- 是否有效 -->
				<template slot="isok" slot-scope="scope">
					<i class="el-icon-success" v-if="scope.row.cat_deleted===false" style="color: lightgreen;"></i>
					<i class="el-icon-error" style="color: red;" v-else></i>
				</template>
				<!-- 排序 -->
				<template slot="order" slot-scope="scope">
					<el-tag size="mini" v-if="scope.row.cat_level===0">一级</el-tag>
					<el-tag size="mini" type="success" v-else-if="scope.row.cat_level===1">二级</el-tag>
					<el-tag size="mini" type="warning" v-else>三级</el-tag>
				</template>
				<!-- 操作 -->
				<template slot="opt" slot-scope="scope">
					<el-button type="primary" icon="el-icon-edit"  size="mini" @click="showEditFormDialog(scope.row.cat_id)">编辑</el-button>
					<el-button type="danger" icon="el-icon-delete"  size="mini" @click="deleteCate(scope.row.cat_id)">删除</el-button>
				</template>
			</tree-table>
设置表格中列配置信息
columns:[
					{
						label:'分类名称',
						prop:'cat_name'
					},
					{
						label:'是否有效',
						// 表示将当前列定义为模板列
						type:'template',
						// 表示这一列使用的模板名称
						template:'isok'
					},
					{
						label:'排序',
						// 表示将当前列定义为模板列
						type:'template',
						// 表示这一列使用的模板名称
						template:'order'
					},
					{
						label:'操作',
						// 表示将当前列定义为模板列
						type:'template',
						// 表示这一列使用的模板名称
						template:'opt'
					}
				]
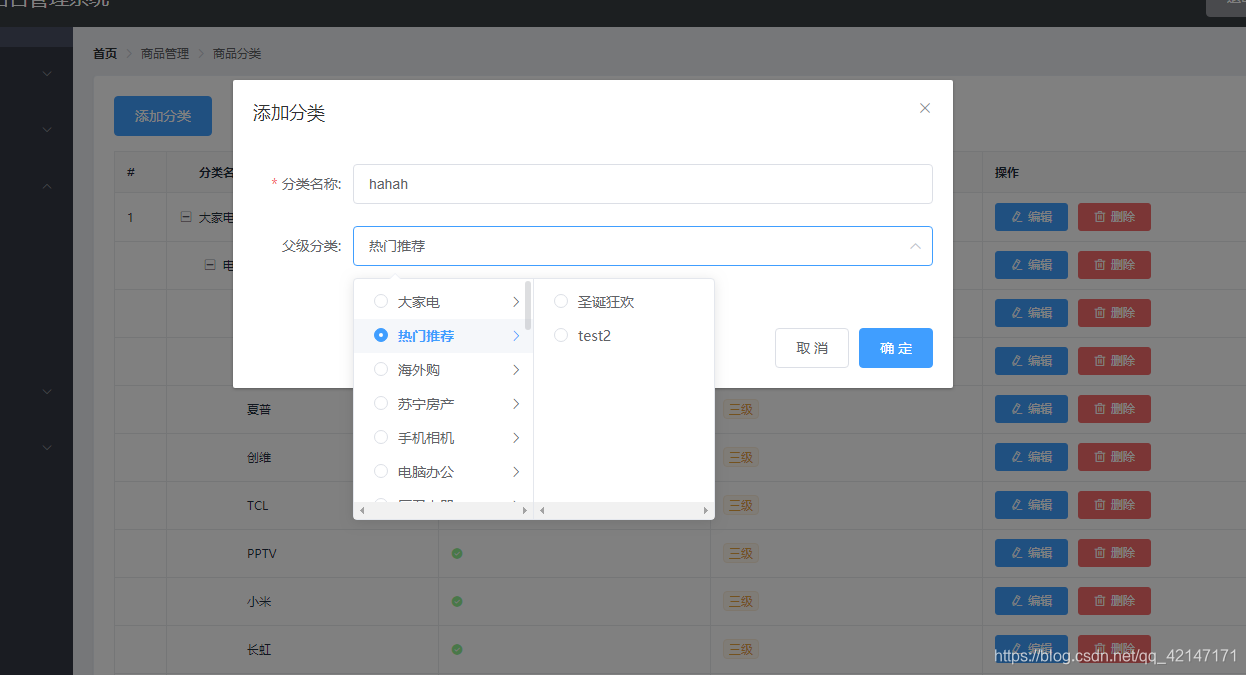
1.7添加分类的功能
添加分类的功能用到了Cascader组件首先我们需要注册组件,这个操作我相信都会所以不在这里具体说明,
我看的网上的教学视频使用的element-ui的版本和我使用的版本不一样,所以我们也不能完全按照别人的来,我们能借鉴的只要思路,大家也要注意我写的可能和你当前用的element-ui的版本是不是一样的,在element-ui的官网下面都有具体的说明,每一个参数是干嘛的
- expandTrigger=‘hover’(鼠标悬停触发级联)
- v-model(设置级联菜单绑定数据)
- :options(指定级联菜单数据源)
- :props(用来配置数据显示的规则)
- clearable(提供“X”号完成删除文本功能)
添加分类的页面
<!-- 添加分类的对话框 -->
		<el-dialog
		  title="添加分类"
		  :visible.sync="addCateDialogVisible"
		  width="50%" @close="addCateDialogClosed">

		  <el-form :model="addCateForm" :rules="addCateFormRules" ref="addCateFormRef" label-width="100px" >
		    <el-form-item label="分类名称:" prop="cat_name">
		      <el-input v-model="addCateForm.cat_name"></el-input>
		    </el-form-item>

			<el-form-item label="父级分类:" >
				<!-- :options:用来指定数据源 -->
				<el-cascader
				    v-model="selectedKeys"
				    :options="ParentCateList"
				    :props="cascaderProPS"
				    @change="ParentCateChange"   clearable>
				</el-cascader>
			</el-form-item>
		</el-form>
		  <span slot="footer" class="dialog-footer">
		    <el-button @click="addCateDialogVisible = false">取 消</el-button>
		    <el-button type="primary" @click="addCate">确 定</el-button>
		  </span>
		</el-dialog>
用来配置数据显示的规则
//指定级联选择器的配置对象
				cascaderProPS:{
					checkStrictly:true,//是否严格的遵守父子节点不互相关联
					expandTrigger: 'hover',//次级菜单的展开方式
					value:'cat_id',//指定选项的子选项为选项对象的某个属性值
					label:'cat_name',//	指定选项标签为选项对象的某个属性值
					children:'children'//指定选项的子选项为选项对象的某个属性值
				}
1.8编辑和删除功能
编辑和删除的功能会在最后的代码中给出与前面的模块差不多,只需要改变api接口和参数
1.9推送代码
制作完添加分类之后,将代码提交到仓库,推送到码云,将goods_cate分支合并到master
git add .
git commit -m '完成商品分类'
git push
git checkout master
git merge goods_cate
1.10Cate.vue完整的代码
<template>
	<div>
		<!-- 面包屑导航区域 -->
		<el-breadcrumb separator-class="el-icon-arrow-right">
			<el-breadcrumb-item :to="{ path: '/home' }">首页</el-breadcrumb-item>
			<el-breadcrumb-item>商品管理</el-breadcrumb-item>
			<el-breadcrumb-item>商品分类</el-breadcrumb-item>
		</el-breadcrumb>

		<!-- 卡片视图区域 -->
		<el-card>
			<el-row>
				<el-col>
					<el-button type="primary" @click="showAddCateDialog">添加分类</el-button>
				</el-col>
			</el-row>


			<!-- 表格 -->
			<tree-table class="treeTable" :data="catelist" :columns="columns" :selection-type="false" :expand-type="false" show-index index-text="#" border :show-row-hover="false">
				<!-- 是否有效 -->
				<template slot="isok" slot-scope="scope">
					<i class="el-icon-success" v-if="scope.row.cat_deleted===false" style="color: lightgreen;"></i>
					<i class="el-icon-error" style="color: red;" v-else></i>
				</template>
				<!-- 排序 -->
				<template slot="order" slot-scope="scope">
					<el-tag size="mini" v-if="scope.row.cat_level===0">一级</el-tag>
					<el-tag size="mini" type="success" v-else-if="scope.row.cat_level===1">二级</el-tag>
					<el-tag size="mini" type="warning" v-else>三级</el-tag>
				</template>
				<!-- 操作 -->
				<template slot="opt" slot-scope="scope">
					<el-button type="primary" icon="el-icon-edit"  size="mini" @click="showEditFormDialog(scope.row.cat_id)">编辑</el-button>
					<el-button type="danger" icon="el-icon-delete"  size="mini" @click="deleteCate(scope.row.cat_id)">删除</el-button>
				</template>
			</tree-table>

			<!-- 分页区域 -->
			<el-pagination
			      @size-change="handleSizeChange"
			      @current-change="handleCurrentChange"
			      :current-page="queryInfo.pagenum"
			      :page-sizes="[3, 5, 10, 15]"
			      :page-size="queryInfo.pagesize"
			      layout="total, sizes, prev, pager, next, jumper"
			      :total="total">
			</el-pagination>
		</el-card>

		<!-- 添加分类的对话框 -->
		<el-dialog
		  title="添加分类"
		  :visible.sync="addCateDialogVisible"
		  width="50%" @close="addCateDialogClosed">

		  <el-form :model="addCateForm" :rules="addCateFormRules" ref="addCateFormRef" label-width="100px" >
		    <el-form-item label="分类名称:" prop="cat_name">
		      <el-input v-model="addCateForm.cat_name"></el-input>
		    </el-form-item>

			<el-form-item label="父级分类:" >
				<!-- :options:用来指定数据源 -->
				<el-cascader
				    v-model="selectedKeys"
				    :options="ParentCateList"
				    :props="cascaderProPS"
				    @change="ParentCateChange"   clearable>
				</el-cascader>
			</el-form-item>
		</el-form>
		  <span slot="footer" class="dialog-footer">
		    <el-button @click="addCateDialogVisible = false">取 消</el-button>
		    <el-button type="primary" @click="addCate">确 定</el-button>
		  </span>
		</el-dialog>


		<!-- 修改分类界面 -->
		<el-dialog title="修改分类" :visible.sync="editDialogVisible" width="50%" @click="editDialogClosed">
			<!-- 内容主体区域 -->
			<el-form :model="editForm" :rules="editFormRules" ref="editFormRef" label-width="80px">
				<el-form-item label="分类名称" prop="cat_name">
					<el-input v-model="editForm.cat_name" ></el-input>
				</el-form-item>
			</el-form>


			<!-- 页脚区域 -->
			<span slot="footer" class="dialog-footer">
				<el-button @click="editDialogVisible=flase">取 消</el-button>
				<el-button type="primary" @click="editCateInfo" >确 定</el-button>
			</span>
		</el-dialog>
	</div>
</template>

<script>
	export default{
		data(){
			return{
				//商品分类的数据列表,默认为空
				catelist:[],
				//查询条件
				queryInfo:{
					type:3,
					pagenum:1,
					pagesize:5
				},
				// 数据总条数
				total:0,
				//为table指定列定义
				columns:[
					{
						label:'分类名称',
						prop:'cat_name'
					},
					{
						label:'是否有效',
						// 表示将当前列定义为模板列
						type:'template',
						// 表示这一列使用的模板名称
						template:'isok'
					},
					{
						label:'排序',
						// 表示将当前列定义为模板列
						type:'template',
						// 表示这一列使用的模板名称
						template:'order'
					},
					{
						label:'操作',
						// 表示将当前列定义为模板列
						type:'template',
						// 表示这一列使用的模板名称
						template:'opt'
					}
				],
				//控制添加分类对话框的显示与隐藏
				addCateDialogVisible:false,
				//添加分类的数据表单数据对象
				addCateForm:{
					// 将要添加的分类的名称
					cat_name:'',
					// 父级分类的id
					cat_pid:0,
					//分类的等级,默认要添加的是一级分类
					cat_level:0
				},
				//添加分类表单的验证规则对象
				addCateFormRules:{
					cat_name:[
						{required:true,message:'请输入分类名称',trigger:'blur'}
					]
				},
				ParentCateList:[],
				//指定级联选择器的配置对象
				cascaderProPS:{
					checkStrictly:true,//是否严格的遵守父子节点不互相关联
					expandTrigger: 'hover',//次级菜单的展开方式
					value:'cat_id',//指定选项的子选项为选项对象的某个属性值
					label:'cat_name',//	指定选项标签为选项对象的某个属性值
					children:'children'//指定选项的子选项为选项对象的某个属性值
				},
				//选中的父级分类的id数组
				selectedKeys:[],
				//修改分类获取到的对象
				editForm:{

				},
				//控制修改分类页面的显示与隐藏
				editDialogVisible:false,								//修改分类时的规则
				editFormRules:{
					cat_name:[
						{required:true,message:'请输入分类名称',trigger:'blur'}
					]
				}
			}
		},
		created() {
			this.getCateList()
		},
		methods:{
			//获取商品分类数据
			async getCateList(){
				const {data:res}=await this.$http.get('categories',{params:this.queryInfo})
				if(res.meta.status!==200){
					return this.$message.error('获取商品分类失败!')
				}
				//把数据列表赋值给catelist
				this.catelist=res.data.result
				// 为总数据条数赋值
				this.total=res.data.total
			},
			//监听pagesize改变
			handleSizeChange(newSize){
				this.queryInfo.pagesize=newSize
				this.getCateList()
			},
			//监听pagenum的改变
			handleCurrentChange(newPage){
				this.queryInfo.pagenum=newPage
				this.getCateList()
			},
			showAddCateDialog(){
				//先获取父级分类数据的列表
				this.getParentCateList()
				//再展现对话框
				this.addCateDialogVisible=true
			},
			async getParentCateList(){
				const {data:res}=await this.$http.get('categories',{params:{type:2}})
				if(res.meta.status!==200){
					return this.$message.error('获取父级分类数据失败!')
				}
				//this.$message.success('获取父级分类数据成功!')
				console.log(res.data)
				this.ParentCateList=res.data
			},
			//选择项发生变化出发这个函数
			ParentCateChange(){

				 //console.log(this.selectedKeys)
				 //如果selectKeys数组中的length大于0,证明选中父级分类
				 //反之,就说明没有选中任何的父级分类
				 if(this.selectedKeys.length>0){
					 //父级分类的id
					// console.log(this.selectedKeys)
					this.addCateForm.cat_pid=this.selectedKeys[this.selectedKeys.length-1]
					// 为当前分类的等级赋值
					 this.addCateForm.cat_level=this.selectedKeys.length
				 }else{
					  //父级分类的id
					 this.addCateForm.cat_pid=0
					 // 为当前分类的等级赋值
					  this.addCateForm.cat_level=0
				 }
			},
			addCate(){
				this.$refs.addCateFormRef.validate(async valid=>{
					if(!valid) return
					const {data:res}=await this.$http.post('categories',this.addCateForm)
					if(res.meta.status!==201){
						return this.$message.error('添加分类失败!')
					}

					this.$message.success('添加分类成功!')
					this.getCateList()
					this.addCateDialogVisible=false

				})

			},
			//监听对话框的关闭,重置表单数据
			addCateDialogClosed(){
				this.$refs.addCateFormRef.resetFields()
				this.selectedKeys=[]
				this.addCateForm.cat_level=0
				this.addCateForm.cat_pid=0
			},
			//展示编辑分类的对话框
			async showEditFormDialog(cat_id){
				const {
					data: res
				} = await this.$http.get('categories/' + cat_id)
				if(res.meta.status !== 200)
				return this.$message.error('查询分类信息失败!')
				this.editForm = res.data
				this.editDialogVisible = true
			},
			//监听编辑分类对话框的关闭事件
			editDialogClosed(){
				this.$refs.editFormRef.resetFields()
			},
			//确认并且提交数据
			editCateInfo(){
				this.$refs.editFormRef.validate(async valid => {
					if (!valid) return
					//可以发起修改用户的网络请求
					const {
						data: res
					} = await this.$http.put('categories/'+this.editForm.cat_id, {cat_name:this.editForm.cat_name})
					if (res.meta.status !== 200) {
						return this.$message.error('更新分类信息失败!')
					}
					//隐藏修改分类对话框
					this.editDialogVisible = false
					// 刷新列表列表
					this.getCateList()
					// 提示分类信息修改成功
					this.$message.success('更新分类信息成功!')

				})
			},
			// 根据id删除对应的分类信息
			async deleteCate(cat_id){
				//弹框询问用户是否删除数据
				const confirmRes=await  this.$confirm('此操作将永久删除该分类, 是否继续?', '提示', {
				          confirmButtonText: '确定',
				          cancelButtonText: '取消',
				          type: 'warning'
				        }).catch(err=>err)
				//console.log(confirmRes)
				//如果用户确认删除,则返回值为字符串confirm

				//如果用户取消删除,则返回值为字符串cancel
				if(confirmRes!=='confirm') {
					return this.$message.info('已取消了删除!')
				}

				const {
					data: res
				} = await this.$http.delete('categories/'+cat_id)
				if (res.meta.status !== 200) {
					return this.$message.error('删除分类失败!')
				}
				// 刷新列表列表
				this.getCateList()
				// 提示用户信息修改成功
				this.$message.success('删除分类信息成功!')
			}

		}
	}
</script>

<style lang="less" scoped>
	.treeTable{
		margin-top: 15px;
	}
	.el-cascader{
		width: 100%;
	}
</style>
1.11完成后的效果
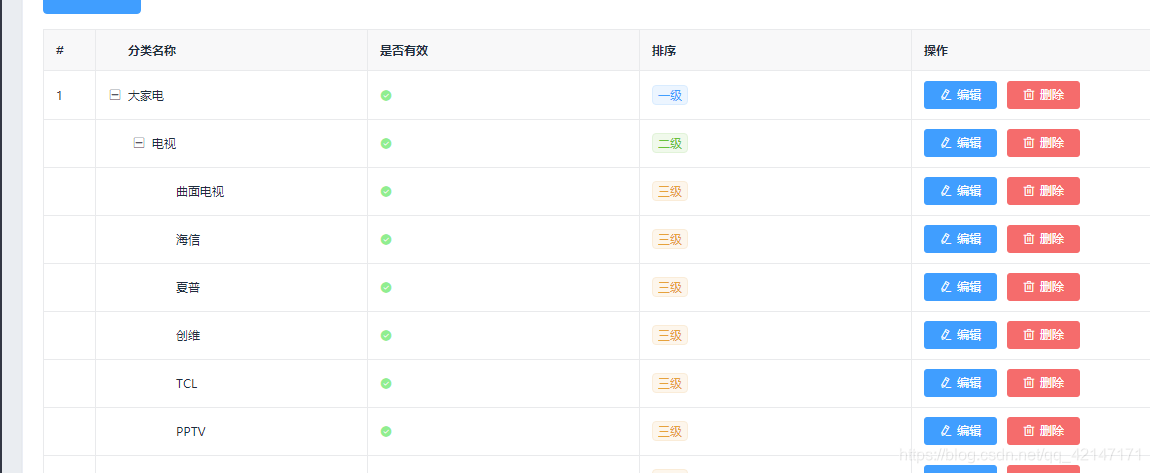
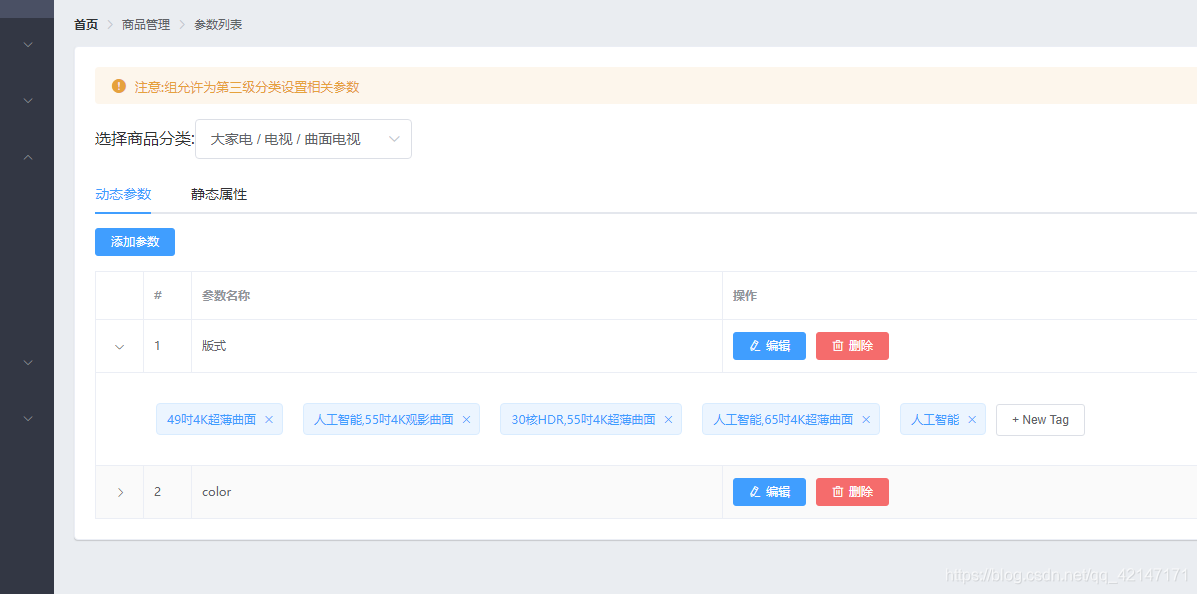
2.参数管理模块
2.1完成后的效果
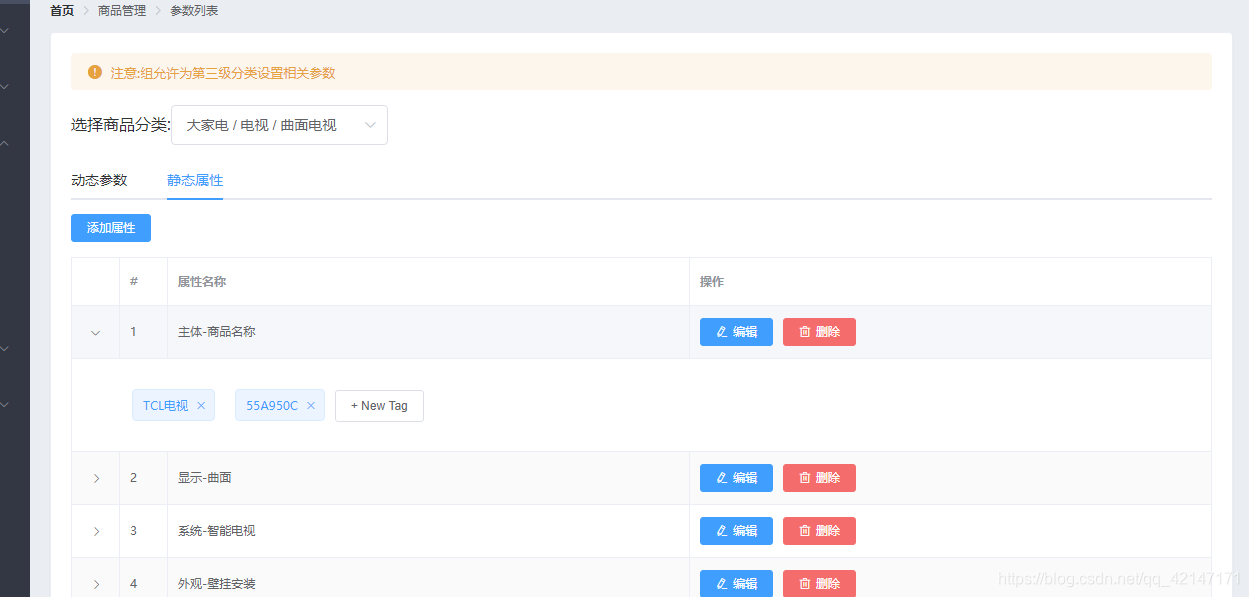
点击静态属性
2.2分析
在上面你的效果图中可以看到要先选择商品分类然后才会显示对应的动态属性和静态参数,而且当切换到静态参数和动态属性时会自动的刷新数据
我们来分析一波,首先不管是动态参数还是静态属性都要选择商品分类,然后唯一的区别就是到底是动态参数还是静态属性,而且在提供的api接口中我们也可以看见在传入的参数中有一个sel参数就是为了区别是静态参数还是动态参数

再来一波分析,根据页面的效果看来输出数据的表格样式基本上相同,区别在于是参数名称还是属性名称,所以我们只需要写完动态参数然后把动态参数的代码复制到静态属性就OK了
2.3创建Params.vue组件以及初始化
这里比较尴尬我没注意打成了params.vue其实也可以正常的使用并不影响功能,但是命名的规范还是要注意的
关于路由规则大家就自己添加一下,相信都会的,毕竟不是第一次了对吧
基本的代码结构:
<template>
    <div>
        <h3>分类参数</h3>
        <!-- 面包屑导航 -->
        <el-breadcrumb separator="/">
            <el-breadcrumb-item :to="{ path: '/home' }">首页</el-breadcrumb-item>
            <el-breadcrumb-item>商品管理</el-breadcrumb-item>
            <el-breadcrumb-item>分类参数</el-breadcrumb-item>
        </el-breadcrumb>
        <!-- 卡片视图区域 -->
        <el-card>
            <!-- 警告区域 :closable="false"(是否展示“X”号) show-icon(显示图标) -->
            <el-alert title="注意:只允许为第三级分类设置相关参数" type="warning" :closable="false" show-icon>
            </el-alert>

            <!-- 选择商品分类区域 -->
            <el-row class="cat_opt">
                <el-col>
                    <span>选择商品分类:</span>
                    <!-- 选择商品分类的级联选择框 -->
                </el-col>
                <el-col></el-col>
            </el-row>
        </el-card>
    </div>
</template>
2.4完成级联选择框
<!-- 选择商品分类区域 -->
<el-row class="cat_opt">
    <el-col>
        <span>选择商品分类:</span>
        <!-- 选择商品分类的级联选择框 -->
        <el-cascader expandTrigger='hover' v-model="selectedCateKeys" :options="cateList" :props="cateProps" @change="handleChange" clearable></el-cascader>
    </el-col>
    <el-col></el-col>
</el-row>
......
<script>
export default {
  data() {
    return {
        //分类列表
        cateList:[],
        //用户在级联下拉菜单中选中的分类id
        selectedCateKeys:[],
        //配置级联菜单中数据如何展示
        cateProps: {
            value: 'cat_id',
            label: 'cat_name',
            children: 'children'
        }
    }
  },
  created() {
      this.getCateList()
  },
  methods: {
      async getCateList(){
        //获取所有的商品分类列表
        const { data: res } = await this.$http.get('categories')

        if (res.meta.status !== 200) {
            return this.$message.error('获取分类数据失败')
        }
        //将数据列表赋值给cateList
        this.cateList = res.data
        // //保存总数据条数
        // this.total = res.data.total
        //   console.log(res.data);
      },
      handleChange(){
        //当用户在级联菜单中选择内容改变时触发
        console.log(this.selectedCateKeys);
      }
  }
}
</script>
以上是初始的版本,在完成的效果中是商品的分类只能选择三级标签所以我们要进行进一步的优化
2.5关于卡片视图区的显示
我们要先完成动态参数的添加参数、编辑和删除功能
这三个功能比较简单我就直接在最后的代码中一起放出来了,然后我们就该实现展开行的效果
首先我们要先判断一波选择的是第几级的分类如果是三级分类,就返回选中的三级分类的id否则就直接返回null,同时添加的按钮也应该被禁用
//如果按钮需要被禁用,返回true
			isBtnDisabled() {
				if (this.selectedCateKeys.length !== 3) {
					return true
				}
				return false
			},
			//当前选中的三级分类的ID
			cateId() {
				if (this.selectedCateKeys.length === 3) {
					return this.selectedCateKeys[2]
				}

				return null
			}
在添加的功能上绑定:disabled=“isBtnDisabled”
监听级联选择框变化,只要发生变化就判断是不是第三级的分类
在展开行的显示中我们用到了tag组件,记得先注册
因为在提供的api中tag中的值是以字符串的形式返回的所以我们需要进行拆分转化为一个数组,我们同事也要解决如何直接在tag上进行增加和删除动态参数和静态属性
2.6el-tag的使用
基本的使用方法在element-ui的官网都有详细的介绍,这里我们就来说说如何实现如下的效果
通过点击
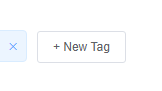
然后就变成了一个
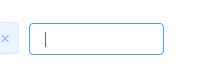
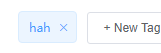
在里面输出对应的内容按钮enter键或者鼠标移出然后点击实现添加
同时也可以通过店家如图的x进行删除
下面我给出这个版块的代码一一分析
<!-- 展开行 -->
							<template slot-scope="scope">
								<!-- 循环渲染tag标签 -->
								<el-tag  v-for="(item,i) in scope.row.attr_vals" :key="i" closable @close="handleClosed(i,scope.row)">{{item}}</el-tag>

								<!-- 输入文本框 -->
								<el-input
								  class="input-new-tag"
								  v-if="scope.row.inputVisible"
								  v-model="scope.row.inputValue"
								  ref="saveTagInput"
								  size="small"
								  @keyup.enter.native="handleInputConfirm(scope.row)"
								  @blur="handleInputConfirm(scope.row)"
								>
								</el-input>
								<!-- 添加的按钮 -->
								<el-button v-else class="button-new-tag" size="small" @click="showInput(scope.row)">+ New Tag</el-button>
							</template>
首先通过v-for渲染已经有的数据
@keyup.enter.native是按钮enter的事件
@blur是失去焦点的事件都绑定了数据的添加确认事件,并且将输入框的值作为参数传递
@click="showInput(scope.row)"事件是绑定点击tag的事件,以及获取焦点
下面我们来看下这些事件
首先是在获取列表数据的过程中将字符串转化为数组,并且保存在对应的数组中
res.data.forEach(item=>{
					console.log(item.attr_vals)
					item.attr_vals=item.attr_vals?item.attr_vals.split(' '):[],
					//控制文本框的显示与隐藏
					item.inputVisible=false
					item.inputValue=''
				})

				if (this.activeName == 'many') {
					this.manyTableData = res.data
				} else {
					this.onlyTableData = res.data
				}
其他的绑定事件
//文本框失去焦点或者按下了enter键
			handleInputConfirm(row){
				if(row.inputValue.trim().length===0){
					row.inputValue=''
					row.inputVisible=false
					return
				}
				//如果没有return则说明输入的内容需要做后续的处理
				row.attr_vals.push(row.inputValue.trim())
				row.inputValue=''
				row.inputVisible=false
				// 需要发起请求保存参数
				this.saveAttrVals(row)

			},
			showInput(row){
				row.inputVisible=true
				// 让文本框自动获得焦点
				//$nextTick:当页面上元素被重新渲染之后才会执行回调函数中的代码
				this.$nextTick(_ => {
				     this.$refs.saveTagInput.$refs.input.focus();
				 })
			},
			//将对attr_vals的操作保存到数据库
			async saveAttrVals(row){
				// 需要发起请求保存参数
				const {data:res}=await this.$http.put(`categories/${this.cateId}/attributes/${row.attr_id}`,{
					attr_name:row.attr_name,
					attr_sel:row.attr_sel,
					attr_vals:row.attr_vals.join(' ')
				})
				if(res.meta.status!==200){
					return this.$message.error('修改参数失败!')
				}

				this.$message.success('修改参数成功!')
			},
			//删除对应的参数和选项
			handleClosed(i,row){
				row.attr_vals.splice(i,1)
				this.saveAttrVals(row)
			}
		}
2.7其他要注意的点和技巧
头部的警告区域
<el-alert title="注意:只允许为第三级分类设置相关参数" type="warning" :closable="false" show-icon>
			</el-alert>
默认是在后面有个x的所以加上属性 :closable=“false”
el-tabs中的v-model="activeName"绑定是标签页的name,你选择了不同的标签页这个值就会改变,所以我们可以定义一个计算方法
//动态计算标题的文本
			titleText(){
				if(this.activeName=='many'){
					return '动态参数'
				}
					return '静态属性'
			}
因为不管是修改静态属性还是动态参数都差不多,就是标题不一样,所以可以增加和修改共用一个页面就OK
标题可以这样写:title="‘修改’+titleText"
2.8params.vue完整的代码
<template>
	<div>
		<!-- 面包屑导航区域 -->
		<el-breadcrumb separator-class="el-icon-arrow-right">
			<el-breadcrumb-item :to="{ path: '/home' }">首页</el-breadcrumb-item>
			<el-breadcrumb-item>商品管理</el-breadcrumb-item>
			<el-breadcrumb-item>参数列表</el-breadcrumb-item>
		</el-breadcrumb>


		<!-- 卡片式图区 -->
		<el-card>
			<!-- 头部的警告区域 -->
			<el-alert title="注意:只允许为第三级分类设置相关参数" type="warning" :closable="false" show-icon>
			</el-alert>

			<!-- 选择商品分类区域 -->
			<el-row class="cat_opt">
				<el-col>
					<span>选择商品分类:</span>
					<!-- 选择商品分类的级联选择框 -->
					<el-cascader v-model="selectedCateKeys" :options="cateList" :props="cateProps" @change="handleChange"></el-cascader>
				</el-col>
			</el-row>

			<!-- tab页签区域 -->
			<el-tabs v-model="activeName" @tab-click="handleTabClick">
				<!-- 添加动态参数面板 -->
				<el-tab-pane label="动态参数" name="many">
					<!-- 添加参数的按钮 -->
					<el-button type="primary" size="mini" :disabled="isBtnDisabled" @click="addDialogVisible=true">添加参数</el-button>
					<!-- 动态参数表格 -->
					<el-table :data="manyTableData" border stripe>
						<el-table-column type="expand">
							<!-- 展开行 -->
							<template slot-scope="scope">
								<!-- 循环渲染tag标签 -->
								<el-tag  v-for="(item,i) in scope.row.attr_vals" :key="i" closable @close="handleClosed(i,scope.row)">{{item}}</el-tag>

								<!-- 输入文本框 -->
								<el-input
								  class="input-new-tag"
								  v-if="scope.row.inputVisible"
								  v-model="scope.row.inputValue"
								  ref="saveTagInput"
								  size="small"
								  @keyup.enter.native="handleInputConfirm(scope.row)"
								  @blur="handleInputConfirm(scope.row)"
								>
								</el-input>
								<!-- 添加的按钮 -->
								<el-button v-else class="button-new-tag" size="small" @click="showInput(scope.row)">+ New Tag</el-button>
							</template>
						</el-table-column>
						<el-table-column type="index" label="#"></el-table-column>
						<el-table-column label="参数名称" prop="attr_name"></el-table-column>
						<el-table-column label="操作">
							<template slot-scope="scope">
								<el-button type="primary" icon="el-icon-edit" size="mini" @click="showaddDialog(scope.row.attr_id)">编辑</el-button>
								<el-button type="danger" icon="el-icon-delete" size="mini" @click="removeParams(scope.row.attr_id)">删除</el-button>
							</template>
						</el-table-column>
					</el-table>
				</el-tab-pane>
				<!-- 添加静态属性面板 -->
				<el-tab-pane label="静态属性" name="only">
					<!-- 添加属性的按钮 -->
					<el-button type="primary" size="mini" :disabled="isBtnDisabled" @click="addDialogVisible=true">添加属性</el-button>
					<!-- 静态参数表格 -->
					<el-table :data="onlyTableData" border stripe>
						<el-table-column type="expand">
							<!-- 展开行 -->
							<template slot-scope="scope">
								<!-- 循环渲染tag标签 -->
								<el-tag  v-for="(item,i) in scope.row.attr_vals" :key="i" closable @close="handleClosed(i,scope.row)">{{item}}</el-tag>

								<!-- 输入文本框 -->
								<el-input
								  class="input-new-tag"
								  v-if="scope.row.inputVisible"
								  v-model="scope.row.inputValue"
								  ref="saveTagInput"
								  size="small"
								  @keyup.enter.native="handleInputConfirm(scope.row)"
								  @blur="handleInputConfirm(scope.row)"
								>
								</el-input>
								<!-- 添加的按钮 -->
								<el-button v-else class="button-new-tag" size="small" @click="showInput(scope.row)">+ New Tag</el-button>
							</template>
						</el-table-column>
						<el-table-column type="index" label="#"></el-table-column>
						<el-table-column label="属性名称" prop="attr_name"></el-table-column>
						<el-table-column label="操作">
							<template slot-scope="scope">
								<el-button type="primary" icon="el-icon-edit" size="mini" @click="showaddDialog(scope.row.attr_id)">编辑</el-button>
								<el-button type="danger" icon="el-icon-delete" size="mini"  @click="removeParams(scope.row.attr_id)">删除</el-button>
							</template>
						</el-table-column>
					</el-table>
				</el-tab-pane>
			</el-tabs>
		</el-card>

		<!-- 添加参数的对话框和添加属性的对话框 -->
		<el-dialog
		  :title="'添加'+titleText"
		  :visible.sync="addDialogVisible"
		  width="50%"
		  @close="addDialogClosed">
		  <!-- 添加参数的对话框 -->
		  <el-form :model="addForm" :rules="addFormRules" ref="addFormRef" label-width="100px" >
		    <el-form-item :label="titleText" prop="attr_name">
		      <el-input v-model="addForm.attr_name"></el-input>
		    </el-form-item>
		</el-form>
		  <span slot="footer" class="dialog-footer">
		    <el-button @click="addDialogVisible = false">取 消</el-button>
		    <el-button type="primary" @click="addParams">确 定</el-button>
		  </span>
		</el-dialog>


		<!-- 修改参数对话框 -->
		<el-dialog
		  :title="'修改'+titleText"
		  :visible.sync="editDialogVisible"
		  width="50%"
		  @close="editDialogClosed">
		  <!-- 添加参数的对话框 -->
		  <el-form :model="editForm" :rules="editFormRules" ref="editFormRef" label-width="100px" >
		    <el-form-item :label="titleText" prop="attr_name">
		      <el-input v-model="editForm.attr_name"></el-input>
		    </el-form-item>
		</el-form>
		  <span slot="footer" class="dialog-footer">
		    <el-button @click="editDialogVisible = false">取 消</el-button>
		    <el-button type="primary" @click="editParams">确 定</el-button>
		  </span>
		</el-dialog>
	</div>
</template>

<script>
	export default {
		data() {
			return {
				cateList: [],
				//级联选择框的配置对象
				cateProps: {
					//checkStrictly:true,
					expandTrigger: 'hover',
					value: 'cat_id',
					label: 'cat_name',
					children: 'children'
				},
				//级联选择框双向绑定的数组
				selectedCateKeys: [],
				//被激活的页签的名称
				activeName: 'many',
				//动态参数的数据
				manyTableData: [],
				//静态属性的数据
				onlyTableData: [],
				//控制添加对话框的显示与隐藏
				addDialogVisible:false,
				//添加参数的表单数据对象
				addForm:{},
				//表单的验证规则对象
				addFormRules:{
					attr_name:[{required:true,message:'请输入参数名称',trigger:'blur'}]
				},
				//控制修改对话框的显示与隐藏
				editDialogVisible:false,
				//修改的表单数据
				editForm:{},
				//表单的验证规则对象
				editFormRules:{
					attr_name:[{required:true,message:'请输入参数名称',trigger:'blur'}]
				}
			}
		},
		created() {
			//获取所有的商品分类列表
			this.getCateList()
		},
		methods: {
			async getCateList() {
				const {
					data: res
				} = await this.$http.get('categories')
				if (res.meta.status !== 200) {
					return this.$message.error('获取商品分类失败')
				}

				this.cateList = res.data

				//console.log(this.cateList)
			},
			//级联选择框变化,会触发这个函数
			handleChange() {
				this.getParamsData()
			},
			//获取参数的列表数据
			async getParamsData() {
				if (this.selectedCateKeys.length !== 3) {
					this.selectedCateKeys = []
					this.manyTableData=[]
					this.onlyTableData=[]
					return
				}
				//证明选中的是三级分类
				//根据所选分类的Id,和当前的面板,获取所对应的参数
				//console.log(this.activeName)
				//console.log(this.cateId)
				const {
					data: res
				} = await this.$http.get(`categories/${this.cateId}/attributes`, {
					params: {
						sel: this.activeName
					}
				})

				//console.log(res.meta.status)
				if (res.meta.status !== 200) {
					return this.$message.error('获取参数列表失败')
				}

				console.log(res.data)
				res.data.forEach(item=>{
					console.log(item.attr_vals)
					item.attr_vals=item.attr_vals?item.attr_vals.split(' '):[],
					//控制文本框的显示与隐藏
					item.inputVisible=false
					item.inputValue=''
				})

				if (this.activeName == 'many') {
					this.manyTableData = res.data
				} else {
					this.onlyTableData = res.data
				}
			},
			//Tab页签的点击事件处理
			handleTabClick() {
				//console.log(this.activeName)
				this.getParamsData()
			},
			//监听添加参数的关闭事件
			addDialogClosed(){
				this.$refs.addFormRef.resetFields()
			},
			//点击按钮添加参数
			addParams(){
				this.$refs.addFormRef.validate(async valid=>{
					if(!valid) return
					const {data:res}=await this.$http.post(`categories/${this.cateId}/attributes`,{
					attr_name:this.addForm.attr_name,
					attr_sel:this.activeName
					})

					if(res.meta.status!==201){
						return this.$message.error('添加参数失败')
					}

					this.$message.success('添加参数成功')
					this.getParamsData()
					this.addDialogVisible =false
				})
			},
			//点击按钮展示修改的对话框
			async showaddDialog(attr_id){
				const {data:res}=await this.$http.get(`categories/${this.cateId}/attributes/${attr_id}`,{params:{attr_sel:this.activeName}})


				if(res.meta.status!==200){
					return this.$message.error('获取参数参数失败')
				}

				this.editForm=res.data
				this.editDialogVisible=true
			},
			//重置修改的表单
			editDialogClosed(){
				this.$refs.editFormRef.resetFields()
			},
			//点击按钮修改参数
			editParams(){
				this.$refs.editFormRef.validate(async valid=>{
					if(!valid) return
					const {data:res}=await this.$http.put(`categories/${this.cateId}/attributes/${this.editForm.attr_id}`,{
					attr_name:this.editForm.attr_name,
					attr_sel:this.activeName
					})

					if(res.meta.status!==200){
						return this.$message.error('修改参数失败')
					}

					this.$message.success('修改参数成功')
					this.getParamsData()
					this.editDialogVisible =false
				})
			},
			//根据id删除对应的参数
			async removeParams(attr_id){
				//弹框询问用户是否删除数据
				const confirmRes=await  this.$confirm('此操作将永久删除该参数, 是否继续?', '提示', {
				          confirmButtonText: '确定',
				          cancelButtonText: '取消',
				          type: 'warning'
				        }).catch(err=>err)
				//console.log(confirmRes)
				//如果用户确认删除,则返回值为字符串confirm

				//如果用户取消删除,则返回值为字符串cancel
				if(confirmRes!=='confirm') {
					return this.$message.info('已取消了删除!')
				}

				const {
					data: res
				} = await this.$http.delete(`categories/${this.cateId}/attributes/${attr_id}`)
				if (res.meta.status !== 200) {
					return this.$message.error('删除参数失败!')
				}
				// 刷新列表列表
				this.getParamsData()
				// 提示用户信息修改成功
				this.$message.success('删除参数成功!')
			},
			//文本框失去焦点或者按下了enter键
			handleInputConfirm(row){
				if(row.inputValue.trim().length===0){
					row.inputValue=''
					row.inputVisible=false
					return
				}
				//如果没有return则说明输入的内容需要做后续的处理
				row.attr_vals.push(row.inputValue.trim())
				row.inputValue=''
				row.inputVisible=false
				// 需要发起请求保存参数
				this.saveAttrVals(row)

			},
			showInput(row){
				row.inputVisible=true
				// 让文本框自动获得焦点
				//$nextTick:当页面上元素被重新渲染之后才会执行回调函数中的代码
				this.$nextTick(_ => {
				     this.$refs.saveTagInput.$refs.input.focus();
				 })
			},
			//将对attr_vals的操作保存到数据库
			async saveAttrVals(row){
				// 需要发起请求保存参数
				const {data:res}=await this.$http.put(`categories/${this.cateId}/attributes/${row.attr_id}`,{
					attr_name:row.attr_name,
					attr_sel:row.attr_sel,
					attr_vals:row.attr_vals.join(' ')
				})
				if(res.meta.status!==200){
					return this.$message.error('修改参数失败!')
				}

				this.$message.success('修改参数成功!')
			},
			//删除对应的参数和选项
			handleClosed(i,row){
				row.attr_vals.splice(i,1)
				this.saveAttrVals(row)
			}
		},
		computed: {
			//如果按钮需要被禁用,返回true
			isBtnDisabled() {
				if (this.selectedCateKeys.length !== 3) {
					return true
				}
				return false
			},
			//当前选中的三级分类的ID
			cateId() {
				if (this.selectedCateKeys.length === 3) {
					return this.selectedCateKeys[2]
				}

				return null
			},
			//动态计算标题的文本
			titleText(){
				if(this.activeName=='many'){
					return '动态参数'
				}
					return '静态属性'
			}

		}
	}
</script>

<style lang="less" scoped>
	.cat_opt {
		margin: 15px 0;
	}
	.el-tag{
		margin:10px;
	}
	.input-new-tag{
		width:135px
	}
</style>
2. 9推送代码到码云
添加到暂存求: git add .
提交到本地仓库:  git commit -m '完成了分类参数开发'
推送到码云:  git push
切换到master : git checkout master
合并到master : git merge goods_params
==大家如果需要数据库和后端的接口以及有任何问题和建议欢迎大家留言,会持续更新,谢谢支持!!=


 4933
4933


 被折叠的 条评论
为什么被折叠?
被折叠的 条评论
为什么被折叠?
 到【灌水乐园】发言


