


微服务
什么是微服务?
-
微服务是—种架构风格,它要求我们在开发一个应用的时候,这个应用必须构建成一系列小服务的组合;可以通过http的方式进行互通。要说微服务架构,先得说说过去我们的单体应用架构。
单体应用架构
- 所谓单体应用架构(all in one)是指,我们将一个应用的中的所有应用服务都封装在一个应用中。
- 无论是ERP、CRM或是其他什么系统,你都把数据库访问,web访问,等等各个功能放到一个war包内。
- 这样做的好处是,易于开发和测试;也十分方便部署;当需要扩展时,只需要将war复制多份,然后放到多个服务器上,再做个负载均衡就可以了。
- 单体应用架构的缺点是,哪怕我要修改一个非常小的地方,我都需要停掉整个服务,重新打包、部署这个应用war包。特别是对于一个大型应用,我们不可能把所有内容都放在一个应用里面,我们如何维护、如何分工合作都是问题。
微服务架构
- all in one的架构方式,我们把所有的功能单元放在一个应用里面。然后我们把整个应用部署到服务器上。如果负载能力不行,我们将整个应用进行水平复制,进行扩展,然后在负载均衡。
- 所谓微服务架构,就是打破之前all in one的架构方式,把每个功能元素独立出来。把独立出来的功能元素动态组合,需要的功能元素才去拿来组合,需要多一些时可以整合多个功能元素。所以微服务架构是对功能元素进行复制,而没有对整个应用进行复制。
这样做的好处是:
- 节省了调用资源。
- 每个功能元素的服务都是一个可替换的、可独立升级的软件代码。
如何构建微服务
一个大型系统的微服务架构,就像一个复杂交织的神经网络,每一个神经元就是一个功能元素,它们各自完成自己的功能,然后通过http相互请求调用。比如一个电商系统,查缓存、连数据库、浏览页面、结账、支付等服务都是一个个独立的功能服务,都被微化了,它们作为一个个微服务共同构建了一个庞大的系统。如果修改其中的一个功能,只需要更新升级其中一个功能服务单元即可。
- 但是这种庞大的系统架构给部署和运维带来很大的难度。于是,spring为我们带来了构建大型分布式微服务的全套、全程产品:
- 构建一个个功能独立的微服务应用单元,使用springboot,可以帮我们快速构建一个应用。
- 大型分布式网络服务的调用,这部分由spring cloud来完成,实现分布式;
- 在分布式中间,进行流式数据计算、批处理,我们有spring cloud data flow。
- spring为我们想清楚了整个从开始构建应用到大型分布式应用全流程方案。
第一个springboot程序
-
在IDEA新建一个项目
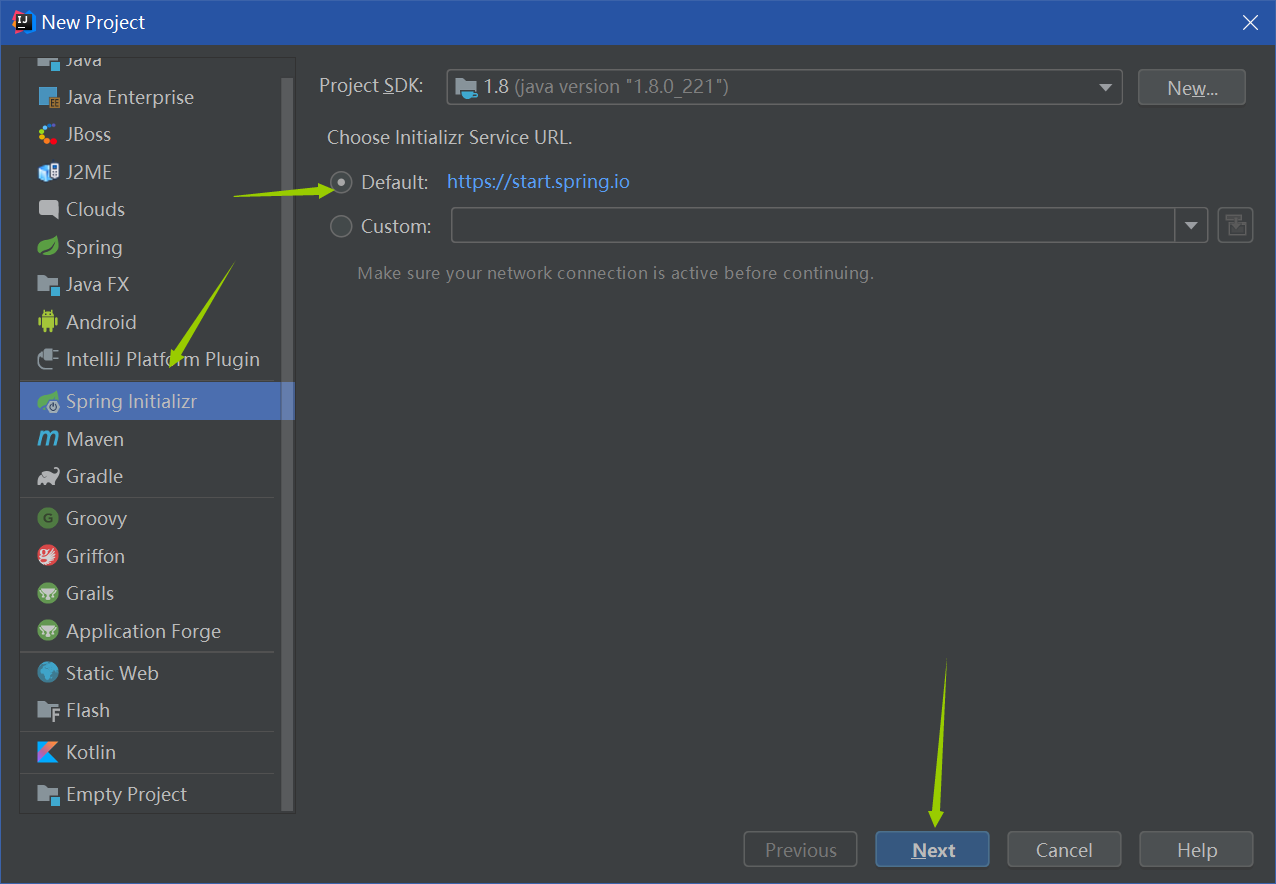
-
项目结构
-
在pom.xml中导入web模块
-
不用写版本号。默认会继承父项目的版本号
<dependency>
   <groupId>org.springframework.boot</groupId>
   <artifactId>spring-boot-starter-web</artifactId>
</dependency>
springboot免配置文件,自动装配
- 编写一个controller,可以直接通过url访问
@Controller
@RequestMapping("/hello")
public class HelloController {

    @GetMapping("/hello")
    @ResponseBody
    public String hello(){
        return "hello";
    }
}
- pom.xml
<?xml version="1.0" encoding="UTF-8"?>
<project xmlns="http://maven.apache.org/POM/4.0.0"
         xmlns:xsi="http://www.w3.org/2001/XMLSchema-instance"
         xsi:schemaLocation="http://maven.apache.org/POM/4.0.0
         https://maven.apache.org/xsd/maven-4.0.0.xsd">
    <modelVersion>4.0.0</modelVersion>

    <parent>
        <groupId>org.springframework.boot</groupId>
        <artifactId>spring-boot-starter-parent</artifactId>
        <version>2.4.2</version>
        <relativePath/> <!-- lookup parent from repository -->
    </parent>

    <groupId>com.rm</groupId>
    <artifactId>springboot_01</artifactId>
    <version>0.0.1-SNAPSHOT</version>
    <name>springboot_01</name>
    <description>Demo project for Spring Boot</description>

    <properties>
        <java.version>1.8</java.version>
    </properties>

    <dependencies>
        <dependency>
            <groupId>org.springframework.boot</groupId>
            <artifactId>spring-boot-starter-web</artifactId>
        </dependency>

        <dependency>
            <groupId>org.springframework.boot</groupId>
            <artifactId>spring-boot-starter-test</artifactId>
            <scope>test</scope>
        </dependency>
    </dependencies>

    <build>
        <!--打jar包插件-->
        <plugins>
            <plugin>
                <groupId>org.springframework.boot</groupId>
                <artifactId>spring-boot-maven-plugin</artifactId>
            </plugin>
        </plugins>
    </build>

</project>
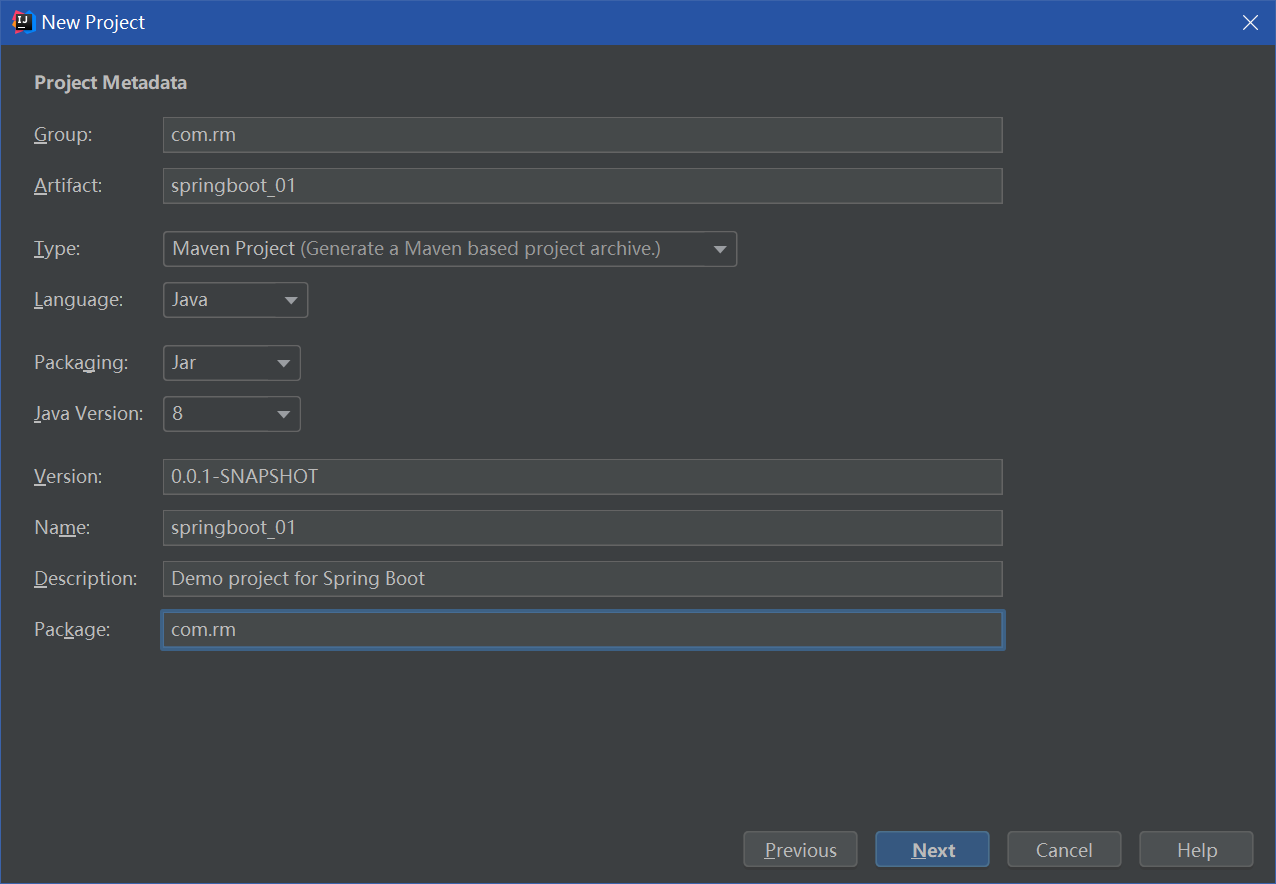
如上所示,主要有四个部分:
- 项目元数据信息:创建时候输入的Project Metadata部分,也就是Maven项目的基本元素,包括: groupld、 artifactld、version、name、description等
- parent:继承spring-boot-starter-parent的依赖管理,控制版本与打包等内容
- dependencies:项目具体依赖,这里包含了spring-boot-starter-web用于实现HTTP接口(该依赖中包含了Spring MVC),官网对它的描述是:使用Spring MVC构建Web(包括RESTful)应用程序的入门者,使用Tomcat作为默认嵌入式容器。 spring-boot-starter-test用于编写单元测试的依赖包。
- build:构建配置部分。默认使用了spring -boot-maven-plugin,配合spring-boot-starter -parent就可以把Spring Boot应用打包成JAR来直接运行。
双击打包
-

-
打包成功

-
通过命令行运行jar包
-
在文件夹目录下按着shift键点鼠标右键,选择在此处打开powershell窗口
-
tab键自动补全jar包名

-
测试

可以在项目的配置文件中更改端口号
application.properties
#更改项目启动的端口号
server.port=8081
更改项目刚开始启动时的图标
banner.txt[文件名不能改]
//                          _ooOoo_                               //
//                         o8888888o                              //
//                         88" . "88                              //
//                         (| ^_^ |)                              //
//                         O\  =  /O                              //
//                      ____/`---'\____                           //
//                    .'  \\|     |//  `.                         //
//                   /  \\|||  :  |||//  \                        //
//                  /  _||||| -:- |||||-  \                       //
//                  |   | \\\  -  /// |   |                       //
//                  | \_|  ''\---/''  |   |                       //
//                  \  .-\__  `-`  ___/-. /                       //
//                ___`. .'  /--.--\  `. . ___                     //
//              ."" '<  `.___\_<|>_/___.'  >'"".                  //
//            | | :  `- \`.;`\ _ /`;.`/ - ` : | |                 //
//            \  \ `-.   \_ __\ /__ _/   .-` /  /                 //
//      ========`-.____`-.___\_____/___.-`____.-'========         //
//                           `=---='                              //
//      ^^^^^^^^^^^^^^^^^^^^^^^^^^^^^^^^^^^^^^^^^^^^^^^^^^        //
//            佛祖保佑       永不宕机     永无BUG                    //
原理初探
pom.xml
- 核心依赖在父工程的父工程项目中
- 我们在写或者引入一些Springboot依赖的时候,不需要指定版本,就因为有这些版本仓库

启动器
- 就是springboot的启动场景
- springboot会将所有的功能场景,都变成一个个的启动器
- 我们要使用什么功能,就只需要找到对应的启动器就可以了
starter - https://docs.spring.io/spring-boot/docs/current/reference/html/using-spring-boot.html#using-boot-starter
比如spring-boot-starter-web,他就会帮我们自动导入web环境所有的依赖!
- 内置了springboot默认启动器spring-boot-starter
<?xml version="1.0" encoding="UTF-8"?>
<project xsi:schemaLocation="http://maven.apache.org/POM/4.0.0
    http://maven.apache.org/xsd/maven-4.0.0.xsd"
    xmlns="http://maven.apache.org/POM/4.0.0"
    xmlns:xsi="http://www.w3.org/2001/XMLSchema-instance">

  <description>
   Starter for building web, including RESTful, applications
   using Spring MVC. Uses Tomcat as the default embedded container
   <!--构建web项目的启动器,包括restful风格,springmvc,tomcat -->
  </description>

  ...

  <dependencies>
    <dependency>
      <groupId>org.springframework.boot</groupId>
      <artifactId>spring-boot-starter</artifactId>
      <version>2.4.2</version>
      <scope>compile</scope>
    </dependency>
    <dependency>
      <groupId>org.springframework.boot</groupId>
      <artifactId>spring-boot-starter-json</artifactId>
      <version>2.4.2</version>
      <scope>compile</scope>
    </dependency>
    <dependency>
      <groupId>org.springframework.boot</groupId>
      <artifactId>spring-boot-starter-tomcat</artifactId>
      <version>2.4.2</version>
      <scope>compile</scope>
    </dependency>
  </dependencies>
</project>
主程序
//该注解标注这个类是一个springboot的应用
@SpringBootApplication
public class Springboot01Application {

    public static void main(String[] args) {
    	//将springboot应用启动
        SpringApplication.run(Springboot01Application.class, args);
    }

}
SpringApplication
这个类主要做了以下四件事情
- 推断应用的类型是普通的项目还是Web项目
- 查找并加载所有可用初始化器,设置到initializers属性中
- 找出所有的应用程序监听器,设置到listeners属性中
- 推断并设置main方法的定义类,找到运行的主类
run方法
。。。
SpringBoot配置
配置文件
SpringBoot使用一个全局的配置文件,配置文件名称是固定的· application.properties
- 语法结构: key=value.
application.yaml
- 语法结构: key:空格value
配置文件的作用∶修改SpringBoot自动配置的默认值,因为SpringBoot在底层都给我们自动配置好了;
YAML
- YAML是"YAML Ain’t a Markup Language”(YAML不是一种置标语言)的递归缩写。在开发的这种语言时,YAML 的意思其实是:“Yet Another Markup Language”
仍是一种置标语言)
以前的配置文件,大多数都是使用xml来配置;比如一个简单的端口配置,我们来对比下yaml和xmlyaml配置:
yaml配置:
server:
	prot: 8080
xml配置:
<server>
	<port>8081<port>
</server>
yaml语法
- 对空格的使用要求较高
#普通的键值对
name: zhangsan

#对象
student:
  name: lisi
  age: 5

#对象的行内写法
student2: {name: wangwu,age: 6}

#数组
pets:
  - cat
  - dog
  - pig

#数组的行内写法
pets2: [cat,dog,pig]
该配置可以注入到配置类中
- 可以直接给实体类属性赋值
通过注解给对象赋值

使用yaml配置文件绑定对象
- 在pom.xml中引入该配置即可取消红色提醒
<dependency>
    <groupId>org.springframework.boot</groupId>
    <artifactId>spring-boot-configuration-processor</artifactId>
    <optional>true</optional>
</dependency>
Person
- @ConfigurationProperties(prefix = “person”)
- @ConfigurationProperties作用:
将配置文件中配置的每一个属性的值,映射到这个组件中;
告诉springBoot将本类中的所有属性和配置文件中相关的配置进行绑定
参数 prefix = “person”:将配置文件中的person下面的所有属性——对应
只有这个组件是容器中的组件,才能使用容器提供的@configurationProperties功能
@Component
//通过该注解绑定yaml文件中的具体对象
@ConfigurationProperties(prefix = "person")
@Data
@NoArgsConstructor
@AllArgsConstructor
public class Person {
    private String name;
    private int age;
    private Boolean happy;
    private List<String> books;
    private Map<String,Integer> score;
    private Date birthday;
    private Dog dog;
}
application.yaml
person:
  name: zhangsan
  age: 8
  happy: true
  books:
    - java
    - c
    - python
  score: {math: 15,english: 20}
  birthday: 2020/1/1
  dog:
    name: xiaobai
    age: 15
测试
@SpringBootTest
class Springboot01ApplicationTests {

    //将Person对象装配(默认ByType)
    @Autowired
    private Person person;

    @Test
    void contextLoads() {
        System.out.println(person);
    }

}
结果
Person(name=zhangsan, age=8, happy=true, books=[java, c, python], score={math=15, english=20}, birthday=Wed Jan 01 00:00:00 CST 2020, dog=Dog(name=xiaobai, age=15))
使用properties和一个类进行绑定
rm.properties
name="xiaobai"
Dog
@Component
@Data
@AllArgsConstructor
@NoArgsConstructor
@PropertySource("classpath:rm.properties")
public class Dog {

    //通过EL表达式取出文件中的值
    @Value("${name}")
    private String name;

    private int age;
}
测试
@SpringBootTest
class Springboot01ApplicationTests {
    //将Dog对象装配
    @Autowired
    private Dog dog;

    @Test
    void contextLoads() {
        System.out.println(dog);
    }
}
结果
Dog(name="xiaobai", age=0)
yaml高级语法
- 可以使用el表达式实现随机ID,占位符等功能
person:
  #生成一个随机id
  name: zhangsan${random.uuid}
  age: ${random.int}
  happy: true
  books:
    - java
    - c
    - python
  score: {math: 15,english: 20}
  birthday: 2020/1/1
  dog:
    #如果person.home属性存在,则取属性值,如果不存在就取冒号后面的值
    name: ${person.home:是}_流浪狗
    age: 15
Person(name=zhangsancf68f2a0-e2e5-49c6-a8d1-8c61337e99c2, age=-1753999088, happy=true, books=[java, c, python], score={math=15, english=20}, birthday=Wed Jan 01 00:00:00 CST 2020, dog=Dog(name=是_流浪狗, age=15))
- 当person.home属性存在时
person:
  #生成一个随机id
  name: zhangsan${random.uuid}
  age: ${random.int}
  happy: true
  home: 不是
  books:
    - java
    - c
    - python
  score: {math: 15,english: 20}
  birthday: 2020/1/1
  dog:
    #如果person.home属性存在,则取属性值,如果不存在就取冒号后面的值
    name: ${person.home:是}_流浪狗
    age: 15
Person(... dog=Dog(name=不是_流浪狗, age=15))
如果使用properties为对象赋值,需要在IDEA修改编码

松散绑定
- java类中使用驼峰命名
@Component
//通过该注解绑定yaml文件中的具体对象
@ConfigurationProperties(prefix = "person")
@Data
@NoArgsConstructor
@AllArgsConstructor
public class Person {

    private String lastName;

}
- yaml中使用-代替
person:
  #生成一个随机id
  last-name: zhangsan${random.uuid}
- 结果
Person(lastName=zhangsanff774394-8c3b-47f6-8d15-55d0adf36de9)
两种方式对比
- configurationProperties只需要写一次即可, value则需要每个字段都添加
- 松散绑定:这个什么意思呢?比如我的yml中写的last-name,这个和lastName是一样的,-后面跟着的字母默认是大写的。这就是松散绑定
- JSR303数据校验,这个就是我们可以在字段是增加一层过滤器验证,可以保证数据的合法性·复杂类型封装,yml中可以封装对象,使用@value就不支持
结论:
- 配置yml和配置properties都可以获取到值,强烈推荐yml
- 如果我们在某个业务中,只需要获取配置文件中的某个值,可以使用一下@value
- 如果说,我们专门编写了一个JavaBean来和配置文件进行映射,就直接使用
@configurationProperties,不要犹豫!
JSR303数据校验
- 导入启动器
<dependency>
    <groupId>org.springframework.boot</groupId>
    <artifactId>spring-boot-starter-validation</artifactId>
</dependency>
- 在类属性上添加数据校验
@Component
//通过该注解绑定yaml文件中的具体对象
@ConfigurationProperties(prefix = "person")
@Data
@NoArgsConstructor
@AllArgsConstructor
@Validated//开启数据校验
public class Person {
    private String name;
    private int age;

    @Email(message = "不符合邮箱格式")
    private String email;

}
- yaml中如果该属性不符合数据
person:

  name: zhangsan
  age: 5
  email: 11111111
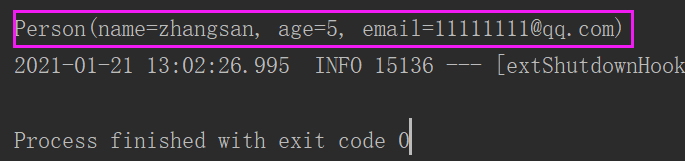
结果

- 修改属性值
email: 11111111@qq.com
结果
JSR 303 基本的校验规则
空检查
- @Null 验证对象是否为null
- @NotNull 验证对象是否不为null, 无法查检长度为0的字符串
- @NotBlank 检查约束字符串是不是Null还有被Trim的长度是否大于0,只对字符串,且会去掉前后空格.
- @NotEmpty 检查约束元素是否为NULL或者是EMPTY.
Booelan检查
- @AssertTrue 验证 Boolean 对象是否为 true
- @AssertFalse 验证 Boolean 对象是否为 false
长度检查
- @Size(min=, max=) 验证对象(Array,Collection,Map,String)长度是否在给定的范围之内
- @Length(min=, max=) Validates that the annotated string is between min and max included.
日期检查
- @Past 验证 Date 和 Calendar 对象是否在当前时间之前,验证成立的话被注释的元素一定是一个过去的日期
- @Future 验证 Date 和 Calendar 对象是否在当前时间之后 ,验证成立的话被注释的元素一定是一个将来的日期
@Pattern 验证 String 对象是否符合正则表达式的规则,被注释的元素符合制定的正则表达式,regexp:正则表达式 flags: 指定 Pattern.Flag 的数组,表示正则表达式的相关选项。
数值检查
建议使用在Stirng,Integer类型,不建议使用在int类型上,因为表单值为“”时无法转换为int,但可以转换为Stirng为”“,Integer为null
- @Min 验证 Number 和 String 对象是否大等于指定的值
- @Max 验证 Number 和 String 对象是否小等于指定的值
- @DecimalMax 被标注的值必须不大于约束中指定的最大值. 这个约束的参数是一个通过BigDecimal定义的最大值的字符串表示.小数存在精度
- @DecimalMin 被标注的值必须不小于约束中指定的最小值. 这个约束的参数是一个通过BigDecimal定义的最小值的字符串表示.小数存在精度
- @Digits 验证 Number 和 String 的构成是否合法
- @Digits(integer=,fraction=) 验证字符串是否是符合指定格式的数字,interger指定整数精度,fraction指定小数精度。
- @Range(min=, max=) 被指定的元素必须在合适的范围内
- @Range(min=10000,max=50000,message=”range.bean.wage”)
- @Valid 递归的对关联对象进行校验, 如果关联对象是个集合或者数组,那么对其中的元素进行递归校验,如果是一个map,则对其中的值部分进行校验.(是否进行递归验证)
- @CreditCardNumber信用卡验证
- @Email 验证是否是邮件地址,如果为null,不进行验证,算通过验证。
- @ScriptAssert(lang= ,script=, alias=)
- @URL(protocol=,host=, port=,regexp=, flags=)
源码所在位置

配置文件配置
Spring Boot will automatically find and load application.properties and application.yaml files from the following locations when your application starts:
- 配置文件能放置的位置及优先级
- 系统默认的是优先级最低的位置

实际开发中可能有多套环境,如何切换环境
- 如何激活具体需要的环境

- 选择的是文件名-后面的内容
spring:
  profiles:
    active: dev
或者使用- - -来分割配置
- 依然使用上面的方法选择哪套配置
server:
  port: 8081

spring:
  profiles:
    active: test
---
server:
  port: 8082
spring:
  profiles: dev

---
server:
  port: 8083
spring:
  profiles: test
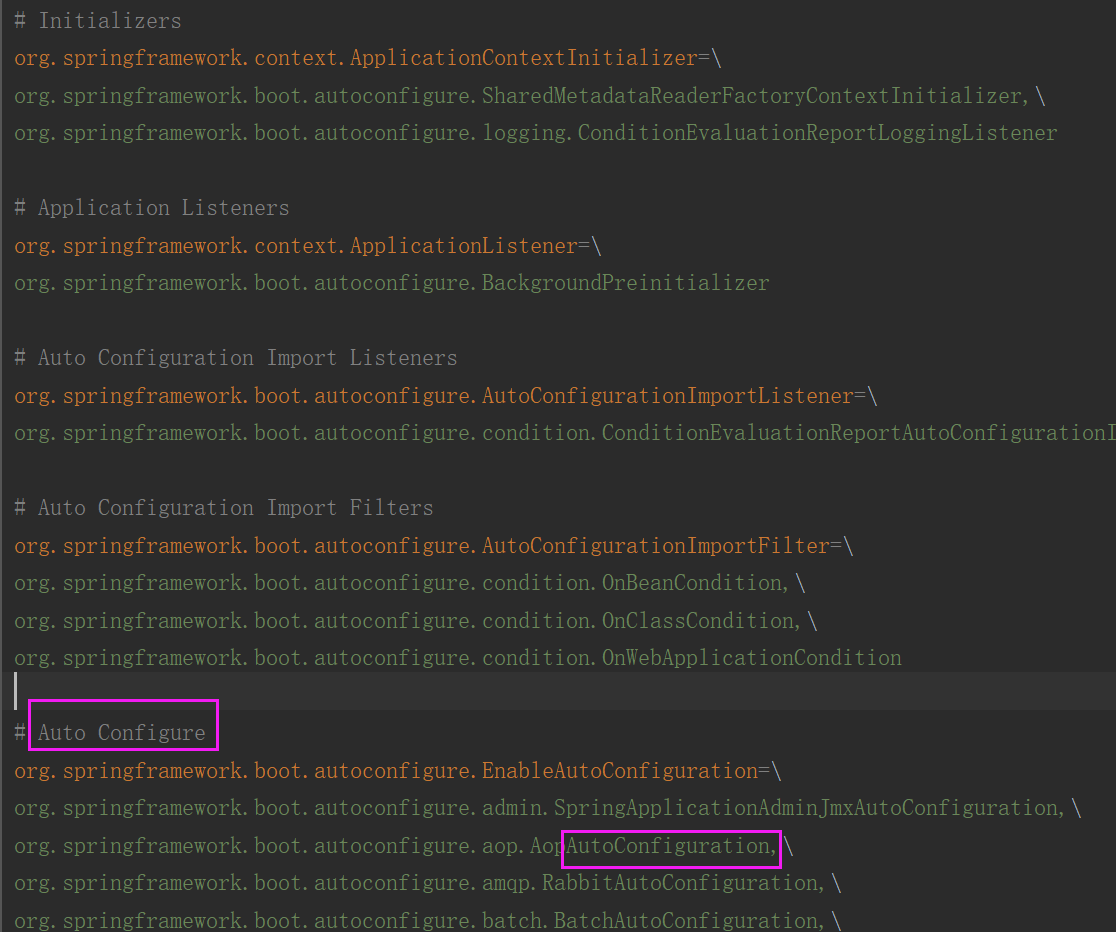
自动装配的原理
@SpringBootApplication-->@EnableAutoConfiguration-->
AutoConfigurationImportSelector.class-->getAutoConfigurationEntry()
-->getCandidateConfigurations()-->SpringFactoriesLoader.class
-->FACTORIES_RESOURCE_LOCATION = "META-INF/spring.factories";
- 找到配置文件所在的位置
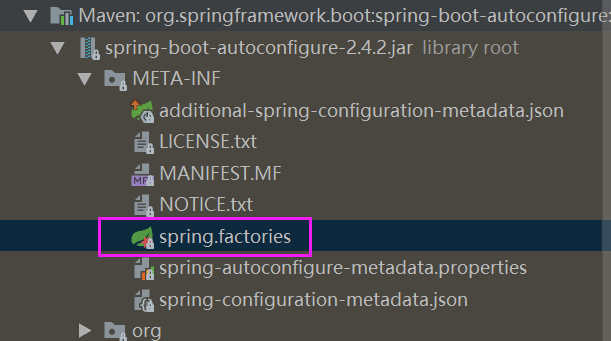
application.yaml和spring.factories之间的关系
- 找到一个易于分许的自动配置类
HttpEncodingAutoConfiguration
@Configuration(proxyBeanMethods = false)
@EnableConfigurationProperties(ServerProperties.class)
@ConditionalOnWebApplication(type =
ConditionalOnWebApplication.Type.SERVLET)
@ConditionalOnClass(CharacterEncodingFilter.class)
@ConditionalOnProperty(prefix = "server.servlet.encoding",
 value = "enabled", matchIfMissing = true)
public class HttpEncodingAutoConfiguration {

	private final Encoding properties;

	public HttpEncodingAutoConfiguration(ServerProperties properties) {
		this.properties = properties.getServlet().getEncoding();
	}
}
- 自动配置的配置属性
@EnableConfigurationProperties(ServerProperties.class)
ServerProperties.class
@ConfigurationProperties(prefix = "server", ignoreUnknownFields = true)
public class ServerProperties {

	/**
	 * Server HTTP port.
	 */
	private Integer port;

	...

	/**
	 * Servlet properties.
	 */
	public static class Servlet {

		/**
		 * Servlet context init parameters.
		 */
		private final Map<String, String> contextParameters =
		new HashMap<>();
		...
	}

	/**
	 * Tomcat properties.
	 */
	public static class Tomcat {

		/**
		 * Access log configuration.
		 */
		private final Accesslog accesslog = new Accesslog();
		...

		  /**
		* Tomcat access log properties.
		 */
		public static class Accesslog {
			/**
			 * Enable access log.
			 */
			private boolean enabled = false;
			...
		}
	}

}
如果需要修改配置
- 在
application.yaml中设置属性的值
server:
  port: xxx

  servlet:
    context-parameters: xxx

  tomcat:
    accesslog:
      enabled: xxx
Conditional注解
- spring的底层注解:根据不同的条件,来判断当前配置或者类是否生效
- 如果条件不满足,bean就不会生效,就不会被注入
@ConditionalOnWebApplication(type =
ConditionalOnWebApplication.Type.SERVLET)
@ConditionalOnClass(CharacterEncodingFilter.class)
@ConditionalOnProperty(prefix = "server.servlet.encoding", value =
"enabled", matchIfMissing = true)

- 如果有不满足条件的,就不会生效

- 一句话总结:根据当前不同的条件判断,决定这个配置类是否生效!
- 一但这个配置类生效,这个配置类(xxxAutoConfiguration)就会给容器中添加各种组件,这些组件的属性是从对应的properties(xxxProperties)类中获取的,这些类里面的每一个属性又是和配置文件绑定的;
- 所有在配置文件中能配置的属性都是在xxxProperties类中封装着,配置文件能配置什么就可以参照某个功能对应的这个属性类
在我们这配置文件中能配置的东西,都存在一个固有的规律
xxxAutoConfiguration:存在默认值
xxxProperties和配置文件绑定,我们就可以使用自定义的配置了!
这就是自动装配的原理!
- SpringBoot启动会加载大量的自动配置类
- 我们看我们需要的功能有没有在SpringBoot默认写好的自动配置类当中
- 我们再来看这个自动配置类中到底配置了哪些组件;(只要我们要用的组件存在其中,我们就不需要再手动配置了)
- 给容器中自动配置类添加组件的时候,会从properties类中获取某些属性。我们只需要在配置文件中指定这些属性的值即可;
xxxxAutoConfigurartion:自动配置类,给容器中添加组件
xxxxProperties:封装配置文件中相关属性;
那么多的自动配置类,必须在一定的条件下才能生效;也就是说,我们加载了这么多的配置类,但不是所有的都生效了。
- 怎么知道哪些自动配置类生效;
- 可以通过启用debug=true属性;来让控制台打印自动配置报告,这样我们就可以很方便的知道哪些自动配置类生效;
application.yaml
#开启springboot的调试类
debug=true
- Positive matches:(自动配置类启用的:正匹配)
- Negative matches:(没有启动,没有匹配成功的自动配置类:负匹配)
- Unconditional classes:(没有条件的类)
输出的日志我们可以在控制台打印日志看下

- 要使用一个组件的功能,看自动配置文件是否生效
- 不生效,去官网找启动器,导入启动器依赖就可以使用了
SpringBootWeb开发
自动装配
springboot到底帮我们配置了什么?我们能不能进行修改?能修改哪些东西?能不能扩展?
- xxxAutoConfiguraion…向容器中自动配置组件
- xxxxProperties:自动配置类,装配配置文件中自定义的一些内容!
要解决的问题
- 导入静态资源
- 首页
- jsp,模板引擎Thymeleaf
- 装配扩展SpringMVC
- 增删改查
- 拦截器
- 国际化!
静态资源
静态资源存放目录
"classpath:/META-INF/resources/",
"classpath:/resources/",
"classpath:/static/",
"classpath:/public/"
双击shift找到WebMvcAutoConfiguration这个类

找到添加资源处理器方法
addResourceHandlers()
	@Override
		protected void addResourceHandlers(
		ResourceHandlerRegistry registry) {
			super.addResourceHandlers(registry);

			//如果资源属性已经被自定义了。则自定义生效
			//找到属性,在application.yaml自定义
			if (!this.resourceProperties.isAddMappings()) {
				logger.debug("Default resource handling disabled");
				return;
			}

			ServletContext servletContext = getServletContext();
			addResourceHandler(registry, "/webjars/**",
			 "classpath:/META-INF/resources/webjars/");
			addResourceHandler(registry,
			this.mvcProperties.getStaticPathPattern(), (registration) ->
			 {
				registration.addResourceLocations(this.
				resourceProperties.getStaticLocations());
				if (servletContext != null) {
					registration.addResourceLocations(
					new ServletContextResource(servletContext,
					SERVLET_LOCATION));
				}
			});
		}
- 自定义静态资源路径
@ConfigurationProperties(prefix = "spring.mvc")
public class WebMvcProperties {
	/**
	 * Path pattern used for static resources.
	 */
	private String staticPathPattern = "/**";
}
application.yaml
- 松散绑定
- yaml中
-等价于Java中的驼峰命名
spring:
  mvc:
    static-path-pattern: xxx
webjars
作用
- 可以通过maven仓库的方式引入jquery
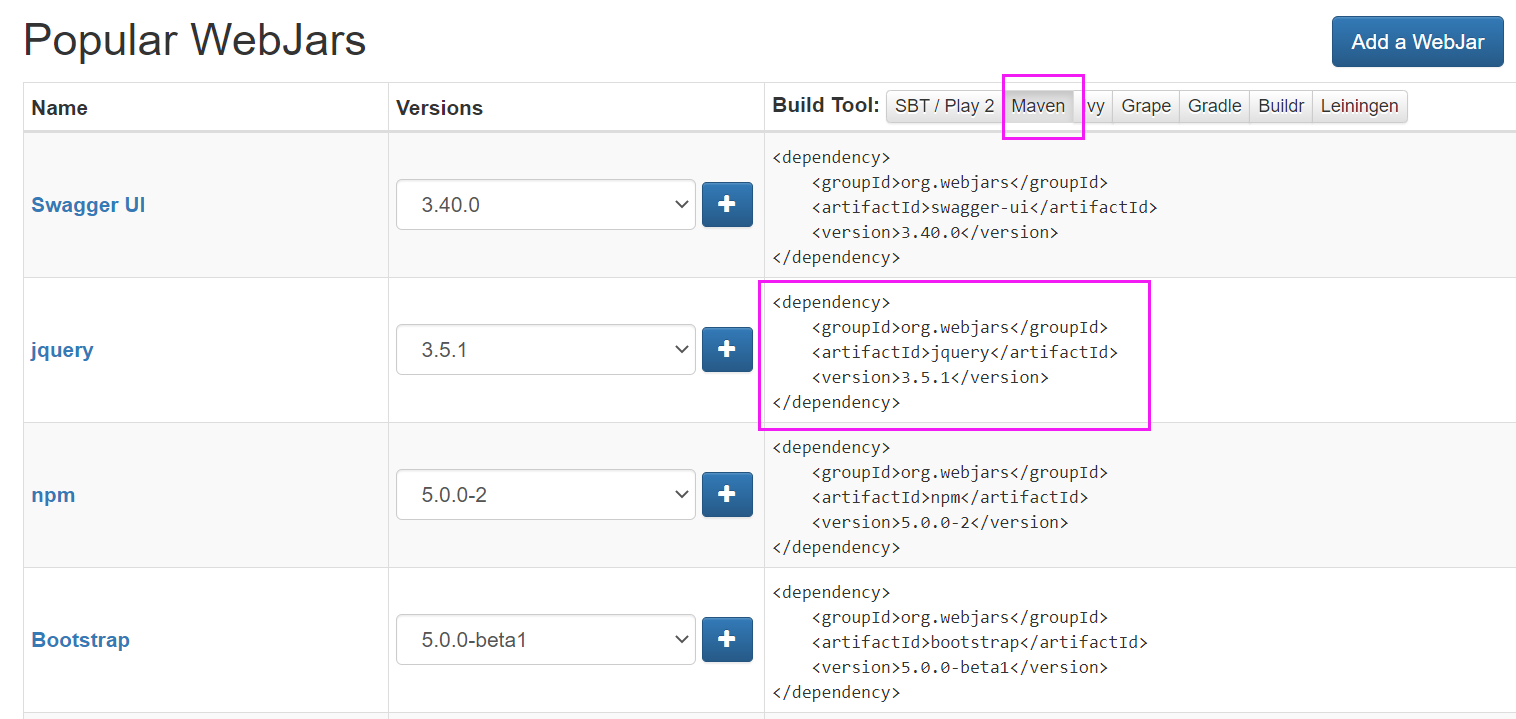
- 以前都是下载jquery,导入包
<dependency>
    <groupId>org.webjars</groupId>
    <artifactId>jquery</artifactId>
    <version>3.5.1</version>
</dependency>

- 测试是否能读取到静态资源文件
- url:http://localhost:8080/webjars/jquery/3.5.1/jquery.js
- 只要是在webjars官网上使用的,都符合这个目录结构

静态资源路径映射
addResourceHandler()
addResourceHandler(registry,
this.mvcProperties.getStaticPathPattern(), (registration) -> {
	registration.addResourceLocations(
	this.resourceProperties.getStaticLocations());
	if (servletContext != null) {
		registration.addResourceLocations(
		new ServletContextResource(servletContext, SERVLET_LOCATION));
	}
});
- 该方法第二个参数表示url路径
private string staticPathPattern = "/**";
- 第三个参数表示对应的 项目结构目录
getStaticLocations()-->staticLocations-->
private String[] staticLocations = CLASSPATH_RESOURCE_LOCATIONS-->
private static final String[] CLASSPATH_RESOURCE_LOCATIONS = {
//web目录结构
"classpath:/META-INF/resources/",
"classpath:/resources/",
"classpath:/static/",
"classpath:/public/" };
静态资源目录优先级
-
同名静态文件,哪个目录下的优先被访问
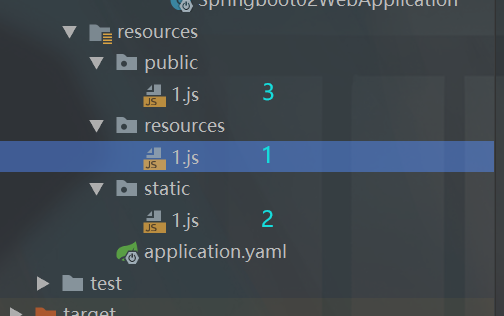
-
public一般存放公共资源
-
resources一般存放上传的文件
-
static一般存放静态资源,图片什么的
首页和图标
-
ctrl+shift+‘+’:展开所有方法。+‘-’:折叠所有方法
-
欢迎页处理映射
@Bean
public WelcomePageHandlerMapping welcomePageHandlerMapping(
		ApplicationContext applicationContext,
		FormattingConversionService mvcConversionService,
		ResourceUrlProvider mvcResourceUrlProvider) {

	WelcomePageHandlerMapping welcomePageHandlerMapping =
	 new WelcomePageHandlerMapping(

			new TemplateAvailabilityProviders(
			applicationContext), applicationContext, getWelcomePage(),
			this.mvcProperties.getStaticPathPattern());

	welcomePageHandlerMapping.setInterceptors(
	getInterceptors(mvcConversionService, mvcResourceUrlProvider));
	welcomePageHandlerMapping.setCorsConfigurations(
	getCorsConfigurations());
	return welcomePageHandlerMapping;
}
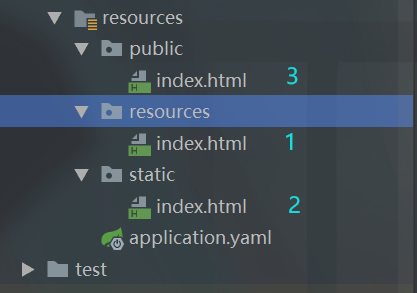
得到欢迎页的方法
private Resource getWelcomePage() {
  for (String location : this.resourceProperties.getStaticLocations()) {
		//传入一个路径,通过getIndexHtml方法获取首页
		//遍历出来的就是那四个路径
		Resource indexHtml = getIndexHtml(location);
		if (indexHtml != null) {
			return indexHtml;
		}
  }
	ServletContext servletContext = getServletContext();
	if (servletContext != null) {
		return getIndexHtml(new ServletContextResource(
		servletContext, SERVLET_LOCATION));
	}
	return null;
}

//在一个资源路径下存在一个“index.html”就设置为首页
private Resource getIndexHtml(Resource location) {
	try {
		Resource resource = location.createRelative("index.html");
		if (resource.exists() && (resource.getURL() != null)) {
			return resource;
		}
	}
	catch (Exception ex) {
	}
	return null;
}
首页优先级
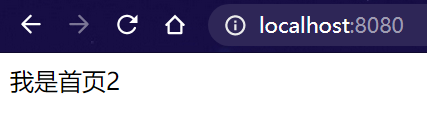
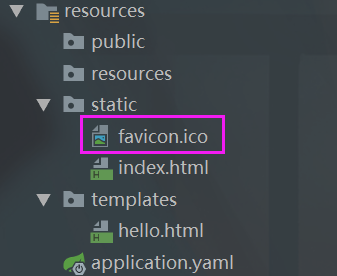
图标
- 将图标图片名改为favicon.ico放在static目录下即可
模板引擎
-
使用springboot开发,默认不支持jsp,使用模板引擎可以很好的在前端页面(html)展示后端的数据
-
以前开发,需要把html转成jsp页面,jsp好处就是当查出一些数据转发到JSP页面以后,可以用jsp轻松实现数据的显示及交互等。
-
其实jsp就是一个模板引擎,还有以用的比较多的freemarker,包括SpringBoot给我们推荐的Thymeleaf,模板引擎有非常多,但再多的模板引擎,他们的思想都是一样的,什么样一个思想呢我们来看一下这张图。

- 官网:https://www.thymeleaf.org/
- 启动器:https://docs.spring.io/spring-boot/docs/current/reference/html/using-spring-boot.html#using-boot-starter
- 依赖:https://docs.spring.io/spring-boot/docs/2.0.3.RELEASE/reference/htmlsingle/#using-boot-starter
thymeleaf模板引擎
使用thymeleaf模板引擎会解析html后缀
导入启动器
- 导入启动器会自动导入启动器包含的依赖
<dependency>
    <groupId>org.springframework.boot</groupId>
    <artifactId>spring-boot-starter-thymeleaf</artifactId>
</dependency>
- 视图解析器解析前缀后缀
@ConfigurationProperties(prefix = "spring.thymeleaf")
public class ThymeleafProperties {

	private static final Charset DEFAULT_ENCODING =
	StandardCharsets.UTF_8;

	public static final String DEFAULT_PREFIX =
	"classpath:/templates/";

	public static final String DEFAULT_SUFFIX =
	".html";
	...
}
编写controller层
- controller
@Controller
public class MyController {
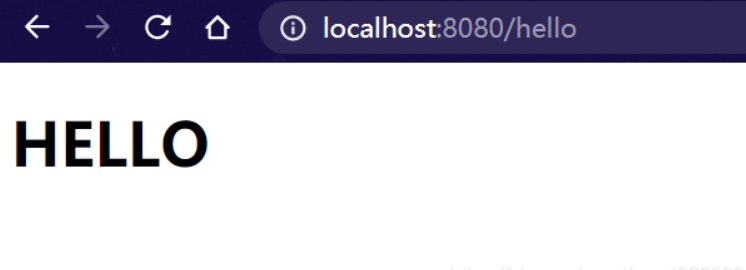
@GetMapping("/hello")
public String hello(){
return "hello";
}
}
将html页面放在templates目录
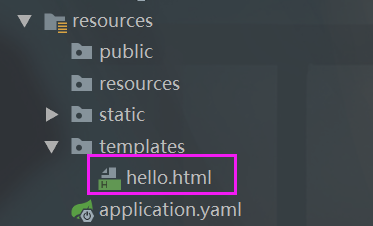
- 结果
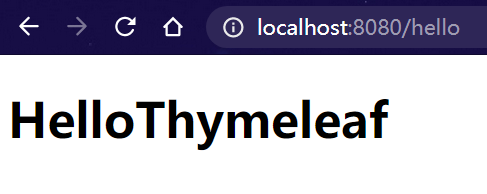
thymeleaf使用
取值
${msg}
- 在controller中存值
@Controller
public class MyController {
    @GetMapping("/hello")
    public String hello(Model model){
        model.addAttribute("msg","HelloThymeleaf");
        return "hello";
    }
}
/templates/hello.html
<!DOCTYPE html>
<!--导入约束-->
<html lang="en" xmlns:th="http://www.thymeleaf.org">
<head>
    <meta charset="UTF-8">
    <title>Title</title>
</head>
<body>
<h1 th:text="${msg}"></h1>
</body>
</html>
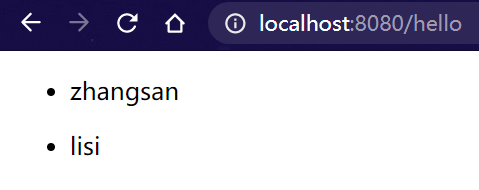
遍历元素
th:each="user:${users}
- 遍历出来的元素只在一个标签体内生效
存数据
@Controller
public class MyController {
    @GetMapping("/hello")
    public String hello(Model model){
        //存放一个集合
        //Arrays.asList()将一个数组转换为一个集合
        model.addAttribute("users", Arrays.asList("zhangsan","lisi"));
        return "hello";
    }
}
hello.html
<!DOCTYPE html>
<html lang="en" xmlns:th="http://www.thymeleaf.org">
<head>
    <meta charset="UTF-8">
    <title>Thymeleaf</title>
</head>
<body>
<div th:each="user:${users}">
	<!--遍历出来的元素只在一个标签体内生效-->
    <ul>
        <li th:text="${user}"></li>
    </ul>
</div>
</body>
</html>
结果
springMVC自动配置
- 查看2.1.6版本的文档
https://docs.spring.io/spring-boot/docs/2.1.6.RELEASE/reference/html/boot-features-developing-web-applications.html
Spring Boot为Spring MVC提供了自动配置,可与多数应用程序配合。
自动配置会在Spring的默认设置之上添加以下功能:
- 包含ContentNegotiatingViewResolver和BeanNameViewResolver Bean。
- 支持提供静态资源,包括对WebJars的支持。
- 自动注册Converter,GenericConverter和Formatter Bean。
- 对HttpMessageConverters的支持。
- 自动注册MessageCodesResolver。
- 静态index.html支持。
- 自定义Favicon支持。
- 自动使用ConfigurableWebBindingInitializer Bean。
如果您想保留Spring Boot MVC功能并想添加其他MVC配置(拦截器,格式化程序,视图控制器和其他功能),则可以添加自己的@Configuration 键入WebMvcConfigurer类,但不能有@EnableWebMvc。
如果希望提供RequestMappingHandlerMapping,RequestMappingHandlerAdapter或ExceptionHandlerExceptionResolver的自定义实例,则可以声明一个WebMvcRegistrationsAdapter实例以提供此类组件。
如果要完全控制Spring MVC,则可以添加带有@EnableWebMvc注释的自己的@Configuration。
视图解析器
- 通过debug找到候选的视图解析器
- 在dispatcherServlet类中进行debug
- 因为所有资源都需要经过该类
- 在初始化视图解析器下面的一个方法打断点

解析视图名字ContentNegotiatingViewResolver.class
public View resolveViewName(String viewName, Locale locale) {
   //得到候选的视图解析器
   List<View> candidateViews = this.getCandidateViews(viewName, locale);
   //得到最好的视图解析器
   View bestView = this.getBestView(candidateViews, attrs);
         if (bestView != null) {
             return bestView;
         }
 }
得到候选视图解析器- 伪代码
private List<View> getCandidateViews(String viewName, Locale locale) {
    List<View> candidateViews = new ArrayList();
    if (this.viewResolvers != null) {

        Iterator var5 = this.viewResolvers.iterator();

        while(var5.hasNext()) {
            ViewResolver viewResolver = (ViewResolver)var5.next();
            View view = viewResolver.resolveViewName(viewName, locale);
            if (view != null) {
                candidateViews.add(view);
            }
        return candidateViews;
}
得到最好的视图解析器- 伪代码
  @Nullable
  private View getBestView(List<View> candidateViews) {
      Iterator var4 = candidateViews.iterator();

      while(var4.hasNext()) {
          View candidateView = (View)var4.next();
          if (candidateView instanceof SmartView) {
              SmartView smartView = (SmartView)candidateView;
              if (smartView.isRedirectView()) {
                  return candidateView;
              }
          }
      }
      return null;
  }
日期格式化
- 找到默认的格式
WebMvcAutoConfiguration-->addFormatters()-->this.mvcProperties.getFormat()-->
return this.format-->private final Format format = new Format()
Format.java
public static class Format {

		/**
		 * Date format to use, for example `dd/MM/yyyy`.
		 */
		private String date;

		/**
		 * Time format to use, for example `HH:mm:ss`.
		 */
		private String time;

		/**
		 * Date-time format to use, for example `yyyy-MM-dd HH:mm:ss`.
		 */
		private String dateTime;
- 可以通过配置文件修改格式
spring:
  mvc:
    format:
      date: dd/MM/yyyy
扩展springMVC的功能

springboot整合数据库
简介
对于数据访问层,无论是SQL(关系型数据库)还是 NOSQL(非关系型数据库),
spring Boot 底层都是用Spring Data的方式进行统一处理。
Sping Data官网: https://spring.io/projects/spring-data
数据库相关的启动器:可以参考官方文档:https://docs.spring.io/spring-boot/docs/2.1.7.RELEASE/reference/htmlsingle/#using-boot-starter
Springboot整合数据库
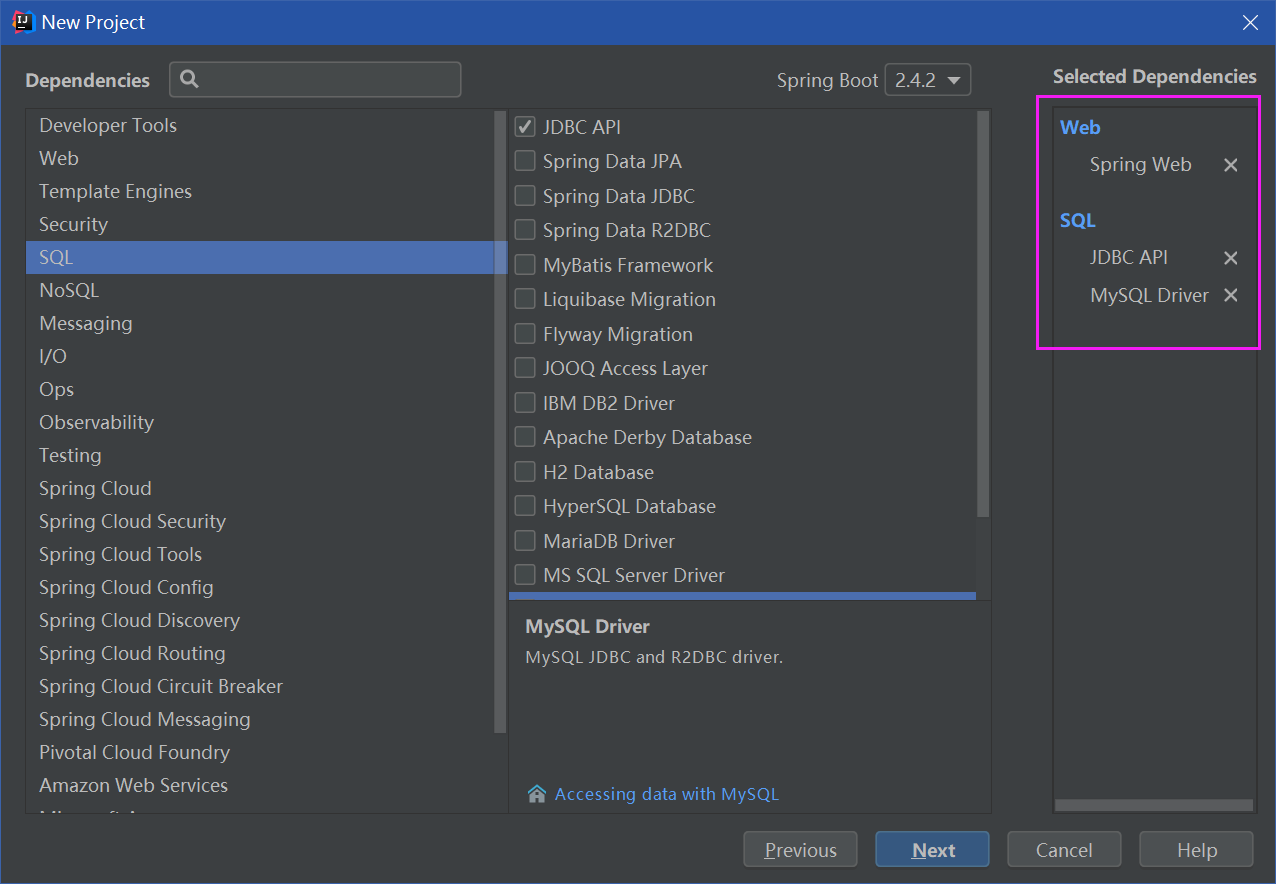
- 新建一个项目
- 勾选依赖
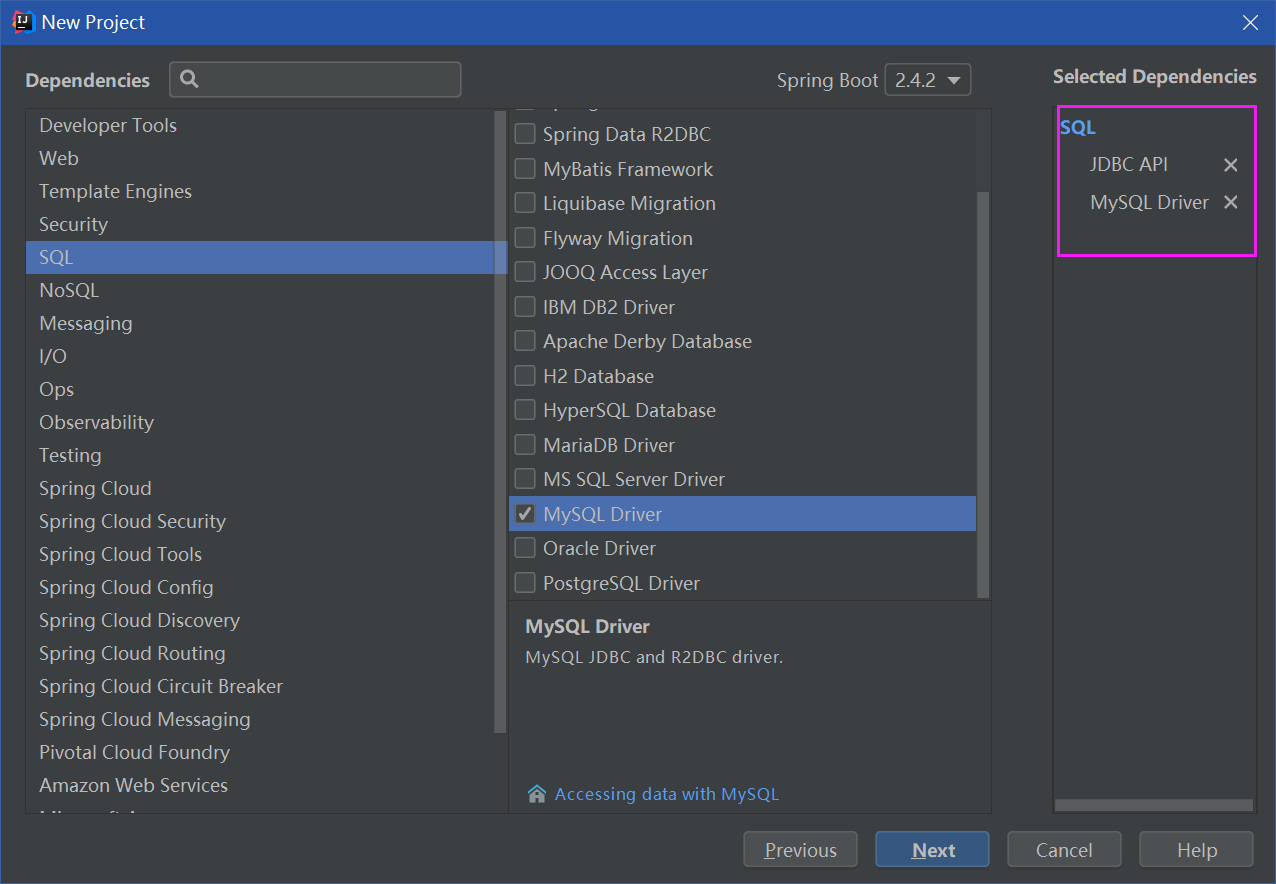
- 配置数据源
spring:
  datasource:
    username: root
    password: root
    #如果时区抛异常,需要加修改时区的配置
    url: jdbc:mysql://localhost:3306/mybatis?
    serverTimezone=UTC&useUnicode=true&characterEncoding=utf-8
    driver-class-name: com.mysql.jdbc.Driver
- 查看springboot默认使用的数据源
dataSources不要导错包
//不要导错包
import javax.sql.DataSource;
import java.sql.Connection;
import java.sql.SQLException;


@SpringBootTest
class Springboot04DataApplicationTests {

    @Autowired
    DataSource dataSource;

    @Test
    void contextLoads() throws SQLException {
        //查看默认的数据源
        System.out.println(dataSource.getClass());

        //获取数据库连接
        Connection connection = dataSource.getConnection();

        System.out.println(connection);
        //关闭连接
        connection.close();
    }

}

使用JDBC原生的方式连接数据库
- 导入web启动器
JdbcTemplate
- xxxTemplate:springBoot配置好的bean,可以直接使用
@Configuration(proxyBeanMethods = false)
@ConditionalOnMissingBean(JdbcOperations.class)
class JdbcTemplateConfiguration {

	@Bean
	@Primary
	JdbcTemplate jdbcTemplate(DataSource dataSource, JdbcProperties properties) {
		JdbcTemplate jdbcTemplate = new JdbcTemplate(dataSource);
		JdbcProperties.Template template = properties.getTemplate();
		jdbcTemplate.setFetchSize(template.getFetchSize());
		jdbcTemplate.setMaxRows(template.getMaxRows());
		if (template.getQueryTimeout() != null) {
			jdbcTemplate.setQueryTimeout((int)
			 template.getQueryTimeout().getSeconds());
		}
		return jdbcTemplate;
	}

}
- 测试
@RestController
public class JdbcController {

	//模板
    @Autowired
    JdbcTemplate jdbcTemplate;

    //查询数据库的信息
    //没有实体类,数据库中的数据如何获取,万能的Map
    @RequestMapping("/list")
    public List<Map<String,Object>> users(){

        String sql="select* from user";
        List<Map<String, Object>> user_list = jdbcTemplate.queryForList(sql);
        return user_list;
    }

}
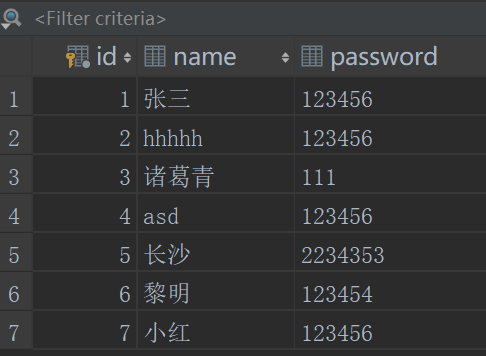
-
结果

-
添加一个用户
-
自动提交事务
//添加一个用户
@RequestMapping("/add")
public String addUser(){
    String sql="insert into mybatis.user values(7,'小红','123456')";
    jdbcTemplate.update(sql);
    return "插入成功";
}
整合Druid数据源
Druid简介
- Druid是阿里巴巴开源平台上一个数据库连接池实现,结合了C3PO、DBCP、PROXOOL等DB池的优点,
同时加入了日志监控。 - Druid可以很好的监控DB池连接和SQL的执行情况,天生就是针对监控而生的DB连接池。
Druid使用
引入数据源
第一步需要在应用的pom.xml文件中添加上Druid 数据源依赖
<dependency>
    <groupId>com.alibaba</groupId>
    <artifactId>druid</artifactId>
    <version>1.1.12</version>
</dependency>
使用数据源
只需要在配置文件配置type属性
spring:
  datasource:
    username: root
    password: root
    #如果时区抛异常,需要加修改时区的配置
    url: jdbc:mysql://localhost:3306/mybatis?
    serverTimezone=UTC&useUnicode=true&characterEncoding=utf-8
    driver-class-name: com.mysql.jdbc.Driver
    type: com.alibaba.druid.pool.DruidDataSource

    #Spring Boot默认是不注入这些属性值的,需要自己绑定
    #druid数据源专有配置
    initialsize: 5
    minIdle: 5
    maxActive: 20
    maxwait: 60000
    timeBetweenEvictionRunsMi1lis: 60000
    minEvictableIdleTimeMil1lis: 300000
    validationQuery: SELECT 1 FROM DUAL
    testwhileIdle: true
    testOnBorrow: false
    testOnReturn: false
    poolPreparedStatements: true

    #配置监控统计拦截的filters,stat:监控统计、Log4j:日志记录、wall:防御sqL注入
    #使用日志功能导入log4j依赖即可
    filters: stat,wall,log4j
    maxPoo1PreparedstatementPerConnectionsize: 20
    useGlobalDataSourceStat: true
    connectionProperties: druid.stat.mergeSql=true;druid.stat.slowSqlMillis=500
- 导入log4j依赖
<dependency>
    <groupId>log4j</groupId>
    <artifactId>log4j</artifactId>
    <version>1.2.17</version>
</dependency>
Spring Boot默认是不注入这些属性值的,需要自己绑定
- 新建一个config类,绑定配置文件
@Configuration
public class DruidConfig {

    //配置文件和该类进行绑定
    //使用配置文件的属性,初始化连接数等...
	//将配置文件中的属性值注入到DruidDataSource中
    @ConfigurationProperties(prefix = "spring.datasource")
    @Bean
    public DataSource druidDataSource(){
        return new DruidDataSource();
    }

}
后台监控功能
@Configuration
public class DruidConfig {

    //配置文件和该类进行绑定
    //使用配置文件的属性,初始化连接数等...
    //将配置文件中的属性值注入到DruidDataSource中
    @ConfigurationProperties(prefix = "spring.datasource")
    @Bean
    public DataSource druidDataSource(){
        return new DruidDataSource();
    }

    //后台监控功能

    @Bean
    public ServletRegistrationBean statViewServlet(){
        //访问配置的url就能进入后台管理页面
        ServletRegistrationBean<StatViewServlet> registrationBean =
        new ServletRegistrationBean<>(new StatViewServlet(), "/druid/*");

        HashMap<String, String> initParameters = new HashMap<>();
        //配置登录后台人员账号密码
        //增加配置
        initParameters.put("loginUsername","admin");//账号,key值是固定的
        initParameters.put("loginPassword","123456");//密码

        //允许谁可以访问
        initParameters.put("allow","127.0.0.1");
        //今朝谁访问
        initParameters.put("deny","112.168.0.1");
        //设置初始化参数
        registrationBean.setInitParameters(initParameters);

        return registrationBean;
    }
}
- 访问http://localhost:8080/druid

- 输入配置的账号和密码

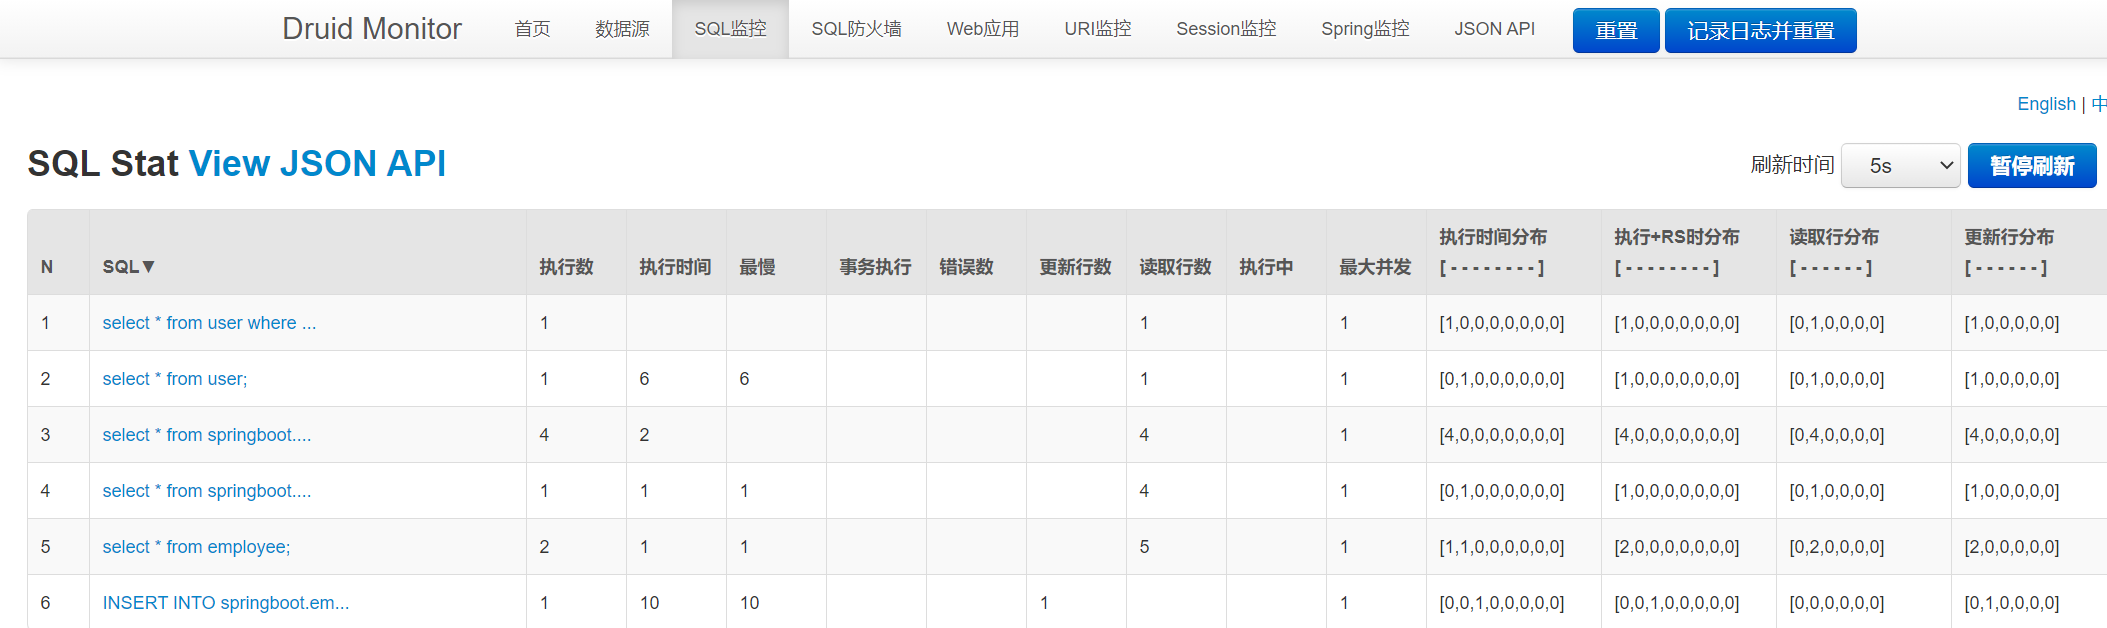
- 访问一个需要执行sql语句的url

- 查看SQL监控

过滤器功能
- 过滤静态资源
@Configuration
public class DruidConfig {

    //配置文件和该类进行绑定
    //使用配置文件的属性,初始化连接数等...
    //将配置文件中的属性值注入到DruidDataSource中
    @ConfigurationProperties(prefix = "spring.datasource")
    @Bean
    public DataSource druidDataSource(){
        return new DruidDataSource();
    }

	//过滤功能
    @Bean
    public FilterRegistrationBean filterRegistrationBean(){

        FilterRegistrationBean<Filter> bean = new FilterRegistrationBean<>();
        bean.setFilter(new WebStatFilter());

        Map<String, String> initParameters =new HashMap<>();
        //可以配置的拦击功能在WebStatFilter类中
        //排除哪些请求,哪些请求不被统计
        initParameters.put("exclusions","*.js,*.css,/druid/*");
        bean.setInitParameters(initParameters);
        return bean;
    }
}
整合Mybatis
mybatis-spring-boot-starter
- 新建一个项目,勾选依赖
- 导入启动器
- 不是springboot官方的启动器
<dependency>
    <groupId>org.mybatis.spring.boot</groupId>
    <artifactId>mybatis-spring-boot-starter</artifactId>
    <version>2.1.4</version>
</dependency>
- 连接数据库
spring:
  datasource:
    username: root
    password: root
    url: jdbc:mysql://localhost:3306/mybatis?useUnicode=true&charsetEncoding=utf-8
    driver-class-name: com.mysql.jdbc.Driver
- 测试能否连接成功
@SpringBootTest
class Springboot05MybatisApplicationTests {

    @Autowired
    DataSource dataSource;

    @Test
    void contextLoads() {
        System.out.println(dataSource);
    }

}
- 创建和数据库对应的实体类
@Data
@AllArgsConstructor
@NoArgsConstructor
public class User {
    private Integer id;
    private String name;
    private String password;
}
- 编写mapper业务接口
@Mapper注解表明这是一个mybatis的Mapper类
@Mapper //该注解表明这是一个mybatis的Mapper类
@Repository
public interface UserMapper {
    //根据Id查用户
    User getUserById(@Param("id") int id);
}
- 编写xml配置文件
<?xml version="1.0" encoding="UTF-8" ?>
<!DOCTYPE mapper
        PUBLIC "-//mybatis.org//DTD Mapper 3.0//EN"
        "http://mybatis.org/dtd/mybatis-3-mapper.dtd">
<mapper namespace="com.rm.mapper.UserMapper">

    <select id="getUserById" resultType="user">
    select * from user where id = #{id}
  </select>

</mapper>
配置mybatis- 别名和绑定Mapper
spring:
  datasource:
    username: root
    password: root
    url: jdbc:mysql://localhost:3306/mybatis?useUnicode=true&charsetEncoding=utf-8
    driver-class-name: com.mysql.jdbc.Driver

mybatis:
  type-aliases-package: com.rm.pojo
  mapper-locations: classpath:mybatis/mapper/*.xml
- 编写service
@Service
public interface UserService {

   User getUserById(int id);

}
- 编写service实现类
@Service
public class UserServiceImpl implements UserService {


    @Autowired
    private UserMapper userMapper;

    @Override
    public User getUserById(int id) {
        return userMapper.getUserById(id);
    }
}
- 编写controller层
- 使用RestFul风格传递参数
@Controller
public class UserController {

    @Autowired
    private UserService userService;

    @ResponseBody
    //RestFul风格
    @RequestMapping("/getUserById/{id}")
    public String getUserById(@PathVariable int id){
        User user = userService.getUserById(id);
        return user.toString();
    }
}
- 测试
- http://localhost:8080//getUserById/3

SpringBoot中的事务处理
介绍
- 前面几篇文章主要讲解了在 Spring Boot 项目中对数据层的操作,本章节将介绍在 Spring Boot 项目中如何进行事务处理。所有的数据访问技术都离不开事务处理,否则将会造成数据不一致,在目前企业级应用开发中,事务管理是必不可少的。
数据库事务简介
-
数据库事务是指作为单个逻辑工作单元执行的一系列操作,要么完全地执行,要么完全地不执行。 事务处理可以确保除非事务性单元内的所有操作都成功完成,否则不会永久更新面向数据的资源。
-
通过将一组相关操作组合为一个要么全部成功要么全部失败的单元,可以简化错误恢复并使应用程序更加可靠。一个逻辑工作单元要成为事务,必须满足所谓的 ACID(原子性、一致性、隔离性和持久性)原则,事务是数据库运行中的逻辑工作单位,由数据库中的事务管理子系统负责事务的处理。
Spring Boot 事务机制
首先需要明确的一点是 Spring Boot 事务机制实质上就是 Spring 的事务机制,是采用统一的机制处理来自不同数据访问技术的事务处理,只不过 Spring Boot 基于自动配置的特性作了部分处理来节省开发者的配置工作,这一知识点我们会结合部分源码进行讲解。
Spring 事务管理分两种方式:
- 编程式事务,指的是通过编码方式实现事务;
- 声明式事务,基于 AOP,将具体业务逻辑与事务处理解耦。
声明式事务
-
声明式事务是建立在 AOP 机制之上的,其本质是对方法前后进行拦截,然后在目标方法开始之前创建或者加入一个事务,在执行完目标方法之后根据执行情况提交或者回滚事务。
-
声明式事务最大的优点,就是通过 AOP 机制将具体业务逻辑与事务处理解耦,不需要通过编程的方式管理事务,这样就不需要在业务逻辑代码中掺杂事务管理的代码,因此在实际使用中声明式事务用的比较多。
声明式事务有两种方式:
- 一种是在 XML 配置文件中做相关的事务规则声明;
- 另一种是基于 @Transactional 注解的方式(@Transactional 注解是来自 org.springframework.transaction.annotation 包),便可以将事务规则应用到业务逻辑中。
未使用 Spring Boot 时的事务配置
    <!-- 事务管理 -->
    <bean id="transactionManager"
          class="org.springframework.jdbc.datasource.DataSourceTransactionManager">
        <property name="dataSource" ref="dataSource"/>
    </bean>

    <!-- 配置事务通知属性 -->
    <tx:advice id="txAdvice" transaction-manager="transactionManager">
        <!-- 定义事务传播属性 -->
        <tx:attributes>
            <tx:method name="insert*" propagation="REQUIRED"/>
            <tx:method name="import*" propagation="REQUIRED"/>
            <tx:method name="update*" propagation="REQUIRED"/>
            <tx:method name="upd*" propagation="REQUIRED"/>
            <tx:method name="add*" propagation="REQUIRED"/>
            <tx:method name="set*" propagation="REQUIRED"/>
            <tx:method name="remove*" propagation="REQUIRED"/>
            <tx:method name="delete*" propagation="REQUIRED"/>
            <tx:method name="get*" propagation="REQUIRED" read-only="true"/>
            <tx:method name="*" propagation="REQUIRED" read-only="true"/>
        </tx:attributes>
    </tx:advice>

    <!-- 配置事务切面 -->
    <aop:config>
        <aop:pointcut id="serviceOperation"
                      expression="(execution(* com.ssm.demo.service.*.*(..)))"/>
        <aop:advisor advice-ref="txAdvice" pointcut-ref="serviceOperation"/>
    </aop:config>
通过这段代码我们也能够看出声明式事务的配置过程:
- 配置事务管理器
- 配置事务通知属性
- 配置事务切面
这样配置后,相关方法在执行时都被纳入事务管理下了,一旦发生异常,事务会正确回滚。
Spring Boot 项目中的事务控制
- 在 SpringBoot 中,建议采用注解 @Transactional 进行事务的控制,只需要在需要进行事务管理的方法或者类上添加 @Transactional 注解即可。
新建 TransactionTestService.java
@Service
public class GeneratorTestService {

    //绑定dao接口
    @Resource
    private GeneratorTestMapper gt;

    //定义方法(不加事务)
    public void test1(){
        GeneratorTest gt1 = new GeneratorTest();
        gt1.setId(1L);
        gt1.setTest("我是1");
        //插入数据库表中
        gt.insert(gt1);
        //模拟出错
        System.out.println(1/0);

    }

    //定义方法(加事务)
    @Transactional
    public void test2(){
        GeneratorTest gt2 = new GeneratorTest();
        gt2.setId(2L);
        gt2.setTest("我是2");
        gt.insert(gt2);
        //模拟出错
        System.out.println(1/0);
    }

}
编写controller,通过请求访问
@Controller
public class MyController {
    //引入service层
    @Resource
    private GeneratorTestService generatorTestService;

    @RequestMapping("/t1")
    @ResponseBody
    public String t1(){
        generatorTestService.test1();
        generatorTestService.test2();
        return "执行完成";
    }
}
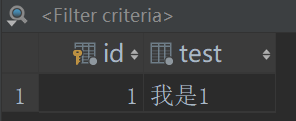
结果
- 1插入成功,2回滚
事务管理器的自动配置类如下:
-
org.springframework.boot.autoconfigure.jdbc.DataSourceTransactionManagerAutoConfiguration
-
org.springframework.boot.autoconfigure.transaction.TransactionAutoConfiguration
@Transactional 事务实现机制
@Transactional 不仅可以注解在方法上,也可以注解在类上。当注解在类上时,意味着此类的所有 public 方法都是开启事务的。如果类级别和方法级别同时使用了 @Transactional 注解,则使用在类级别的注解会重载方法级别的注解。
在应用系统调用声明了 @Transactional 的目标方法时,Spring Framework 默认使用 AOP 代理,在代码运行时生成一个代理对象,根据 @Transactional 的属性配置信息,这个代理对象决定该声明 @Transactional 的目标方法是否由拦截器 TransactionInterceptor 来使用拦截,在 TransactionInterceptor 拦截时,会在目标方法开始执行之前创建并加入事务,并执行目标方法的逻辑, 最后根据执行情况是否出现异常,利用抽象事务管理器 AbstractPlatformTransactionManager 操作数据源 DataSource 提交或回滚事务。
Linux上发布SpringBoot项目
软件版本
Linux
- centOS 8.0
JDK
- 1.8.0_221
Mysql
- 5.7.33
Tomcat
- springboot项目内置tomcat,故不需要安装
环境安装
JDK安装
1.下载JDK rpm。去oralce官网下载即可!
2. 安装java环境
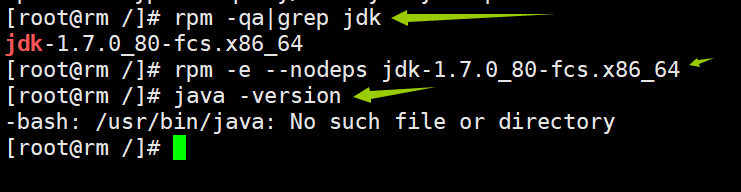
#检测当前系统是否存在java环境!
java -version

#如果有的话就需要卸载
rpm -qa|grep jdk #检测JDK版本信息
rpm -e --nodeps jdk_xxxx #后面的参数是查询出来的JDK版本
- 卸载JDK
- 安装JDK
#卸载完毕后即可安装jdk
rpm -ivh rpm包

- 测试安装是否成功
java -version
- npm方式安装的JDK不需要配置环境变量
宝塔面板安装
yum install -y wget && wget -O install.sh http://download.bt.cn/install/install_6.0.sh && sh install.sh
- 安装成功会给一个网址和一个随机的账号和密码
- 通过访问该网址,输入账号和密码
Mysql安装
- 通过软件商店,安装mysql

- 在数据库页面,找到默认的root密码

- 通过 命令进入到mysql
# ***表示数据库密码
mysql -uroot -p*******
- 切换到mysql数据库
use mysql
- 创建一个账号并为其赋予权限
-- 账号为aa 密码为123456 '%'表示所有ip地址都可以登录该账号
CREATE USER 'aa'@'%' IDENTIFIED BY '123456';
- 赋予权限
-- 用户授权,授予全部权限(全部数据库.全部表)
-- ALL PRIVILEGES除了给别人授权,其他都能干
GRANT ALL PRIVILEGES ON *.* TO  'aa'@'%';
- 测试连接(使用sqlyog)
- 先开启防火墙端口
#退出数据库
exit

# 开启端口
开端口命令:firewall-cmd --zone=public --add-port=3306/tcp --permanent
重启防火墙:systemctl restart firewalld.service
- 在sqlyog中创建项目需要的数据库
项目设置
注意: 项目和数据库需要在同一台服务器中
url 中的localhost表示服务器
- 配置数据源
spring:
  datasource:
    username: aa
    password: 123456
    url: jdbc:mysql://localhost:3306/springboot?serverTimezone=UTC&useUnicode=true&characterEncoding=utf-8
- 项目打包

- 通过xftp将打包好的jar包复制到服务器
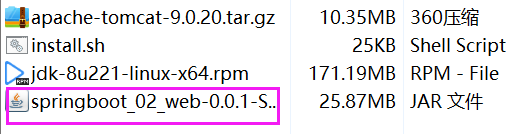
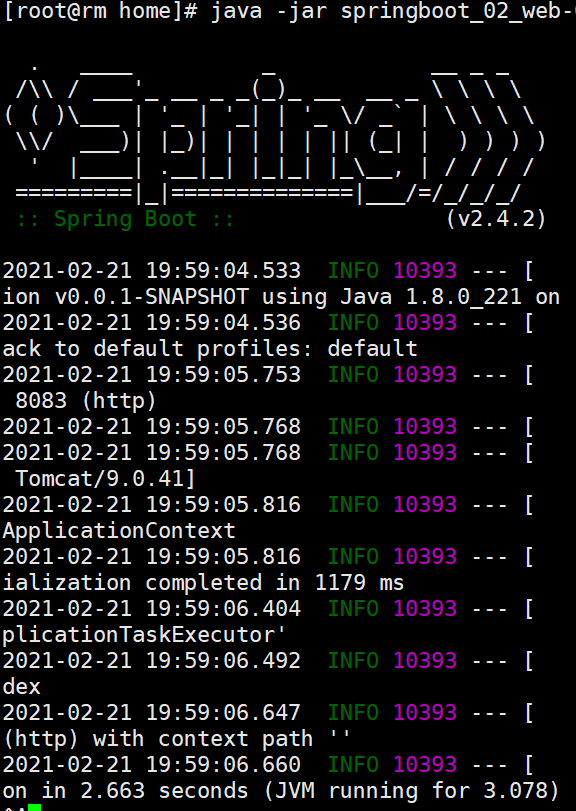
- 通过命令运行程序
java -jar springboot_02_...
-
如果发现项目访问不了
- 查看服务器安全组是否开启项目需要的端口
- 查看防火墙是否开启了改端口
-
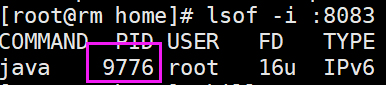
如果端口被占用,查看进程ID
lsof -i :端口号
- 发现不是必要的程序,可以杀死进程id
kill -9 ID号
- 项目启动成功
- ctrl + z 退出项目
druid设置
- 允许本机电脑查看sql监控页面
initParameters.put("allow","121.3.xx.xxx");
关闭Xshell程序也能一直运行
nohup java -jar rm_blog-0.0.1-SNAPSHOT.jar &


 被折叠的 条评论
为什么被折叠?
被折叠的 条评论
为什么被折叠?
 到【灌水乐园】发言


