


环境准备
一台RHEL7 DHCP 和 DNS服务器(192.168.10.10)
一台RHEL8 DHCP从服务器(192.168.10.12)
一台RHEL7 Apache服务器(192.168.10.15)
一台客户端测试机(Windows 10)
一、RHEL7 DHCP服务器安装配置
- 安装DHCP软件
[root@rhel7-01 ~]# yum -y install dhcp - 安装完DHCP软件后,配置dhcpd.conf文件
#复制dhcpd.conf.example模板文件到/etc/dhcp/dhcpd.conf文件
[root@rhel7-01 dhcp]# cp -a /usr/share/doc/dhcp-4.2.5/dhcpd.conf.example /etc/dhcp/dhcpd.conf
cp: overwrite ‘/etc/dhcp/dhcpd.conf’? y
#编辑配置文件
[root@rhel7-01 dhcp]# vi /etc/dhcp/dhcpd.conf
# dhcpd.conf
#
# Sample configuration file for ISC dhcpd
#

# option definitions common to all supported networks...
# 设置domain名称和服务器地址
**option domain-name "tradeprobe.com";
option domain-name-servers 192.168.10.10;**

default-lease-time 600;
max-lease-time 7200;

# Use this to enble / disable dynamic dns updates globally.
#ddns-update-style none;

# If this DHCP server is the official DHCP server for the local
# network, the authoritative directive should be uncommented.
#authoritative;

# Use this to send dhcp log messages to a different log file (you also
# have to hack syslog.conf to complete the redirection).
log-facility local7;

# No service will be given on this subnet, but declaring it helps the
# DHCP server to understand the network topology.

#subnet 10.152.187.0 netmask 255.255.255.0 {
#}

# This is a very basic subnet declaration.

#subnet 10.254.239.0 netmask 255.255.255.224 {
#  range 10.254.239.10 10.254.239.20;
#  option routers rtr-239-0-1.example.org, rtr-239-0-2.example.org;
#}

# This declaration allows BOOTP clients to get dynamic addresses,
# which we don't really recommend.

#subnet 10.254.239.32 netmask 255.255.255.224 {
#  range dynamic-bootp 10.254.239.40 10.254.239.60;
#  option broadcast-address 10.254.239.31;
#  option routers rtr-239-32-1.example.org;
#}

# A slightly different configuration for an internal subnet.
# 设置DHCP服务网段、ip地址范围、网关和domain服务名称和地址
**subnet 192.168.10.0 netmask 255.255.255.0 {
  range 192.168.10.11 192.168.10.20;
  option domain-name-servers 192.168.10.10;
  option domain-name "tradeprobe.com";
  option routers 192.168.10.10;
#  option broadcast-address 10.5.5.31;
  default-lease-time 600;
  max-lease-time 7200;**
}

# Hosts which require special configuration options can be listed in
# host statements.   If no address is specified, the address will be
# allocated dynamically (if possible), but the host-specific information
# will still come from the host declaration.

host passacaglia {
  hardware ethernet 0:0:c0:5d:bd:95;
  filename "vmunix.passacaglia";
  server-name "toccata.fugue.com";
}

# Fixed IP addresses can also be specified for hosts.   These addresses
# should not also be listed as being available for dynamic assignment.
# Hosts for which fixed IP addresses have been specified can boot using
# BOOTP or DHCP.   Hosts for which no fixed address is specified can only
# be booted with DHCP, unless there is an address range on the subnet
# to which a BOOTP client is connected which has the dynamic-bootp flag
# set.
# 给Apache服务器设定固定IP地址
host fantasia {
  **hardware ethernet 00:0C:29:8F:9D:4C;
  fixed-address 192.168.10.15;**
}

# You can declare a class of clients and then do address allocation
# based on that.   The example below shows a case where all clients
# in a certain class get addresses on the 10.17.224/24 subnet, and all
# other clients get addresses on the 10.0.29/24 subnet.

class "foo" {
  match if substring (option vendor-class-identifier, 0, 4) = "SUNW";
}

shared-network 224-29 {
  subnet 10.17.224.0 netmask 255.255.255.0 {
    option routers rtr-224.example.org;
  }
  subnet 10.0.29.0 netmask 255.255.255.0 {
    option routers rtr-29.example.org;
  }
  pool {
    allow members of "foo";
    range 10.17.224.10 10.17.224.250;
  }
  pool {
    deny members of "foo";
    range 10.0.29.10 10.0.29.230;
  }
}
- 启动DHCP服务
[root@rhel7-01 dhcp]# systemctl start dhcpd.service. - 客户机的网卡设置成DHCP自动获取,重启网卡,查看是否可以自动到IP地址
二、 DNS主服务器安装配置
5. 软件安装
[root@rhel7-01 etc]# yum -y install bind bind-chroot.x86_64
6. 配置主配置文件(/etc/named.conf)
options {
        listen-on port 53 { **any**; };
        listen-on-v6 port 53 { **any**; };
        directory       "/var/named";
        dump-file       "/var/named/data/cache_dump.db";
        statistics-file "/var/named/data/named_stats.txt";
        memstatistics-file "/var/named/data/named_mem_stats.txt";
        recursing-file  "/var/named/data/named.recursing";
        secroots-file   "/var/named/data/named.secroots";
        allow-query     { **any**; };
此处将服务器网卡监听改成any,ipv6也改成any;allow-query改成any。
7. 配置区域文件(/etc/named.rfc1912.zones)
先对区域配置文件进行备份,删除多余的模板,只留下一个正向和一个反向
# 正向解析配置
zone "tradeprobe.com" IN {
        type master;
        file "tradeprobe.localhost";
        allow-update { 192.168.10.14; };   #编辑从服务器IP地址
};
# 反向解析配置
zone "10.168.192.in-addr.arpa" IN {
        type master;
        file "tradeprobe.loopback";
        allow-update { 192.168.10.14; };  #编辑从服务器IP地址
};
在区域配置文件中“allow-update”中填入从服务器IP地址,切记
8. 配置数据文件(/var/named/tradeprobe.localhost、tradeprobe.loopback)
# 复制正向解析配置数据文件
[root@rhel7-01 etc]# cp -a named.localhost tradeprobe.localhost
# 编辑tradeprobe.localhost
[root@rhel7-01 etc]# vi tradeprobe.localhost
$TTL 1D
@       IN SOA  tradeprobe.com. rname.invalid. (
                                        1       ; serial
                                        1D      ; refresh
                                        1H      ; retry
                                        1W      ; expire
                                        3H )    ; minimum
        NS      dns.tradeprobe.com.
dns     A       192.168.10.10
www     A       192.168.10.15

# 复制反向解析配置数据文件
[root@rhel7-01 etc]# cp -a named.loopback tradeprobe.loopback
# 编辑tradeprobe.loopback
[root@rhel7-01 etc]# vi tradeprobe.loopback
$TTL 1D
@       IN SOA  tradeprobe.com. rname.invalid. (
                                        1       ; serial
                                        1D      ; refresh
                                        1H      ; retry
                                        1W      ; expire
                                        3H )    ; minimum
        NS      dns.tradeprobe.com.
dns     A       192.168.10.10
10      PTR     dns.tradeprobe.com.
15      PTR     www.tradeprobe.com.
- 启动DNS服务
[root@rhel7-01 named]# systemctl start named
三、DNS从服务器安装配置 - 安装bind软件
[root@rhel7-01 named]# yum -y install bind
11.修改主配置文件(/etc/named.conf)
[root@rhel7-01 named]# vi /etc/named.conf
options {
        listen-on port 53 { 192.168.10.14; };		#监听本机网卡
        listen-on-v6 port 53 { ::1; };
        directory       "/var/named";
        dump-file       "/var/named/data/cache_dump.db";
        statistics-file "/var/named/data/named_stats.txt";
        memstatistics-file "/var/named/data/named_mem_stats.txt";
        secroots-file   "/var/named/data/named.secroots";
        recursing-file  "/var/named/data/named.recursing";
        allow-query     { any; };			#允许任意访问
- 修改区域配置文件(/etc/named.rfc1912.zones)
在从服务器中填写主服务器的IP地址与要抓取的区域信息,然后重启服务。注意此时的服务类型应该是slave(从),而不再是master(主)。masters参数后面应该为主服务器的IP地址,而且file参数后面定义的是同步数据配置文件后要保存到的位置,稍后可以在该目录内看到同步的文件。这里的masters参数比正常的主服务类型master多了个字母s,表示可以有多个主服务器。请大家小心,不要漏掉哦。
[root@rhel8-01 ~]# vi /etc/named.rfc1912.zones
zone "tradeprobe.com" IN {
        type slave;
        masters { 192.168.10.10; };
        file "slaves/tradeprobe.localhost";
        //allow-update { none; };
};
#allow-update需要注释掉,否则启动named服务报错,无法启动
zone "10.168.192.in-addr.arpa" IN {
        type slave;
        masters { 192.168.10.10; };
        file "slaves/tradeprobe.loopback";
        //allow-update { none; };
};
- 查看从服务器/var/named/slaves文件
#启动named服务之前,先查看slaves目录,确保没有文件
[root@rhel8-02 etc]# cd /var/named/slaves/
[root@rhel8-02 slaves]# ls
#启动named服务
[root@rhel8-02 slaves]# systemctl start named
#再次查看目录
[root@rhel8-02 slaves]# ls
tradeprobe.localhost  tradeprobe.loopback
四、 客户端测试
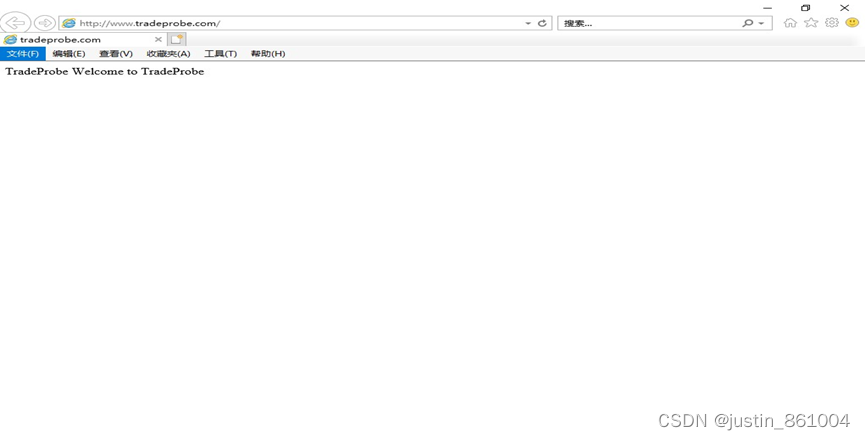
14. 打开IE浏览器,输入www.tradeprobe.com
15. 使用CMD窗口,nslookup查看主从DNS服务
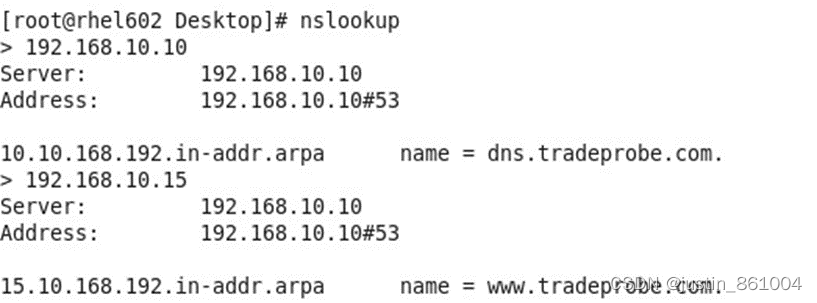
主DNS服务器
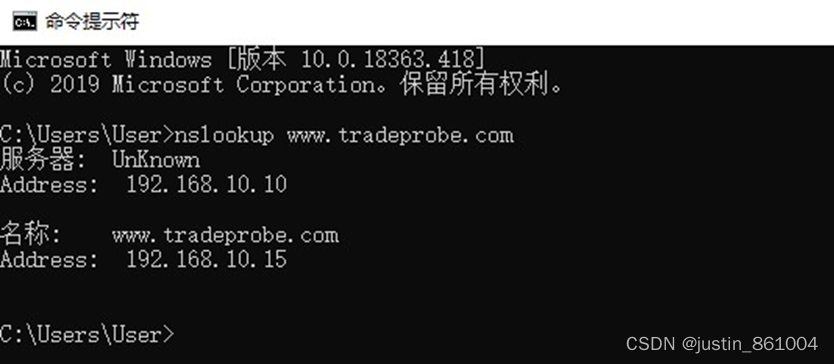
正反向解析DNS域名查询
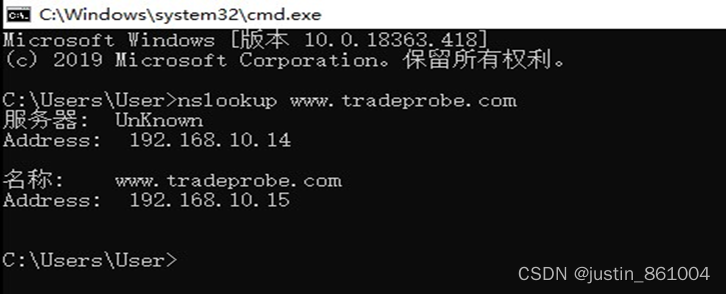
从DNS服务器


 1223
1223


 被折叠的 条评论
为什么被折叠?
被折叠的 条评论
为什么被折叠?
 到【灌水乐园】发言


