


前言:
Mybatis-plus的简单介绍和简单使用,在Mybatis-plus的使用(一)中已经简单介绍了。本篇主要对Mybatis-plus的AR模式、各种插件、逆向工程、自定义全局操作、公共字段自动填充等功能进行讲解和使用。
一、ActiveRecord:
Active Record(活动记录),是一种领域模型模式,特点是一个模型类对应关系型数据库中的一个表,而模型类的一个实例对应表中的一行记录。ActiveRecord 一直广受动态语言( PHP 、 Ruby 等)的喜爱,而 Java 作为准静态语言,对于 ActiveRecord 往往只能感叹其优雅,所以 MP 也在 AR 道路上进行了一定的探索,仅仅需要让实体类继承 Model 类且实现主键指定方法,即可开启 AR 之旅。
1、Entity:
@Data
@NoArgsConstructor
@AllArgsConstructor
@EqualsAndHashCode
@TableName(value = "ts_user")
public class User extends Model<User> implements Serializable {
    //value与数据库主键列名一致,若实体类属性名与表主键列名一致可省略value
    @TableId(value = "id",type = IdType.AUTO)//指定自增策略
    private int id;
    //若没有开启驼峰命名,或者表中列名不符合驼峰规则,可通过该注解指定数据库表中的列名,exist标明数据表中有没有对应列
    @TableField(value = "user_name",exist = true)
    private String userName;
    private String gender;
    private int age;
    private String phone;

    @Override
    protected Serializable pkVal() {
        return id;
    }
}
让实体类继承Model类,重写pkVal方法。
2、Mapper:
public interface UserMapper extends BaseMapper<TsManageUser> {

}
虽然开启了AR不再需要使用mapper了,但是也仍然需要定义,否则使用AR时会报空指针异常。
3、AR使用:
AR插入操作:
@RunWith(SpringJUnit4ClassRunner.class)
@ContextConfiguration({"classpath:spring/spring-common.xml"})
public class TestTest {
    @Test
    public void add(){
        User user = new User();
        user.setUserName("AR");
        user.setGender("男");
        user.setAge(60);
        user.setPhone("1500000");
        user.insert();
    }
}
控制台输出:
==>  Preparing: INSERT INTO ts_user ( user_name, gender, age, phone ) VALUES ( ?, ?, ?, ? )
==> Parameters: AR(String), 男(String), 60(Integer), 1500000(String)
<==    Updates: 1
AR操作是通过对象本身调用相关方法,比如要insert一个user,那就用这个user调用insert方法即可,方法返回值为布尔类型。
AR更新操作:
@RunWith(SpringJUnit4ClassRunner.class)
@ContextConfiguration({"classpath:spring/spring-common.xml"})
public class TestTest {
    @Test
    public void update(){
        User user = new User();
        user.setId(6);
        user.setUserName("mybatis-plus");
        user.setGender("女");
        user.updateById();
    }
}
控制台输出:
==>  Preparing: UPDATE ts_user SET user_name=?, gender=?, age=? WHERE id=?
==> Parameters: mybatis-plus(String), 女(String), 0(Integer), 6(Long)
<==    Updates: 1
AR查询操作:
@RunWith(SpringJUnit4ClassRunner.class)
@ContextConfiguration({"classpath:spring/spring-common.xml"})
public class TestTest {
    @Test
    public void select(){
        User user = new User();

        //1、根据id查询
        user = user.selectById(1);
        System.out.println("user = " + user);

        //2、查询所有
        List<User> userList = user.selectAll();
        System.out.println("userList = " + userList);

        //3、根据条件查询
        List<User> users = user.selectList(new EntityWrapper<User>().like("user_name","mybatis"));
        System.out.println("users = " + users);

        //4、查询符合条件的总数
        int count = user.selectCount(new EntityWrapper<User>().eq("gender","男"));
        System.out.println("count = " + count);

    }
}
控制台输出:
==>  Preparing: SELECT id AS id,user_name AS userName,gender,age,phone FROM ts_user WHERE id=?
==> Parameters: 1(Integer)

==>  Preparing: SELECT id AS id,user_name AS userName,gender,age,phone FROM ts_user

==>  Preparing: SELECT id AS id,user_name AS userName,gender,age,phone FROM ts_user WHERE (user_name LIKE ?)
==> Parameters: %mybatis%(String)

==>  Preparing: SELECT COUNT(1) FROM ts_user WHERE (gender = ?)
==> Parameters: 男(String)
这些方法的用法与BaseMapper提供的方法的用法差不多,只不过这里是实体对象调用,而不是通过Mapper调用。
AR删除操作:
@RunWith(SpringJUnit4ClassRunner.class)
@ContextConfiguration({"classpath:spring/spring-common.xml"})
public class TestTest {
    @Test
    public void delete(){
        User user = new User();

        //1、根据id删除数据 数据库中不存在的数据也是返回true
        user.deleteById(10);

        //2、根据条件删除  没有符合条件的也会返回true
        user.delete(new EntityWrapper<User>()
                .like("user_name","mybatis")
                .eq("gender","男"));

    }
}
控制台输出:
==>  Preparing: DELETE FROM ts_user WHERE id=?
==> Parameters: 10(Integer)

==>  Preparing: DELETE FROM ts_user WHERE (user_name LIKE ? AND gender = ?)
==> Parameters: %mybatis%(String), 男(String)
AR分页操作:
@RunWith(SpringJUnit4ClassRunner.class)
@ContextConfiguration({"classpath:spring/spring-common.xml"})
public class TestTest {
    @Test
    public void selectPage(){
        User user = new User();
        Page<User> page =
                user.selectPage(new Page<>(1,4),
                        new EntityWrapper<User>().like("user_name","mybatis"));

        List<User> userList = page.getRecords();
        System.out.println("userList = " + userList);
    }
}
控制台输出:
==>  Preparing: SELECT id AS id,user_name AS userName,gender,age,phone FROM ts_user WHERE (user_name LIKE ?) LIMIT 0,4
==> Parameters: %mybatis%(String)
这个分页方法和BaseMapper提供的分页一样都是内存分页,并非物理分页,因为sql语句中没用limit,和BaseMapper的selectPage方法一样,配置了分页插件后就可以实现真正的物理分页。AR的分页方法与BaseMapper提供的分页方法不同的是,BaseMapper的selectPage方法返回值是查询到的记录的list集合,而AR的selectPage方法返回的是page对象,该page对象封装了查询到的信息,可以通过getRecords方法获取信息。
二、插件的配置:
1、分页插件:
BaseMapper的selectPage方法和AR提供的selectPage方法都不是物理分页,因为没有limit,需要配置分页插件后才会是真正的物理分页,那么如何配置这个分页插件。
    <!-- 配置mybatis-plus的sqlSessionFactory -->
    <bean id="sqlSessionFactory" class="com.baomidou.mybatisplus.spring.MybatisSqlSessionFactoryBean">
        <property name="dataSource" ref="dataSource" />
        <!-- 控制台输出sql语句 -->
        <property name="configLocation" value="classpath:mybatis-configuration.xml"/>
        <property name="typeAliasesPackage" value="com.project.crm.model"/>
        <!-- 配置插件 -->
        <property name="plugins">
            <list>
                <!-- 分页插件 -->
                <bean class="com.baomidou.mybatisplus.plugins.PaginationInterceptor"/>
            </list>
        </property>
        <!-- 注入全局配置 -->
        <property name="globalConfig" ref="globalConfiguration"/>
        <!-- 导入.xml文件路径 -->
<!--        <property name="mapperLocations" value="classpath:mapper/*Mapper.xml"/>-->
    </bean>
2、性能分析插件:
在plugin的list中添加如下bean即可开启性能分析插件:
        <!-- 输出每条SQL语句及其执行时间,生产环境不建议使用该插件 -->
        <bean class="com.baomidou.mybatisplus.plugins.PerformanceInterceptor">
            <property name="format" value="true"/><!-- 格式化SQL语句 -->
            <property name="maxTime" value="1000"/><!-- sql执行时间超过value值就会停止执行,单位是毫秒 -->
        </bean>
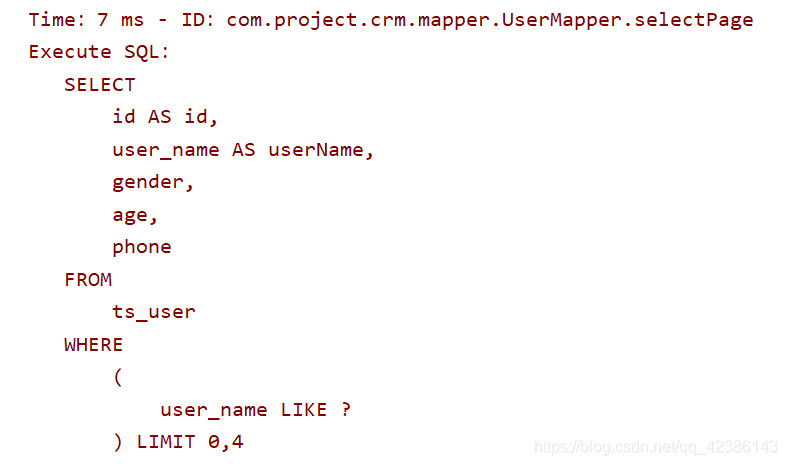
这个性能分析插件配置了两个属性,第一个是格式化sql语句,设置为true后,sql语句格式就像上面的截图中的一样;第二个属性是sql语句执行的最大时间,超过value值就会报错,这里表示超过1000毫秒就会停止执行sql语句。
3、执行分析插件:
 <!-- 对全表的删除或更新操作,就会终止该操作 -->
                <bean class="com.baomidou.mybatisplus.plugins.SqlExplainInterceptor">
                    <property name="stopProceed" value="true"/>
                </bean>
这个插件的stopProceed属性设置为true后,如果执行的是全表更新或者全表删除操作,那就会抛出异常,终止该操作。
Cause: com.baomidou.mybatisplus.exceptions.MybatisPlusException: com.baomidou.mybatisplus.exceptions.MybatisPlusException: Error: Full table operation is prohibited. SQL: DELETE FROM ts_user
	at org.apache.ibatis.exceptions.ExceptionFactory.wrapException(ExceptionFactory.java:30)
	at org.apache.ibatis.session.defaults.DefaultSqlSession.update(DefaultSqlSession.java:200)
	at org.apache.ibatis.session.defaults.DefaultSqlSession.delete(DefaultSqlSession.java:213)
	... 39 more
三、MP的逆向工程:
MyBatis 的代码生成器基于xml文件进行生成,可生成: 实体类Entity、Mapper 接口、Mapper 映射文件。
MyBatis-plus 的代码生成器基于Java代码进行生成,可生成: 实体类Entity(可以选择是否支持 AR)、Mapper 接口、MapperXml 文件、 Service、Controller 。
1、添加依赖:
	<dependency>
      <groupId>org.springframework</groupId>
      <artifactId>spring-tx</artifactId>
      <version>${spring.version}</version>
    </dependency>
	<dependency>
      <groupId>mysql</groupId>
      <artifactId>mysql-connector-java</artifactId>
      <version>5.1.6</version>
    </dependency>
	<!-- mybatis-plus 依赖 -->
	<dependency>
      <groupId>com.baomidou</groupId>
      <artifactId>mybatis-plus</artifactId>
      <version>2.3</version>
    </dependency>
      <!-- mybatis-plus逆向工程需要模板引擎,用freemaker也行 -->
    <dependency>
       <groupId>org.apache.velocity</groupId>
       <artifactId>velocity-engine-core</artifactId>
       <version>2.0</version>
    </dependency>
这些是必须的依赖,为了可以在控制台直观的看到生成情况,可以添加日志包(slf4j-api和slf4j-log4j12),为了让生成的代码不会报错,可以根据情况添加Spring相关的依赖、Lombok依赖等。
2、生成器示例代码:
public class TestTest {
    @Test
    public void testGenerator(){
        AutoGenerator mpg = new AutoGenerator();
        mpg.setTemplateEngine(new FreemarkerTemplateEngine());  // 选择 freemarker 引擎,默认 Veloctiy
        //1、全局配置
        GlobalConfig config = new GlobalConfig();
        config.setActiveRecord(true)//开启AR模式
                .setAuthor("Muma")//设置作者
                .setOutputDir("D:\\IdeaProject\\Mybatis-Plus\\src\\main\\java") //生成路径(一般都是生成在此项目的src/main/java下面)
                .setFileOverride(true)//第二次生成会把第一次生成的覆盖掉
                .setIdType(IdType.AUTO)//主键策略
                .setServiceName("%sService")//生成的service接口名字首字母是否为I,这样设置就没有I
                .setBaseResultMap(true)//生成resultMap
                .setBaseColumnList(true)//在xml中生成基础列
                .setOpen(false) //生成完成是否打开文件所在目录
                .setEnableCache(false);// xml二级缓存
        //.setSwegger(true); //实体属性 Swagger2 注解
        //2、数据源配置
        DataSourceConfig dataSourceConfig = new DataSourceConfig();
        dataSourceConfig.setDbType(DbType.MYSQL)//数据库类型
                .setDriverName("com.mysql.jdbc.Driver")
                .setUrl("jdbc:mysql://数据库名")
                .setUsername("xxx")
                .setPassword("xxx");
        //3、策略配置
        StrategyConfig strategyConfig = new StrategyConfig();
        strategyConfig.setCapitalMode(true)//开启全局大写命名
                .setDbColumnUnderline(true)//表名字段名使用下划线
                .setNaming(NamingStrategy.underline_to_camel)//下划线到驼峰的命名方式
                .setColumnNaming(NamingStrategy.underline_to_camel)//实体字段生成策略
                .setTablePrefix("")//去掉表名表名前缀
                .setEntityLombokModel(true)//使用lombok
                .setInclude("ts_xxx","ts_yyy","ts_zzz")//逆向工程使用的表
                .setRestControllerStyle(true) //@RestController注解
                .entityTableFieldAnnotationEnable(true); //@TableField注解
        //4、包名策略配置
        PackageConfig packageConfig = new PackageConfig();
        packageConfig.setParent("com.project.Muma")//设置包名的parent
                .setMapper("mapper")
                .setService("service")
                .setController("controller")
                .setEntity("model")
                .setXml("mapperXml");//设置xml文件的目录
        //5、整合配置
        AutoGenerator autoGenerator = new AutoGenerator();
        autoGenerator.setGlobalConfig(config)
                .setDataSource(dataSourceConfig)
                .setStrategy(strategyConfig)
                .setPackageInfo(packageConfig);
        //6、执行
        autoGenerator.execute();
    }
}
运行该测试方法,就会在设定的目录下生成Entity实体类、Mapper接口、MapperXml文件、Service、ServiceImpl、Controller代码。
四、自定义全局操作:
(一)、AutoSqlInjector :
BaseMapper提供了17个常用方法,但是有些需求这些方法还是不能很好的实现,大家肯定会想到是在xml文件中写sql语句解决。Mybatis-plus是只做增强不做改变,我们完全可以按照Mybatis的原来的方式来解决。不过Mybatis-plus也提供了另一种解决办法,那就是自定义全局操作。在mapper中自定义一些方法也能像BaseMapper的内置方法,供全局调用。
1、在Mapper接口中定义方法:
public interface UserMapper extends BaseMapper<User> {
    List selectAll();
}

public interface StudentMapper extends BaseMapper<Student> {
    List selectAll();
}
在这两个Mapper接口中都定义了相同的selectAll()方法。
2、编写自定义注入类:
public class MySqlInjector extends AutoSqlInjector {
    @Override
    public void inject(Configuration configuration, MapperBuilderAssistant builderAssistant,
                       Class<?> mapperClass, Class<?> modelClass, TableInfo table) {
        /* 添加一个自定义方法 */
        selectAllUser(mapperClass, modelClass, table);
    }

    public void selectAllUser(Class<?> mapperClass, Class<?> modelClass, TableInfo table) {
        /* 执行 SQL ,动态 SQL 参考类 SqlMethod */
        String sql = "select * from " + table.getTableName();
        /* mapper 接口方法名一致 */
        String method = "selectAll";
        SqlSource sqlSource = languageDriver.createSqlSource(configuration, sql, modelClass);
        this.addSelectMappedStatement(mapperClass, method, sqlSource, modelClass, table);
    }
}
该类继承AutoSqlInjector,重写inject方法。然后编写拼接需要执行的SQL语句,指定Mapper接口中的selectAll()方法,最后调用addSelectMappedStatement()方法。
3、在spring-common.xml配置文件中配置:
 <!-- 自定义注入器 -->
    <bean id="mySqlInjector" class="com.project.crm.model.MySqlInjector"/>
在全局策略配置的bean中引用自定义类的bean。
  <!-- mybatisplus的全局策略配置 -->
    <bean id="globalConfiguration" class="com.baomidou.mybatisplus.entity.GlobalConfiguration">
        <!-- 2.3版本后,驼峰命名默认值就是true,所以可不配置 -->
        <property name="dbColumnUnderline" value="true"/>
        <!-- 全局主键自增策略,0表示auto -->
        <property name="idType" value="0"/>
        <!-- 全局表前缀配置 -->
        <property name="tablePrefix" value="ts_"/>
        <!-- 注入自定义全局操作 -->
        <property name="sqlInjector" ref="mySqlInjector"/>
    </bean>
4、测试:
@RunWith(SpringJUnit4ClassRunner.class)
@ContextConfiguration({"classpath:spring/spring-common.xml"})
public class TestTest {
    @Autowired
    private UserMapper userMapper;
    @Autowired
    private StudentMapper studentMapper;

    @Test
    public void test(){
        List<User> userList = userMapper.selectAll();
        System.out.println("userList = " + userList);

        List<Student> studentList = studentMapper.selectAll();
        System.out.println("studentList = " + studentList);
    }
}
控制台输出:
==> Preparing: select * from ts_user
==> Parameters:

==> Preparing: select * from ts_student
==> Parameters:
userMapper调用selectAll()方法,会查询ts_user表的所有数据,studentMapper调用selectAll()方法,会查询ts_student表的所有数据。说明selectAll方法是有效的。
(二)、逻辑删除:
其实数据并不会轻易的删除掉,毕竟数据收集不易,所以就有了逻辑删除。逻辑删除: 并不会真正的从数据库中将数据删除掉,而是将当前被删除的这条数据中的一个逻辑删除字段置为删除状态,比如该数据有一个字段delete_status,当其值为1表示未删除,值为2表示删除,那么逻辑删除就是将1变成2。
1、数据表:
在数据表中需要添加逻辑删除字段(delete_status)。

2、Entity:
@Data
@NoArgsConstructor
@AllArgsConstructor
@EqualsAndHashCode
public class User implements Serializable {
    private int id;
    private String userName;
    private String gender;
    private int age;
    private String phone;
    @TableLogic //标注逻辑删除属性
    private String deleteStatus;
}
实体类中的logicFlag需要用@TableLogic注解标记。
3、Mapper:
public interface UserMapper extends BaseMapper<User> {

}
4、spring-common.xml配置:
 <!-- 逻辑删除 -->
    <bean id="logicSqlInjector" class="com.baomidou.mybatisplus.mapper.LogicSqlInjector"/>
在全局配置中引入:
 <!-- mybatisplus的全局策略配置 -->
    <bean id="globalConfiguration" class="com.baomidou.mybatisplus.entity.GlobalConfiguration">
        <!-- 2.3版本后,驼峰命名默认值就是true,所以可不配置 -->
        <property name="dbColumnUnderline" value="true"/>
        <!-- 全局主键自增策略,0表示auto -->
        <property name="idType" value="0"/>
        <!-- 全局表前缀配置 -->
        <property name="tablePrefix" value="ts_"/>
        <!-- 注入自定义全局操作 -->
<!--        <property name="sqlInjector" ref="mySqlInjector"/>-->
        <!-- 注入逻辑删除,先要把自定义的注释掉 -->
        <property name="sqlInjector" ref="logicSqlInjector"/>
        <!-- 注入逻辑删除值 -->
        <property name="logicNotDeleteValue" value="1"/><!-- 1是未删除状态 -->
        <property name="logicDeleteValue" value="2"/><!-- 2是删除状态 -->
    </bean>
因为逻辑删除实际上也是一个sqlInjector,所以先要把自己添加的自定义全局操作注释掉。
6、测试:
@RunWith(SpringJUnit4ClassRunner.class)
@ContextConfiguration({"classpath:spring/spring-common.xml"})
public class TestTest {
    @Autowired
    private UserMapper userMapper;

    @Test
    public void test(){
      userMapper.deleteById(1);

 	  userMapper.selectById(1);
    }
}
控制台输出:
==>  Preparing: UPDATE ts_user SET delete_status='2' WHERE id=?
==> Parameters: 1(Integer)

==>  Preparing: SELECT id AS id,user_name AS userName,gender,age,phone,delete_status AS deleteStatus FROM ts_user WHERE id=? AND delete_status='1'
==> Parameters: 1(Integer)
查询时也会加上delete_status="1"这个条件。
五、公共字段自动填充:
当我们进行添加或者更新操作时,对于一些没有设置值的属性,那么在数据表中要么是为null,要么是保留原来的值。但如果我们没有赋值但是也不想让其为空,比如name属性,在添加时如果不赋值让其默认赋上“马云”,更新时不赋值让其默认赋值上“马化腾”,那么就可以用公共字段自动填充来实现这样的操作。
1、Entity使用@TableField注解标记填充字段
@Data
@NoArgsConstructor
@AllArgsConstructor
@EqualsAndHashCode
public class User implements Serializable {
    private int id;
    @TableField(fill = FieldFill.INSERT_UPDATE)//插入和更新时填充
    private String userName;
    private String gender;
    private int age;
    private String phone;
    @TableLogic //标注逻辑删除属性
    private String deleteStatus;
}
2、添加公共字段填充处理器类:
public class MyMetaObjectHandler extends MetaObjectHandler {
    @Override
    public void insertFill(MetaObject metaObject) {
        Object fieldValue = getFieldValByName("user_name",metaObject); //获取需要填充的字段
        if(fieldValue == null){   //如果该字段没有设置值
            setFieldValByName("user_name","马云",metaObject); //那就将其设置为"马云"
        }
    }

    @Override
    public void updateFill(MetaObject metaObject) {
        Object fieldValue = getFieldValByName("user_name",metaObject);//获取需要填充的字段
        if(fieldValue == null){ //如果该字段没有设置值
            setFieldValByName("user_name","马化腾",metaObject);  //那就将其设置为"马化腾"
        }
    }
}
该类继承了MetaObjectHandler类,重写了insertFill和updateFill方法,在这两个方法获取需要填充的字段以及默认填充的值。
3、在spring-common.xml中配置:
<bean id="myMetaObjectHandler" class="com.project.crm.model.MyMetaObjectHandler"/>
在全局配置中引入:
<bean id="globalConfiguration" class="com.baomidou.mybatisplus.entity.GlobalConfiguration">
    <!-- 此处省略其他配置 -->
    <!-- 注入公共字段填充处理器 -->
    <property name="metaObjectHandler" ref="myMetaObjectHandler"/>
</bean>
4、测试:
@RunWith(SpringJUnit4ClassRunner.class)
@ContextConfiguration({“classpath:spring/spring-common.xml”})
public class TestTest {
@Autowired
private UserMapper userMapper;
@Test
public void test1(){
    User user = new User();
    user.setGender("男");
    user.setAge(18);
    user.setPhone("123456");
    userMapper.insert(user);

}

@Test
public void test2(){
    User user = new User();
    user.setGender("男");
    user.setAge(20);
    user.setPhone("654321");
    userMapper.update(user,new EntityWrapper<User>()
            .eq("id",14));

}
}
控制台输出:
==>  Preparing: INSERT INTO ts_user ( user_name, gender, age, phone ) VALUES ( ?, ?, ?, ? )
==> Parameters: 马云(String), 男(String), 18(Integer), 123456(String)

==>  Preparing: UPDATE ts_user SET user_name=?, gender=?, age=?, phone=? WHERE delete_status='1' AND (id = ?)
==> Parameters: 马化腾(String), 男(String), 20(Integer), 654321(String), 14(Integer)
测试成功。
总结:
Mybatis-plus的简单CRUD用法已经在Mybatis-plus的使用(一)中讲解到了,以及本文中讲解的全局策略配置、条件构造器、AR模式、各种插件配置、代码生成器、自定义全局操作、公共字段自动填充等功能。当然Mybatis-plus远远不止这些功能,还有一些其他的功能在后面会继续探索。
以上内容属于个人学习整理,如有错误和不足,欢迎批评指导。


 457
457


 被折叠的 条评论
为什么被折叠?
被折叠的 条评论
为什么被折叠?
 到【灌水乐园】发言


