一、AOP入门
1、业务层
public class AccountServiceImpl implements IAccountService{
public void saveAccount() {
System.out.println("AccountService.saveAccount()");
}
public void updateAccount(int i) {
System.out.println("AccountService.updateAccount()"+i);
}
public int deleteAccount() {
System.out.println("AccountService.deleteAccount()");
return 0;
}
}
2、通知类
public class Logger {
public void printLog() {
System.out.println("Logger.printLog()开始记录日志了");
}
}
3、配置文件
<dependencies>
<dependency>
<groupId>org.springframework</groupId>
<artifactId>spring-context</artifactId>
<version>5.0.2.RELEASE</version>
</dependency>
<dependency>
<groupId>org.aspectj</groupId>
<artifactId>aspectjweaver</artifactId>
<version>1.8.7</version>
</dependency>
</dependencies>
<?xml version="1.0" encoding="UTF-8"?>
<beans xmlns="http://www.springframework.org/schema/beans"
xmlns:xsi="http://www.w3.org/2001/XMLSchema-instance"
xmlns:aop="http://www.springframework.org/schema/aop"
xsi:schemaLocation="http://www.springframework.org/schema/beans
http://www.springframework.org/schema/beans/spring-beans.xsd
http://www.springframework.org/schema/aop
http://www.springframework.org/schema/aop/spring-aop.xsd">
<bean id="accountService" class="com.itheima.service.impl.AccountServiceImpl"></bean>
<bean id="logger" class="com.itheima.service.utils.Logger"></bean>
<aop:config>
<aop:aspect id="logAdvice" ref="logger">
<aop:before method="printLog" pointcut="execution(* com.itheima.service.impl.*.*(*))"/>
</aop:aspect>
</aop:config>
</beans>
4、测试类
public class AOPTest {
public static void main(String[] args) {
ApplicationContext ac = new ClassPathXmlApplicationContext("bean.xml");
IAccountService as = (IAccountService) ac.getBean("accountService");
as.saveAccount();
as.deleteAccount();
as.updateAccount(3);
}
}
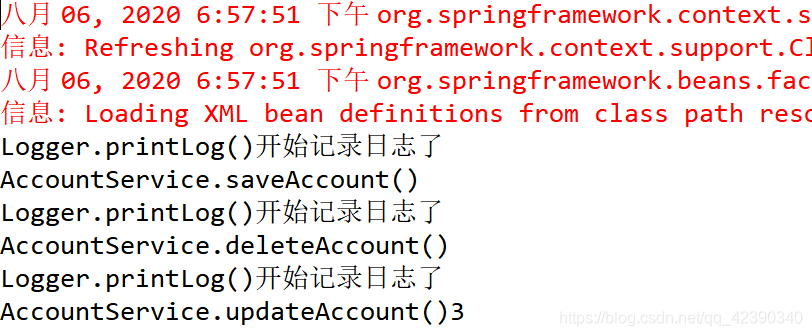
5、执行结果
二、通知类型
1、业务层
public class AccountServiceImpl implements IAccountService{
public void saveAccount() {
System.out.println("AccountService.saveAccount()");
}
public void updateAccount(int i) {
System.out.println("AccountService.updateAccount()"+i);
}
public int deleteAccount() {
System.out.println("AccountService.deleteAccount()");
return 0;
}
}
2、通知类
public class Logger {
public void beforePrintLog() {
System.out.println("前置通知Logger.beforePrintLog()");
}
public void afterReturningPrintLog() {
System.out.println("后置通知Logger.afterReturningPrintLog()");
}
public void afterThrowingPrintLog() {
System.out.println("异常通知Logger.afterThrowingPrintLog()");
}
public void afterPrintLog() {
System.out.println("最终通知Logger.afterPrintLog()");
}
public Object aroundPringLog(ProceedingJoinPoint pjp ) {
Object rtValue = null;
System.out.println("环绕通知 Logger.aroundPringLog()。。。前置");
try {
rtValue = pjp.proceed();
System.out.println("环绕通知 Logger.aroundPringLog()。。。后置");
return rtValue;
} catch (Throwable e) {
System.out.println("环绕通知 Logger.aroundPringLog()...异常");
throw new RuntimeException();
}finally {
System.out.println("环绕通知 Logger.aroundPringLog()。。。最终");
}
}
}
3、配置文件
<dependencies>
<dependency>
<groupId>org.springframework</groupId>
<artifactId>spring-context</artifactId>
<version>5.0.2.RELEASE</version>
</dependency>
<dependency>
<groupId>org.aspectj</groupId>
<artifactId>aspectjweaver</artifactId>
<version>1.8.7</version>
</dependency>
</dependencies>
<?xml version="1.0" encoding="UTF-8"?>
<beans xmlns="http://www.springframework.org/schema/beans"
xmlns:xsi="http://www.w3.org/2001/XMLSchema-instance"
xmlns:aop="http://www.springframework.org/schema/aop"
xsi:schemaLocation="http://www.springframework.org/schema/beans
http://www.springframework.org/schema/beans/spring-beans.xsd
http://www.springframework.org/schema/aop
http://www.springframework.org/schema/aop/spring-aop.xsd">
<bean id="accountService" class="com.itheima.service.impl.AccountServiceImpl"></bean>
<bean id="logger" class="com.itheima.service.utils.Logger"></bean>
<aop:config>
<aop:pointcut id="pt1" expression="execution(* com.itheima.service.impl.*.*(..))" />
<aop:aspect id="logAdvice" ref="logger">
<aop:before method="beforePrintLog" pointcut-ref="pt1"/>
<aop:after-returning method="afterReturningPrintLog" pointcut-ref="pt1"/>
<aop:after-throwing method="afterThrowingPrintLog" pointcut-ref="pt1"/>
<aop:after method="afterPrintLog" pointcut-ref="pt1"/>
</aop:aspect>
</aop:config>
</beans>
4、测试类
public class AOPTest {
public static void main(String[] args) {
ApplicationContext ac = new ClassPathXmlApplicationContext("bean.xml");
IAccountService as = (IAccountService) ac.getBean("accountService");
as.saveAccount();
}
}
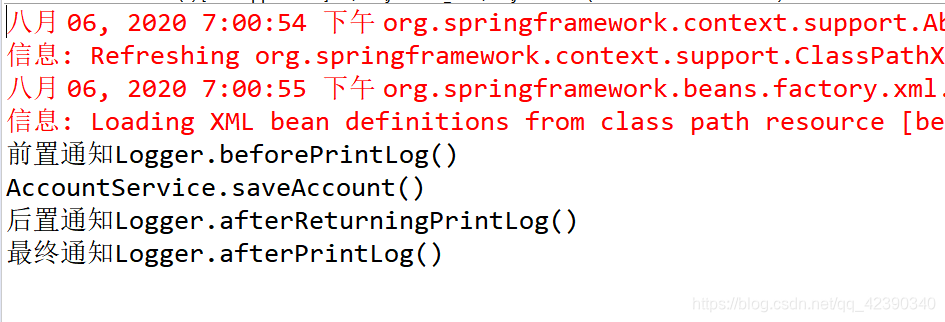
5、执行结果
三、基于注解的AOP
1、业务层
@Service("accountService")
public class AccountServiceImpl implements IAccountService{
public void saveAccount() {
System.out.println("AccountService.saveAccount()");
}
public void updateAccount(int i) {
System.out.println("AccountService.updateAccount()"+i);
}
public int deleteAccount() {
System.out.println("AccountService.deleteAccount()");
return 0;
}
}
2、通知类
@Component("logger")
@Aspect
public class Logger {
@Pointcut("execution(* com.itheima.service.impl.*.*(..))")
private void pt1() {}
@Before("pt1()")
public void beforePrintLog() {
System.out.println("前置通知Logger.beforePrintLog()");
}
@AfterReturning("pt1()")
public void afterReturningPrintLog() {
System.out.println("后置通知Logger.afterReturningPrintLog()");
}
@AfterThrowing("pt1()")
public void afterThrowingPrintLog() {
System.out.println("异常通知Logger.afterThrowingPrintLog()");
}
@After("pt1()")
public void afterPrintLog() {
System.out.println("最终通知Logger.afterPrintLog()");
}
}
3、配置文件
<dependencies>
<dependency>
<groupId>org.springframework</groupId>
<artifactId>spring-context</artifactId>
<version>5.0.2.RELEASE</version>
</dependency>
<dependency>
<groupId>org.aspectj</groupId>
<artifactId>aspectjweaver</artifactId>
<version>1.8.7</version>
</dependency>
</dependencies>
<?xml version="1.0" encoding="UTF-8"?>
<beans xmlns="http://www.springframework.org/schema/beans"
xmlns:xsi="http://www.w3.org/2001/XMLSchema-instance"
xmlns:aop="http://www.springframework.org/schema/aop"
xmlns:context="http://www.springframework.org/schema/context"
xsi:schemaLocation="http://www.springframework.org/schema/beans
http://www.springframework.org/schema/beans/spring-beans.xsd
http://www.springframework.org/schema/aop
http://www.springframework.org/schema/aop/spring-aop.xsd
http://www.springframework.org/schema/context
http://www.springframework.org/schema/context/spring-context.xsd">
<context:component-scan base-package="com.itheima"></context:component-scan>
<aop:aspectj-autoproxy></aop:aspectj-autoproxy>
</beans>
4、测试类
public class AOPTest {
public static void main(String[] args) {
ApplicationContext ac = new ClassPathXmlApplicationContext("bean.xml");
IAccountService as = (IAccountService) ac.getBean("accountService");
as.saveAccount();
}
}
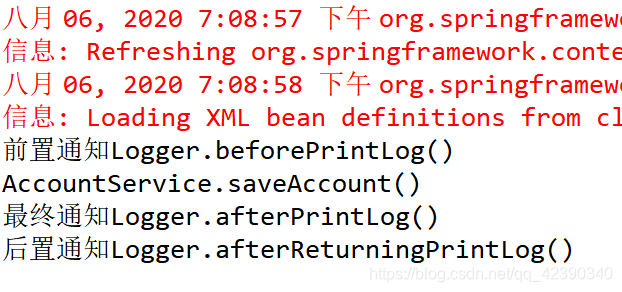
5、执行结果
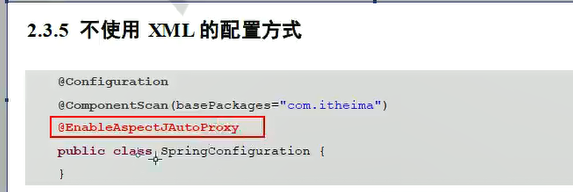
6、注意:使用纯注解


 5889
5889

 被折叠的 条评论
为什么被折叠?
被折叠的 条评论
为什么被折叠?
 到【灌水乐园】发言


