


不废话了,oss是什么这些去姑够或度娘查;
我一springboot项目为例,
配置oss服务器
首先配置图片服务器的配置信息
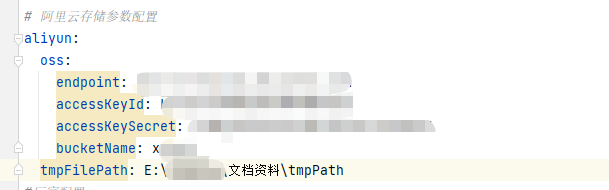
图中oss为oss服务器的配置信息,tmpFilePath是本地存放临时图的地址
图片数据转码
为了安全图片肯定是要结果转码的,至于什么转码方式就根据业务需要了。
我们这里的图片经过URL传递过来,且使用了URL与base64双重编码,所以这里需要用URLDecoder解码后才可用。如果你有现成的图片可以省略这一步操作

        String fileName = imagebase64Utils.GenerateImage(ImageStr, UserId);
        String fileUrl = ossUtil.uploadFile(fileName);
如果你的图片已经有了 可忽略这一步操作
imagebase64Utils
import org.apache.commons.io.IOUtils;
import sun.misc.BASE64Decoder;
import sun.misc.BASE64Encoder;

import org.springframework.beans.factory.annotation.Value;
import org.springframework.stereotype.Component;
import java.io.*;
import java.util.Date;

@Component
public class Imagebase64Utils {
    @Value("${aliyun.tmpFilePath}")
    private String tmpFilePath ;

    public  String GenerateImage(String imgData,Long UserId) { // 对字节数组字符串进行Base64解码并生成图片
        //找了一个sun公司包下的

        Date date = new Date();
        String fileName = tmpFilePath+UserId+date.toString().split(" ")+".png";

            //byte[] decode = Base64Utils.decode(base64);方法一公司的包
        String tempstr = null;
        try {
            tempstr = java.net.URLDecoder.decode(imgData, "UTF-8");

        BASE64Decoder decoder = new BASE64Decoder();//sun的
            byte[] bytes = decoder.decodeBuffer(tempstr);

            IOUtils.write(bytes, new FileOutputStream(fileName));
        } catch (Exception e) {
            e.printStackTrace();
        }
    return fileName;
    }
}
图中的
@Value("${aliyun.tmpFilePath}")
private String tmpFilePath ;
是从yml配置文件中读取配置信息数据的,需要加上@Component注解

oss连接使用
OssUtil
import com.aliyun.oss.OSS;
import com.aliyun.oss.OSSClientBuilder;
import com.aliyun.oss.model.PutObjectRequest;
import com.aliyun.oss.model.PutObjectResult;
import org.slf4j.Logger;
import org.slf4j.LoggerFactory;
import org.springframework.beans.factory.annotation.Autowired;
import org.springframework.beans.factory.annotation.Value;
import org.springframework.stereotype.Component;

import java.io.*;
import java.net.URL;
import java.util.Date;

/**
 * 阿里云OSS服务器工具类
 */
@Component
public class OssUtil {
    protected static final Logger log = LoggerFactory.getLogger(OssUtil.class);

    @Value("${aliyun.oss.endpoint}")
    private String endpoint;
    @Value("${aliyun.oss.accessKeyId}")
    private String accessKeyId;
    @Value("${aliyun.oss.accessKeySecret}")
    private String accessKeySecret;
    @Value("${aliyun.oss.bucketName}")
    private String bucketName;
    @Value("${aliyun.tmpFilePath}")
    private String tmpFilePath ;

    Imagebase64Utils imagebase64Utils = new Imagebase64Utils();
    /**
     * 文件上传
     * @param fileName
     * @return 返回完整URL地址
     */
    public String   uploadFile(String fileName) {


        OSS ossClient = new OSSClientBuilder().build(endpoint, accessKeyId, accessKeySecret);
        // 创建PutObjectRequest对象。
        // 填写Bucket名称、Object完整路径和本地文件的完整路径。Object完整路径中不能包含Bucket名称。
        // 如果未指定本地路径,则默认从示例程序所属项目对应本地路径中上传文件。
        File file = new File(fileName);

        PutObjectRequest putObjectRequest = new PutObjectRequest("xroad", file.getName(), file);
       // 上传文件。
        PutObjectResult res =ossClient.putObject(putObjectRequest);
        // 生成URL
        URL url = ossClient.generatePresignedUrl(bucketName, file.getName(), new Date(System.currentTimeMillis() +  3600L * 1000 * 24 * 360));
        // 关闭OSSClient。
        ossClient.shutdown();
        System.gc();
        file.delete();
        return url.toString();
    }
}
如此一顿操作后,若你的oss服务器配置成功,图片就一局上传好了,最后的url即是你oss图片的地址,可以存储在数据库,也可直接在页面展示
vue中如此操作
 <template slot-scope="scope">
            <img :src="scope.row.faceImg" width="40" height="40" />
      </template>
看其中的img标签就好了
这里的faceImg就是对于url.toString的值
代码中有使用的system.gc对进程进行处理,处理以后图片才处于未使用状态,才能执行图片删除操作。这里是不完美的。希望有大神指点。


 2460
2460


 被折叠的 条评论
为什么被折叠?
被折叠的 条评论
为什么被折叠?
 到【灌水乐园】发言


