


文章目录
前言
项目背景:在某医院的急诊死亡预测系统中,后端通过接受前端传入的病人体征参数然后通过机器学习算法,计算出风险值后,判断该病人是否会有生命危险,然后通过后端给用户端发送消息,让用户(医生)能及时的抢救病人。那么后端如何实现向前端发消息呢,其实有两种选择一种是websocket一种就是本文用到的SSE。本项目只是独立于原项目的一个小demo与原项目无关。本demo前端采用react框架搭建,使用的antd组件,由于本文主要介绍的是后端技术,前端代码不会详细介绍,前端只是一个空壳,代码不难,很容易看懂,而且博主已经差不多半年没碰前端了。
一、前导知识
1.1 SSE简介
SSE(Server-Sent Event)直译为服务器发送事件,顾名思义,也就是客户端可以获取到服务器发送的事件我们常见的 http 交互方式是客户端发起请求,服务端响应,然后一次请求完毕;但是在 SSE 的场景下,客户端发起请求,连接一直保持,服务端有数据就可以返回数据给客户端,这个返回可以是多次间隔的方式。
SSE的特点总结为两个:
1. 长连接
2. 服务端可以向客户端推送消息
3. 客户端自动重连
1.2 各通信技术对比
| Ajax短轮询 | Comet | WebSocket | SSE |
|---|---|---|---|
| http端轮询是服务器收到请求不管是否有数据都直接响应 http 请求; 浏览器受到 http 响应隔一段时间在发送同样的http 请求查询是否有数据; | http 长轮询是服务器收到请求后如果有数据, 立刻响应请求; 如果没有数据就会 hold 一段时间,这段时间内如果有数据立刻响应请求; 如果时间到了还没有数据, 则响应 http 请求;浏览器受到 http 响应后立在发送一个同样http 请求查询是否有数据; | WebSocket的实现了一次连接,双方通信的功能。首先由客户端发出WebSocket请求,服务器端进行响应,实现类似TCP握手的动作。这个连接一旦建立起来,就保持在客户端和服务器之间,两者之间可以直接的进行数据的互相传送。 | 在 sse 的场景下,客户端发起请求,连接一直保持,服务端有数据就可以返回数据给客户端,这个返回可以是多次间隔的方式。sse 是单通道,只能服务端向客户端发消息 |
1.3 后端SseEmitter 核心方法
后端中实现SSE 主要依靠的就是SseEmitter这个类,下面对于它的核心方法如下:
1. send(): 发送数据,如果传入的是一个非SseEventBuilder对象,那么传递参数会被封装到 data 中
2. complete(): 表示执行完毕,会断开连接
3. onTimeout(): 超时回调触发
4. onCompletion(): 结束之后的回调触发
1.4 前端EventSource核心方法
前端中实现SSE主要是声明一个EventSource 然后调用它的addEventListener,实现对消息的接收,连接的建立与连接的断开进行监听。从而实现相应的功能。
1. source.addEventListener(‘open’,(e)=>{ }) :连接建立
2. source.addEventListener(‘message’,(e)=>{ }) :监听消息
3. source.addEventListener(‘error’,(e)=>{ }) :连接出错
二、后端实现
1.控制层 SseController
SseController主要有4个方法,分别是
1.建立连接的createConnect(),
2.向所有的客户端进行广播的sendMessageToAllClient()方法,
3.根据客户端id向某一客户端单独发送消息的sendMessageToOneClient()方法接受的参数为MessageVo,该类为自定义类。
4.请求关闭连接的方法closeConnect()
package com.ypf.controller;

import com.ypf.domain.MessageVo;
import com.ypf.service.Impl.SseServiceImpl;
import org.springframework.beans.factory.annotation.Autowired;
import org.springframework.web.bind.annotation.*;
import org.springframework.web.servlet.mvc.method.annotation.SseEmitter;

import javax.websocket.server.PathParam;

@RestController
@RequestMapping("/sse")
public class SseController {
    @Autowired
    private SseServiceImpl sseService;

    @CrossOrigin
    @GetMapping("/createConnect")
    public SseEmitter createConnect(String clientId){
       return sseService.createConnect(clientId);
    }

    @CrossOrigin
    @PostMapping("/broadcast")
    public void sendMessageToAllClient(@RequestBody(required = false) String msg){
        sseService.sendMessageToAllClient(msg);
    }

    @CrossOrigin
    @PostMapping("/sendMessage")
    public void sendMessageToOneClient(@RequestBody(required = false) MessageVo messageVo){
        if (messageVo.getClientId().isEmpty()){
            return;
        }
        sseService.sendMessageToOneClient(messageVo.getClientId(),messageVo.getMsg());
    }

    @CrossOrigin
    @GetMapping("/closeConnect")
    public void closeConnect(@RequestParam(required = true) String clientId){
        sseService.closeConnect(clientId);
    }

}
2.SseServiceImpl层
整个后端中实现类中都是围绕着SseEmitter这个类的四个核心方法来写,具体代码如下:
package com.ypf.service.Impl;

import com.ypf.service.SseService;
import com.ypf.util.ResponseResult;
import org.springframework.http.MediaType;
import org.springframework.stereotype.Service;
import org.springframework.util.ObjectUtils;
import org.springframework.web.servlet.mvc.method.annotation.SseEmitter;

import java.io.IOException;
import java.util.*;
import java.util.concurrent.ConcurrentHashMap;
import java.util.function.Consumer;

@Service
public class SseServiceImpl implements SseService {

    // 创建一个容器来存储所有的 SseEmitter 使用ConcurrentHashMap 是因为它是线程安全的。
    private static Map<String, SseEmitter> sseCache = new ConcurrentHashMap<>();

    private static Integer num=0;

    /**
     * 模拟数据
     */
    private static List<String> msgList = new ArrayList<String>(){{
        add("早上好呀!");
        add("新的一天要加油呀!");
        add("要天天开心呀!");
        add("你可以的呀!");
    }};

    @Override
    public SseEmitter createConnect(String clientId) {
        // 设置过期时间 0 表示 不过期 默认值位30秒
        SseEmitter sseEmitter = new SseEmitter(0L);
        // 如果clientId 为空 后端自动创建一个clientId 并返回给前端
        if (ObjectUtils.isEmpty(clientId)){
            clientId = UUID.randomUUID().toString().replaceAll("-","");
        }
        // 注册回调
        sseEmitter.onCompletion(completionCallBack(clientId));     // 长链接完成后回调接口(即关闭连接时调用)
        sseEmitter.onTimeout(timeoutCallBack(clientId));        // 连接超时回调
        sseEmitter.onError(errorCallBack(clientId));          // 推送消息异常时,回调方法

        // 存入容器中
        sseCache.put(clientId,sseEmitter);
        System.out.println("创建新的sse连接,当前用户:"+clientId+"   累计用户数:"+sseCache.size());
        try {
            List<ResponseResult> list = new ArrayList<>();
            list.add(new ResponseResult(0,clientId));
            sseEmitter.send(SseEmitter.event().data(list,MediaType.APPLICATION_JSON));
        }catch (Exception e){
            System.out.println("创建ss连接异常,客户端id:"+clientId);
            e.printStackTrace();
        }
        return sseEmitter;
    }

    /**
     * 发送消息给所有客户端
     * @param msg
     */
    @Override
    public void sendMessageToAllClient(String msg) {
        if (ObjectUtils.isEmpty(sseCache)){
            return;
        }

        List<ResponseResult> list = new ArrayList<>();
        // 判断发送的消息是否为空
        if (!ObjectUtils.isEmpty(msg)){
            ResponseResult responseResult = new ResponseResult(200,msg);
            list.add(responseResult);
        }else {
             ResponseResult responseResult = new ResponseResult(200,getMessage());
             list.add(responseResult);
        }

        for (Map.Entry<String, SseEmitter> entry : sseCache.entrySet()) {
            sendMsgToClientByClientId(entry.getKey(),list,entry.getValue());
        }
    }

    /**
     * 根据clientId发送消息给某一客户端
     * @param clientId
     * @param msg
     */
    @Override
    public void sendMessageToOneClient(String clientId, String msg) {
        List<ResponseResult> list = new ArrayList<>();
        // 判断发送的消息是否为空
        if (!ObjectUtils.isEmpty(msg)){
            ResponseResult responseResult = new ResponseResult(200,msg);
            list.add(responseResult);
        }else {
            ResponseResult responseResult = new ResponseResult(200,getMessage());
            list.add(responseResult);
        }
        sendMsgToClientByClientId(clientId,list,sseCache.get(clientId));
    }

    /**
     * 关闭连接
     * @param clientId
     */
    @Override
    public void closeConnect(String clientId) {
        // 获取对应的sseEmitter
        SseEmitter sseEmitter = sseCache.get(clientId);

        if (sseEmitter!=null){
            sseEmitter.complete();
            removeUser(clientId);
        }
    }


    /**
     * 获取写死的消息
     * @return
     */
    private String getMessage(){
        String result = msgList.get(num);
        num = num+1;
        num = num%4;
       return result;
    }


    /**
     * 长链接完成后回调接口(即关闭连接时调用)
     * @param clientId
     * @return
     */
    private Runnable completionCallBack(String clientId) {
        return () -> {
            System.out.println("结束连接:"+clientId);
            removeUser(clientId);
        };
    }

    /**
     * 连接超时回调
     * @param clientId
     * @return
     */
    private Runnable timeoutCallBack(String clientId){
        return ()->{
            System.out.println("连接超时:"+clientId);
            removeUser(clientId);
        };
    }

    /**
     * 根据客户端id 发送给某一客户端
     * @param clientId
     * @param ResponseResultList
     * @param sseEmitter
     */
    private void sendMsgToClientByClientId(String clientId, List<ResponseResult> ResponseResultList, SseEmitter sseEmitter){
        if (sseEmitter == null){
            System.out.println("推送消息失败:客户端:"+clientId+" 未创建长连接,失败消息:"+ResponseResultList.toString());
            return;
        }
        SseEmitter.SseEventBuilder sendData = SseEmitter.event().id("201").data(ResponseResultList, MediaType.APPLICATION_JSON);
        try {
            sseEmitter.send(sendData);
        } catch (IOException e) {
            // 推送消息失败,记录错误日志,进行重推
            System.out.println(" 推送消息失败:"+ResponseResultList.toString());
            boolean isSuccess = true;
            for (int i = 0;i<5;i++){
                try {
                    Thread.sleep(1000);
                    sseEmitter = sseCache.get(clientId);
                    if(sseEmitter == null){
                        System.out.println(ResponseResultList.toString()+"消息的"+"第"+i+1+"次"+"重推失败,未创建长链接");
                        continue;
                    }
                    sseEmitter.send(sendData);
                }catch (Exception ex){
                    System.out.println(ResponseResultList.toString()+"消息的"+"第"+i+1+"次"+"重推失败");
                    ex.printStackTrace();
                    continue;
                }
                System.out.println(ResponseResultList.toString()+"消息的"+"第"+i+1+"次"+"重推成功");
                return;
            }
        }
    }

    /**
     * 推送消息异常时,回调方法
     * @param clientId
     * @return
     */
    private Consumer<Throwable> errorCallBack(String clientId){
        return throwable -> {
            System.out.println("连接异常:客户端ID:"+clientId);

            // 推送消息失败后 每隔1s 推送一次 推送5次
            for (int i = 0;i<5;i++){
                try {
                    Thread.sleep(1000);
                    SseEmitter sseEmitter = sseCache.get(clientId);
                    if (sseEmitter == null){
                        System.out.println("第"+i+"次消息重推失败,未获取到"+clientId+"对应的长链接");
                        continue;
                    }
                    sseEmitter.send("失败后重新推送");
                }catch (Exception e){
                    e.printStackTrace();
                }
            }
        };
    }


    /**
     * 删除用户
     * @param clientId
     */
    private void  removeUser(String clientId){
        sseCache.remove(clientId);
        System.out.println("移除用户:"+clientId);
    }
}
3前端实现
前端主要采用的是react框架进行搭建,依据EventSource中的三个核心方法,监听到相应的变化后做出一定的状态改变,具体就不一一赘述了,有疑问可在评论区留言或者私信我。
import React, { Component } from 'react'
import { Button , Comment, Tooltip, Avatar,List,Steps, notification, Divider, Space} from 'antd'
import moment from 'moment';
import { ExclamationCircleOutlined } from '@ant-design/icons';
import axios from 'axios';

import "./App.css"


const openNotification = (msg) => {
    notification.open({
      message: '系统消息',
      description:
        msg,
      icon:<ExclamationCircleOutlined style={{ color: '#108ee9' }} />,
      duration:5
    });
  };

export default class App extends Component {
    state={
        current:0,
        status:"wait",
        systemMessages:[{msg:'【hello ypf】 请创建连接以获取后台消息!'}],
    }


    // 新建Sse连接
    createSseConnect=()=>{
        if(window.EventSource){

            var source = new EventSource('http://localhost:3000/api1/sse/createConnect?clientId=001')

            // 监听打开事件
            source.addEventListener('open',(e)=>{
               console.log("打开连接 onopen==>",e)
               this.setState({current:1,status:'process'})
               openNotification('建立连接成功')
            })

            // 监听消息事件
            source.addEventListener("message",(e)=>{
                let systemMessages = this.state.systemMessages;
                const data =JSON.parse(e.data)
                const code = data[0].code
                const msg = data[0].msg

                if(code===200){
                   openNotification(msg);
                   systemMessages.push({"msg":msg})
                   this.setState({systemMessages:systemMessages})
                }else if(code === 0){
                    // 然后状态码为000 把客户端id储存在本地
                  localStorage.setItem("clientId",msg)
                }
                console.log(systemMessages);

            })

            // 监听错误事件
            source.addEventListener("error",(e)=>{
               let systemMessages = this.state.systemMessages;

                openNotification('已断开与后端连接')
                systemMessages.push({"msg":"已断开与后端连接"})

                this.setState({current:0,status:'error',systemMessages:systemMessages})

            })

            // 关闭连接
            source.close = function(e){
                console.log("断开 οnerrοr==>",e)
           }

        }else {
            alert("该浏览器不支持sse")
        }
    }

    // 获取系统消息
    getSystemMessage=()=>{
        // 发送网络请求
        axios.post(`http://localhost:3000/api1/sse/broadcast`).then(
        response=>{

        },
        error=>{

        }
      )
    }

    // 断开连接
    closeSseConnect=()=>{

        // 先获取到本地存储的clientId 再
        const clientId = localStorage.getItem("clientId")
        if(clientId===null){
           return
        }

        // 发送网络请求
        axios.get(`http://localhost:3000/api1/sse/closeConnect?clientId=${clientId}`).then(
            response=>{

            },
            error=>{

            }
        )

    }

  render() {
    const { Step } = Steps;
    const {current,status,systemMessages} = this.state;

    return (
      <div className='center'>
        <Button type='primary' style={{ marginRight:20}} onClick={()=>{this.createSseConnect()}}>创建连接</Button>
        <Button type='primary' style={{ marginRight:20}} onClick={()=>{this.getSystemMessage()}}>获取消息</Button>
        <Button type='primary' danger onClick={()=>{this.closeSseConnect()}}>断开连接</Button>

        <Steps direction="vertical" current={current} status={status}>
            <Step title="成功建立SSE连接" description="successful connected" />
            <Step title="接收后端通知中" description="waiting for message" />
        </Steps>

        {
           systemMessages.map((systemMessage)=>{
               return(
                    <Comment
                        key={systemMessage.msg}
                        author={<a>系统消息</a>}
                        avatar={<Avatar src="https://joeschmoe.io/api/v1/random" alt="Han Solo" />}
                        content={
                            <p>
                            {systemMessage.msg}
                            </p>
                        }
                        datetime={
                            <Tooltip title={moment().format('YYYY-MM-DD HH:mm:ss')}>
                            <span>{moment().fromNow()}</span>
                            </Tooltip>
                        }

                        className='comment'
                    />
               )

           })
        }


      </div>

    )
  }
}
4 整体演示
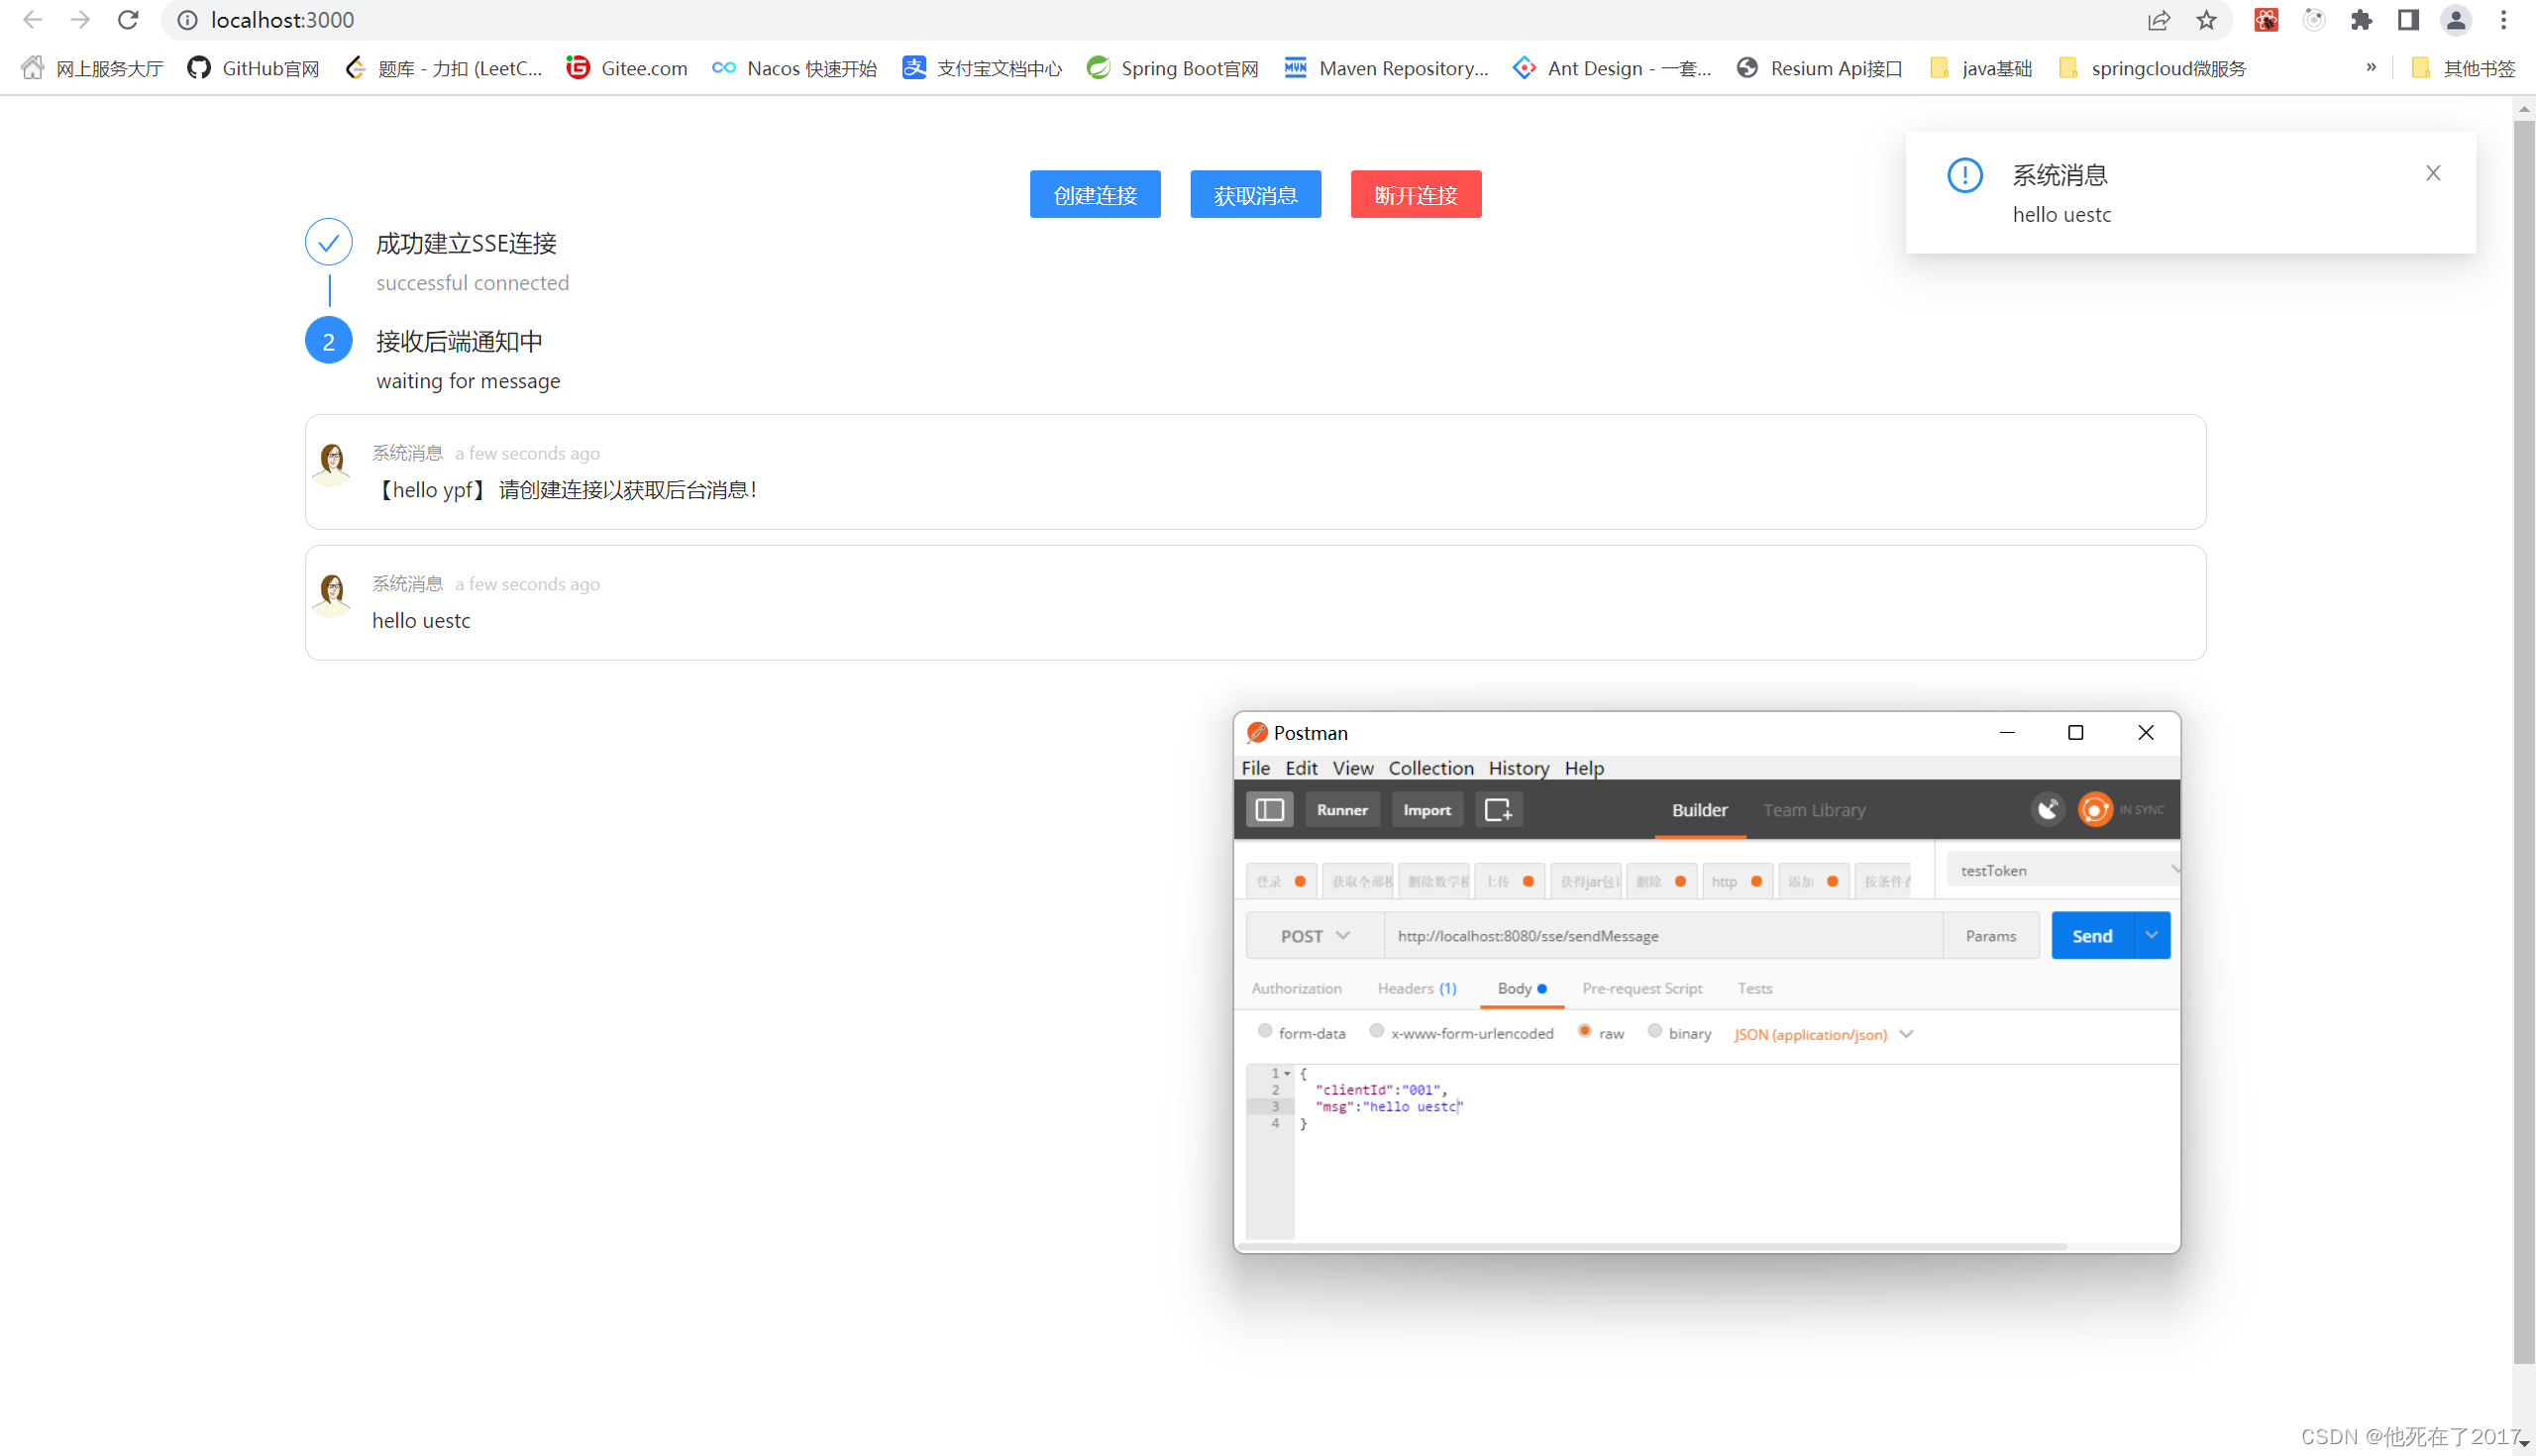
使用步骤:首先启动后端服务器,然后再启动前端。打开前端后点击创建连接,连接成功后,可以点击获取消息,或者使用postman访问http://localhost:8080/sse/sendMessage 然后输入发送消息内容。具体如图所示:
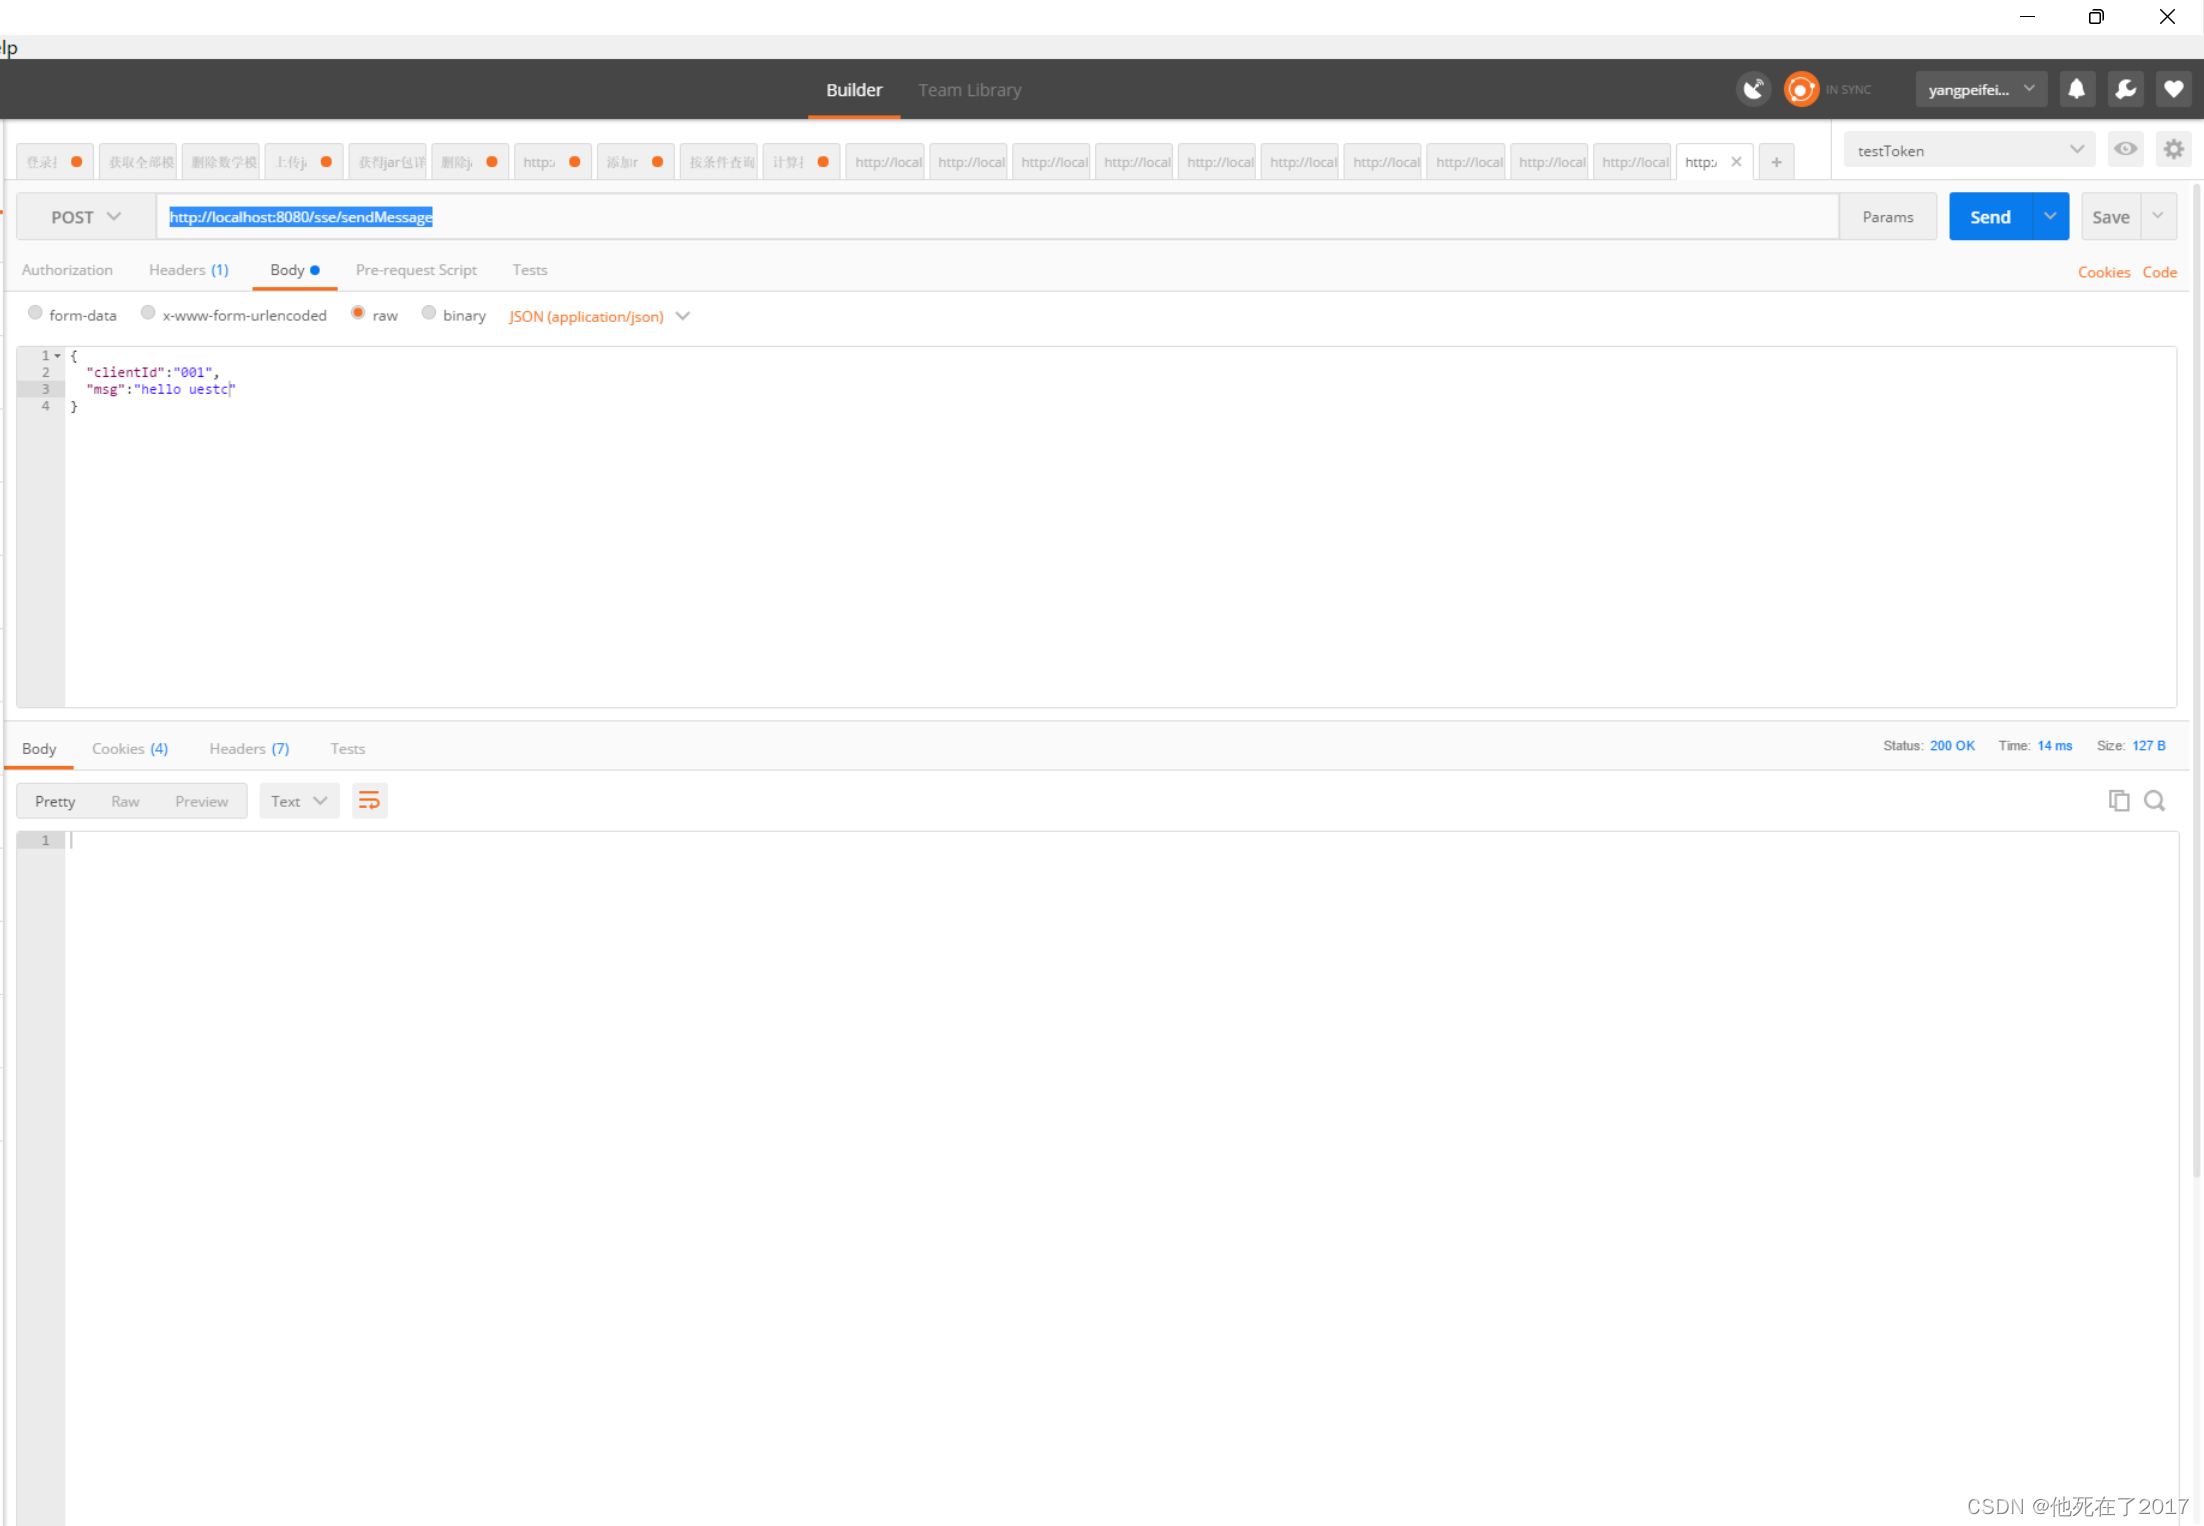
然后点击发送即可在前端收到后端推送的消息
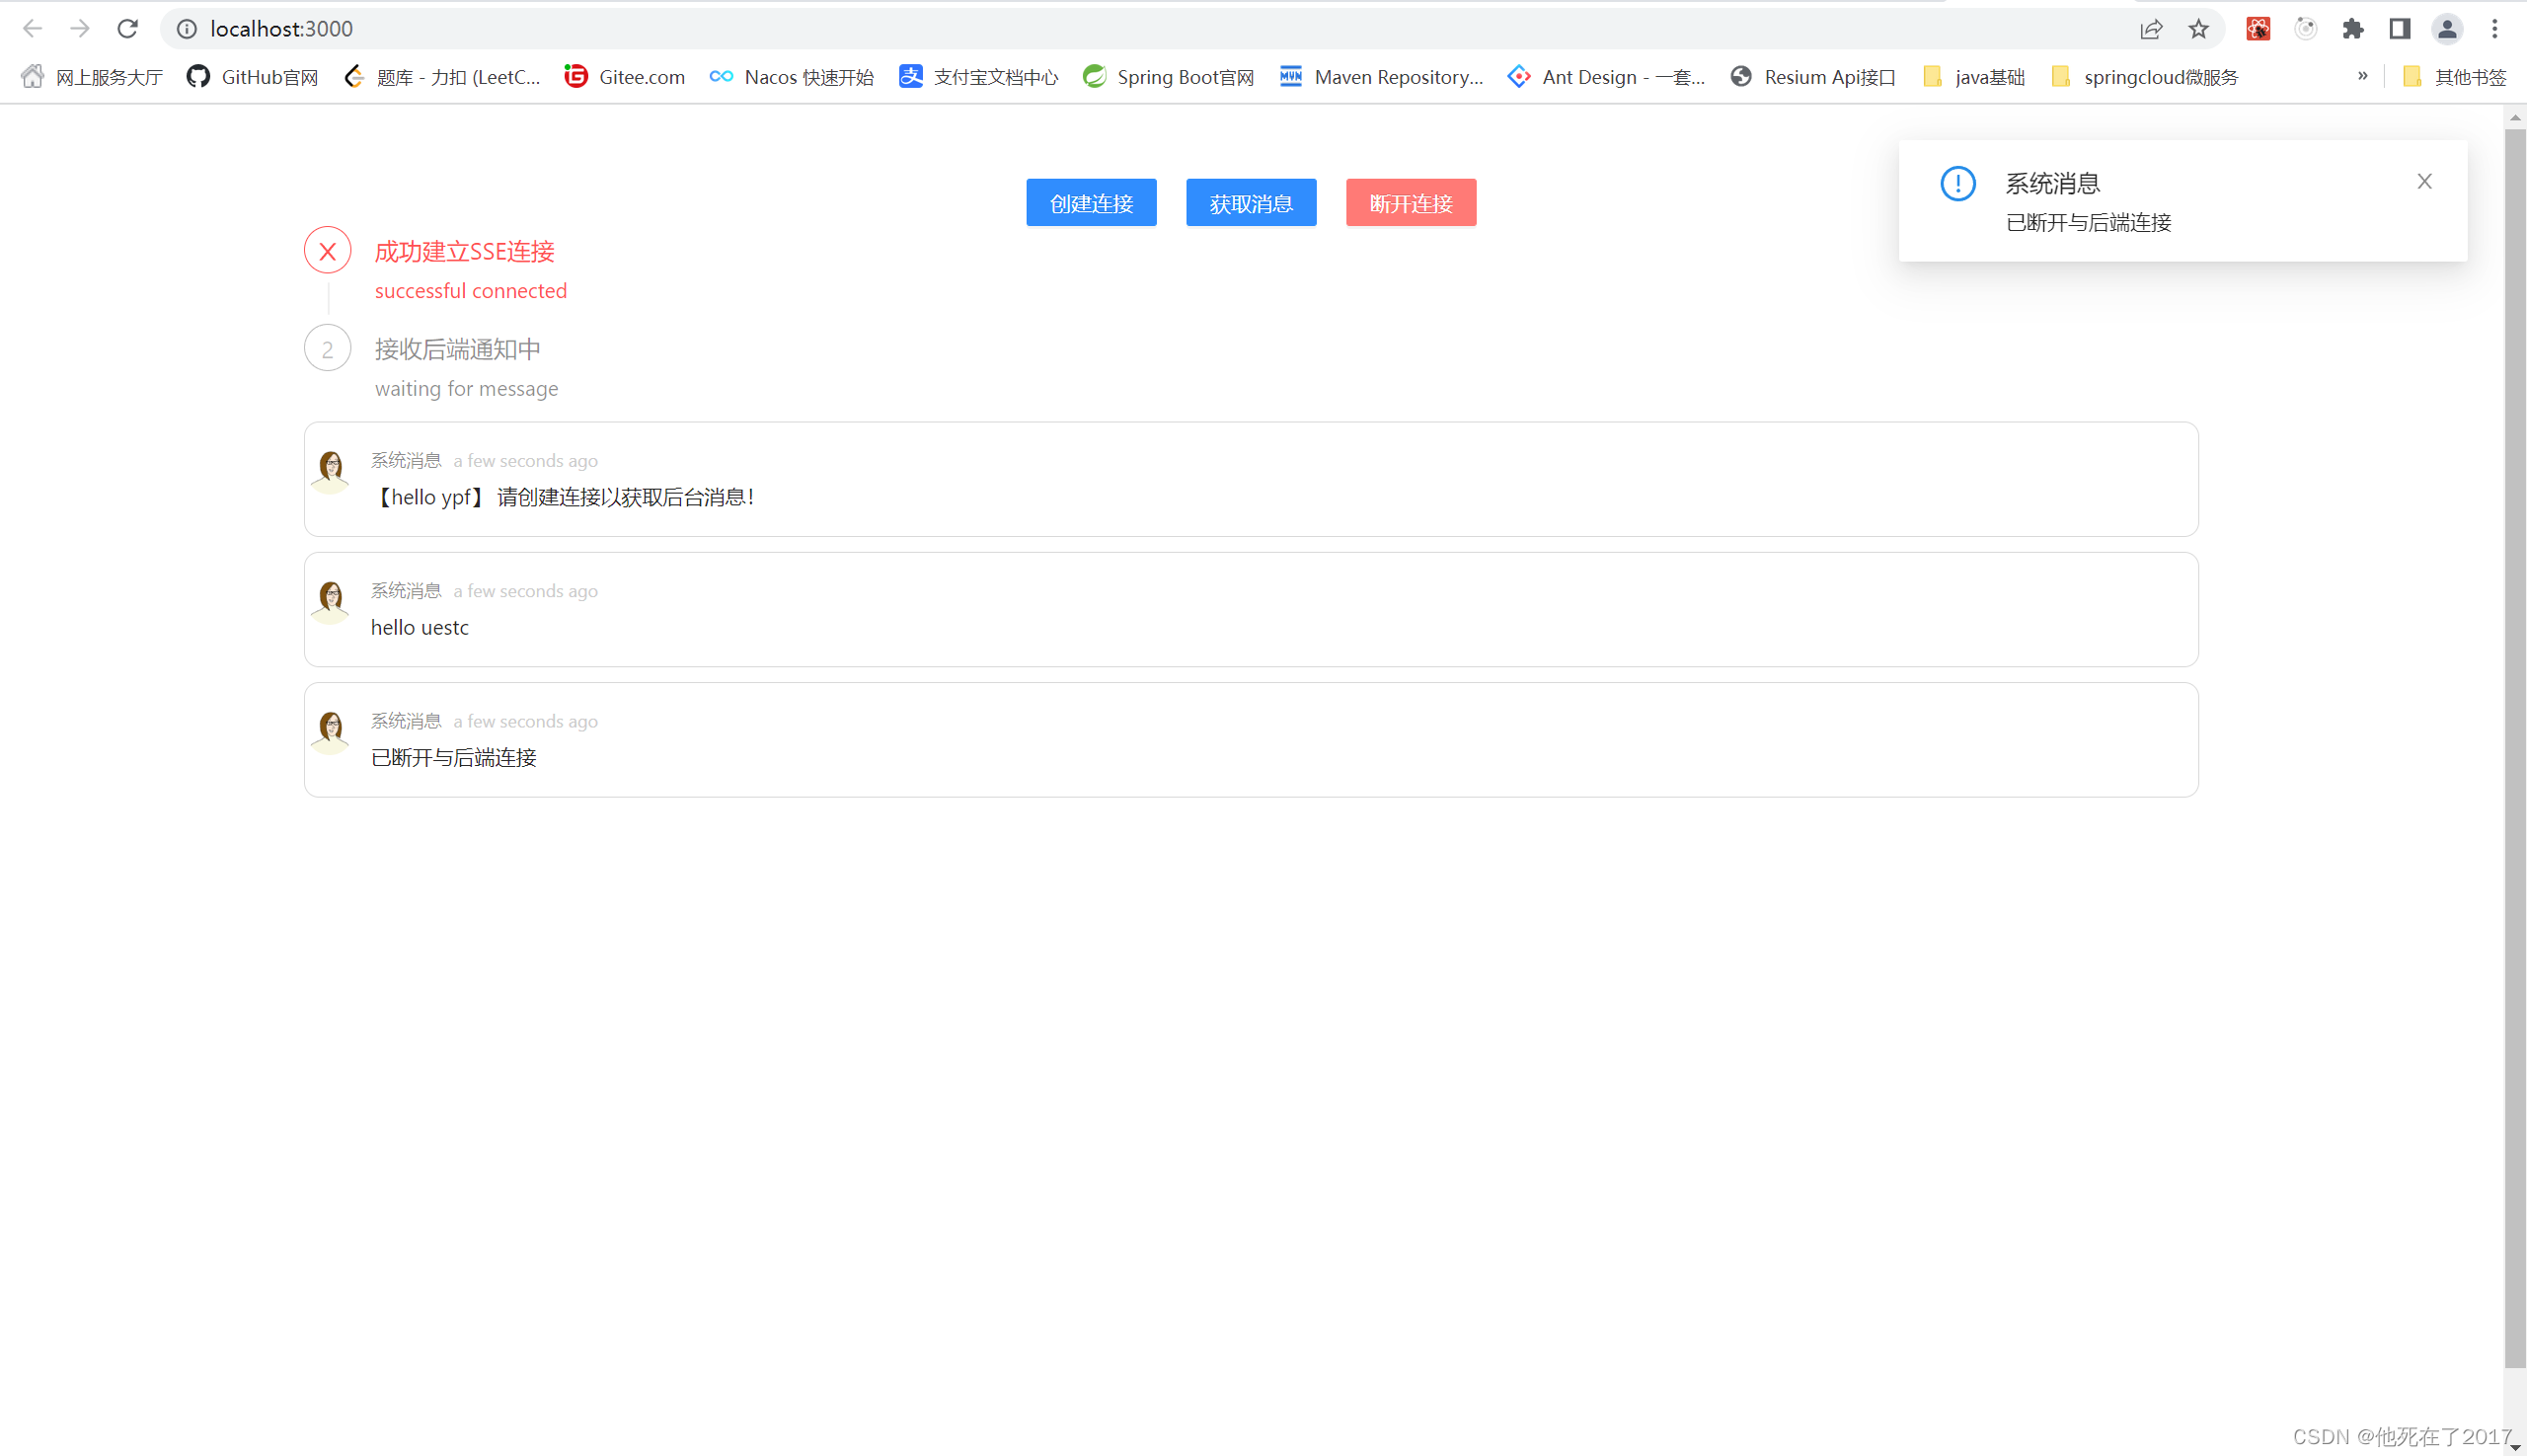
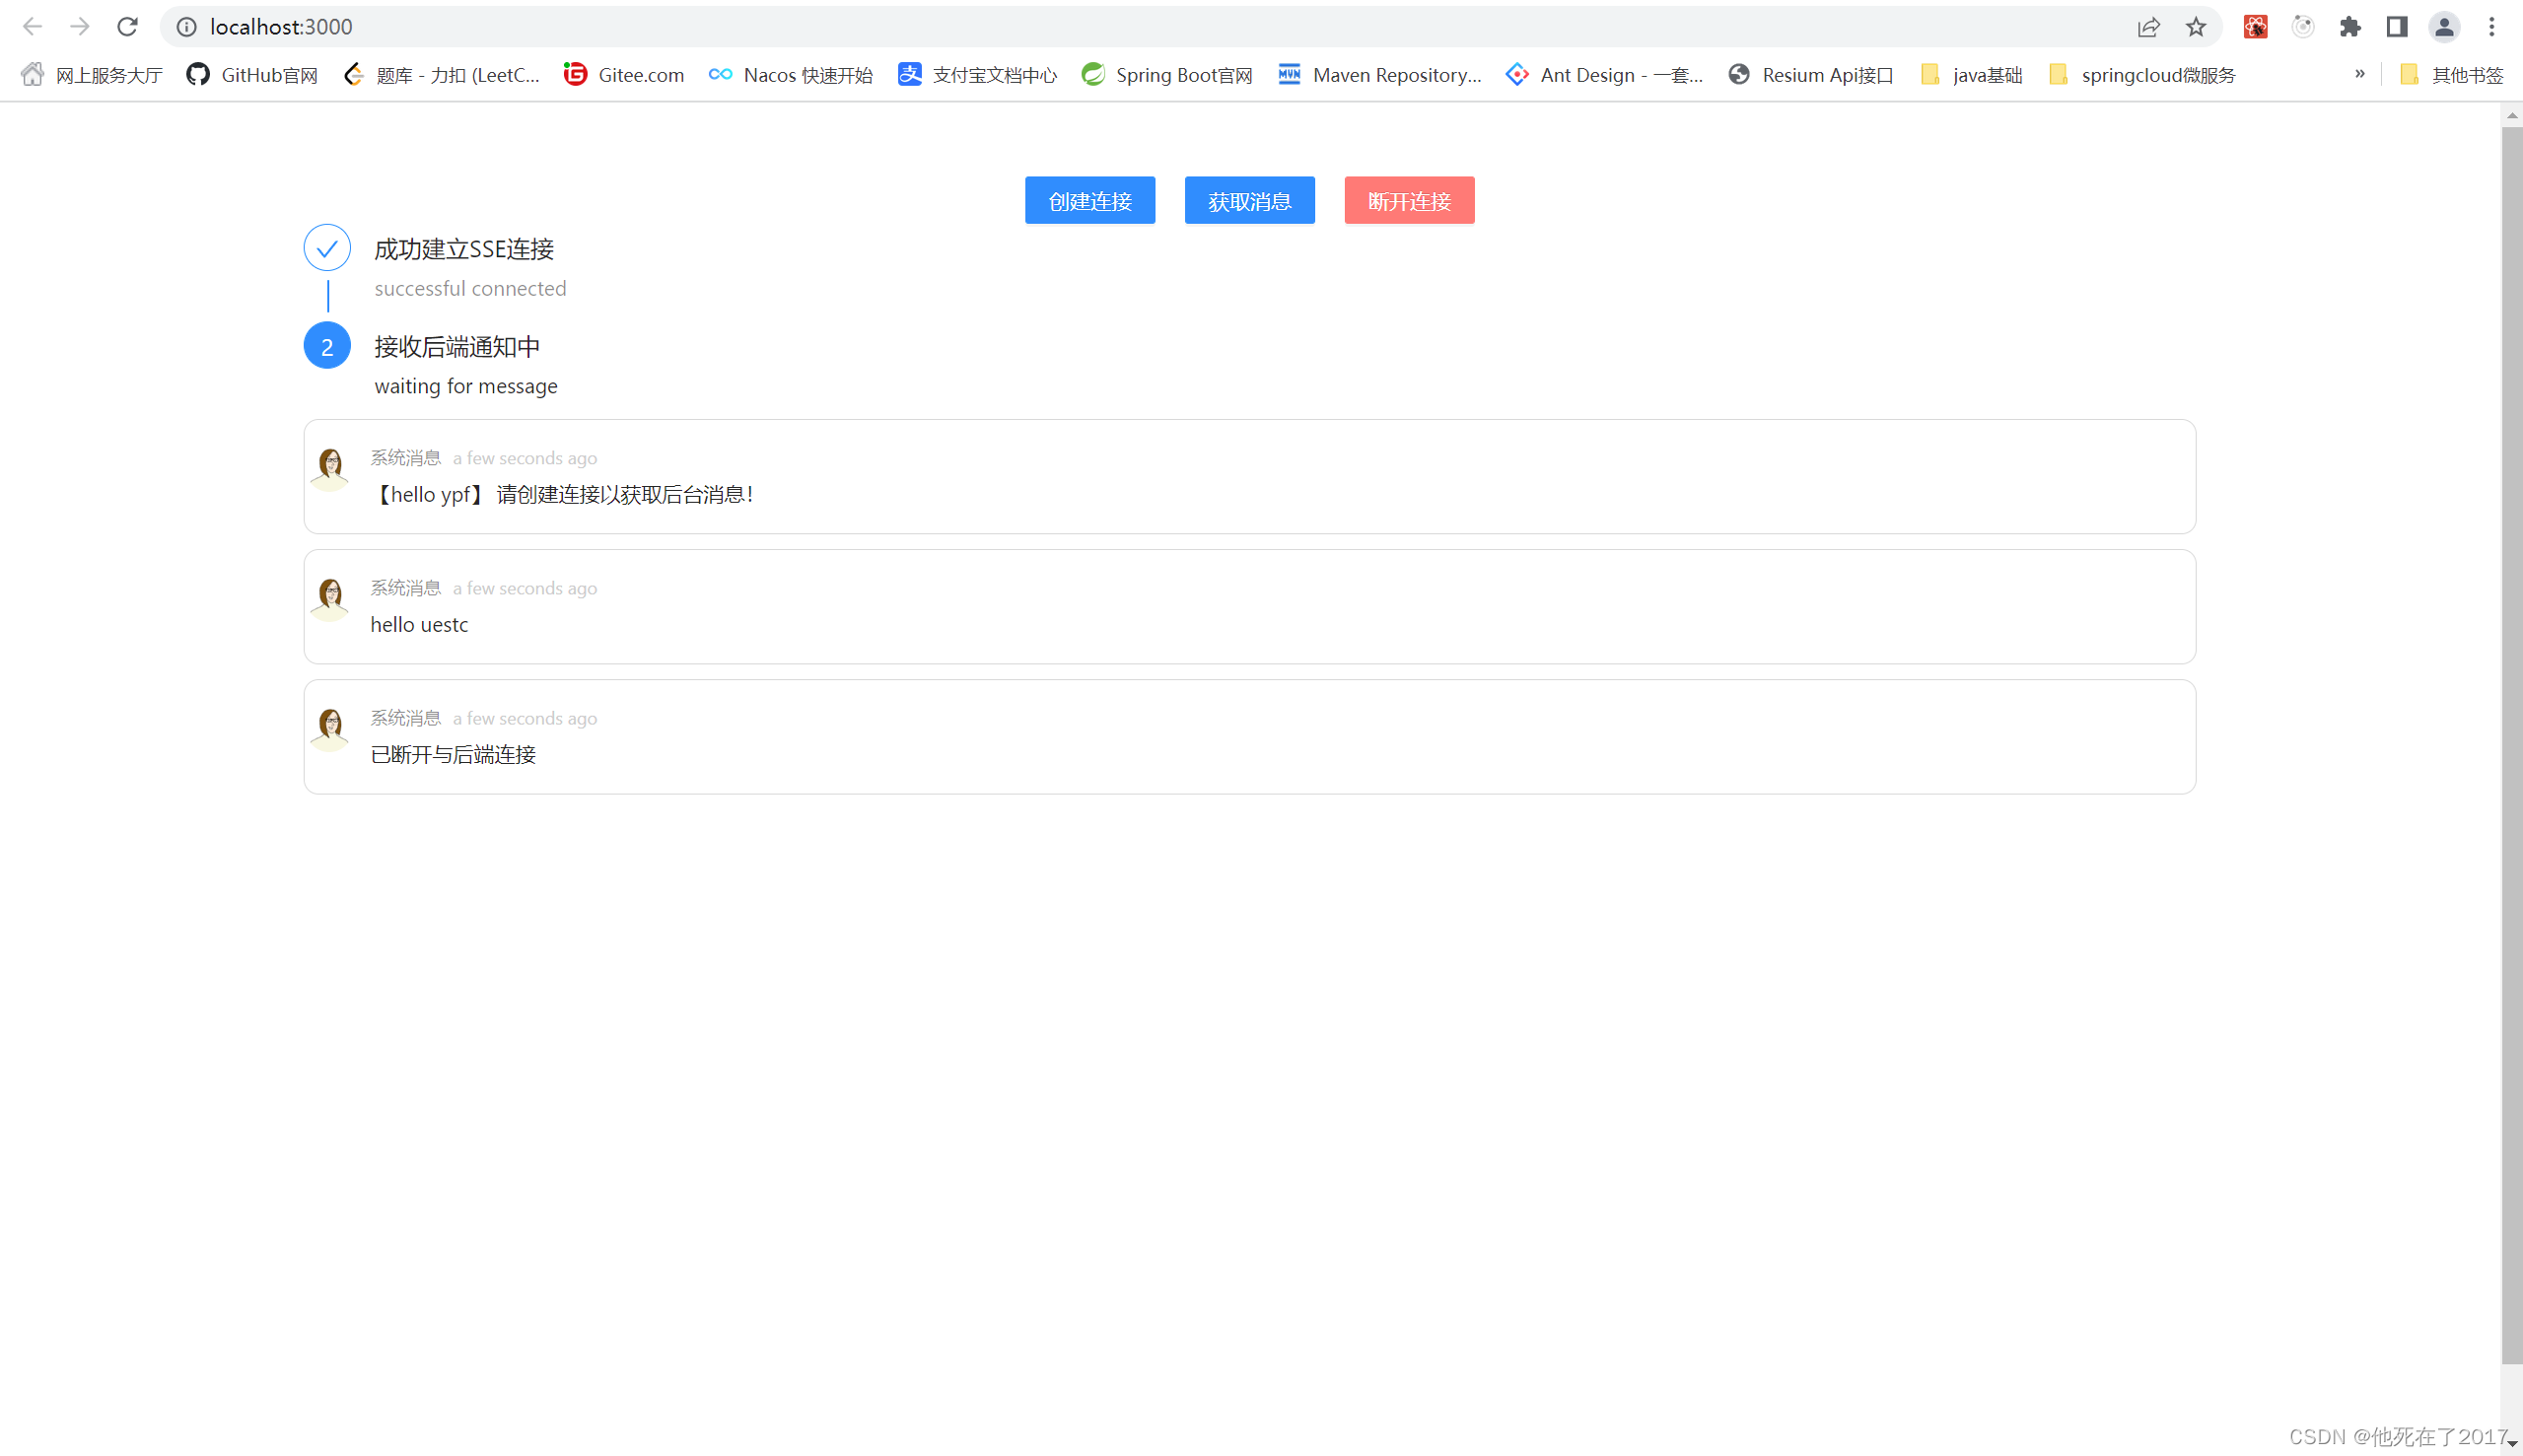
用于SSE自动重连机制,即使手动断开连接后,前端在几秒后也会自动重连。
5 项目地址
总结
这是我第三个项目的其中一个小技术点,觉得相对于传统的CRUD,这个小技术点还是很有意思的,所以特此写了一个独立的小demo来记录一下本次开发中遇到的后端向前端推送消息的问题解决办法。最后加油吧,少年!


 1225
1225

 被折叠的 条评论
为什么被折叠?
被折叠的 条评论
为什么被折叠?
 到【灌水乐园】发言


