


Vue3源码系列文章目录
目录
目录
目录
一、vue3中createApp()实例是如何创建的,实例是什么样子的?
2、 其调用了工厂函数ensureRenderer()内部的createApp函数, 进入ensureRenderer
3、ensureRenderer()工厂函数内容据说是vue3中最多的,纠结过程容易迷路,此处直接跳转到该工厂函数返回的结果,
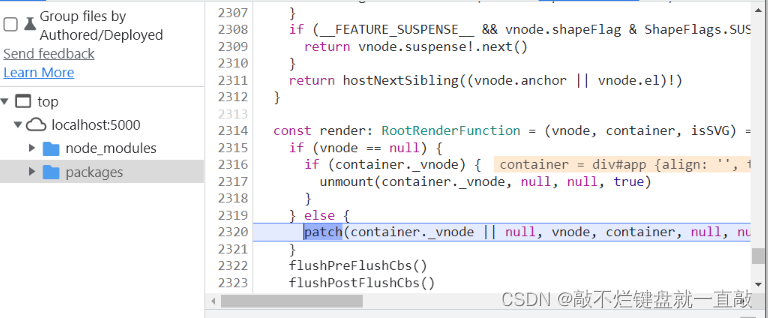
2、创建render函数并执行render函数, 第一步生成vnode传递给patch函数转换成dom,然后将其添加到宿主上
挂载时做了: 将传入的组件数据和状态转换成DOM,并追加到宿主元素上
2、单点进入后进入更新状态counter 此处应该是counter = this.counter += 1 会先走get 拿值, 然后走set赋值
3、 单点产看更新,最终走trigger通过!hadkey判断其走trigger Add(添加), 还是走trigger Set(更新)
5、走triggerEffect / triggerEffects
6、走triggerEffect后进入effect.schedule查看其如何更新
7、单点进入, 激活响应式, 此处想看断点应该打在componentUpdateFn
8、最后走patch更新 对比prevTree和nextTree哪里不同然后去更新
2、结合reactive、生命周期钩子、属性和上下文进行体验
前言
学习源码的笔记,以及vue3源码学习过程的问题、思路、总结。知识是容易遗忘的,让其留下痕迹,方便以后回顾学习。
一、vue3中createApp()实例是如何创建的,实例是什么样子的?
1、以todoMvc为入口,进行断点调试
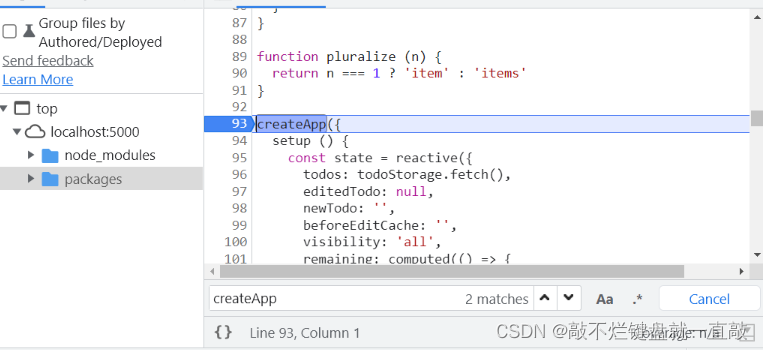
2、 其调用了工厂函数ensureRenderer()内部的createApp函数, 进入ensureRenderer

3、ensureRenderer()工厂函数内容据说是vue3中最多的,纠结过程容易迷路,此处直接跳转到该工厂函数返回的结果,
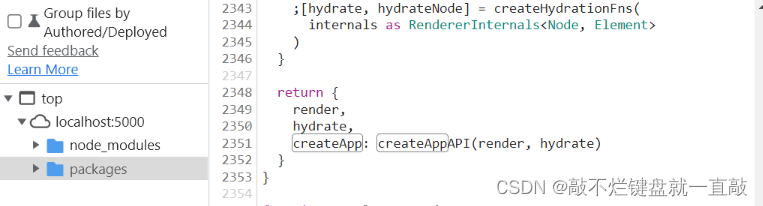
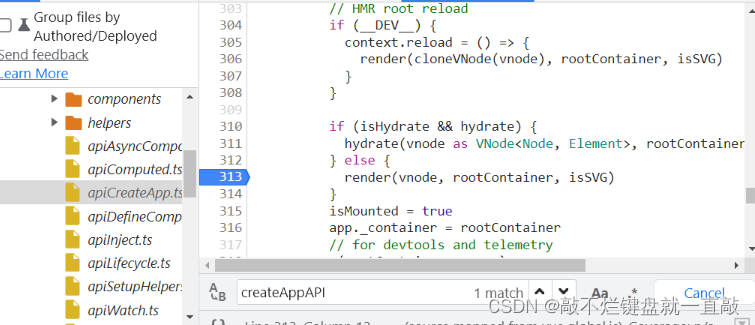
4、找到createAppApi()
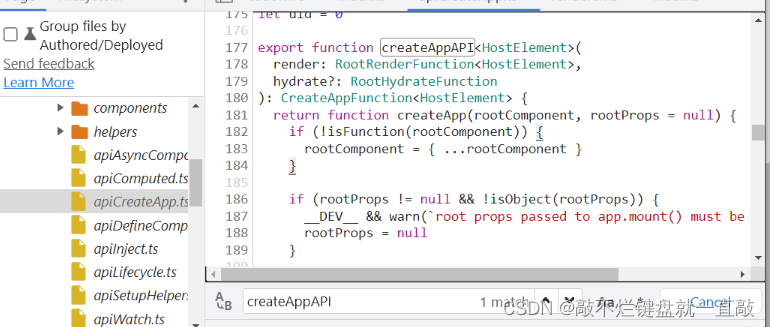
5、工厂函数创建的app是这个样子
export function createAppAPI<HostElement>(
render: RootRenderFunction<HostElement>,
hydrate?: RootHydrateFunction
): CreateAppFunction<HostElement> {
return function createApp(rootComponent, rootProps = null) {
if (!isFunction(rootComponent)) {
rootComponent = { ...rootComponent }
}
if (rootProps != null && !isObject(rootProps)) {
__DEV__ && warn(`root props passed to app.mount() must be an object.`)
rootProps = null
}
const context = createAppContext()
const installedPlugins = new Set()
let isMounted = false
const app: App = (context.app = {
_uid: uid++,
_component: rootComponent as ConcreteComponent,
_props: rootProps,
_container: null,
_context: context,
_instance: null,
version,
get config() {
return context.config
},
set config(v) {
if (__DEV__) {
warn(
`app.config cannot be replaced. Modify individual options instead.`
)
}
},
use(plugin: Plugin, ...options: any[]) {
if (installedPlugins.has(plugin)) {
__DEV__ && warn(`Plugin has already been applied to target app.`)
} else if (plugin && isFunction(plugin.install)) {
installedPlugins.add(plugin)
plugin.install(app, ...options)
} else if (isFunction(plugin)) {
installedPlugins.add(plugin)
plugin(app, ...options)
} else if (__DEV__) {
warn(
`A plugin must either be a function or an object with an "install" ` +
`function.`
)
}
return app
},
mixin(mixin: ComponentOptions) {
if (__FEATURE_OPTIONS_API__) {
if (!context.mixins.includes(mixin)) {
context.mixins.push(mixin)
} else if (__DEV__) {
warn(
'Mixin has already been applied to target app' +
(mixin.name ? `: ${mixin.name}` : '')
)
}
} else if (__DEV__) {
warn('Mixins are only available in builds supporting Options API')
}
return app
},
component(name: string, component?: Component): any {
if (__DEV__) {
validateComponentName(name, context.config)
}
if (!component) {
return context.components[name]
}
if (__DEV__ && context.components[name]) {
warn(`Component "${name}" has already been registered in target app.`)
}
context.components[name] = component
return app
},
directive(name: string, directive?: Directive) {
if (__DEV__) {
validateDirectiveName(name)
}
if (!directive) {
return context.directives[name] as any
}
if (__DEV__ && context.directives[name]) {
warn(`Directive "${name}" has already been registered in target app.`)
}
context.directives[name] = directive
return app
},
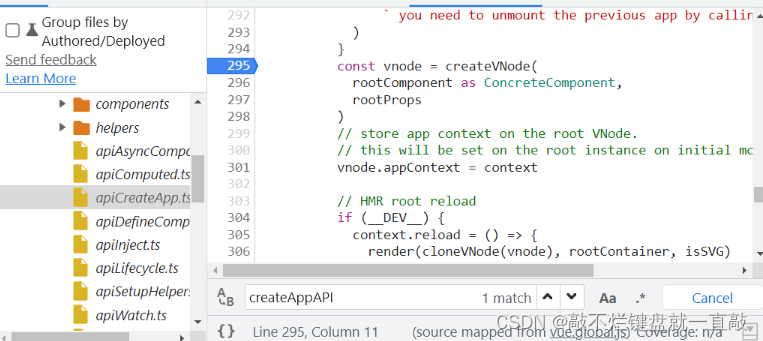
mount(
rootContainer: HostElement,
isHydrate?: boolean,
isSVG?: boolean
): any {
if (!isMounted) {
// #5571
if (__DEV__ && (rootContainer as any).__vue_app__) {
warn(
`There is already an app instance mounted on the host container.\n` +
` If you want to mount another app on the same host container,` +
` you need to unmount the previous app by calling \`app.unmount()\` first.`
)
}
const vnode = createVNode(
rootComponent as ConcreteComponent,
rootProps
)
// store app context on the root VNode.
// this will be set on the root instance on initial mount.
vnode.appContext = context
// HMR root reload
if (__DEV__) {
context.reload = () => {
render(cloneVNode(vnode), rootContainer, isSVG)
}
}
if (isHydrate && hydrate) {
hydrate(vnode as VNode<Node, Element>, rootContainer as any)
} else {
render(vnode, rootContainer, isSVG)
}
isMounted = true
app._container = rootContainer
// for devtools and telemetry
;(rootContainer as any).__vue_app__ = app
if (__DEV__ || __FEATURE_PROD_DEVTOOLS__) {
app._instance = vnode.component
devtoolsInitApp(app, version)
}
return getExposeProxy(vnode.component!) || vnode.component!.proxy
} else if (__DEV__) {
warn(
`App has already been mounted.\n` +
`If you want to remount the same app, move your app creation logic ` +
`into a factory function and create fresh app instances for each ` +
`mount - e.g. \`const createMyApp = () => createApp(App)\``
)
}
},
unmount() {
if (isMounted) {
render(null, app._container)
if (__DEV__ || __FEATURE_PROD_DEVTOOLS__) {
app._instance = null
devtoolsUnmountApp(app)
}
delete app._container.__vue_app__
} else if (__DEV__) {
warn(`Cannot unmount an app that is not mounted.`)
}
},
provide(key, value) {
if (__DEV__ && (key as string | symbol) in context.provides) {
warn(
`App already provides property with key "${String(key)}". ` +
`It will be overwritten with the new value.`
)
}
context.provides[key as string | symbol] = value
return app
}
})
if (__COMPAT__) {
installAppCompatProperties(app, context, render)
}
return app
}
}
二、vue3中app.mount(), 挂载都做了什么?
1、创建节点vnode
2、创建render函数并执行render函数, 第一步生成vnode传递给patch函数转换成dom,然后将其添加到宿主上
- 
app.mount('#app')
挂载时做了: 将传入的组件数据和状态转换成DOM,并追加到宿主元素上
三、patch状态更新流程
以下面代码为例子
<!DOCTYPE html>
<html lang="en">
<head>
  <meta charset="UTF-8">
  <meta http-equiv="X-UA-Compatible" content="IE=edge">
  <meta name="viewport" content="width=device-width, initial-scale=1.0">
  <title>Document</title>

</head>
<body>
  <div id="app">
    <h1>vue3 更新流程</h1>
    <p>{{counter}}</p>
    <comp></comp>
  </div>
  <script src="../dist/vue.global.js"></script>
  <script>
    // vue2: new Vue({}).$mount()
    // 变化1: 函数创建实例
    // vue3: createApp({})
    const app = Vue.createApp({
      // render() {
      //   return Vue.h('div', {
      //     myprop, title, onClick
      //   })
      // }
      data() {
        return {
          counter: 1
        }
      },
      mounted() {
        setInterval(() => {
          this.counter++
        }, 1000)
      }
    })
    // 变化2: 实例方法
    app.component('comp', {
      template: '<div>comp</div>'
    })
    // 变化3: 挂载mount
    app.mount('#app')
  </script>
</body>
</html>
1、从状态更新处打断点

2、单点进入后进入更新状态counter 此处应该是counter = this.counter += 1 会先走get 拿值, 然后走set赋值
此处data是proxy对象, key是counter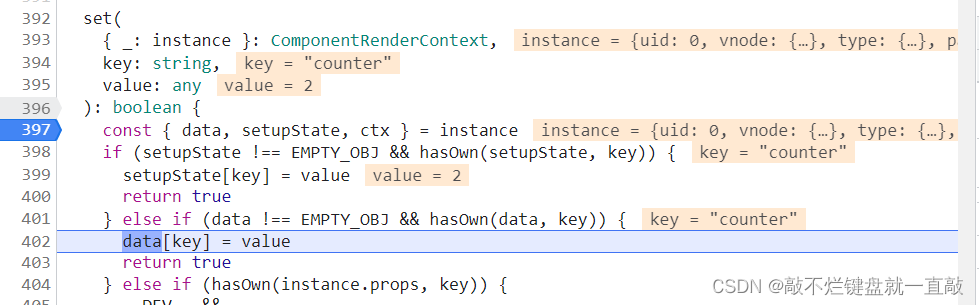
3、 单点产看更新,最终走trigger通过!hadkey判断其走trigger Add(添加), 还是走trigger Set(更新)
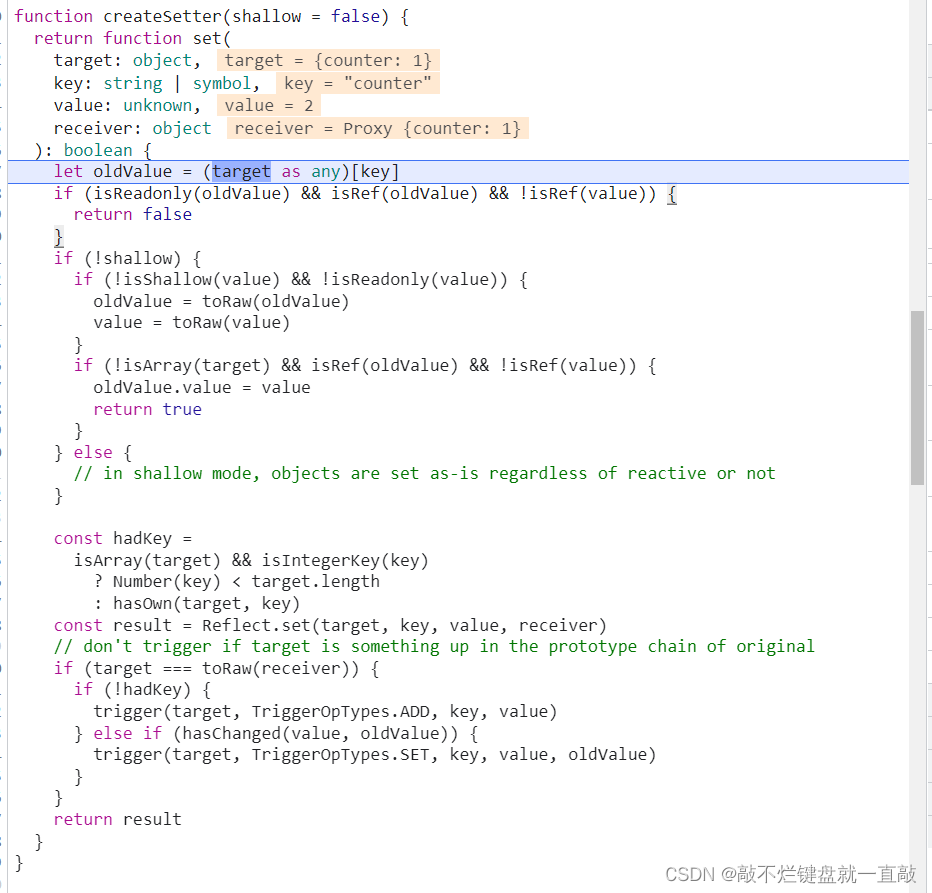
4、单点进入trigger Set

进入后进入
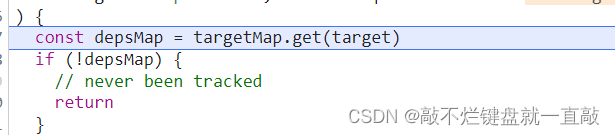
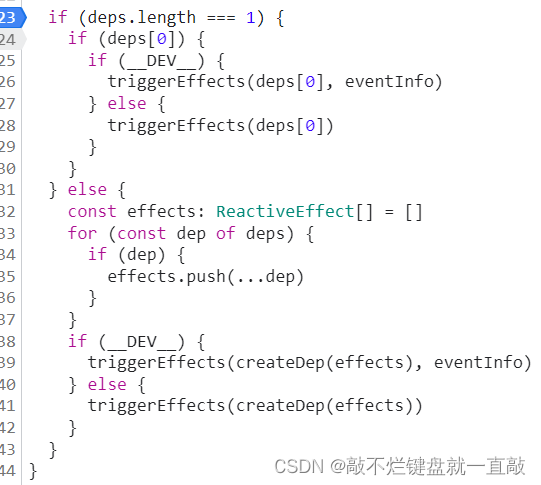
5、走triggerEffect / triggerEffects

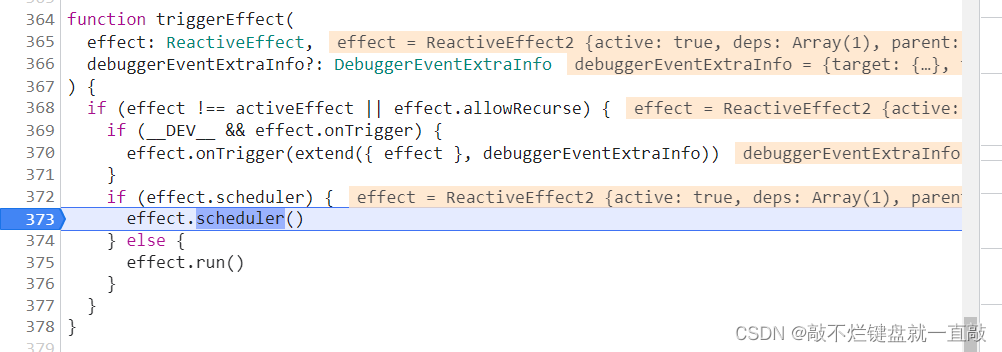
6、走triggerEffect后进入effect.schedule查看其如何更新
7、单点进入, 激活响应式, 此处想看断点应该打在componentUpdateFn
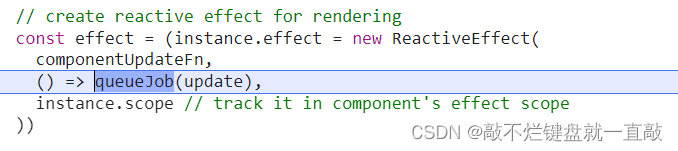
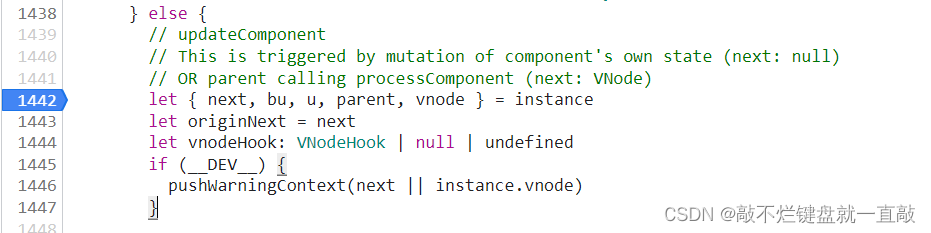
更新走componentUpdateFn所以断点要提前打在componentUpdateFn的elese update上
启动queueFlush()只启动一次就行了, 说是启动一个异步任务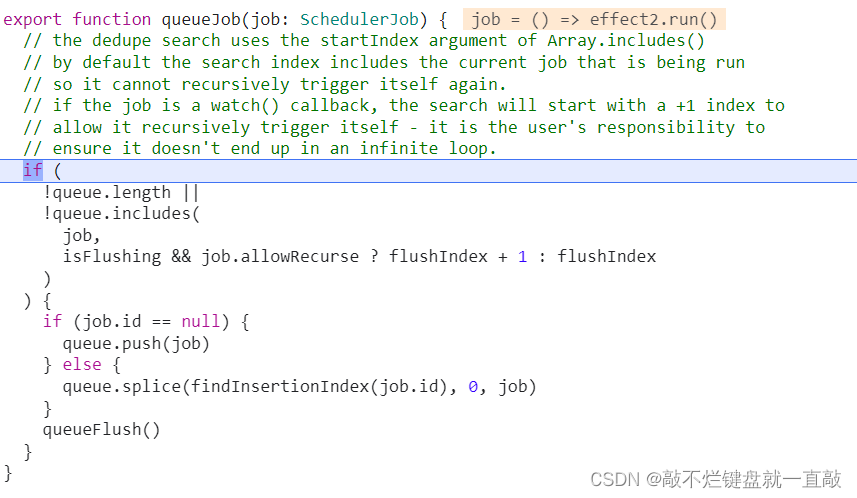

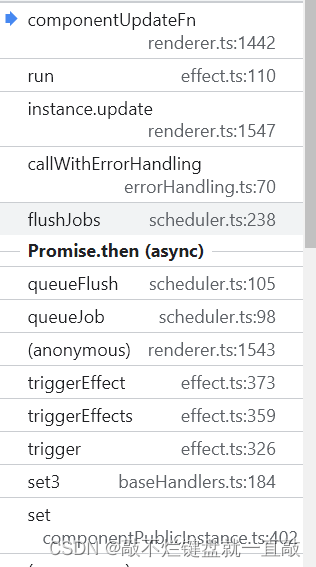
此处可以看到调用栈的promise 异步任务 此时跟初始化非常相似,多了一个上一次执行的结果
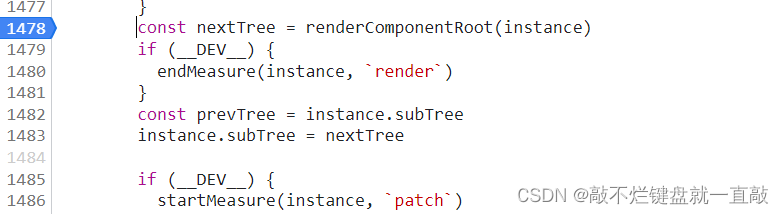
可以打到下面nexttree查看 nexttree中的count 加1了
8、最后走patch更新 对比prevTree和nextTree哪里不同然后去更新

四、Vue3 Composition Api 探究
1、Composition Api包括:
- setup
- 生命周期钩子
- getCurrentInstance
- provide/inject
问题1: 执行的时刻? 为什么没有created钩子?
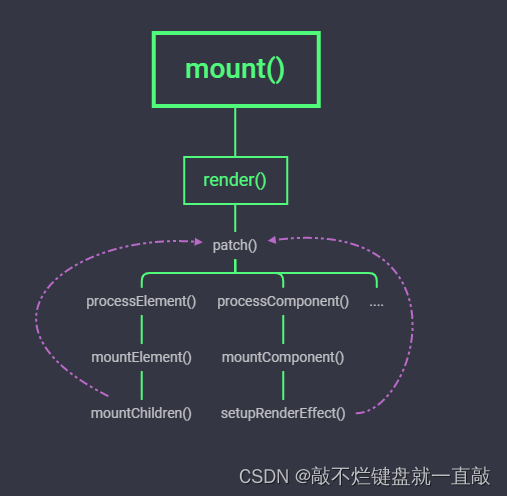
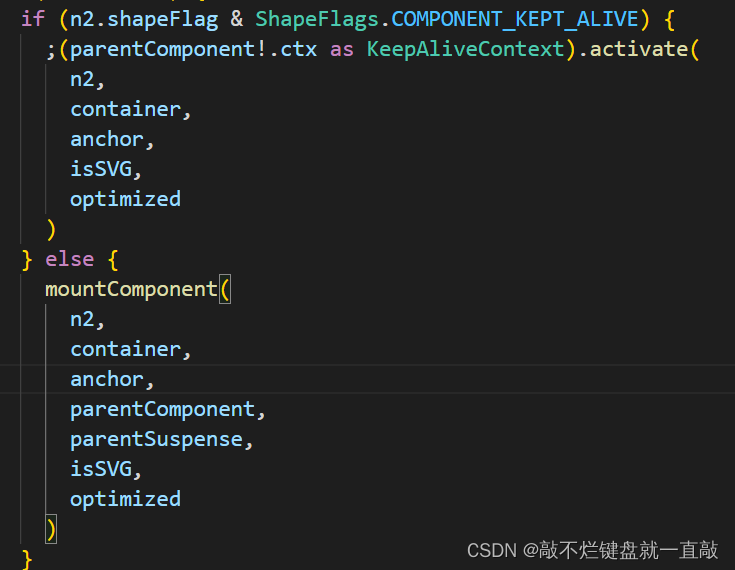
- 从何看起, 首次执行mount挂载, 调用render函数,render内部 调用patch函数进行dom的渲染与更新, patch内部调用processComponent跟组件初始化开始, 从这开始,

- 进入下一步mountComponent
-
进入后首先创建了实例instance,然后进行组件实例初始化setupComponent(instance)

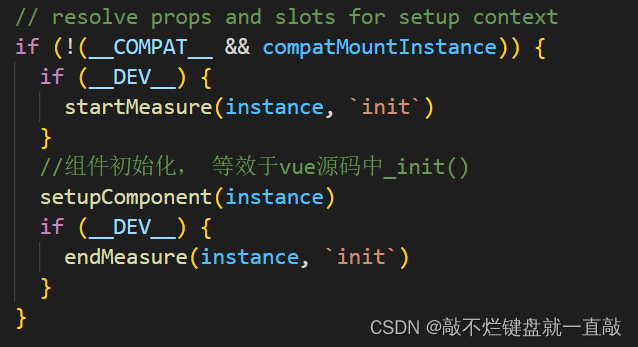
- 进入组件初始化列表 , 如果组件有状态,执行初始化过程, 并返回setup选项的返回值
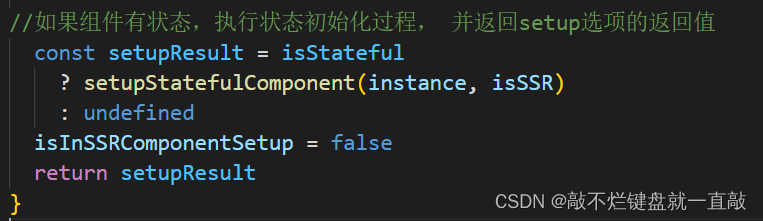
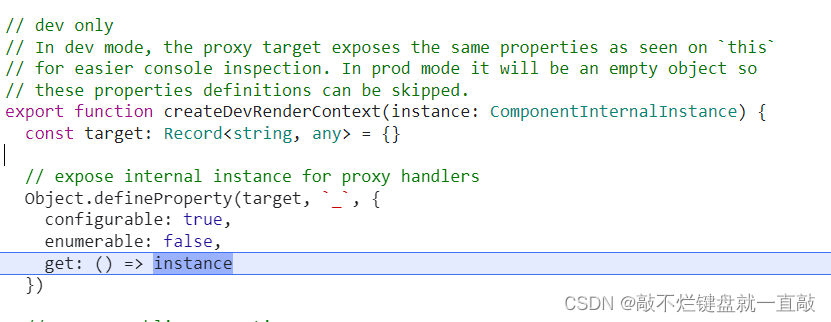
- 看一下如果组件有状态,是如何处理返回setup的返回值的, 此处可以看到将ctx进行proxy代理, 下面是从组件中拿出创建的setup, 如果有就创建setup上下文将 其存入instance.setupContext

- 查看创建setup上下文, 就可以看到context中为什么有四个属性,且为什么attrs是只读的
export function createSetupContext(
  instance: ComponentInternalInstance
): SetupContext {
  // 对外暴露接口
  const expose: SetupContext['expose'] = exposed => {
    if (__DEV__ && instance.exposed) {
      warn(`expose() should be called only once per setup().`)
    }
    instance.exposed = exposed || {}
  }

  //组件非属性特性
  let attrs: Data
  if (__DEV__) {
    // We use getters in dev in case libs like test-utils overwrite instance
    // properties (overwrites should not be done in prod)
    return Object.freeze({
      get attrs() {
        return attrs || (attrs = createAttrsProxy(instance))
      },
      get slots() {
        return shallowReadonly(instance.slots)
      },
      get emit() {
        return (event: string, ...args: any[]) => instance.emit(event, ...args)
      },
      expose
    })
  } else {
    //返回的就是setupContext
    return {
      // 只读的attrs
      get attrs() {
        return attrs || (attrs = createAttrsProxy(instance))
      },
      slots: instance.slots,
      emit: instance.emit,
      expose
    }
  }
}-
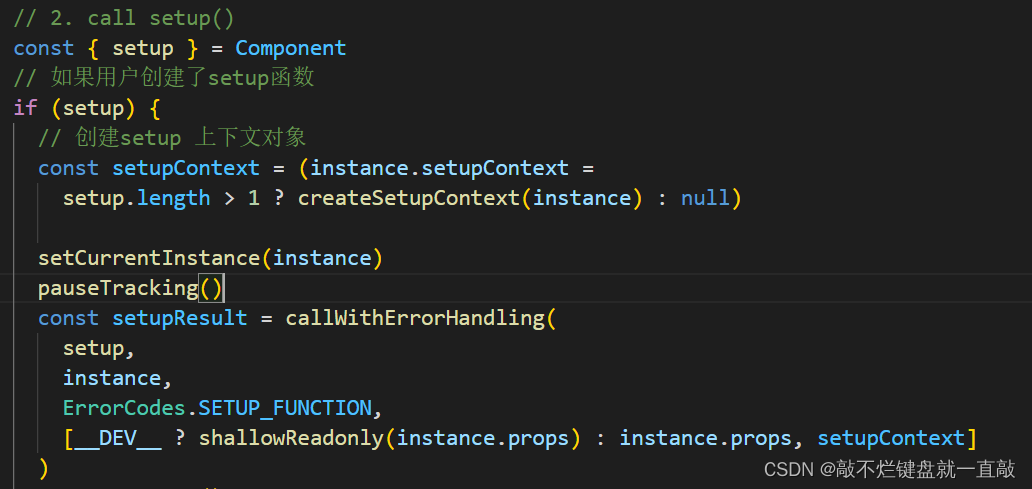
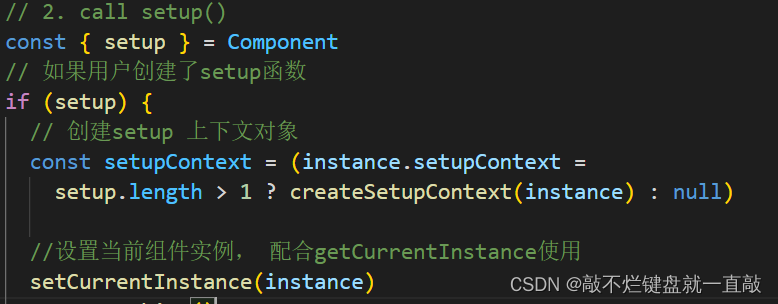
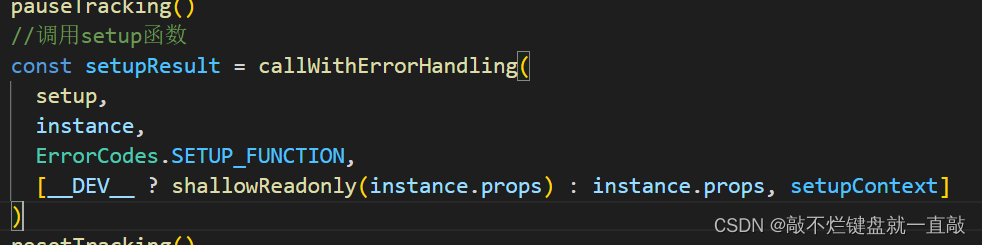
继续回到setup, 可以看到setCurrentInstance
- 下面开始调用setup, 此时传入instance.props, 和setupContext, 这就是为什么setup中有两个参数
export function handleSetupResult(
  instance: ComponentInternalInstance,
  setupResult: unknown,
  isSSR: boolean
) {
  // 首先判断返回的结果是不是函数
  //如果是函数则作为render函数处理
  if (isFunction(setupResult)) {
    // setup returned an inline render function
    if (__SSR__ && (instance.type as ComponentOptions).__ssrInlineRender) {
      // when the function's name is `ssrRender` (compiled by SFC inline mode),
      // set it as ssrRender instead.
      instance.ssrRender = setupResult
    } else {
      instance.render = setupResult as InternalRenderFunction
    }
  } else if (isObject(setupResult)) {
    if (__DEV__ && isVNode(setupResult)) {
      warn(
        `setup() should not return VNodes directly - ` +
          `return a render function instead.`
      )
    }
    // setup returned bindings.
    // assuming a render function compiled from template is present.
    if (__DEV__ || __FEATURE_PROD_DEVTOOLS__) {
      instance.devtoolsRawSetupState = setupResult
    }
    // 如果是对象, 转换setupoResult这个对象为响应式对象
    // 将来组件渲染函数中会首先从setupState中获取值
    instance.setupState = proxyRefs(setupResult)
    if (__DEV__) {
      exposeSetupStateOnRenderContext(instance)
    }
  } else if (__DEV__ && setupResult !== undefined) {
    warn(
      `setup() should return an object. Received: ${
        setupResult === null ? 'null' : typeof setupResult
      }`
    )
  }
  // 最后依然执行组件的安装
  // 里面主要是处理其他的options api
  finishComponentSetup(instance, isSSR)
}- 查看finishComponentSetup(instance, isSSR), 可得知为什么不需要created()

回答: 执行时刻beforeCreate之类的传统生命周期钩子,实际上setup函数执行的时候,组件实例已经创建了,所以setup中处理beforeCreate和created是没有意义的。
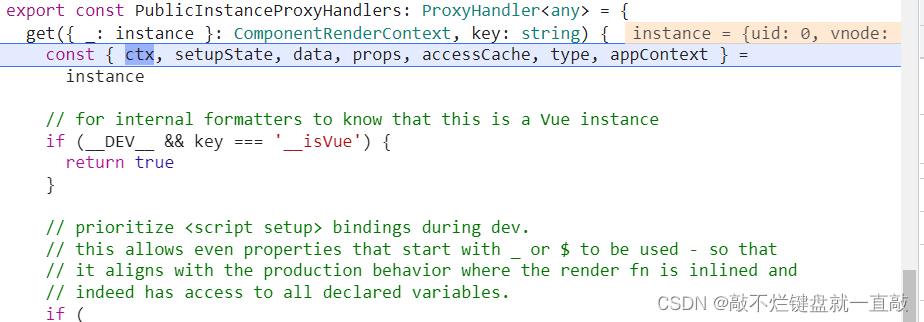
问题2: 传入setup参数中的props和ctx从何而来? 又是什么?
问题3: 如果和data这些数据发生冲突,他们能共存吗,Vue3处理时的行为?
setup优先级更高一些,两者可以共存, 为什么setup优先级更高,如何处理的?


 3910
3910


 被折叠的 条评论
为什么被折叠?
被折叠的 条评论
为什么被折叠?
 到【灌水乐园】发言


