


一、监控当前主机资源使用情况
-
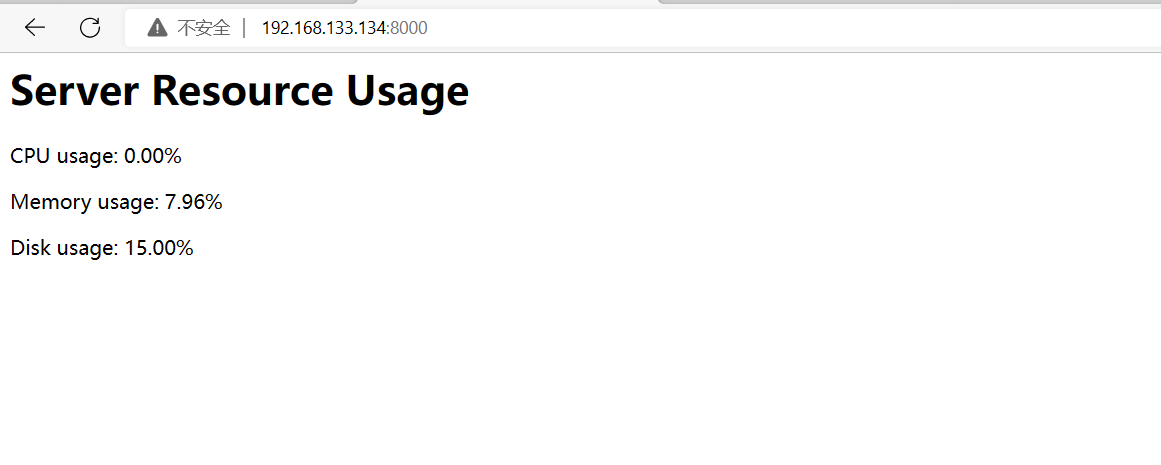
- 监控当前主机资源使用情况并创建WEB服务展示
-
该脚本提供了一个简单的 Web 服务器,在浏览器中展示每台主机的资源使用情况:
import os
import time
import threading
from http.server import BaseHTTPRequestHandler, HTTPServer
import os
import time
import threading
from http.server import BaseHTTPRequestHandler, HTTPServer

class ServerStatsHandler(BaseHTTPRequestHandler):
    def do_GET(self):
        self.send_response(200)
        self.send_header("Content-type", "text/html")
        self.end_headers()

        def get_cpu_usage():
            # Return the current CPU usage as a percentage
            return float(os.popen("top -n1 | awk '/Cpu\(s\):/ {print $2}'").read().strip())

        def get_memory_usage():
            # Return the current memory usage as a percentage
            return float(os.popen("free | awk '/Mem:/ {print $3/$2 * 100.0}'").read().strip())

        def get_disk_usage():
            # Return the current disk usage as a percentage
            return float(os.popen("df / | awk '/\// {print $5}'").read().strip()[:-1])

        # Get the current resource usage
        cpu_usage = get_cpu_usage()
        memory_usage = get_memory_usage()
        disk_usage = get_disk_usage()

        # Generate the HTML page
        self.wfile.write(b"<html><body>")
        self.wfile.write(b"<h1>Server Resource Usage</h1>")
        self.wfile.write(b"<p>CPU usage: %.2f%%</p>" % cpu_usage)
        self.wfile.write(b"<p>Memory usage: %.2f%%</p>" % memory_usage)
        self.wfile.write(b"<p>Disk usage: %.2f%%</p>" % disk_usage)
        self.wfile.write(b"</body></html>")

def run_server():
    # Start the HTTP server
    server_address = ("0.0.0.0", 8000)
    httpd = HTTPServer(server_address, ServerStatsHandler)
    httpd.serve_forever()

# Start the server in a separate thread
thread = threading.Thread(target=run_server)
thread.start()

# Run the server forever
while True:
    time.sleep(3600)
-
- 监控当前主机资源使用情况并通过syslog发送到统一的服务器
-
该脚本会将服务器资源使用率信息以 syslog 文件格式发送到统一的服务器:
import os
import time
import logging

logging.basicConfig(format='%(message)s', level=logging.INFO)

def get_cpu_usage():
    # Return the current CPU usage as a percentage
    return float(os.popen("top -n1 | awk '/Cpu\(s\):/ {print $2}'").read().strip())

def get_memory_usage():
    # Return the current memory usage as a percentage
    return float(os.popen("free | awk '/Mem:/ {print $3/$2 * 100.0}'").read().strip())

def get_disk_usage():
    # Return the current disk usage as a percentage
    return float(os.popen("df / | awk '/\// {print $5}'").read().strip()[:-1])

while True:
    # Get the current resource usage
    cpu_usage = get_cpu_usage()
    memory_usage = get_memory_usage()
    disk_usage = get_disk_usage()

    # Send the data to the server using syslog
    message = "CPU usage: %.2f%% | Memory usage: %.2f%% | Disk usage: %.2f%%" % (cpu_usage, memory_usage, disk_usage)
    logging.info(message)

    # Wait for 5 seconds before checking again
    time.sleep(5)
-
- 监控当前主机资源使用情况并通过HTTPserverAPI发送
-
该脚本会将服务器资源使用率信息发送到统一的服务器:
import os
import time
import requests

URL = "http://example.com/server-stats"

def get_cpu_usage():
    # Return the current CPU usage as a percentage
    return float(os.popen("top -n1 | awk '/Cpu\(s\):/ {print $2}'").read().strip())

def get_memory_usage():
    # Return the current memory usage as a percentage
    return float(os.popen("free | awk '/Mem:/ {print $3/$2 * 100.0}'").read().strip())

def get_disk_usage():
    # Return the current disk usage as a percentage
    return float(os.popen("df / | awk '/\// {print $5}'").read().strip()[:-1])

while True:
    # Get the current resource usage
    cpu_usage = get_cpu_usage()
    memory_usage = get_memory_usage()
    disk_usage = get_disk_usage()

    # Send the data to the server
    data = {
        "cpu_usage": cpu_usage,
        "memory_usage": memory_usage,
        "disk_usage": disk_usage
    }
    requests.post(URL, data=data)

    # Wait for 5 seconds before checking again
    time.sleep(5)
二、监控多台主机资源使用情况
-
- 监控多台主机的资源使用率,并将结果存储到一个数据库中:
-
使用 Python 的 sqlite3 模块来连接和操作 SQLite 数据库。
-
使用 threading 模块来启动多个线程来监控多台主机。
import os
import time
import threading
import sqlite3

def get_cpu_usage(host):
    # Return the current CPU usage as a percentage
    command = "ssh %s top -n1 | awk '/Cpu\(s\):/ {print $2}'" % host
    return float(os.popen(command).read().strip())

def get_memory_usage(host):
    # Return the current memory usage as a percentage
    command = "ssh %s free | awk '/Mem:/ {print $3/$2 * 100.0}'" % host
    return float(os.popen(command).read().strip())

def get_disk_usage(host):
    # Return the current disk usage as a percentage
    command = "ssh %s df / | awk '/\// {print $5}'" % host
    return float(os.popen(command).read().strip()[:-1])

def monitor_host(host):
    while True:
        # Get the current resource usage
        cpu_usage = get_cpu_usage(host)
        memory_usage = get_memory_usage(host)
        disk_usage = get_disk_usage(host)

        # Save the data to the database
        conn = sqlite3.connect("server_stats.db")
        c = conn.cursor()
        c.execute("INSERT INTO stats (timestamp, host, cpu_usage, memory_usage, disk_usage) VALUES (?, ?, ?, ?, ?)",
                  (time.time(), host, cpu_usage, memory_usage, disk_usage))
        conn.commit()
        conn.close()

        # Wait for 5 seconds before checking again
        time.sleep(5)

# Create the database if it doesn't exist
conn = sqlite3.connect("server_stats.db")
c = conn.cursor()
c.execute("CREATE TABLE IF NOT EXISTS stats (timestamp REAL, host TEXT, cpu_usage REAL, memory_usage REAL, disk_usage REAL)")
conn.close()

# Start a thread to monitor each host
hosts = ["host1", "host2", "host3"]
for host in hosts:
    thread = threading.Thread(target=monitor_host, args=(host,))
    thread.start()

# Run the monitoring forever
while True:
    time.sleep(3600)
注意!在这个脚本中,我使用的 ssh 命令来连接到其他主机,需要在你的主机上配置好 ssh免密 连接。
或者使用 Python 的 paramiko 模块来执行 sshpass 命令,我给一个示例:
import paramiko

# 创建 SSH 客户端
client = paramiko.SSHClient()

# 自动添加策略,保存服务器的主机名和密钥信息,没有则添加
client.set_missing_host_key_policy(paramiko.AutoAddPolicy())

# 连接到服务器
client.connect(
    hostname="remote_host",
    username="user",
    password="password",
    allow_agent=False,
    look_for_keys=False,
)

# 执行命令
stdin, stdout, stderr = client.exec_command("ps -aux")

# 获取命令输出
output = stdout.read().decode("utf-8")

# 关闭连接
client.close()
-
- 在上一个程序的基础上提供一个简单的 Web 服务器,在浏览器中展示所有主机的资源使用情况:
-
使用 Python 的 `http.server` 模块来提供一个简单的 Web 服务器。使用浏览器展示所有主机的最新的资源使用率信息。
-
在浏览器中访问 `http://localhost:8000` 来查看服务器资源使用率信息。也可以修改 `server_address` 变量来更改 Web 服务器的端口或地址。
import sqlite3
import time
import threading
from http.server import BaseHTTPRequestHandler, HTTPServer

class ServerStatsHandler(BaseHTTPRequestHandler):
    def do_GET(self):
        self.send_response(200)
        self.send_header("Content-type", "text/html")
        self.end_headers()

        # Query the database for the latest stats
        conn = sqlite3.connect("server_stats.db")
        c = conn.cursor()
        c.execute("SELECT host, cpu_usage, memory_usage, disk_usage FROM stats ORDER BY timestamp DESC LIMIT 10")
        stats = c.fetchall()
        conn.close()

        # Generate the HTML page
        self.wfile.write(b"<html><body>")
        self.wfile.write(b"<h1>Server Resource Usage</h1>")
        self.wfile.write(b"<table border='1'>")
        self.wfile.write(b"<tr><th>Host</th><th>CPU usage</th><th>Memory usage</th><th>Disk usage</th></tr>")
        for stat in stats:
            self.wfile.write(b"<tr>")
            self.wfile.write(b"<td>%s</td>" % stat[0].encode())
            self.wfile.write(b"<td>%.2f%%</td>" % stat[1])
            self.wfile.write(b"<td>%.2f%%</td>" % stat[2])
            self.wfile.write(b"<td>%.2f%%</td>" % stat[3])
            self.wfile.write(b"</tr>")
            self.wfile.write(b"</table>")
            self.wfile.write(b"</body></html>")
def run_server():
    # Start the HTTP server
    server_address = ("0.0.0.0", 8000)
    httpd = HTTPServer(server_address, ServerStatsHandler)
    httpd.serve_forever()
#Start the server in a separate thread
thread = threading.Thread(target=run_server)
thread.start()
#Run the server forever
while True:
    time.sleep(3600)
注意!!这个脚本依赖于前面我给出的脚本,需要先运行前面的脚本来监控多台主机并将结果存储到数据库中。
也可以修改数据库查询语句来调整要展示的数据的时间范围和数量。
-
使用 WHERE timestamp > datetime('now', '-1 hour') 来展示最近一小时内的数据
-
使用 LIMIT 100 来展示最近 100 条数据。
注意事项
-
代码编写环境 python3.7.2,无python环境再安装即可
-
出现以下报错,执行 pip3 install xxxx
ModuleNotFoundError: No module named 'xxxx'-
这个脚本无法在 Windows 服务器上正常运行,因为它使用的是 Unix 系统的命令。在 Windows 上可以使用 wmic 命令替代程序中的这些命令。
其余没想到的地方,大家可以留言评论一起讨论。


 被折叠的 条评论
为什么被折叠?
被折叠的 条评论
为什么被折叠?
 到【灌水乐园】发言


