


 本文档详细介绍了如何下载、解压Seata服务,配置为使用MySQL进行回滚,注册到Nacos服务发现,并在Nacos中配置Seata。接着,启动Seata服务,并在业务模块中添加依赖,配置应用ID、服务组名等信息。最后,通过在启动类中排除默认数据源,启用Seata代理数据源来完成集成。
一:先下载seata https://github.com/seata/seata/releases

下载第一个和第三个
二:在服务器中解压tar.gz包
tar -zxvf seata-server-1.3.0.tar.gz
三:进入conf中
![]()
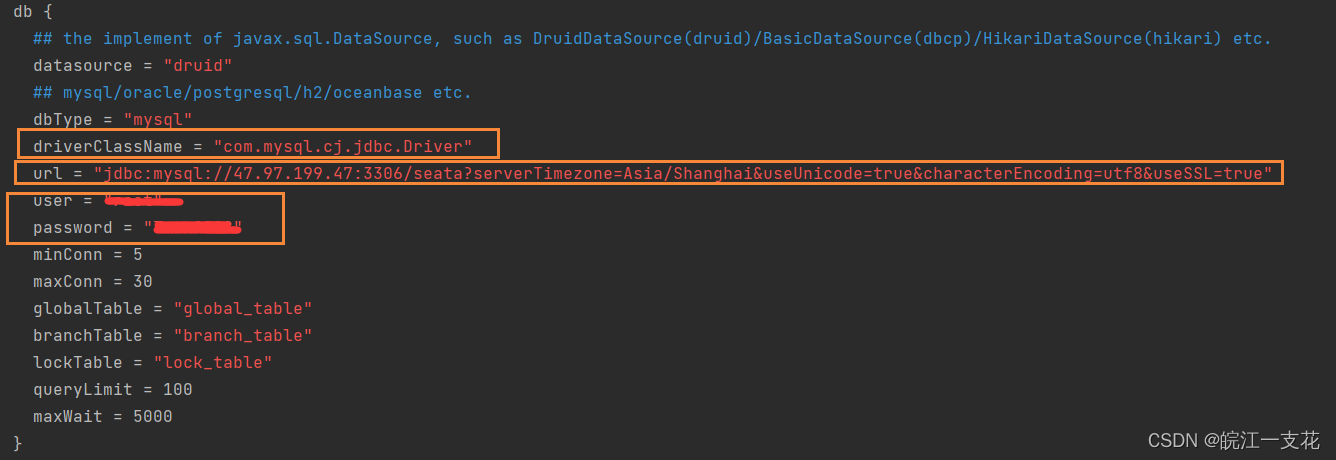
vim file.conf 改为db类型,使用mysql进行回滚
![]()
保存完毕
vim registry.conf 改两处地方
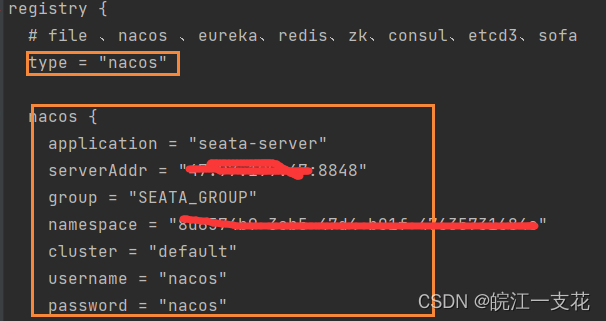
这个地方是注册seata服务配置,是用来注册nacos
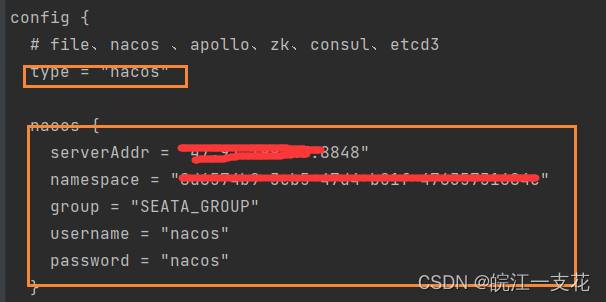
这个地方是nacos中seata配置设置,用来找到nacos的配置中心。
保存退出;
三:进入下载的zip解压后的:seata-server\seata-1.3.0\script\config-center。编辑config.tex
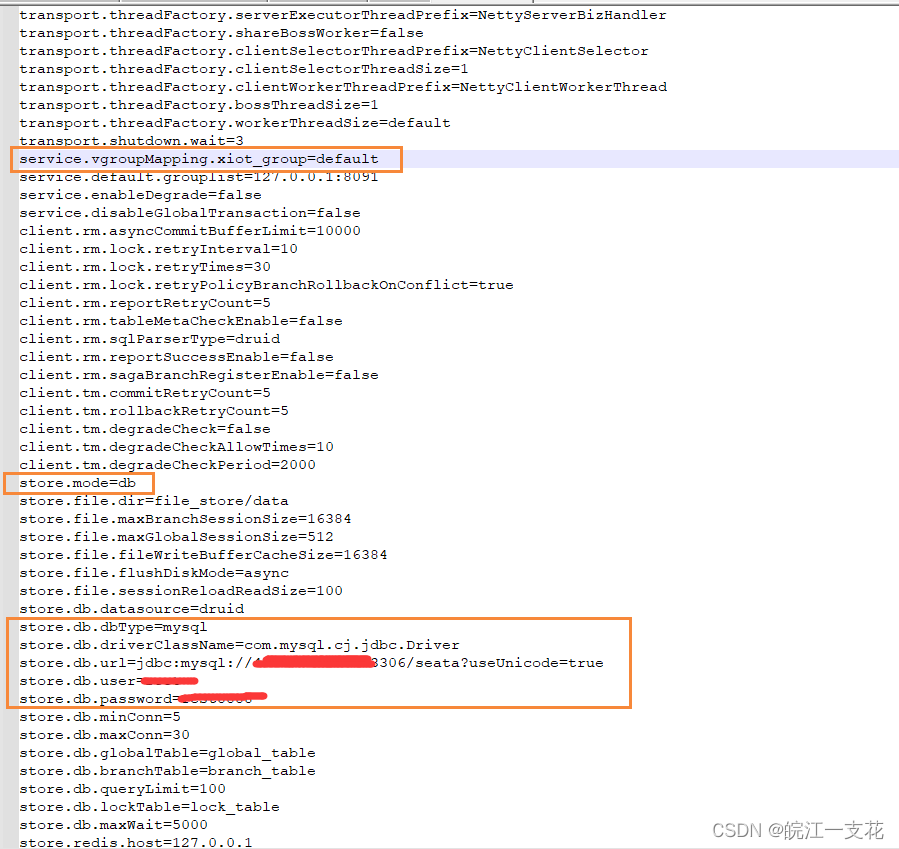
关键这个default和registry.conf 中的default是一致的,名字随便取。(集群名称)
改好之后,进入同级nacos文件中 右键进入git bash here
在里面输入 sh nacos-config.sh -h (自己ip) -p 8848 -g SEATA_GROUP -t (自己的命名空间) -u nacos -w nacos
运行成功后会在nacos中 配置列表中出现
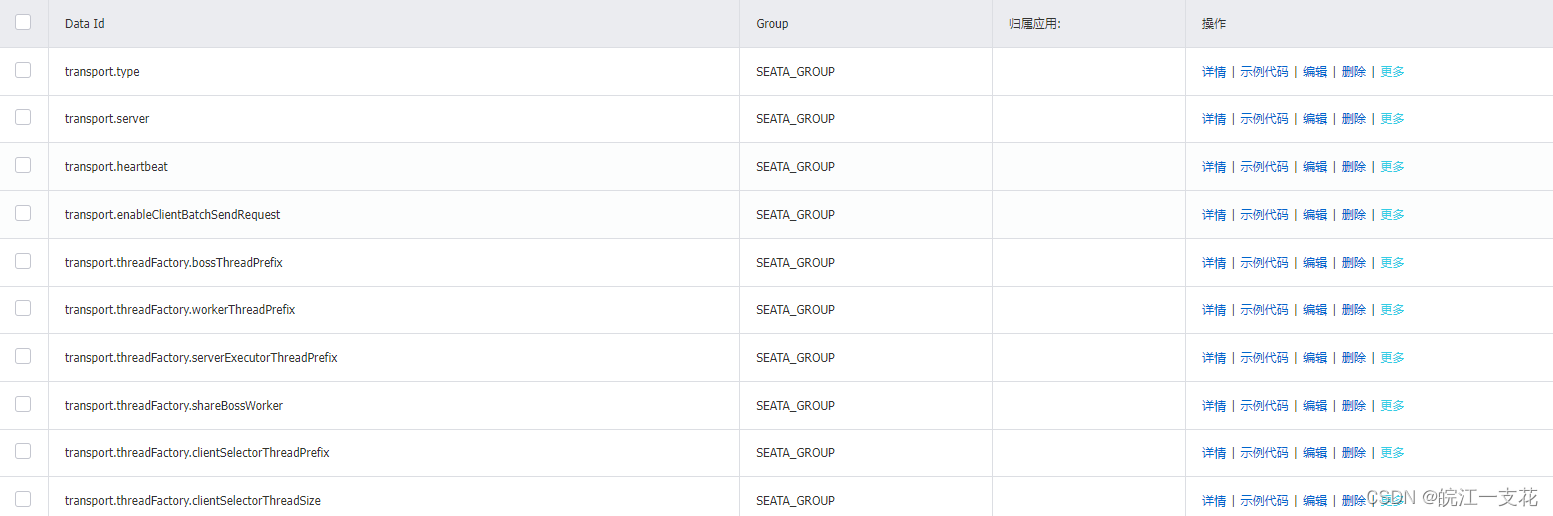
第四步:启动seata服务
到seata中的bin目录中,执行./seata-server.sh -h 自己ip -p 8091
![]()
第五步:在业务模块中调用seata服务。
加入maven
 <dependency>
            <groupId>com.alibaba.cloud</groupId>
            <artifactId>spring-cloud-starter-alibaba-seata</artifactId>
        </dependency>
        <dependency>
            <groupId>org.springframework.cloud</groupId>
            <artifactId>spring-cloud-starter-openfeign</artifactId>
            <exclusions>
                <exclusion>
                    <groupId>org.springframework.cloud</groupId>
                    <artifactId>spring-cloud-openfeign-core</artifactId>
                </exclusion>
            </exclusions>
        </dependency>
在application.ym中加入seata配置
seata:
  enabled: true
  application-id: ${spring.application.name}
  tx-service-group: xiot_group
  enable-auto-data-source-proxy: true
  registry:
    type: nacos
    nacos:
      server-addr:
      username: nacos
      password: nacos
      group: SEATA_GROUP
      namespace:
      application: seata-server
  config:
    type: nacos
    nacos:
      server-addr:
      username: nacos
      password: nacos
      group: SEATA_GROUP
      namespace:
  service:
    vgroupMapping:
      xiot_group: default
空的部分自己加入就行了。
六:最后一步在启动类中加入
@SpringBootApplication(exclude = DataSourceAutoConfiguration.class)使用seata自己代理的数据源。
启动就行了。。


 781
781

 被折叠的 条评论
为什么被折叠?
被折叠的 条评论
为什么被折叠?
 到【灌水乐园】发言


