


本地环境安装docker工具
这里以ubutun下安装docker为例,其他操作系统安装命令略有不同,可自行百度。(建议使用阿里源安装速度快)
sudo apt install docker.io如果你本地有gpu,请继续执行如下命令以支持gpu调用:
# Add the package repositories
distribution=$(. /etc/os-release;echo $ID$VERSION_ID)
curl -s -L https://nvidia.github.io/nvidia-docker/gpgkey | sudo apt-key add -
curl -s -L https://nvidia.github.io/nvidia-docker/$distribution/nvidia-docker.list | sudo tee /etc/apt/sources.list.d/nvidia-docker.list


sudo apt-get update && sudo apt-get install -y nvidia-container-toolkit
sudo systemctl restart docker
创建镜像仓库账号(阿里云容器镜像)
阿里云容器服务地址为(https://cr.console.aliyun.com) 注册开通后产品页面如下
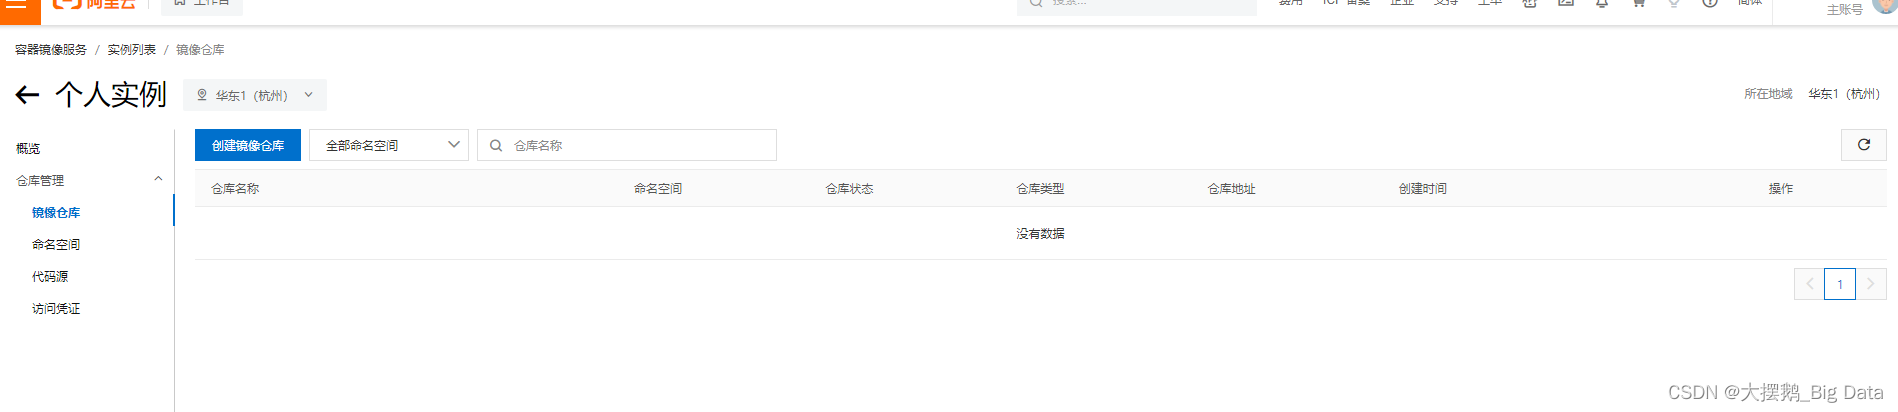
step 1:切换标签页到命名空间,创建地址唯一的命名空间
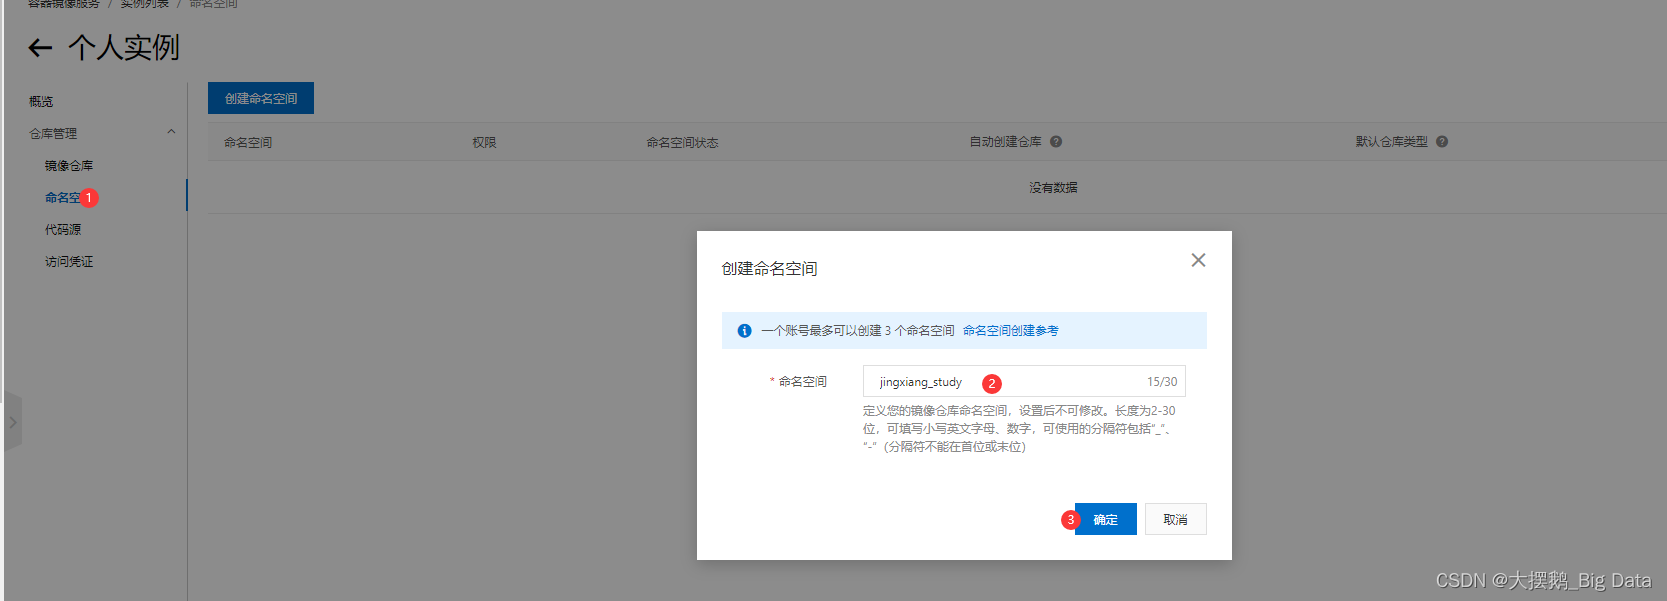
根据要求选择对应的地域,其他的按照自己需求选择或填写
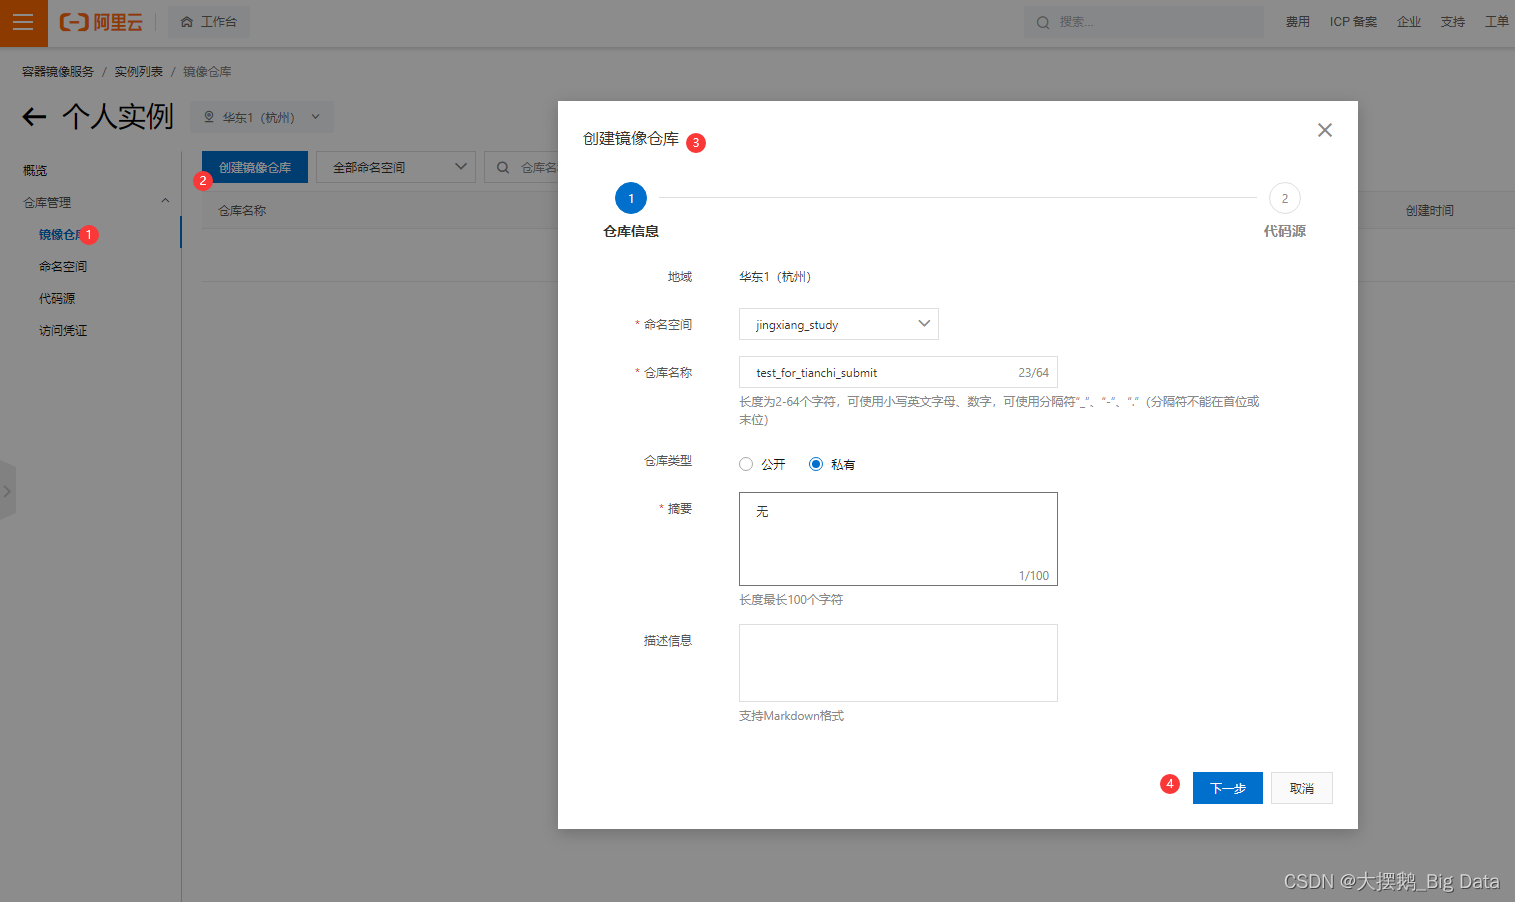
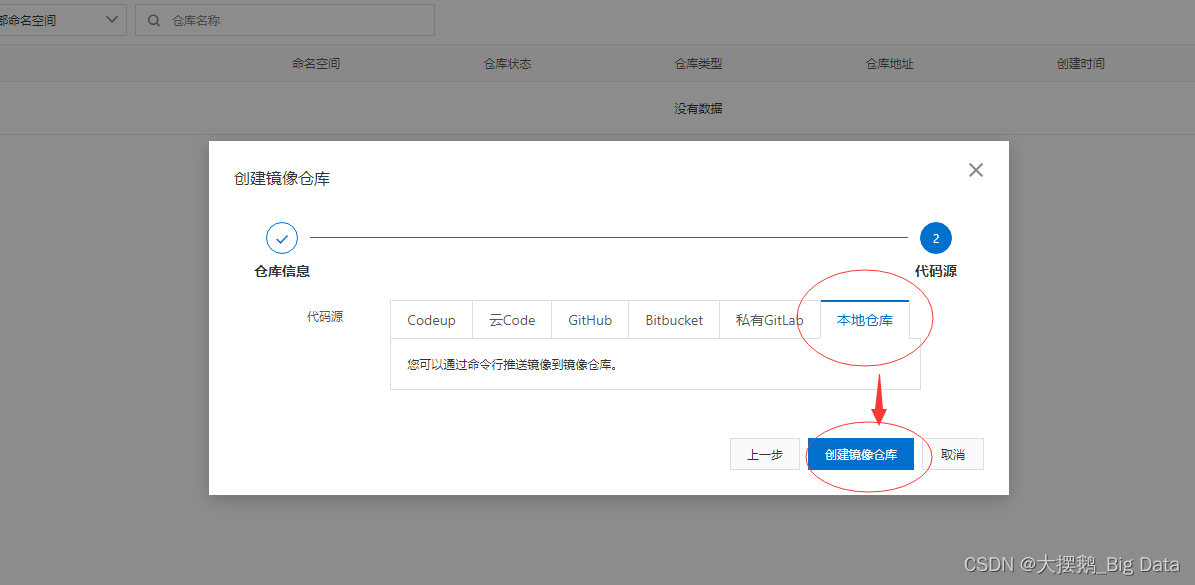
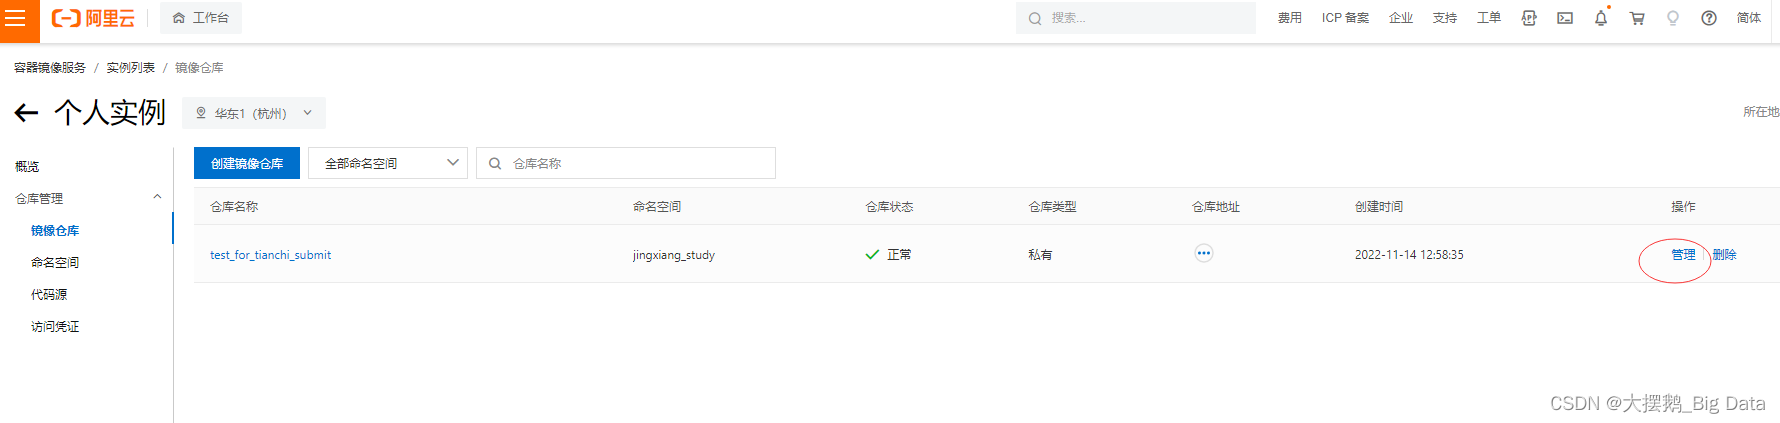
step 2:创建镜像仓库,选择本地仓库,不建议其他选项,完成创建。
step 3: 点击管理,可查看详情。
step 4: 按照页面的指令在本地完成登陆:
export DOCKER_REGISTRY= your_registry_url
(注意这里your_registry_url最后字段结尾,不能多不能少E.g registry.cn-shanghai.aliyuncs.com/xxxx/xxxx)
docker login $DOCKER_REGISTRY \
    --username your_username \
    --password your_password
1. 登录阿里云Docker Registry
$ docker login --username=aliyun8914549048 registry.cn-hangzhou.aliyuncs.com用于登录的用户名为阿里云账号全名,密码为开通服务时设置的密码。
您可以在访问凭证页面修改凭证密码。
2. 从Registry中拉取镜像
$ docker pull registry.cn-hangzhou.aliyuncs.com/jingxiang_study/test_for_tianchi_submit:[镜像版本号]3. 将镜像推送到Registry
$ docker login --username=aliyun8914549048 registry.cn-hangzhou.aliyuncs.com$ docker tag [ImageId] registry.cn-hangzhou.aliyuncs.com/jingxiang_study/test_for_tianchi_submit:[镜像版本号]$ docker push registry.cn-hangzhou.aliyuncs.com/jingxiang_study/test_for_tianchi_submit:[镜像版本号]请根据实际镜像信息替换示例中的[ImageId]和[镜像版本号]参数。
4. 选择合适的镜像仓库地址
从ECS推送镜像时,可以选择使用镜像仓库内网地址。推送速度将得到提升并且将不会损耗您的公网流量。
如果您使用的机器位于VPC网络,请使用 registry-vpc.cn-hangzhou.aliyuncs.com 作为Registry的域名登录。
5. 示例
使用"docker tag"命令重命名镜像,并将它通过专有网络地址推送至Registry。
$ docker imagesREPOSITORY TAG IMAGE ID CREATED VIRTUAL SIZEregistry.aliyuncs.com/acs/agent 0.7-dfb6816 37bb9c63c8b2 7 days ago 37.89 MB$ docker tag 37bb9c63c8b2 registry-vpc.cn-hangzhou.aliyuncs.com/acs/agent:0.7-dfb6816使用 "docker push" 命令将该镜像推送至远程。
$ docker push registry-vpc.cn-hangzhou.aliyuncs.com/acs/agent:0.7-dfb6816
构建镜像并推送至仓库
(以天池 零基础入门Docker-cuda练习场 为例:)
step1,选定一个基础镜像
自行构建镜像请确保安装curl.这里选择python3镜像为例:
docker pull registry.cn-shanghai.aliyuncs.com/tcc-public/python:3step 2:准备大赛项目文件
新建项目文件夹(例如tianchi_submit_demo)用于存放这次任务镜像所需的文件
准备解题文件main.py实现读取/tcdata下的数据,计算a*b 生成result.npy文件
#main.py
import os
import numpy as np
import torch
device = torch.device("cuda")
data_dir = '/tcdata'
a = np.load(os.path(data_dir,a.npy))
b = np.load(os.path(data_dir,b.npy))
a = torch.from_numpy(a).to(device)
b = torch.from_numpy(b).to(device)
c = torch.matmul(a,b).cpu()
print(c)
np.save("result.npy", c)
编写run.sh
#bin/bash
#打印GPU信息
nvidia-smi
#执行math.py
python3 math.py
然后编写Dockerfile 用于打包main.py和运行环境为镜像
# Base Images
## 从天池基础镜像构建(from的base img 根据自己的需要更换,建议使用天池open list镜像链接:https://tianchi.aliyun.com/forum/postDetail?postId=67720)
FROM registry.cn-shanghai.aliyuncs.com/tcc-public/pytorch:1.1.0-cuda10.0-py3
##安装python依赖包
RUN pip install numpy -i https://pypi.tuna.tsinghua.edu.cn/simple
## 把当前文件夹里的文件构建到镜像的根目录下,并设置为默认工作目录
ADD . /
WORKDIR /
## 镜像启动后统一执行 sh run.sh
CMD ["sh", "run.sh"]
命令行执行,构建镜像:
docker build -t registry.cn-hangzhou.aliyuncs.com/jingxiang_study/test_for_tianchi_submit:1.0 .
注意:registry.~~~是上面创建仓库的公网地址,用自己仓库地址替换。地址后面的:1.0为自己指定的版本号,用于区分每次build的镜像。最后的.是构建镜像的路径,不可以省掉。
构建完成后可先验证是否正常运行,正常运行后再进行推送。
docker run your_image sh run.sh推送到镜像仓库
docker pushregistry.cn-hangzhou.aliyuncs.com/jingxiang_study/test_for_tianchi_submit:1.0


 234
234


 被折叠的 条评论
为什么被折叠?
被折叠的 条评论
为什么被折叠?
 到【灌水乐园】发言


