


目录/Contents
第7章 Spring中的Bean的管理
学习目标
了解Spring IoC容器的原理
掌握Bean标签及其属性的使用
熟悉Bean的实例化
掌握Bean的作用域
掌握Bean的装配方式
熟悉Bean的生命周期
学习内容
1 Spring IoC容器
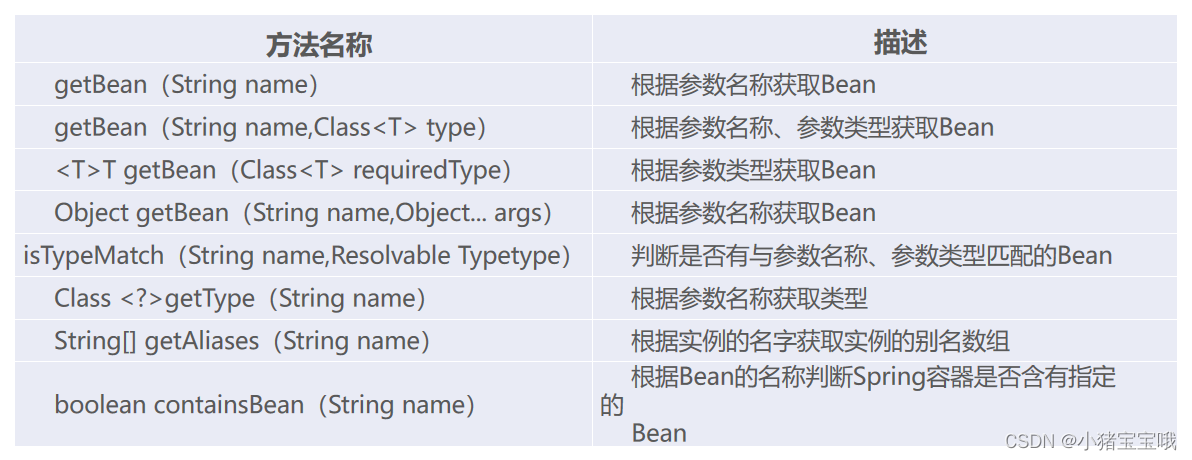
1.1 BeanFactory接口
1.1.1 BeanFactory接口的常用方法
1.1.2 BeanFactory接口实例的语法格式
Spring提供了几个BeanFactory接口的实现类,其中最常用的是XmlBeanFactory,它可以读取XML文件并根据XML文件中的配置信息生成BeanFactory接口的实例,BeanFactory接口的实例用于管理Bean。XmlBeanFactory类读取XML文件生成BeanFactory接口实例的具体语法格式如下。
BeanFactory beanFactory=new XmlBeanFactory
	(new FileSystemResource(”D:/bean.xml”));
1.2 ApplicationContext接口
1.2.1 ApplicationContext接口的特点
ApplicationContext接口建立在BeanFactory接口的基础之上,它丰富了BeanFactory接口的特性,例如,添加了对国际化、资源访问、事件传播等方面的支持。
ApplicationContext接口可以为单例的Bean实行预初始化,并根据<property>元素执行setter方法,单例的Bean可以直接使用,提升了程序获取Bean实例的性能。
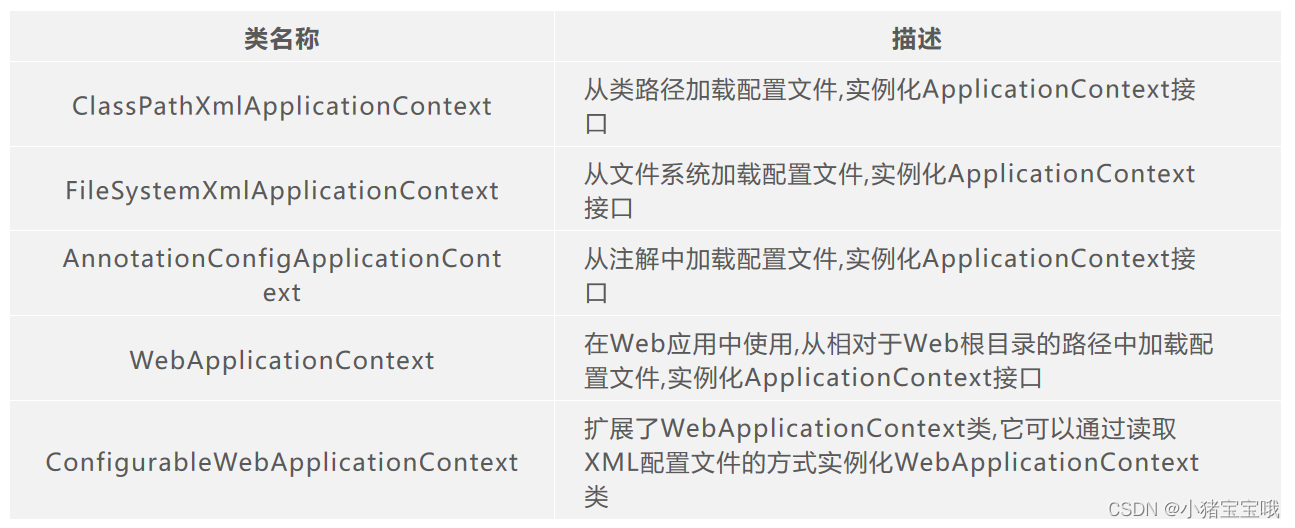
1.2.2 ApplicationContext接口的常用实现类
2 Bean的配置
2.1 Spring容器所支持的配置文件格式
Spring容器支持XML和Properties两种格式的配置文件,在实际开发中,最常用的是XML格式的配置文件。XML是标准的数据传输和存储格式,方便查看和操作数据。在Spring中,XML配置文件的根元素是<beans>,<beans>元素包含<bean>子元素,每个<bean>子元素可以定义一个Bean,通过<bean>元素将Bean注册到Spring容器中。
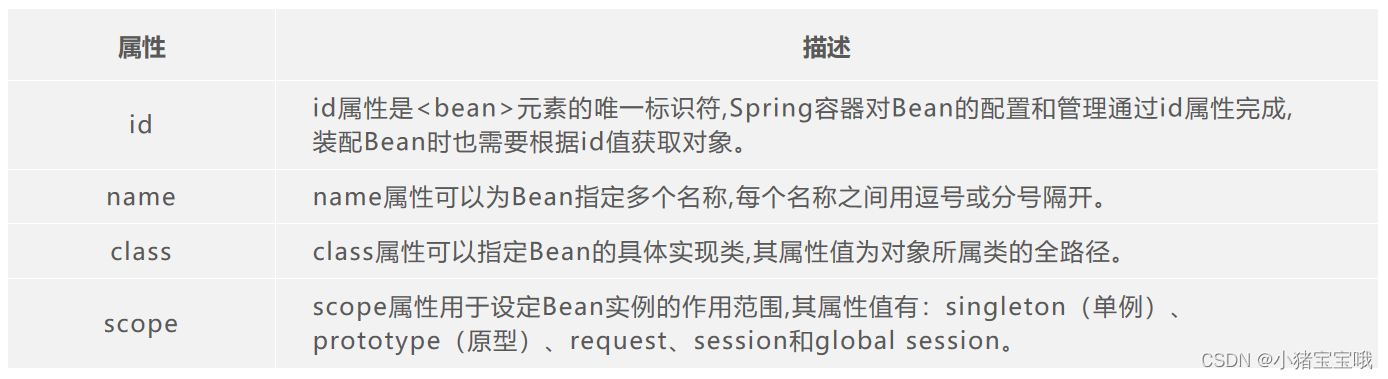
2.2 <bean>元素的常用属性
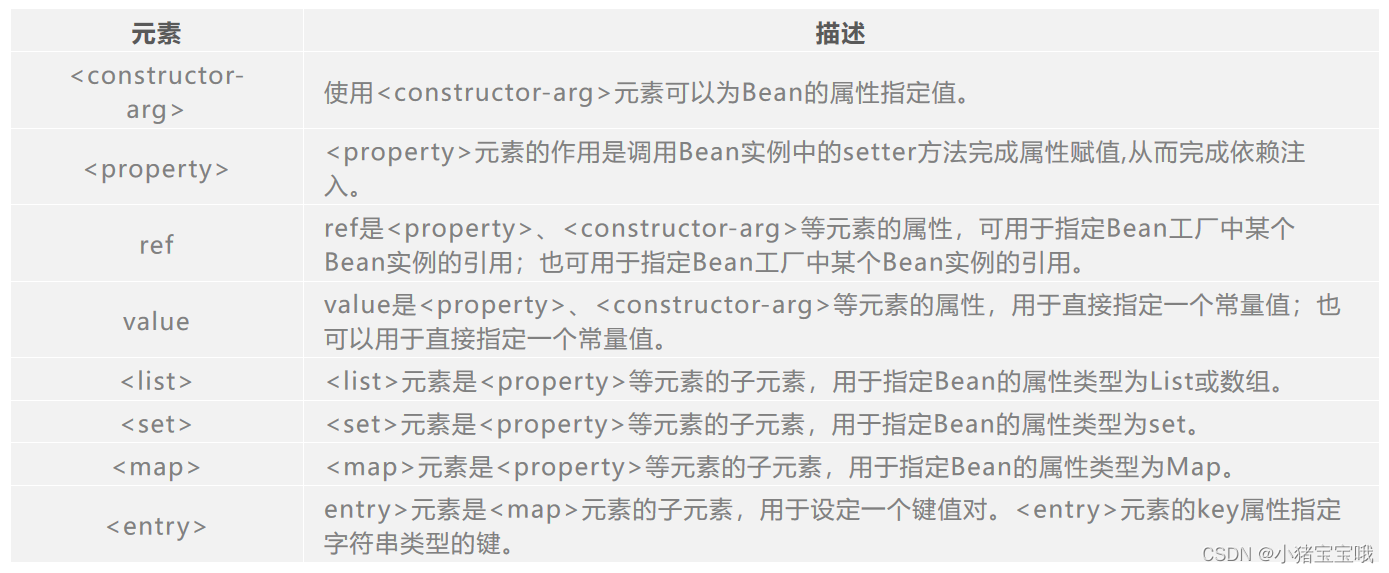
2.3 <bean>元素的常用子元素
2.4 普通的Bean通常只需定义id(或者name)和class两个属性
<beans xmlns="http://www.springframework.org/schema/beans"
       xmlns:xsi="http://www.w3.org/2001/XMLSchema-instance" xsi:schemaLocation="http://www.springframework.org/schema/beans
http://www.springframework.org/schema/beans/spring-beans.xsd">
    <!--使用id属性定义bean1,对应的实现类为com.itheima.Bean1-->
    <bean id="bean1" class="com.itheima.Bean1">
    </bean>
    <!--使用name属性定义bean2,对应的实现类为com.itheima.Bean2-->
    <bean name="bean2" class="com.itheima.Bean2"/>
</beans>
3 Bean的实例化
3.1 构造方法实例化
下面通过一个案例演示Spring容器如何通过构造方法实例化Bean。
STEP 01
在IDEA中创建一个名为chapter07的Maven项目,然后在项目的pom.xml文件中配置需使用到的Spring四个基础包和Spring的依赖包。
<!– 这里只展示了一个依赖包-->
<!-- spring-expression的依赖包 -->
        <dependency>
            <groupId>org.springframework</groupId>
            <artifactId>spring-expression</artifactId>
            <version>5.2.8.RELEASE</version>
        </dependency>
STEP 02
创建一个名称为com.itheima的包,在该包中创建Bean1类。
package com.itheima;
public class Bean1 {

    public Bean1(){

        System.out.println("这是Bean1");
    }
}
STEP 03
新建applicationBean1.xml作为Bean1类的配置文件,在该配置文件中定义一个id为bean1的Bean,并通过class属性指定其对应的实现类为Bean1。
<?xml version="1.0" encoding="UTF-8"?>
<beans xmlns="http://www.springframework.org/schema/beans"
       xmlns:xsi="http://www.w3.org/2001/XMLSchema-instance"
       xsi:schemaLocation="http://www.springframework.org/schema/beans
	http://www.springframework.org/schema/beans/spring-beans.xsd">
    <bean id="bean1" class="com.itheima.Bean1"></bean>
</beans>
STEP 04
创建测试类Bean1Test,在main()方法中通过加载applicationBean1.xml配置文件初始化Spring容器,再通过Spring容器生成Bean1类的实例bean1,用来测试构造方法是否能实例化Bean1。
public class Bean1Test {

    public static void main(String[] args){

        // 加载applicationBean1.xml配置
        ApplicationContext applicationContext=new
                                             ClassPathXmlApplicationContext("applicationBean1.xml");
        // 通过容器获取配置中bean1的实例
        Bean1 bean=(Bean1) applicationContext.getBean("bean1");
        System.out.print(bean);		}
}
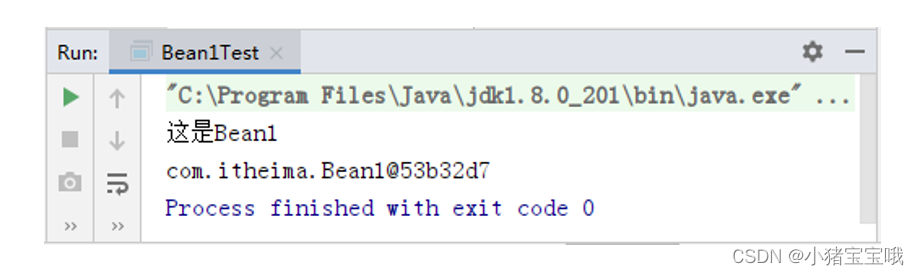
STEP 05
在IDEA中启动Bean1Test类,控制台会输出结果。
 最低0.47元/天 解锁文章


 439
439


 被折叠的 条评论
为什么被折叠?
被折叠的 条评论
为什么被折叠?
 到【灌水乐园】发言


