


目录
Gitee地址:狂神-SpringBoot: 学习狂神的课程时,写的练习项目 - Gitee.com
一、Springboot简介
1、什么是Springboot
Spring是一个开源框架,2003 年兴起的一个轻量级的Java 开发框架,SpringBoot是对他的加强

Spring Boot的主要优点:
- 为所有Spring开发者更快的入门
- 开箱即用,提供各种默认配置来简化项目配置
- 内嵌式容器简化Web项目
- 没有冗余代码生成和XML配置的要求
- 简化配置:Springboot是对Spring的进一步封装,基于注解开发,舍弃了笨重的xml配置,使用yml或者properties配置
- 产品级独立运行:每一个工程都可以打包成一个jar包,内置了Tomcat和Servlet容器,可以独立运行
- 强大的场景启动器:每一个特定场景下的需求都封装成了一个starter,只要导入了这个starter就有了这个场景所有的一切
2、微服务学习路线

3、第一个SpringBoot程序
开发环境
- JDK-1.8
- Maven-3.6.3
- Springboot-2.2.13.RELEASE
Spring官方提供了非常方便的工具让我们快速构建应用
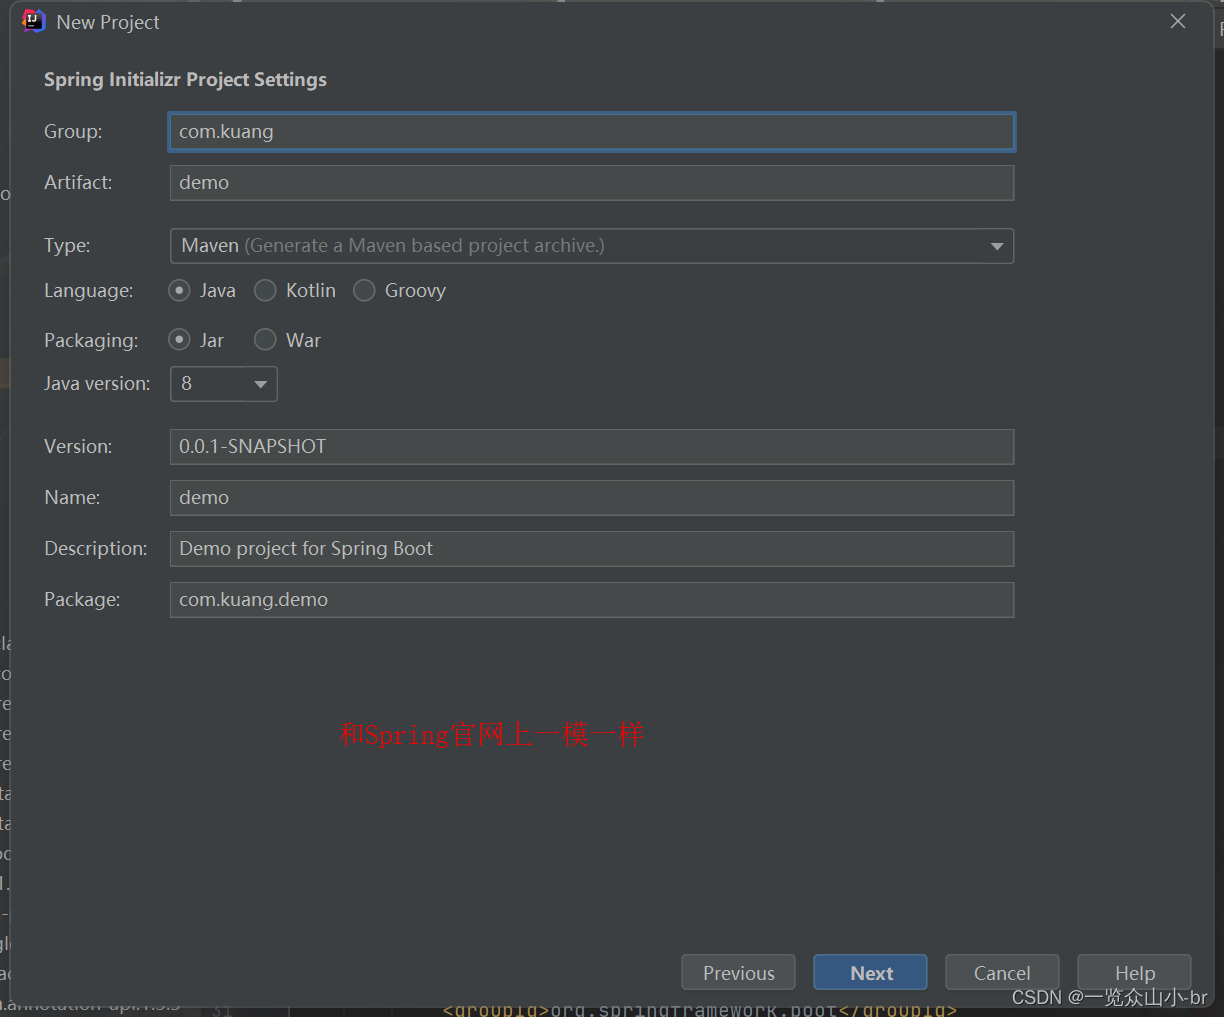
构建方式一:Spring Initializr:https://start.spring.io/

填写项目信息
构建方式二:打开https://start.spring.io/网站,构建maven项目

点击Generate,会下载构建好的项目工程
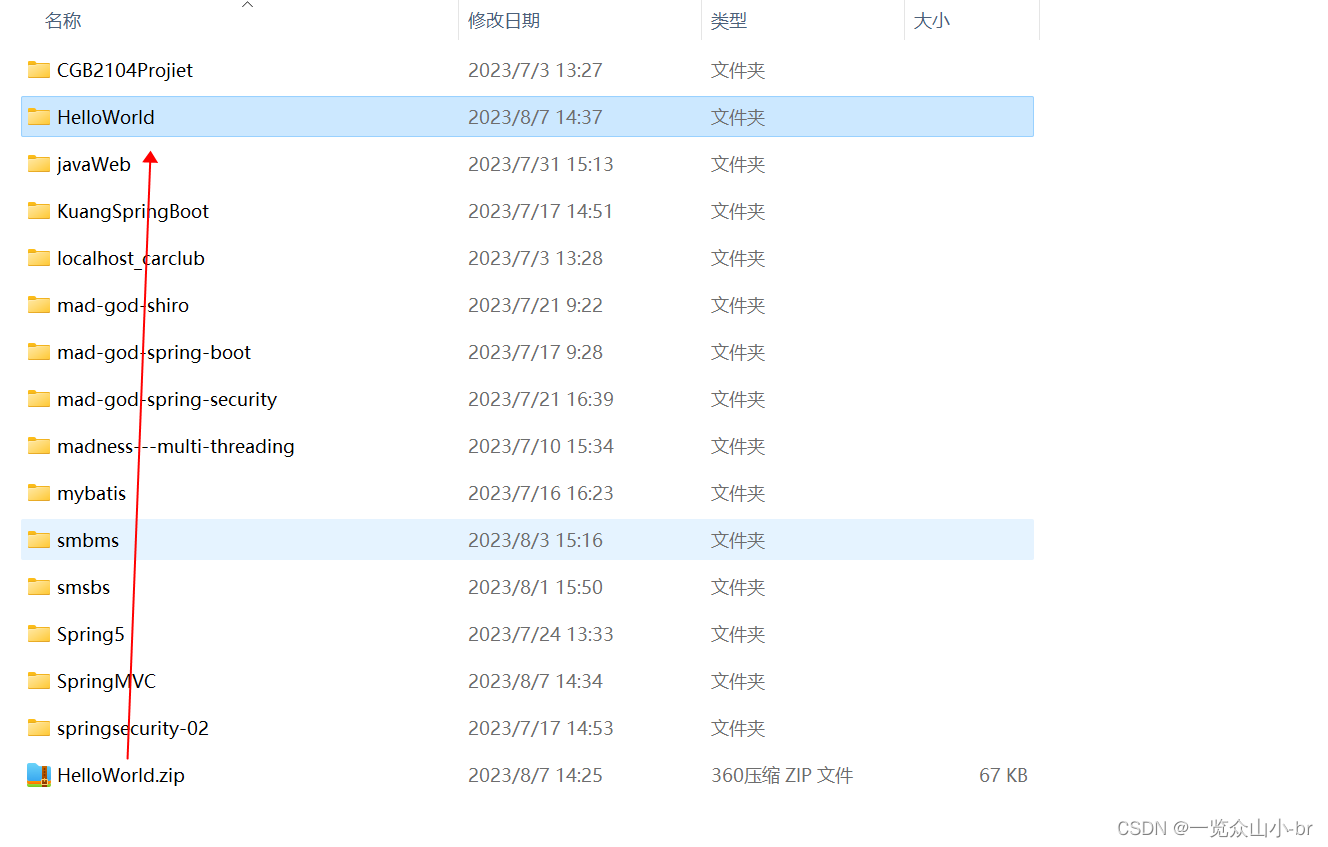
解压缩打开,自动下载jar包
好了,项目这时就可以启动了!
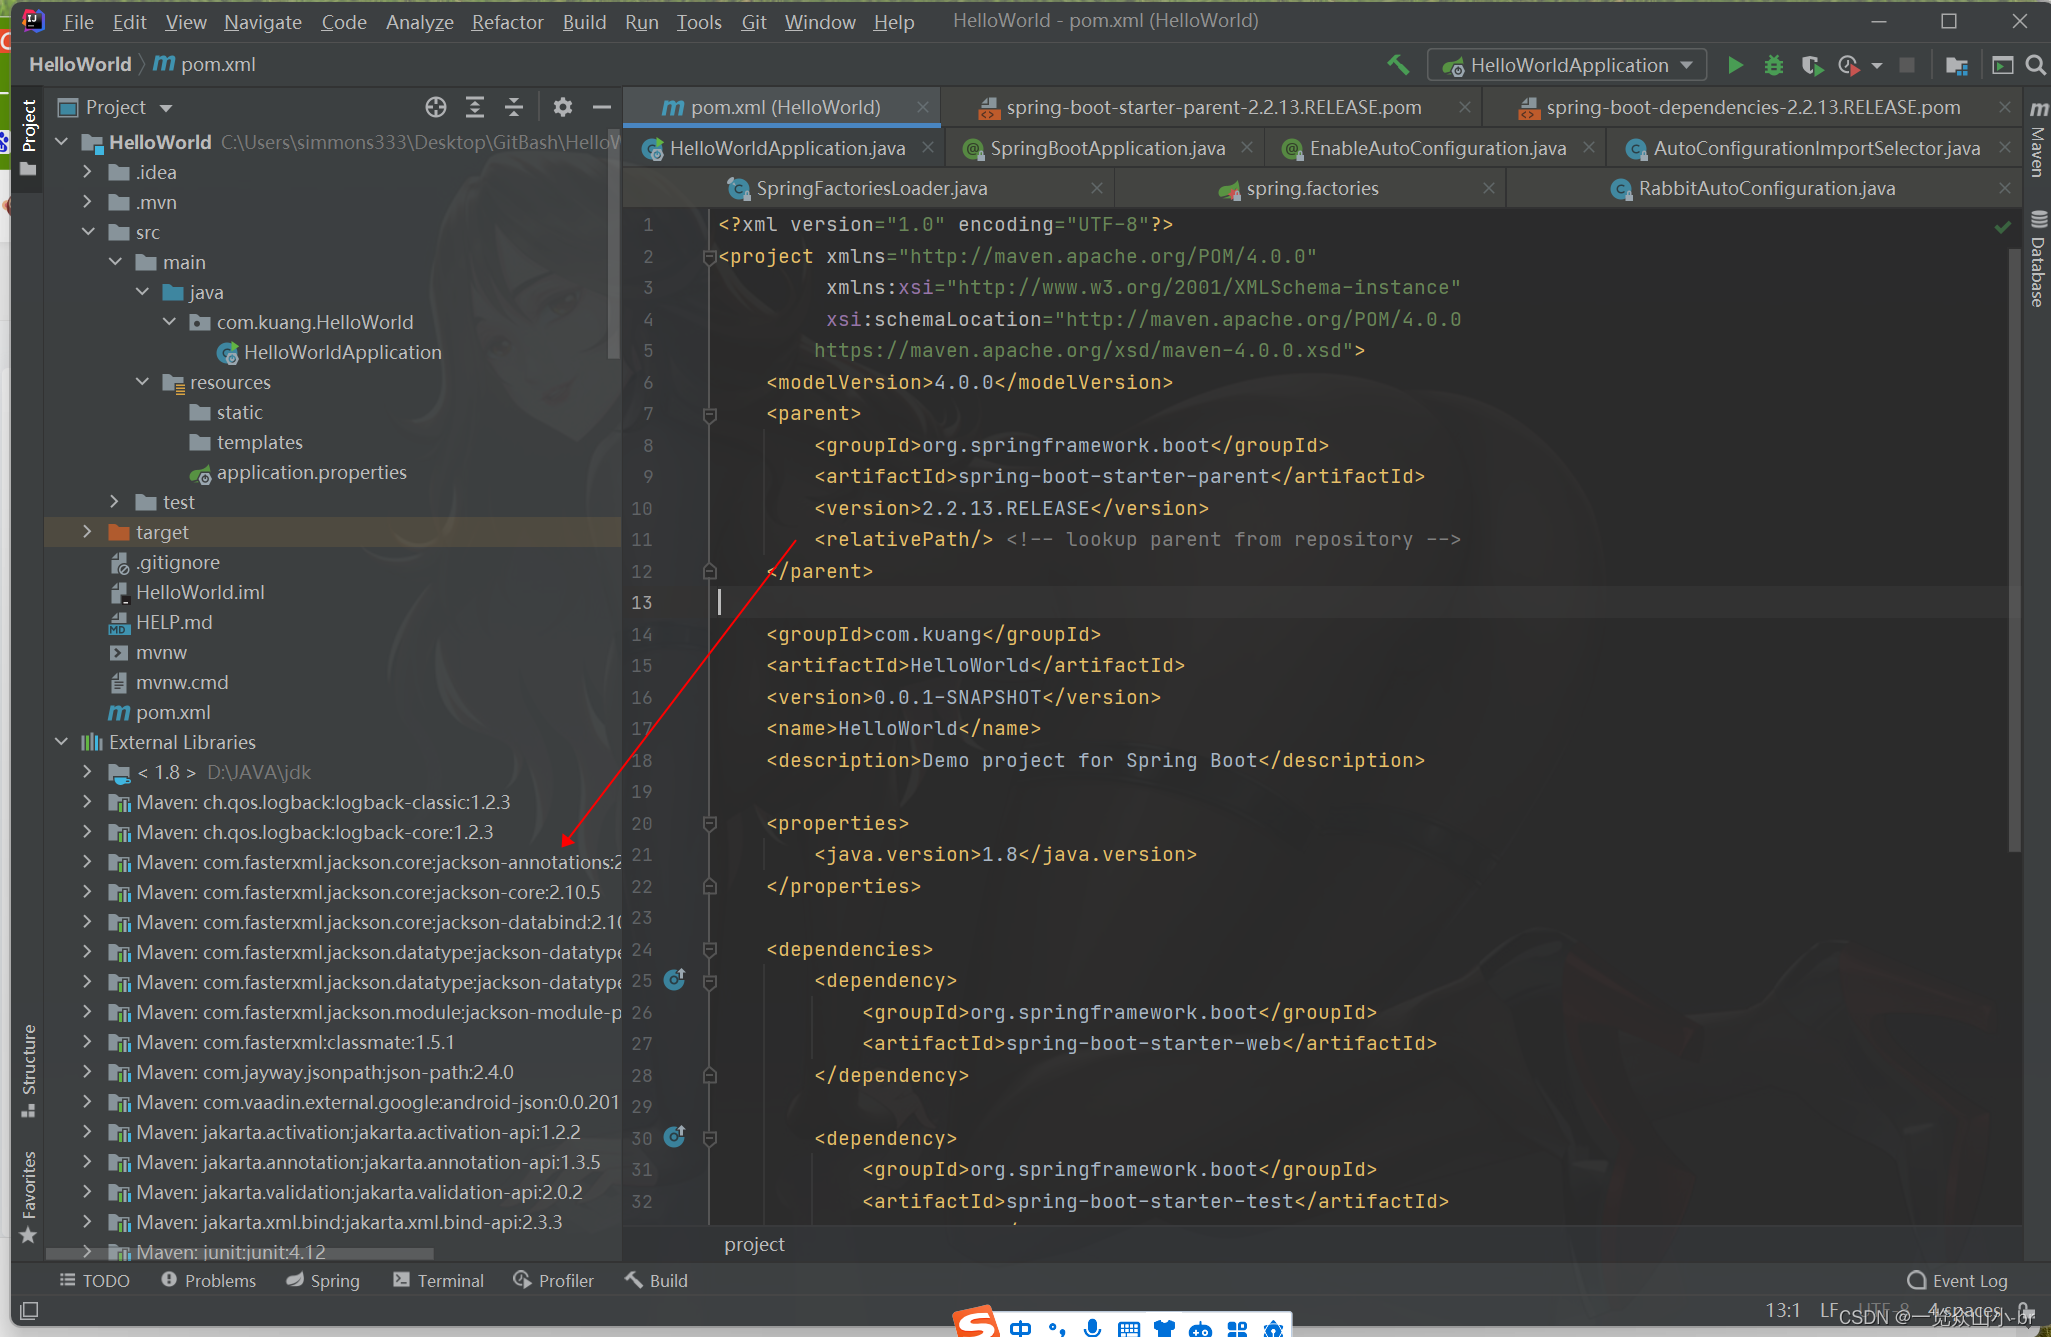
项目结构分析:
1、程序的主启动类Application.java
2、一个 application.properties 配置文件
3、一个 测试类
4、一个 pom.xml
<?xml version="1.0" encoding="UTF-8"?>
<project xmlns="http://maven.apache.org/POM/4.0.0"
         xmlns:xsi="http://www.w3.org/2001/XMLSchema-instance"
         xsi:schemaLocation="http://maven.apache.org/POM/4.0.0
		https://maven.apache.org/xsd/maven-4.0.0.xsd">
    <modelVersion>4.0.0</modelVersion>
    <parent>
        <groupId>org.springframework.boot</groupId>
        <artifactId>spring-boot-starter-parent</artifactId>
        <version>2.2.13.RELEASE</version>
        <relativePath/> <!-- lookup parent from repository -->
    </parent>

    <groupId>com.kuang</groupId>
    <artifactId>HelloWorld</artifactId>
    <version>0.0.1-SNAPSHOT</version>
    <name>HelloWorld</name>
    <description>Demo project for Spring Boot</description>

    <properties>
        <java.version>1.8</java.version>
    </properties>

    <dependencies>
        <dependency>
            <groupId>org.springframework.boot</groupId>
            <artifactId>spring-boot-starter-web</artifactId>
        </dependency>

        <dependency>
            <groupId>org.springframework.boot</groupId>
            <artifactId>spring-boot-starter-test</artifactId>
            <scope>test</scope>
        </dependency>
    </dependencies>

    <build>
        <plugins>
            <plugin>
                <groupId>org.springframework.boot</groupId>
                <artifactId>spring-boot-maven-plugin</artifactId>
            </plugin>
        </plugins>
    </build>

</project>
编写一个HelloController后,运行主启动类
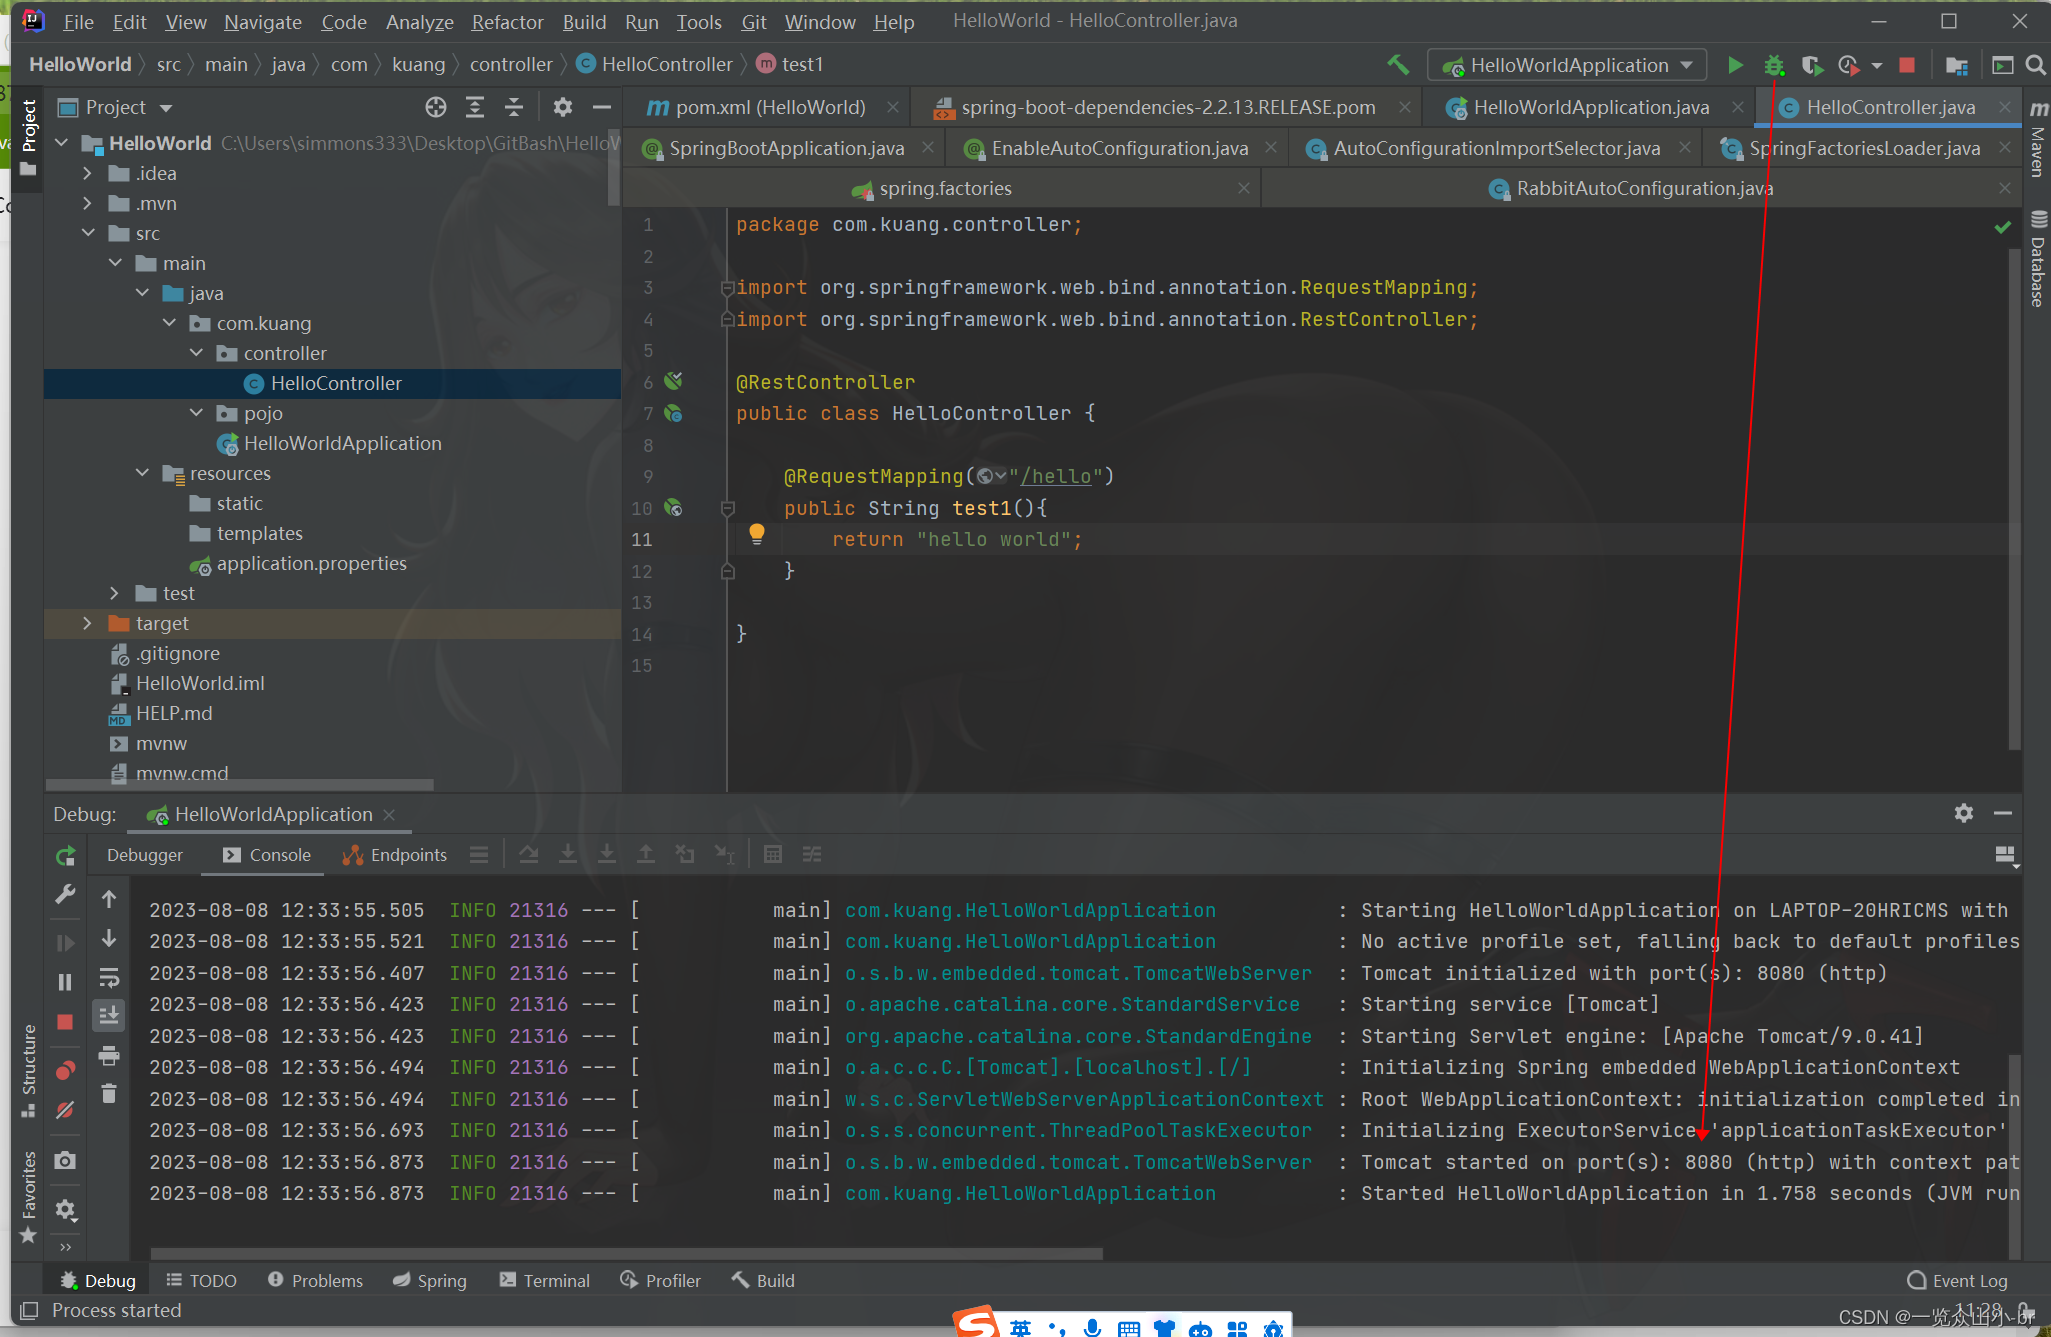
访问8080端口
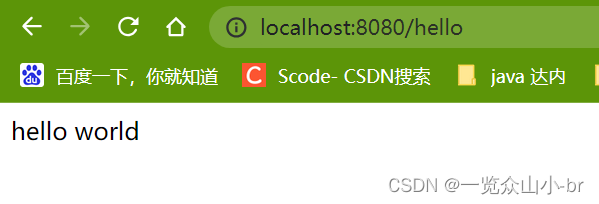
简单几步,就完成了一个web接口的开发,SpringBoot就是这么简单。
所以我们常用它来建立我们的微服务项目!
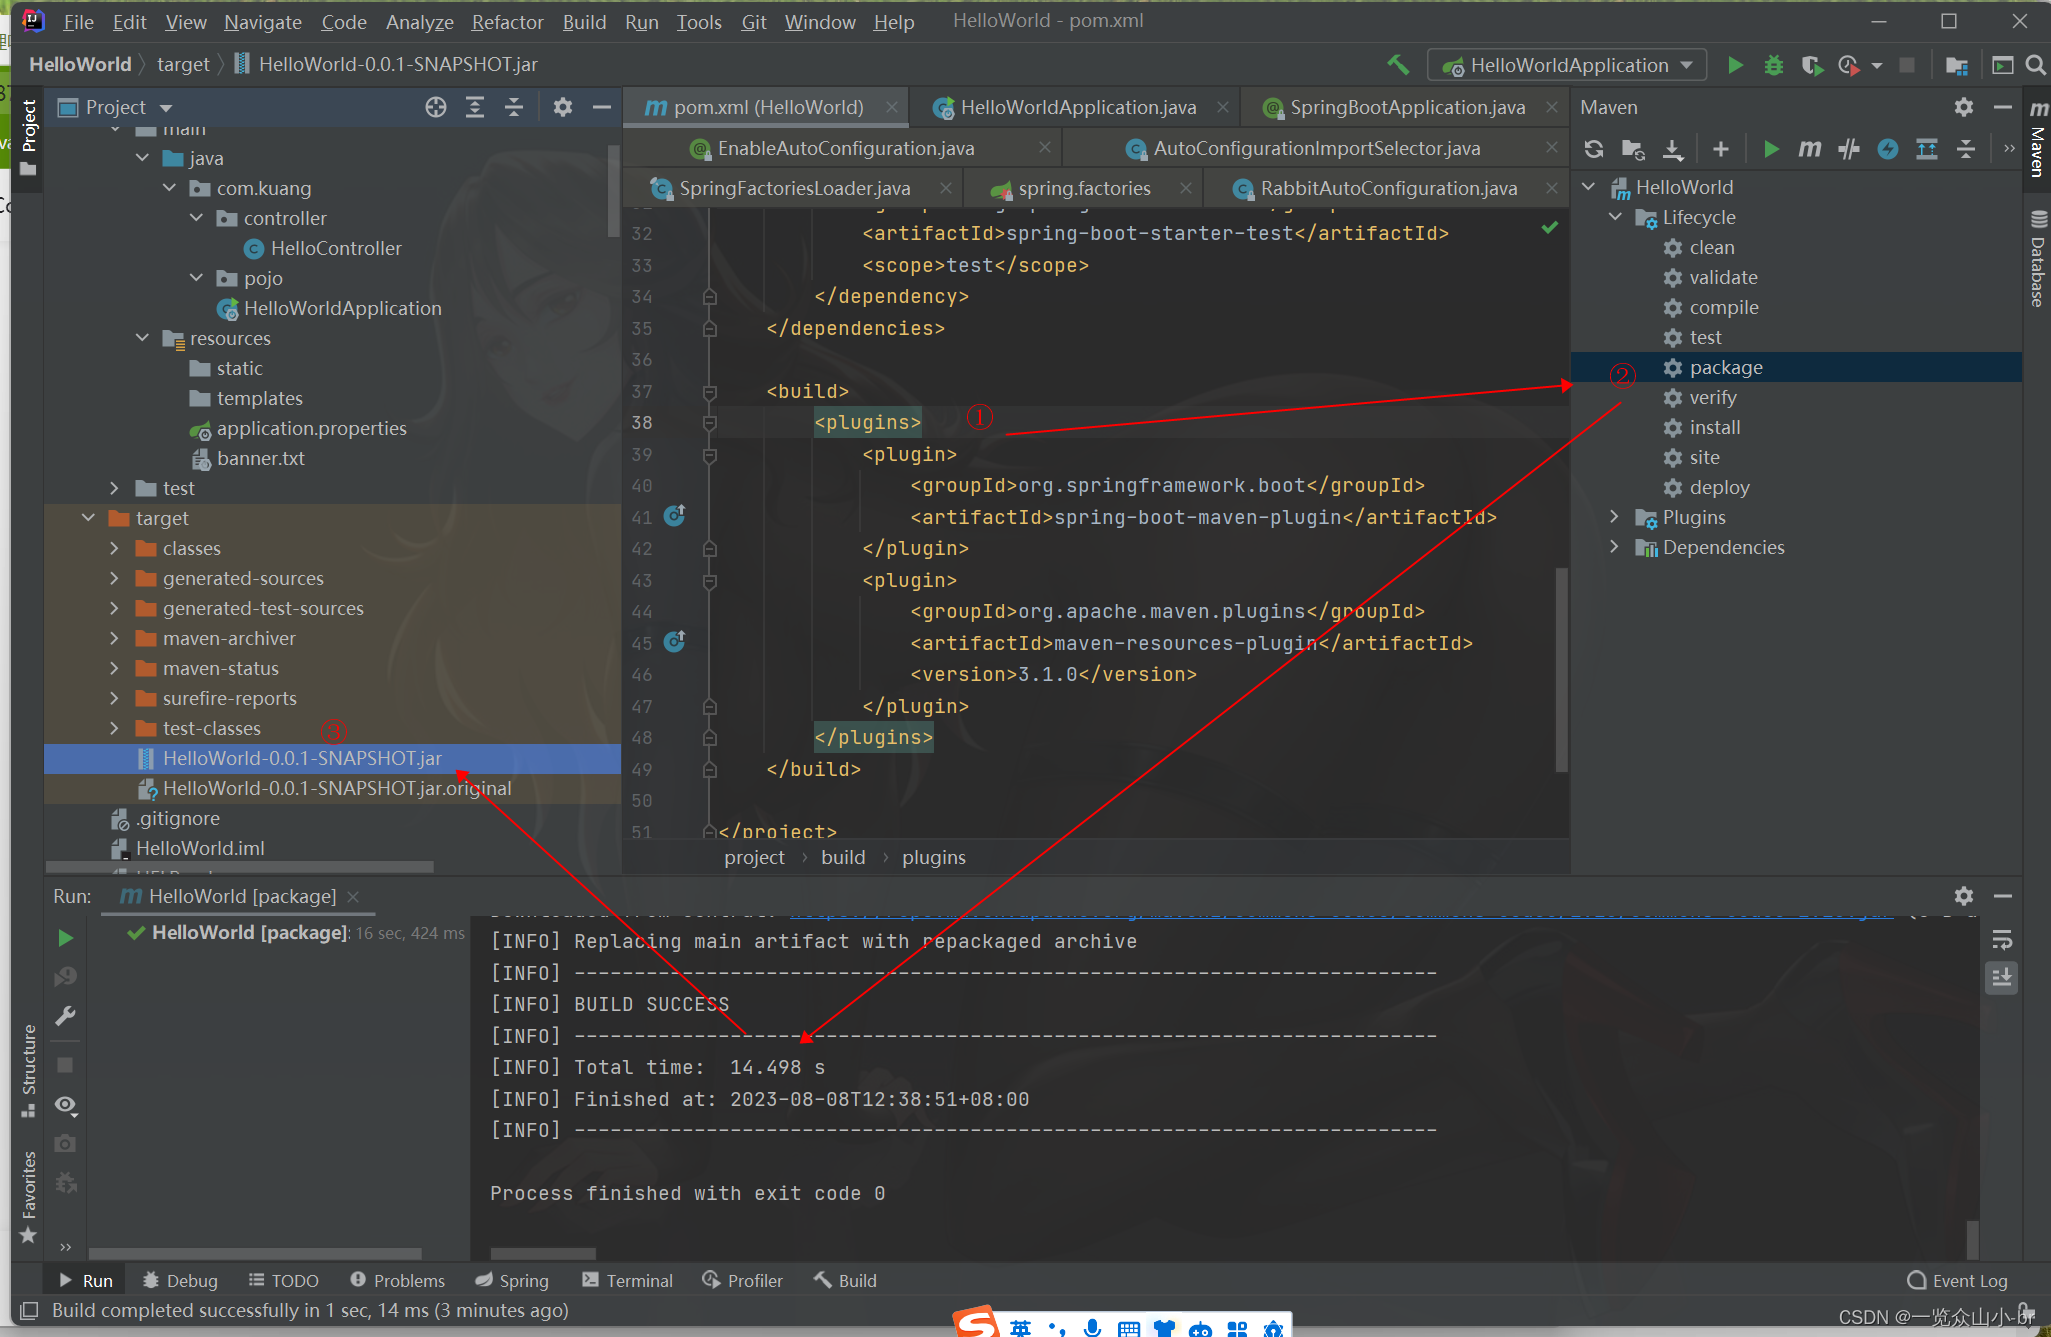
简单的3步,就可以打包项目
<!-- 第一种方法 -->
<plugin>
<groupId>org.apache.maven.plugins</groupId>
<artifactId>maven-resources-plugin</artifactId>
<version>3.1.0</version>
</plugin>
<!-- 第二种方法 -->
<!--
在工作中,很多情况下我们打包是不想执行测试用例的
可能是测试用例不完事,或是测试用例会影响数据库数据
跳过测试用例执
-->
<plugin>
<groupId>org.apache.maven.plugins</groupId>
<artifactId>maven-surefire-plugin</artifactId>
<configuration>
<!--跳过项目运行测试用例-->
<skipTests>true</skipTests>
</configuration>
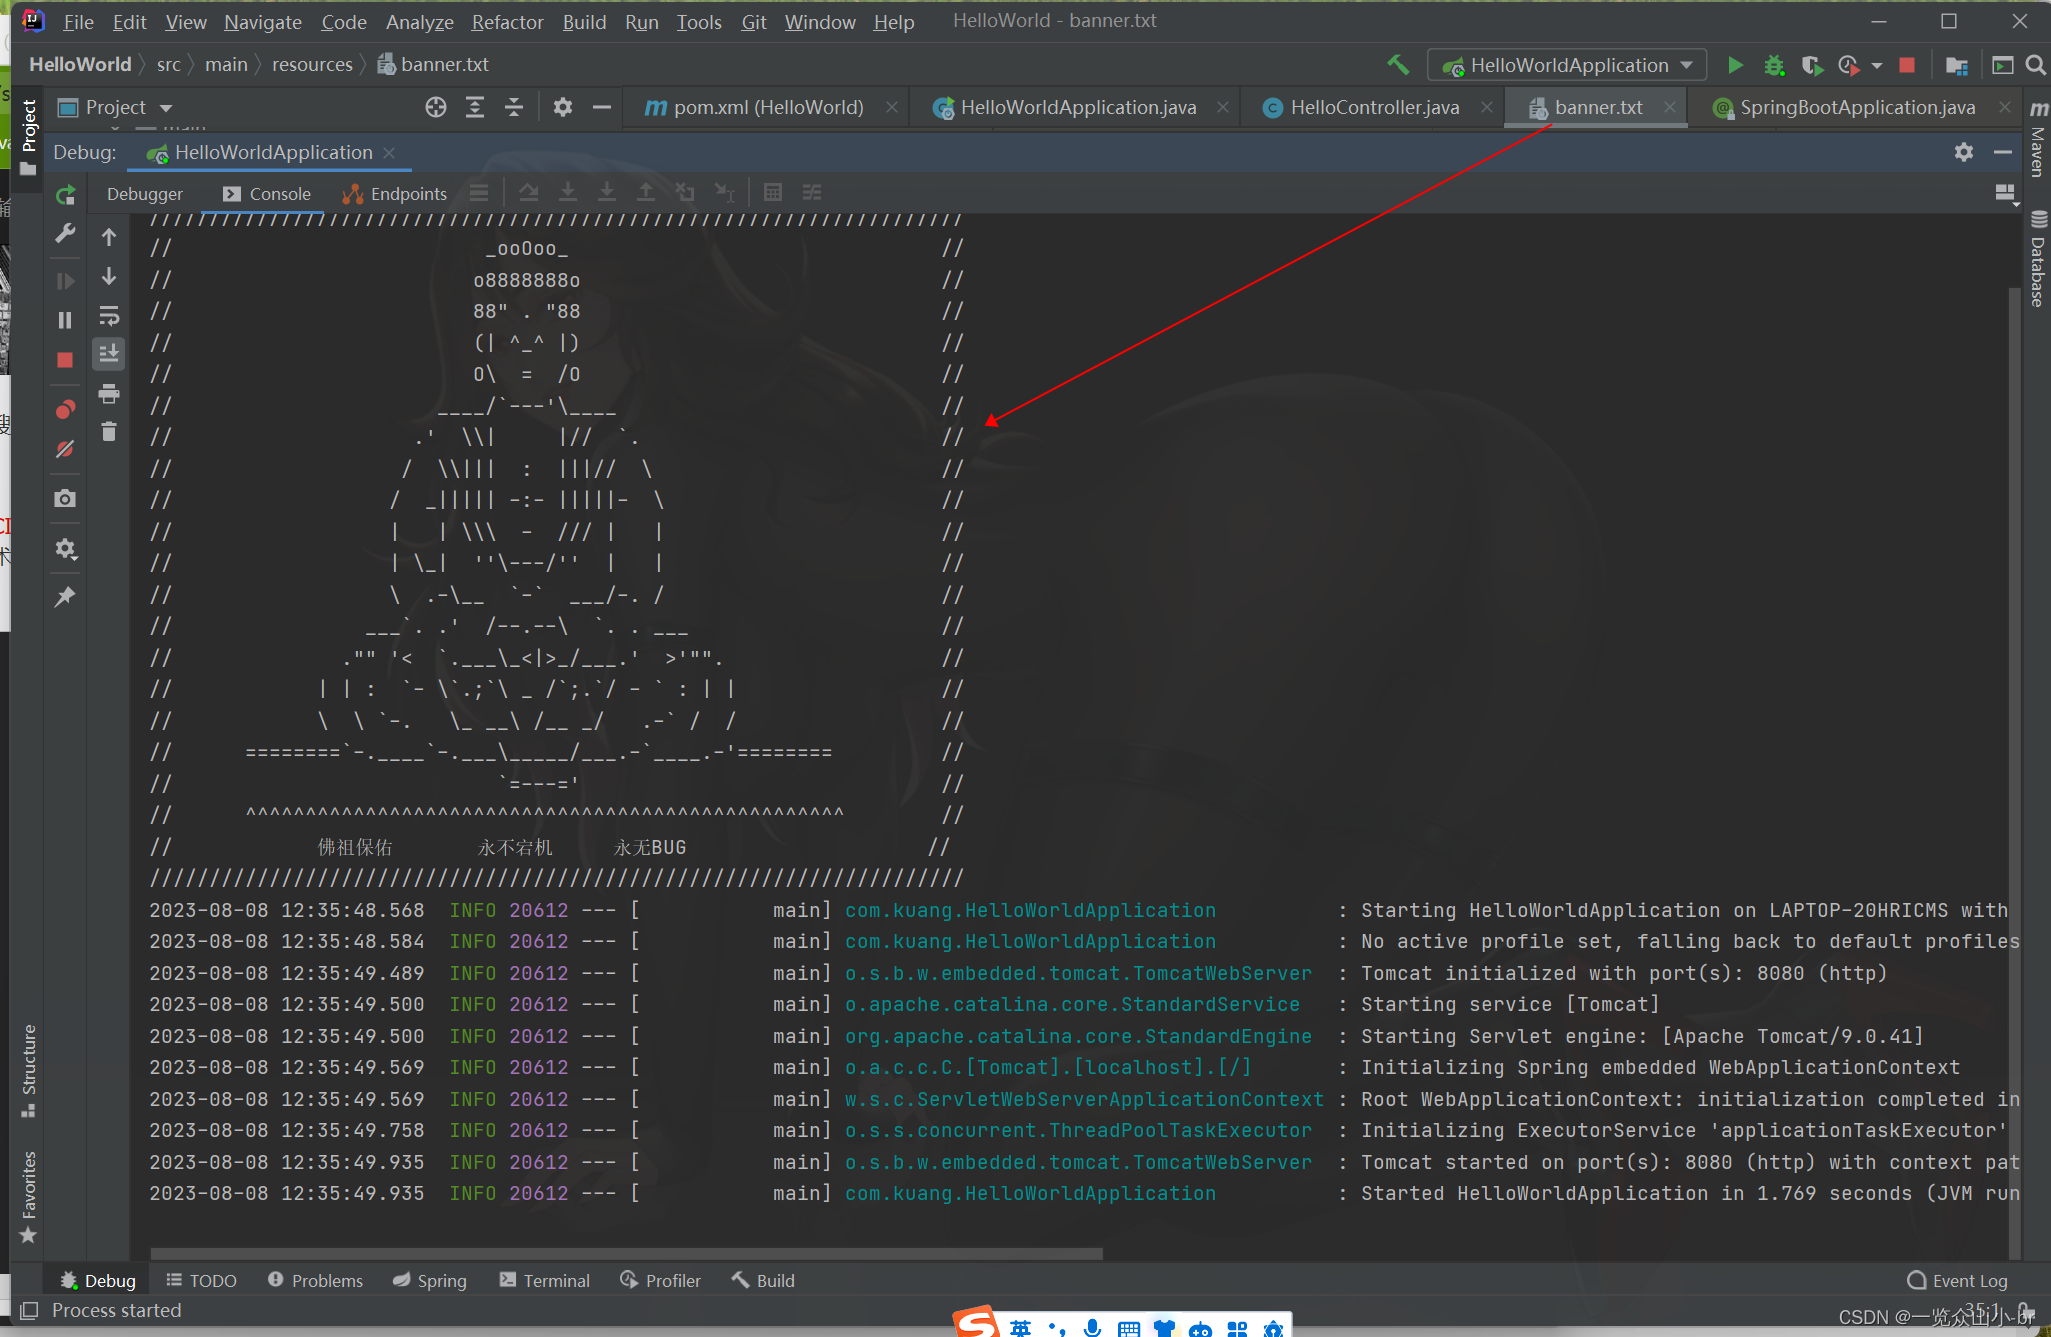
</plugin>图案可以到:https://www.bootschool.net/ascii 这个网站生成,然后拷贝到文件中即可!
二、分析SpringBoot源码
1、pom.xml父工程
父工程师官网默认设置好了的资源和依赖,已有的,我们配置时就不用写版本号
    <parent>
        <groupId>org.springframework.boot</groupId>
        <artifactId>spring-boot-starter-parent</artifactId>
        <version>2.2.13.RELEASE</version>
        <relativePath/> <!-- lookup parent from repository -->
    </parent>
点spring-boot-starter-parent进去看父工程,就会看到官方配置好的依赖和资源版本号
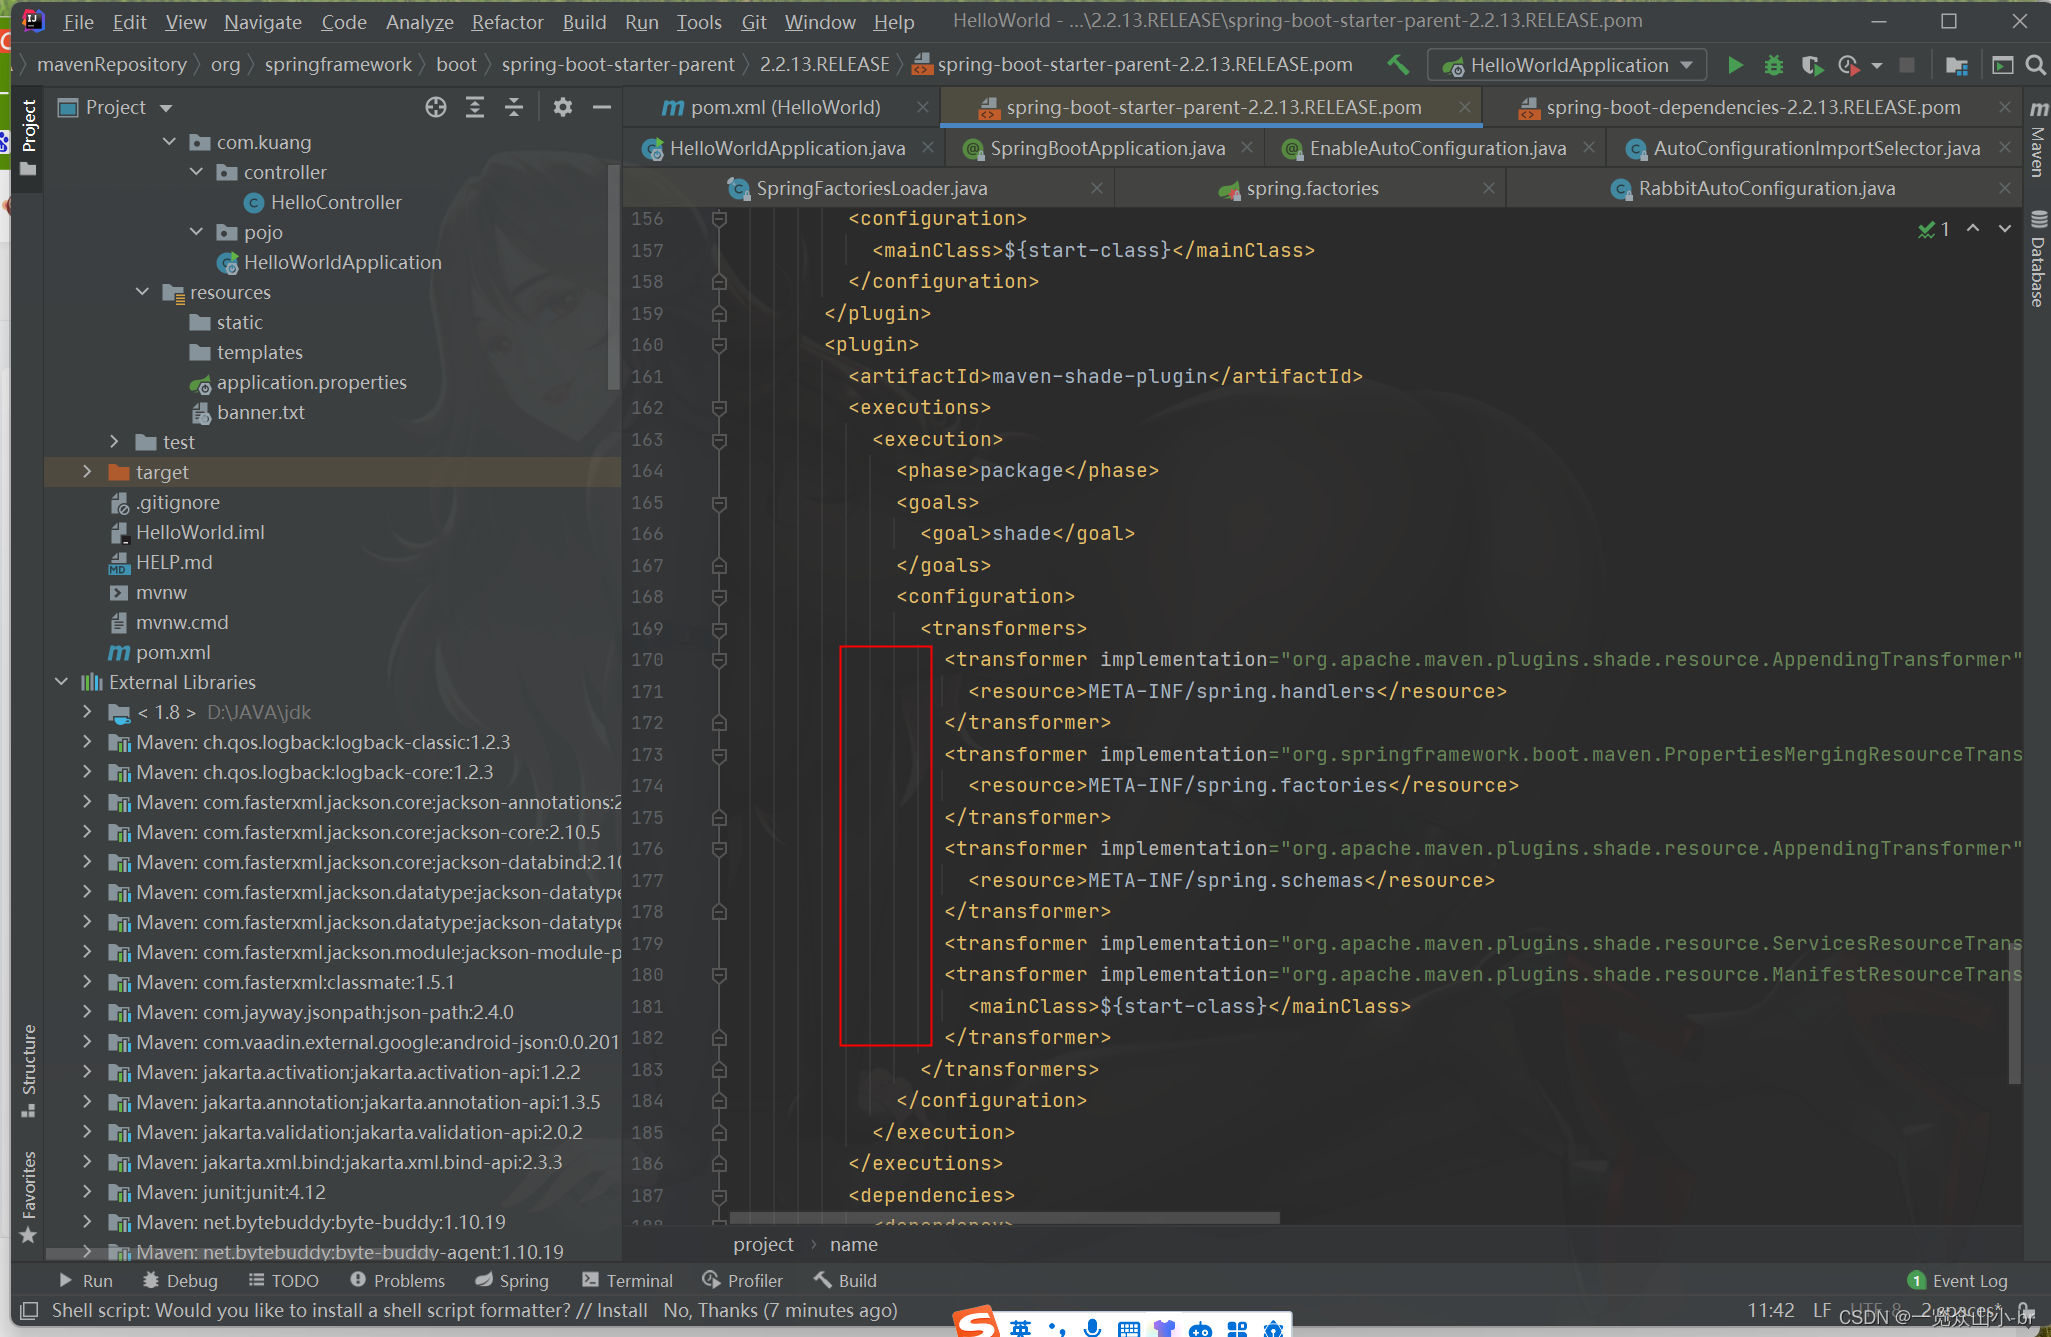
- 配置好了资源文件的格式
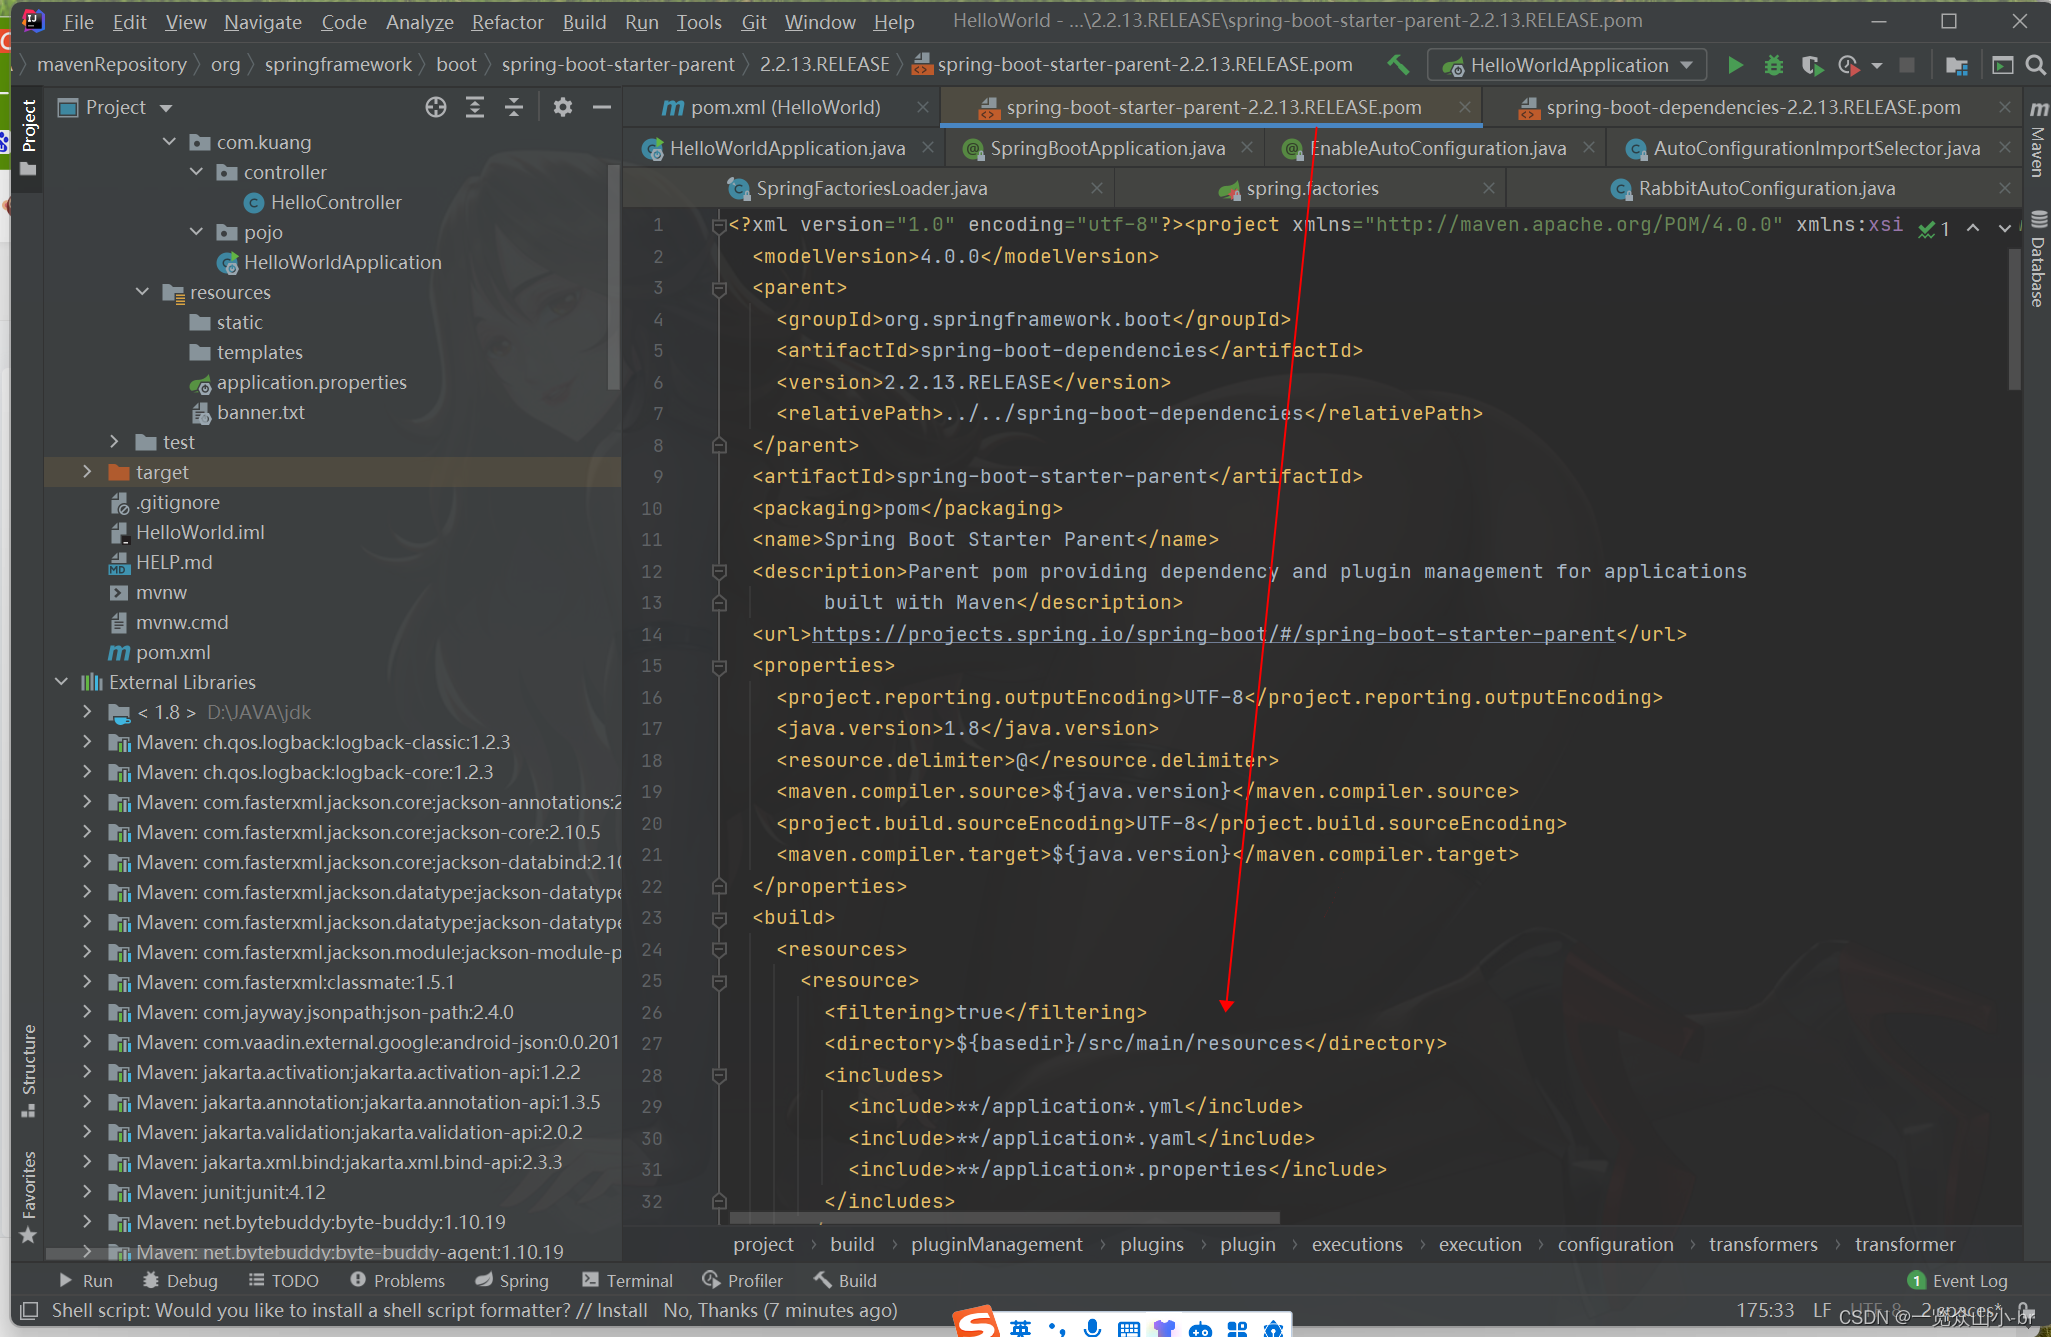
- 自动装配的文件的名称和类
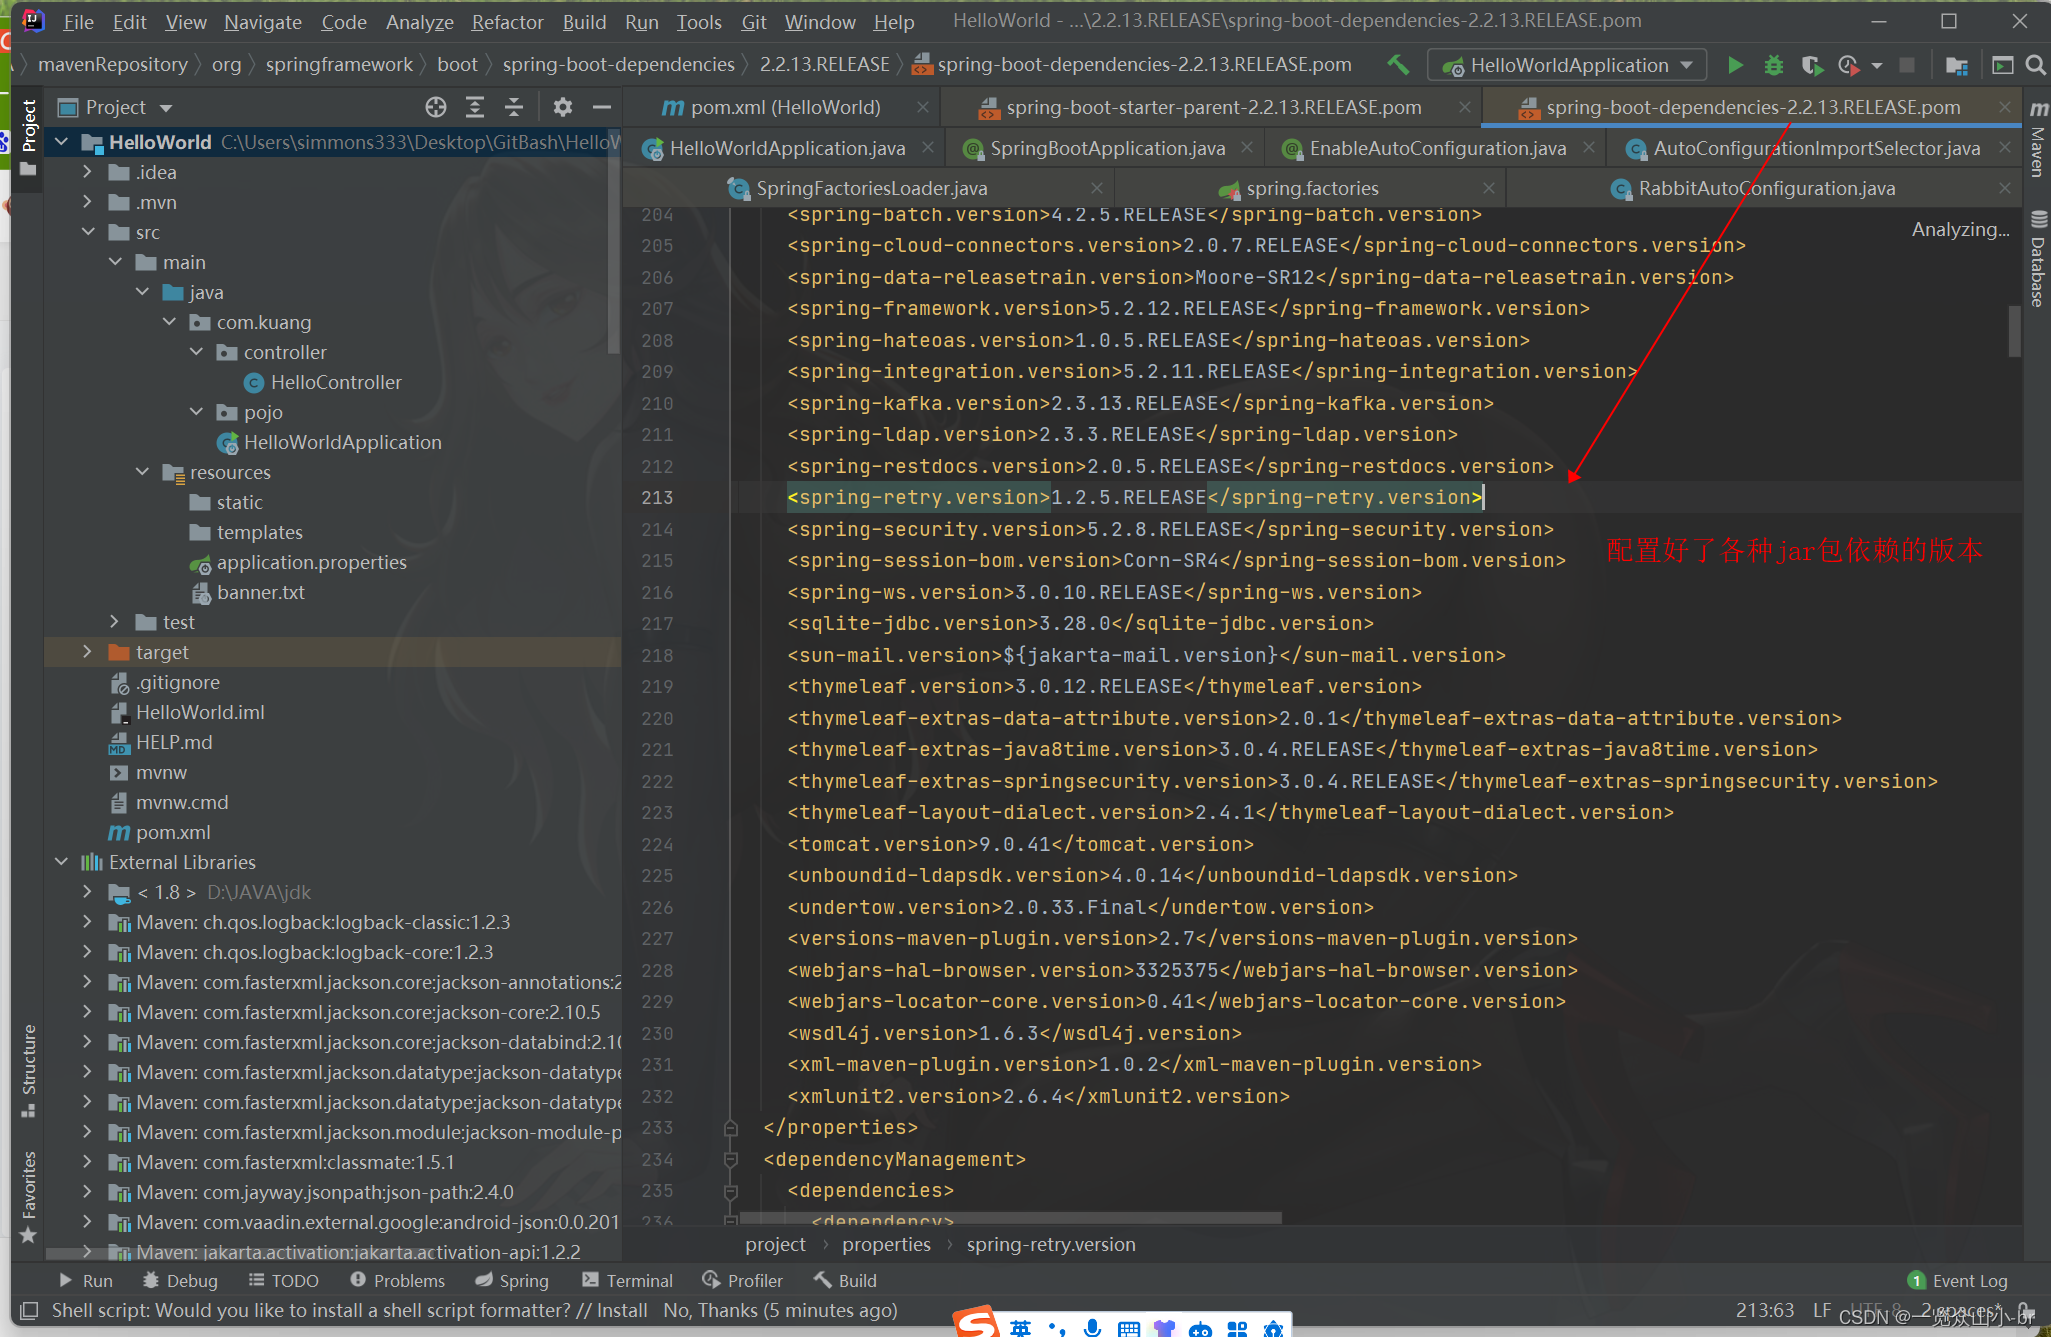
- 再点击父工程的父工程,会看到爷爷工程配置好了各种jar包,及他们的关联版本
2、starter启动器
SpringBoot将所有的功能场景都抽取出来,做成一个个的starter (启动器),只需要在项目中引入这些starter即可,所有相关的依赖都会导入进来 , 我们要用什么功能就导入什么样的场景启动器即可 ;我们未来也可以自己自定义 starter;
<dependency>
    <groupId>org.springframework.boot</groupId>
    <artifactId>spring-boot-starter-web</artifactId>
</dependency>
3、Application主启动类
//@SpringBootApplication : 标注这个类是一个Springboot的应用
@SpringBootApplication
public class Springboot01HellowordApplication {
    //将Springboot的应用启动
    public static void main(String[] args) {
        SpringApplication.run(Springboot01HellowordApplication.class, args);
    }
}
① 分析SpringBootApplication源码
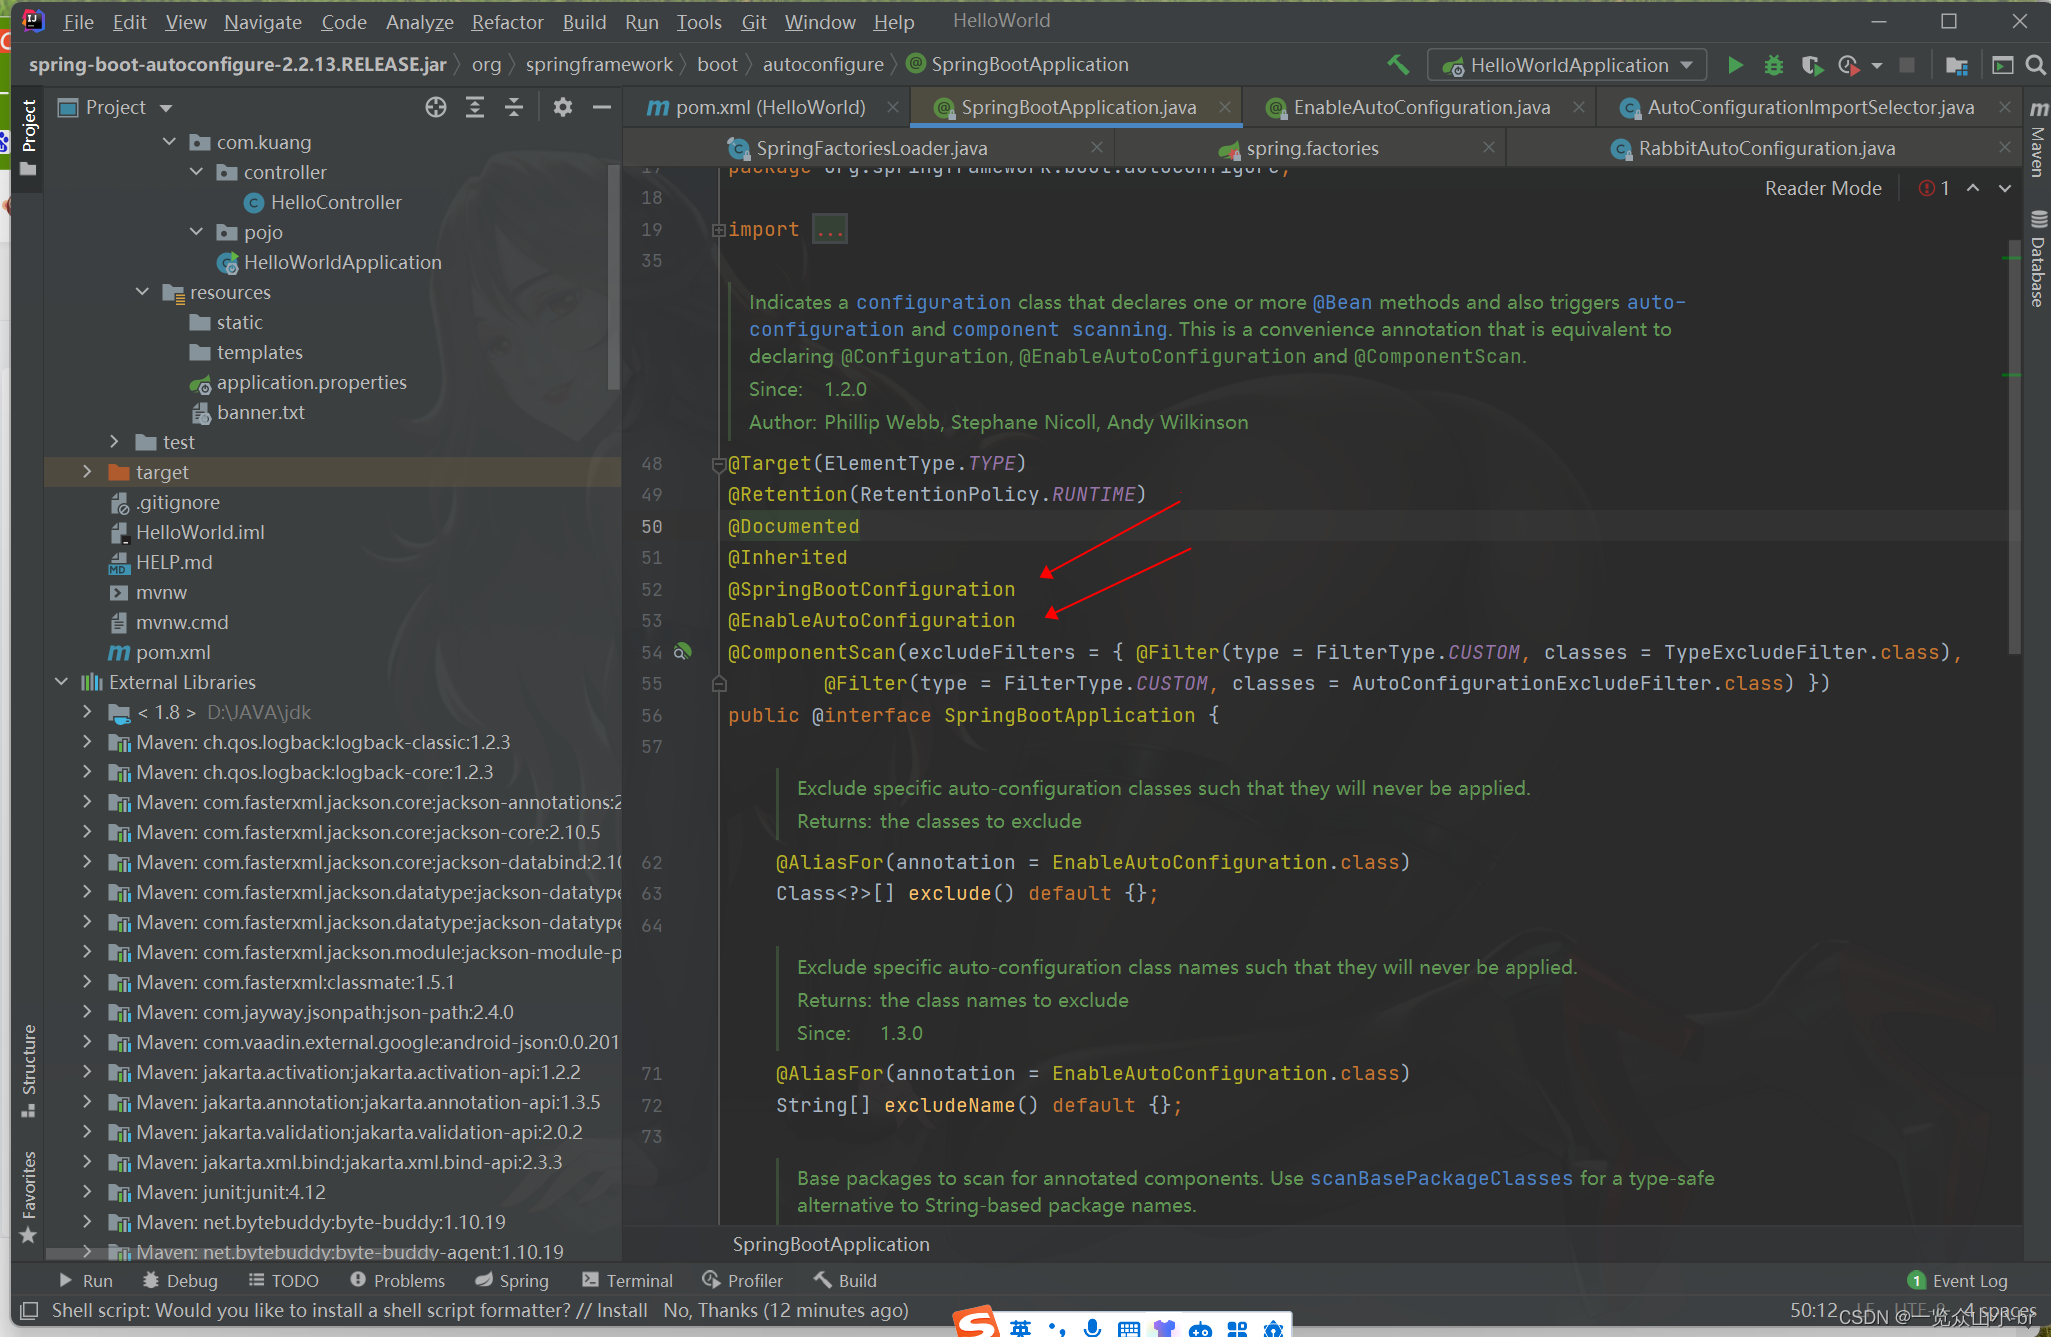
点击注解进入源码,开始一层层的分析
// 主启动类的注解,一个tab表示点进去一次
@SpringBootApplication
    @SpringBootConfiguration// 表明是一个SpringBoot配置文件
		@Configuration// 再次说明这是一个Spring配置

    @EnableAutoConfiguration // 自动配置
		@AutoConfigurationPackage
			@Import(AutoConfigurationPackages.Registrar.class)
		@Import(AutoConfigurationImportSelector.class)

    @ComponentScan(excludeFilters = { @Filter(type = FilterType.CUSTOM, classes = TypeExcludeFilter.class),
            @Filter(type = FilterType.CUSTOM, classes = AutoConfigurationExcludeFilter.class) })
@EnableAutoConfiguration
- @AutoConfigurationPackage
- @AutoConfigurationPackages.Registrar.class:
- Registrar.class作用就是将主启动所在的包及以下的所有子包都扫描进spring容器中
- @AutoConfigurationPackages.Registrar.class:
- @Import(AutoConfigurationImportSelector.class) ,找到
getCandidateConfigurations方法getCandidateConfigurations方法:获得候选的配置
protected List<String> getCandidateConfigurations(AnnotationMetadata metadata, AnnotationAttributes attributes) {
		List<String> configurations = SpringFactoriesLoader.loadFactoryNames(getSpringFactoriesLoaderFactoryClass(),
				getBeanClassLoader());
		Assert.notEmpty(configurations, "No auto configuration classes found in META-INF/spring.factories. If you "
				+ "are using a custom packaging, make sure that file is correct.");
		return configurations;
	}
- 找到
SpringFactoriesLoader.loadFactoryNames,点进去,找到loadSpringFactories方法SpringFactoriesLoader类中的预定义的自动装配路径FACTORIES_RESOURCE_LOCATION = "META-INF/spring.factories";
public static final String FACTORIES_RESOURCE_LOCATION = "META-INF/spring.factories";


public static List<String> loadFactoryNames(Class<?> factoryType, @Nullable ClassLoader classLoader) {
		String factoryTypeName = factoryType.getName();
		return loadSpringFactories(classLoader).getOrDefault(factoryTypeName, Collections.emptyList());
	}

private static Map<String, List<String>> loadSpringFactories(@Nullable ClassLoader classLoader) {
    //获得classLoader
    MultiValueMap<String, String> result = cache.get(classLoader);
    if (result != null) {
        return result;
    }

    ...
}
- 多次出现的spring.factories,就是预定好的加载配置文件
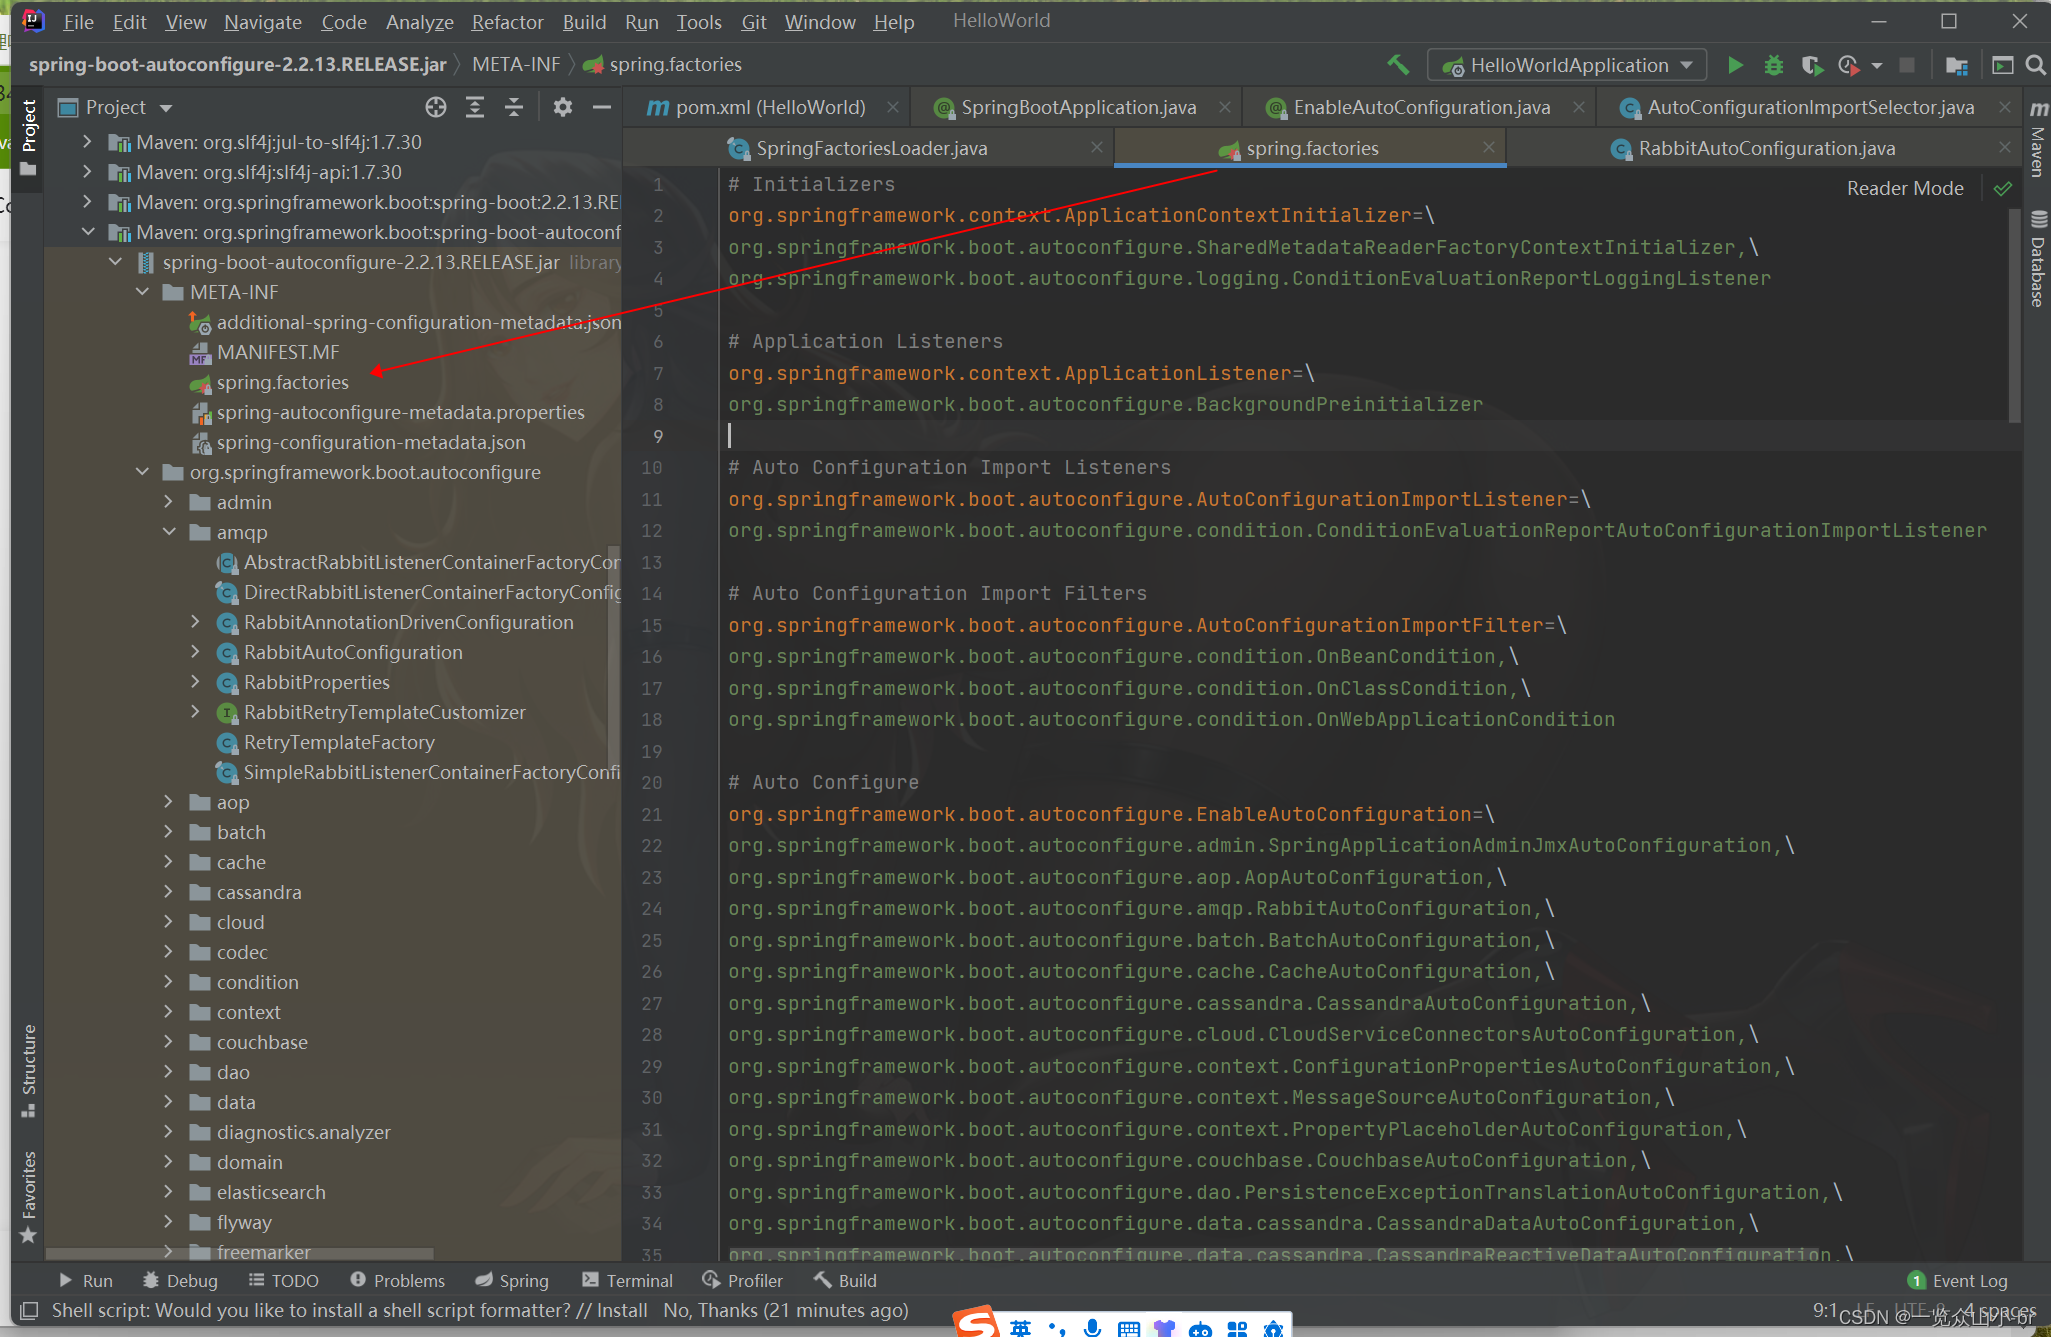
大功告成!
@ComponentScan
- 自动扫描并加载符合条件的组件bean,并将这个组件bean注入到IOC容器中
@ComponentScan(excludeFilters = { @Filter(type = FilterType.CUSTOM, classes = TypeExcludeFilter.class),
		@Filter(type = FilterType.CUSTOM, classes = AutoConfigurationExcludeFilter.class) })
② 自动装配
- 自动配置真正实现是从classpath中搜寻所有的META-INF/spring.factories配置文件 ,并将其中对应的org.springframework.boot.autoconfigure.包下的配置项,通过反射实例化为对应标注了 @Configuration的JavaConfig形式的IOC容器配置类 , 然后将这些都汇总成为一个实例并加载到IOC容器中。
- 用户如何书写yml配置,需要去查看META-INF/spring.factories下的某自动配置,如HttpEncodingAutoConfiguration
EnableConfigrutionProperties(xxx.class):表明这是一个自动配置类,加载某些配置XXXProperties.class:封装配置文件中的属性,yam中需要填入= 它指定的前缀+方法
③ 工作原理总结
- 读取spring.properties文件
- SpringBoot在启动的时候从spring-boot-autoConfigure.jar包下的的META-INF/spring.factories中获取EnableAutoConfiguration属性的值加载自动配置类
- 将这些值作为自动配置类导入容器 , 自动配置类就生效 , 帮我们进行自动配置工作;
- 加载XXXProperties类
- 根据自动配置类中指定的xxxxProperties类设置自动配置的属性值,开发者可以根据该类在yml配置文件中修改自动配置
- 根据@ConditionalXXX注解决定加载哪些组件
- Springboot通过该注解指定组件加入IOC容器时锁需要具备的特定条件。这个组件会在满足条件时候加入到IOC容器内

④ run方法
我最初以为就是运行了一个main方法,没想到却开启了一个服务;
//@SpringBootApplication : 标注这个类是一个springboot的应用,启动类下的所有资源被导入
@SpringBootApplication
public class Springboot01HelloworldApplication {

    public static void main(String[] args) {
        //将springboot应用启动
        //SpringAplication类
        //run 方法
        SpringApplication.run(Springboot01HelloworldApplication.class, args);
    }
}
分析该方法主要分两部分,一部分是SpringApplication的实例化,二是run方法的执行;
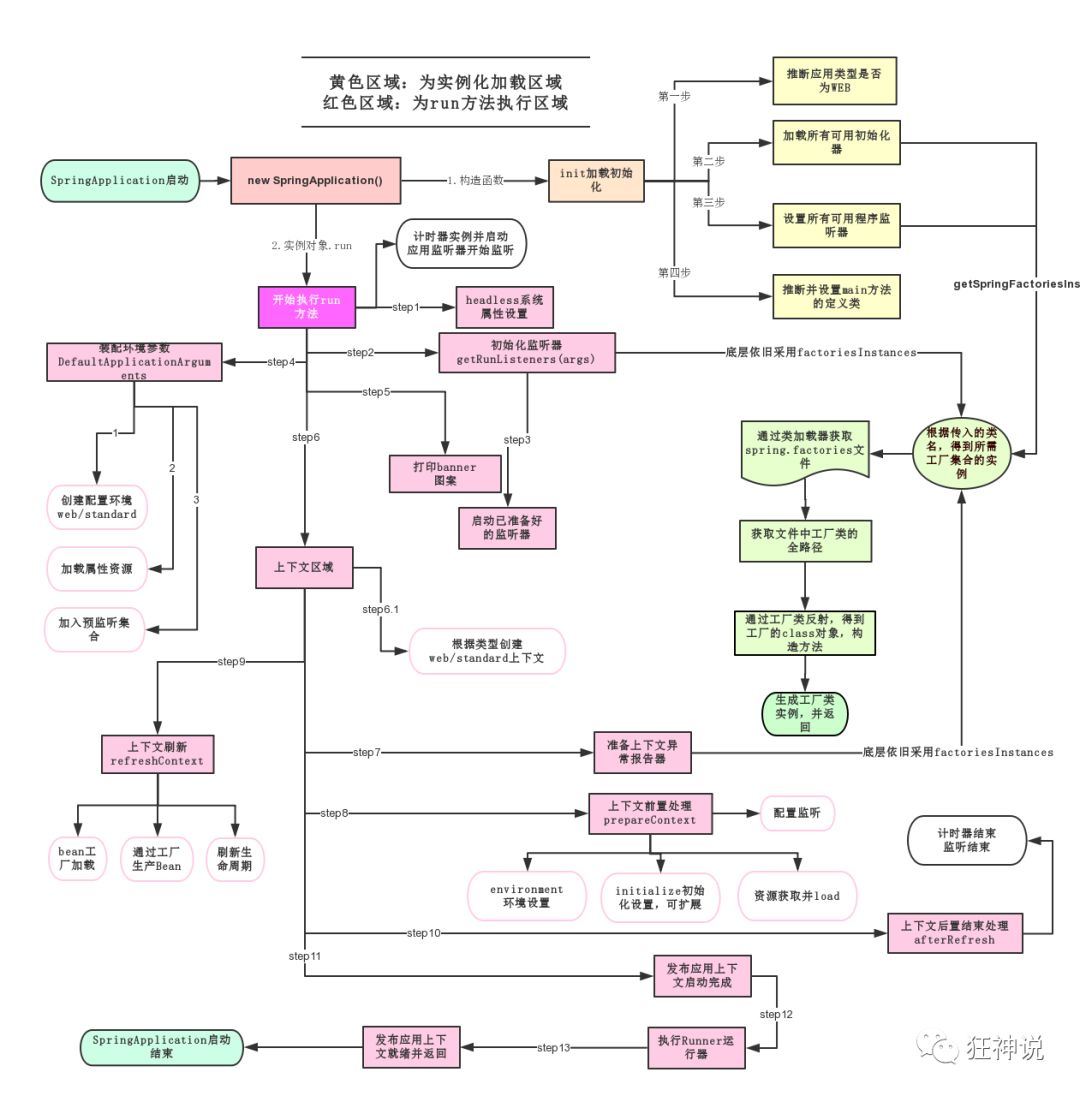
SpringApplication这个类主要做了以下四件事情:
- 推断应用的类型是普通的项目还是Web项目
- 查找并加载所有可用初始化器 , 设置到initializers属性中
- 找出所有的应用程序监听器,设置到listeners属性中
- 推断并设置main方法的定义类,找到运行的主类
三、YAML
0、SpringBoot的配置文件的种类
SpringBoot中的配置文件详解(yml、properties全局配置和自定义配置)
SpringBoot使用一个全局的配置文件 , 配置文件名称是固定的
-
application.properties
-
语法结构 :key=value
-
-
application.yml
-
语法结构 :key:空格 value
-
自定义配置在第7章
1、yaml概述

其让人最容易上手的特色是巧妙避开各种封闭符号,如:引号、各种括号等,这些符号在嵌套结构时会变得复杂而难以辨认
传统xml配置:
<server>
    <port>8081<port>
</server>
yaml配置:
server:
  prot: 8080
2、yml基础语法
说明:语法要求严格!
- 空格不能省略,键值对中间必须要有一个空格
- 以缩进来控制层级关系,只要是左边对齐的一列数据都是同一个层级的。
- 属性和值的大小写都是十分敏感的。
3、yml基本类型写入
字面值:普通字符换、数值、布尔类型,直接写成k:v,字符串默认不用加‘’或“”
注意:
- “ ” 双引号,不会转义字符串里面的特殊字符 , 特殊字符会作为本身想表示的意思;
比如 :name: “kuang \n shen” 输出 :kuang 换行 shen
- ‘’ 单引号,会转义特殊字符 , 特殊字符最终会变成和普通字符一样输出
比如 :name: ‘kuang \n shen’ 输出 :kuang \n shen
对象、Map:属性值必须和Bean中的对应一致
Student:
		name: zhangsan
		age: nan
#行内写法
student: {name: qinjiang,age: 3}
数组:使用 - 表示一个元素
Countries:
    - Chine
    - USA
#行内写法
pets: [cat,dog,pig]
4、注入配置文件
yaml文件更强大的地方在于,他可以给我们的实体类直接注入匹配值!
原本给bean注入属性值的方法
编写一个实体类User,添加@Component,再在字段上加@Value赋值
@Data
@Component
public class User {
@Value("小狂狂")
private String name;
private int age;
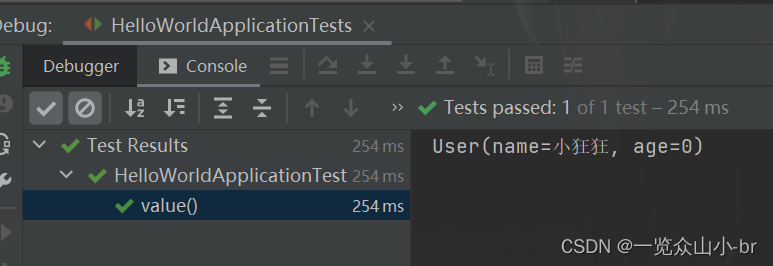
}在测试类引入User,编写测试方法
@SpringBootTest
class HelloWorldApplicationTests {
@Autowired
User user;
@Test
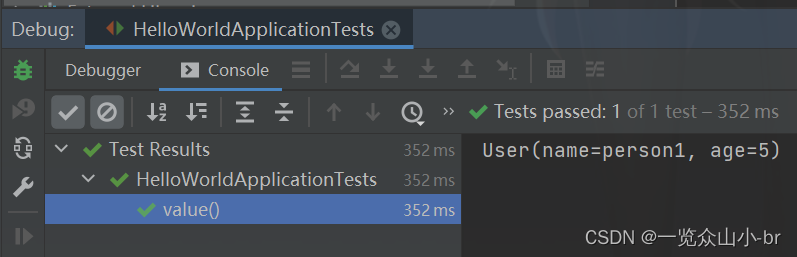
void value() {
System.out.println(user.toString());
}
}启动项目测试,打印User的值
通过配置文件给bean注入属性的方法
导入依赖
<dependency>
    <groupId>org.springframework.boot</groupId>
    <artifactId>spring-boot-configuration-processor</artifactId>
    <optional>true</optional>
</dependency>
添加注解,@ConfigurationProperties(prefix = “person”)默认是从全局配置获取,文件名只能是application.yml
@Data
@Component
@ConfigurationProperties(prefix = "person")
public class User {
@Value("小狂狂")
private String name;
private int age;
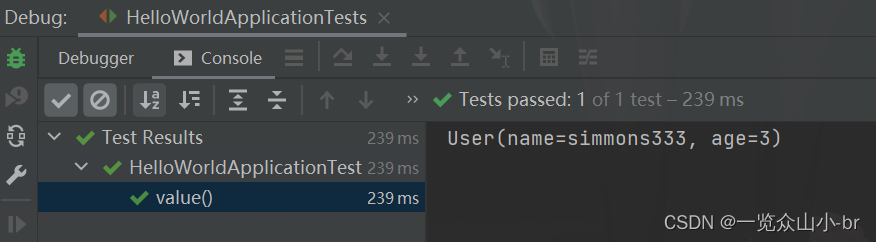
}application.yml
#对象
person:
  name: wang
  age: 3
启动项目测试,打印User的值
5、加载指定的配置文件
- @PropertySource :加载指定的配置文件;
- @configurationProperties:默认从全局配置文件中获取值;
我们去在resources目录下新建一个person.properties文件
name=person1
age=5
然后在我们的代码中指定加载person.properties文件
@Data
@Component
//@ConfigurationProperties(prefix = "person")
@PropertySource(value = "classpath:person.properties")
public class User {

//    SPEL表达式取出配置文件内的值
    @Value("${name}")
    private String name;
    @Value("${age}")
    private int age;

}
再次输出测试一下:指定配置文件绑定成功!
6、配置文件占位符
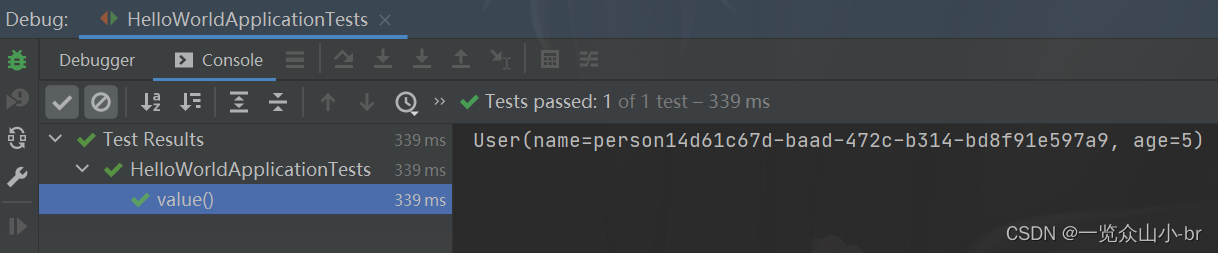
修改上面的person.properties文件内容
# 配置文件占位符:随机uuid
name=person1${random.uuid}
age=5
启动项目测试
7、@configurationProperties和@Value对比
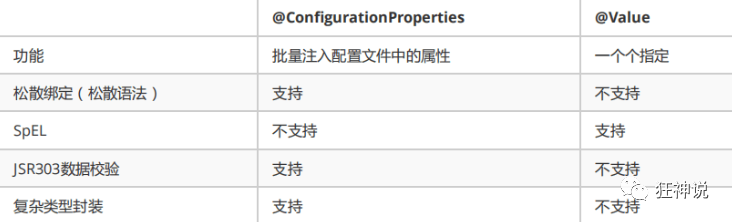
1、@ConfigurationProperties只需要写一次即可 , @Value则需要每个字段都添加
2、松散绑定:这个什么意思呢? 比如我的yml中写的last-name,这个和lastName是一样的, - 后面跟着的字母默认是大写的。这就是松散绑定。可以测试一下
3、JSR303数据校验 , 这个就是我们可以在字段是增加一层过滤器验证 , 可以保证数据的合法性
4、复杂类型封装,yml中可以封装对象 , 使用value就不支持
结论:
- 配置yml和配置properties都可以获取到值 , 强烈推荐 yml;
- 如果我们在某个业务中,只需要获取配置文件中的某个值,可以使用一下 @value;
- 如果说,我们专门编写了一个JavaBean来和配置文件进行一一映射,就直接@configurationProperties,不要犹豫!
8、JSR303

就是一种数据校验格式,在类上绑定@Validated,在属性上使用指定的参数如@Email(message="邮箱格式错误")
9、多配置文件
我们在主配置文件编写的时候,文件名可以是 application-{profile}.properties/yml , 用来指定多个环境版本;
例如:
- application-test.properties 代表测试环境配置
- application-dev.properties 代表开发环境配置
但是Springboot并不会直接启动这些配置文件,它默认使用application.properties主配置文件;
我们需要通过一个配置来选择需要激活的环境:
#比如在配置文件中指定使用dev环境,我们可以通过设置不同的端口号进行测试;
#我们启动SpringBoot,就可以看到已经切换到dev下的配置了;
spring.profiles.active=dev
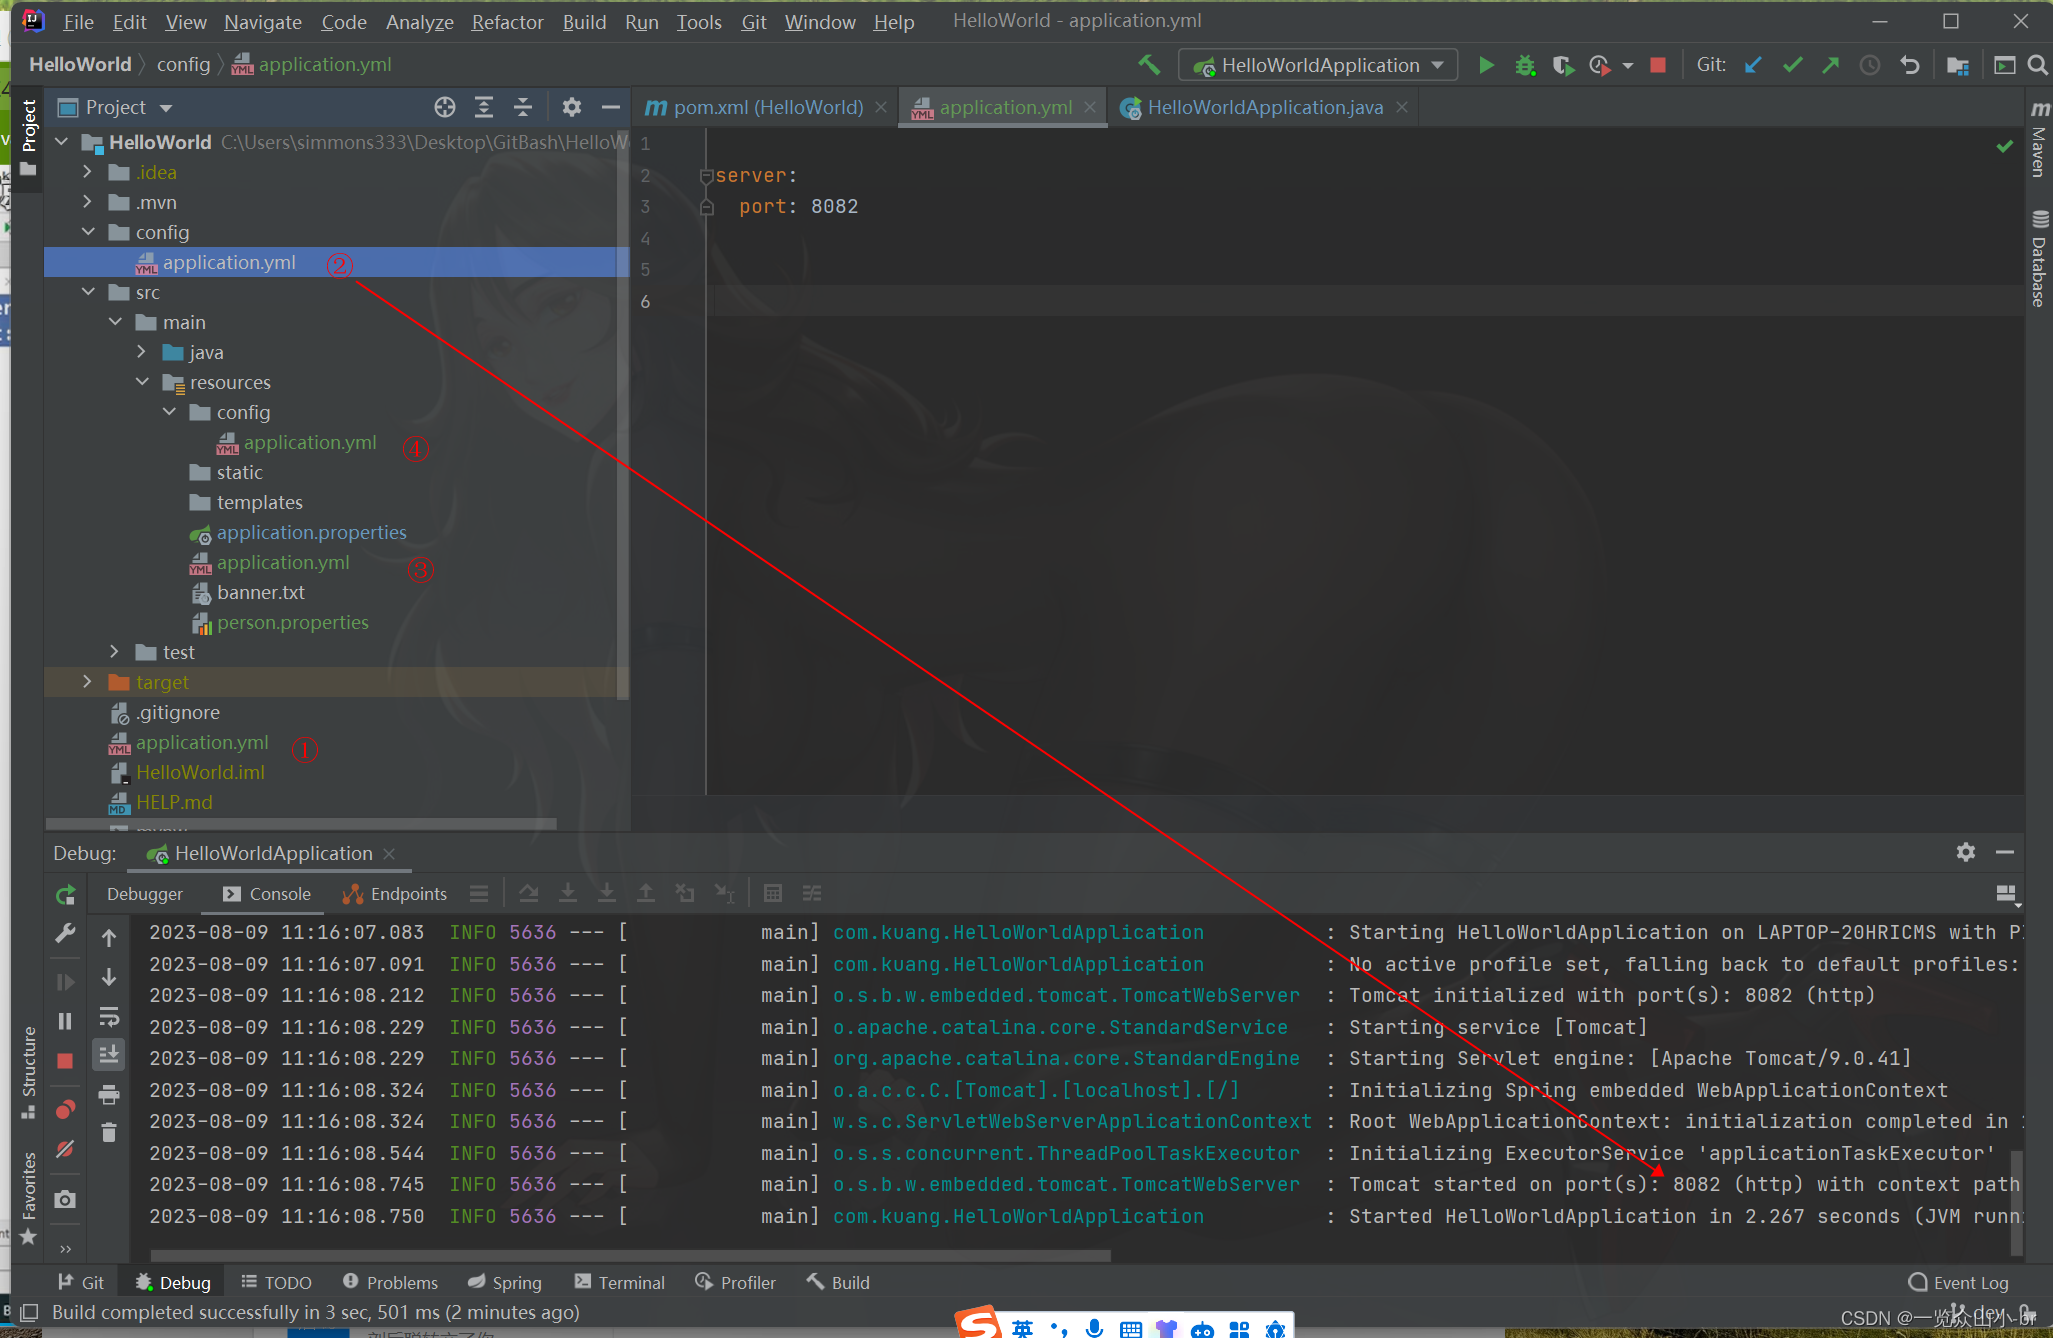
10、配置文件的加载位置
springboot 启动会扫描以下位置的application.properties或者application.yml文件作为Spring boot的默认配置文件:
- 优先级1:项目路径下的config文件夹配置文件
- 优先级2:项目路径下配置文件
- 优先级3:资源路径下的config文件夹配置文件
- 优先级4:资源路径下配置文件
在本地配置4个不同位置的application.yml,启动项目测试
11、yaml的多文档块
来分割多个yml配置,并且用profiles来命名
一个yml文件可以使用active来区分配置,比properties强大之一
server:
  port: 8081
#选择要激活那个环境块
spring:
  profiles:
    active: prod

---
server:
  port: 8083
spring:
  profiles: dev #配置环境的名称


---
server:
  port: 8084
spring:
  profiles: prod  #配置环境的名称
四、自动装配再理解
1、通过源码分析自动配置原理
我们以HttpEncodingAutoConfiguration(Http编码自动配置)为例解释自动配置原理;
//表示这是一个配置类,和以前编写的配置文件一样,也可以给容器中添加组件;
@Configuration
//启动指定类的ConfigurationProperties功能;
//进入这个HttpProperties查看,将配置文件中对应的值和HttpProperties绑定起来;
//并把HttpProperties加入到ioc容器中
@EnableConfigurationProperties({HttpProperties.class})
//Spring底层@Conditional注解
// 根据不同的条件判断,如果满足指定的条件,整个配置类里面的配置就会生效;
//这里的意思就是判断当前应用是否是web应用,如果是,当前配置类生效
@ConditionalOnWebApplication(type = Type.SERVLET)
//判断当前项目有没有这个类CharacterEncodingFilter;SpringMVC中进行乱码解决的过滤器;
@ConditionalOnClass({CharacterEncodingFilter.class})
//判断配置文件中是否存在某个配置:spring.http.encoding.enabled;
//如果不存在,判断也是成立的
//即使我们配置文件中不配置pring.http.encoding.enabled=true,也是默认生效的;
@ConditionalOnProperty(prefix = "spring.http.encoding", value = {"enabled"}, matchIfMissing = true)
public class HttpEncodingAutoConfiguration {
    //他已经和SpringBoot的配置文件映射了
    private final Encoding properties;

    //只有一个有参构造器的情况下,参数的值就会从容器中拿
    public HttpEncodingAutoConfiguration(HttpProperties properties) {
        this.properties = properties.getEncoding();
    }

    //给容器中添加一个组件,这个组件的某些值需要从properties中获取
    @Bean
    //判断容器没有这个组件?
    @ConditionalOnMissingBean
    public CharacterEncodingFilter characterEncodingFilter() {
        CharacterEncodingFilter filter = new OrderedCharacterEncodingFilter();
        filter.setEncoding(this.properties.getCharset().name());
        filter.setForceRequestEncoding(this.properties.shouldForce(org.springframework.boot.autoconfigure.http.HttpProperties.Encoding.Type.REQUEST));
        filter.setForceResponseEncoding(this.properties.shouldForce(org.springframework.boot.autoconfigure.http.HttpProperties.Encoding.Type.RESPONSE));
        return filter;
    }
}
一句话总结 :根据当前不同的条件判断,决定这个配置类是否生效!
- 一但这个配置类生效;这个配置类就会给容器中添加各种组件;
- 这些组件的属性是从对应的properties类中获取的,这些类里面的每一个属性又是和配置文件绑定的;
- 所有在配置文件中能配置的属性都是在xxxxProperties类中封装着;
- 配置文件能配置什么就可以参照某个功能对应的这个属性类
2、自动装配流程
1、SpringBoot启动会加载大量的自动配置类
2、我们看我们需要的功能有没有在SpringBoot默认写好的自动配置类当中;
3、我们再来看这个自动配置类中到底配置了哪些组件;(只要我们要用的组件存在在其中,我们就不需要再手动配置了)
4、给容器中自动配置类添加组件的时候,会从properties类中获取某些属性。我们只需要在配置文件中指定这些属性的值即可;
xxxxAutoConfigurartion:自动配置类;给容器中添加组件
xxxxProperties:封装配置文件中相关属性;
3、@Conditional
了解完自动装配的原理后,我们来关注一个细节问题,自动配置类必须在一定的条件下才能生效
它是Spring原生的@Conditional的派生注解
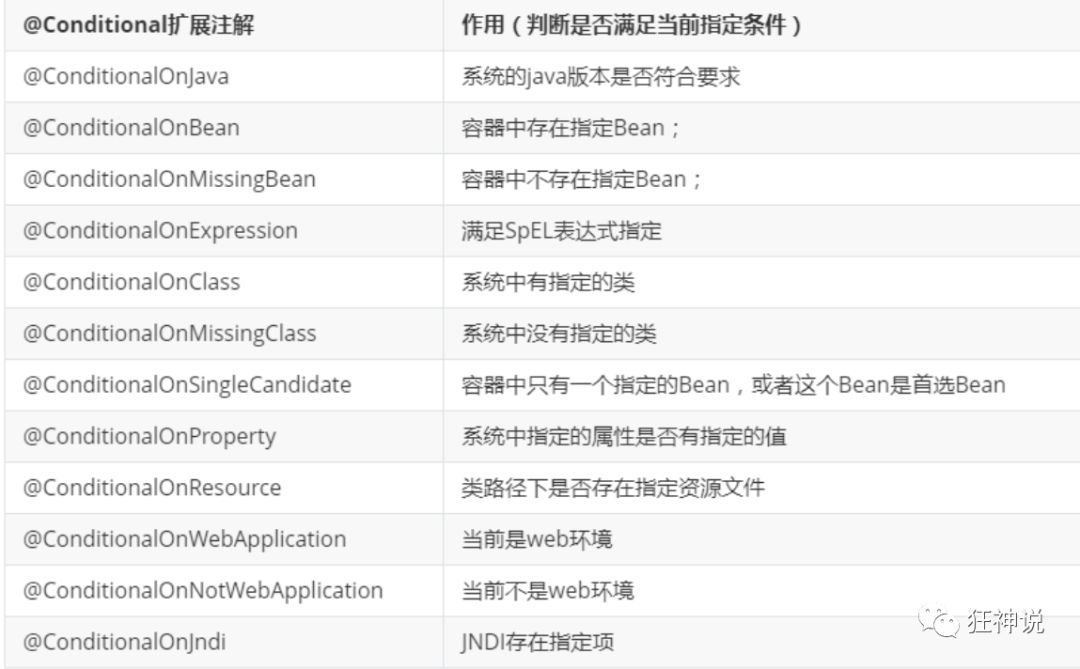
作用:必须是@Conditional指定的条件成立,才给容器中添加组件,配置配里面的所有内容才生效;
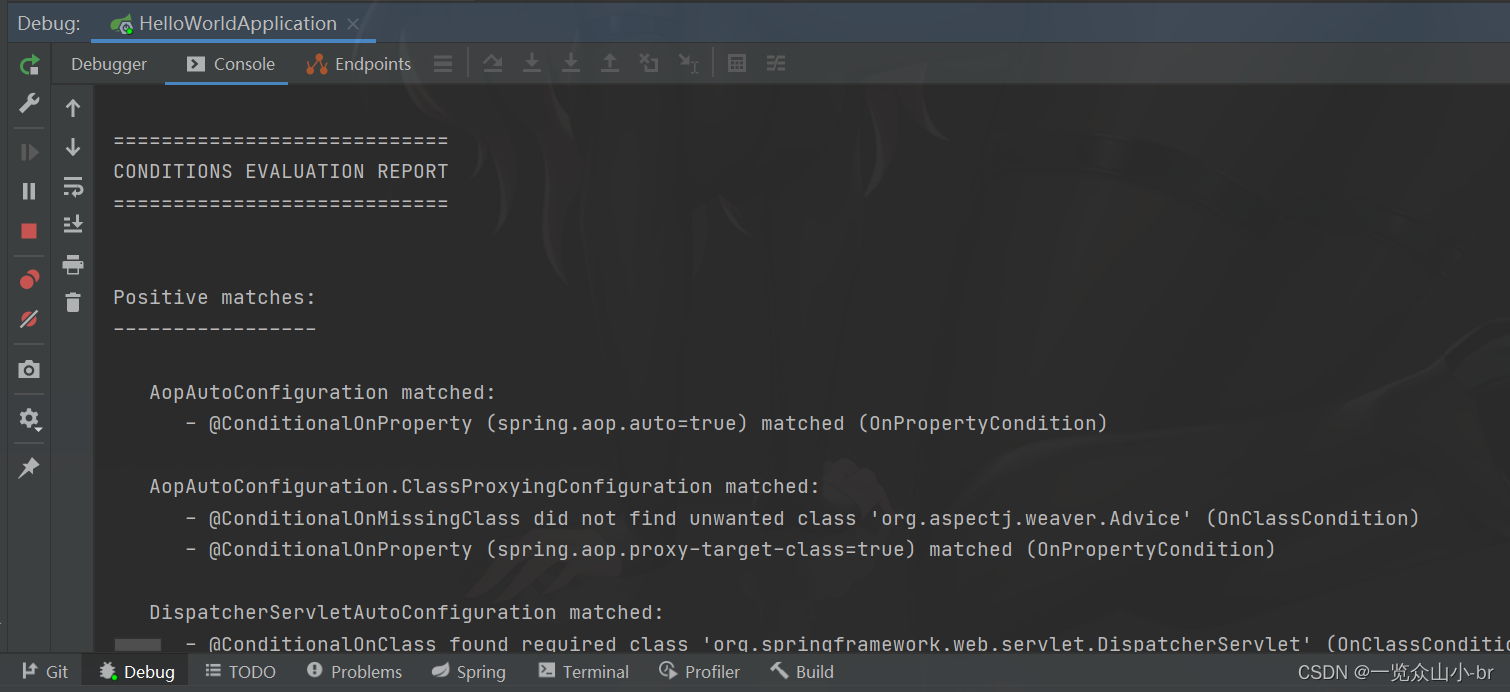
我们怎么知道哪些自动配置类生效?
我们可以通过启用 debug=true属性;来让控制台打印自动配置报告,这样我们就可以很方便的知道哪些自动配置类生效;
debug: truePositive matches:(自动配置类启用的:正匹配)
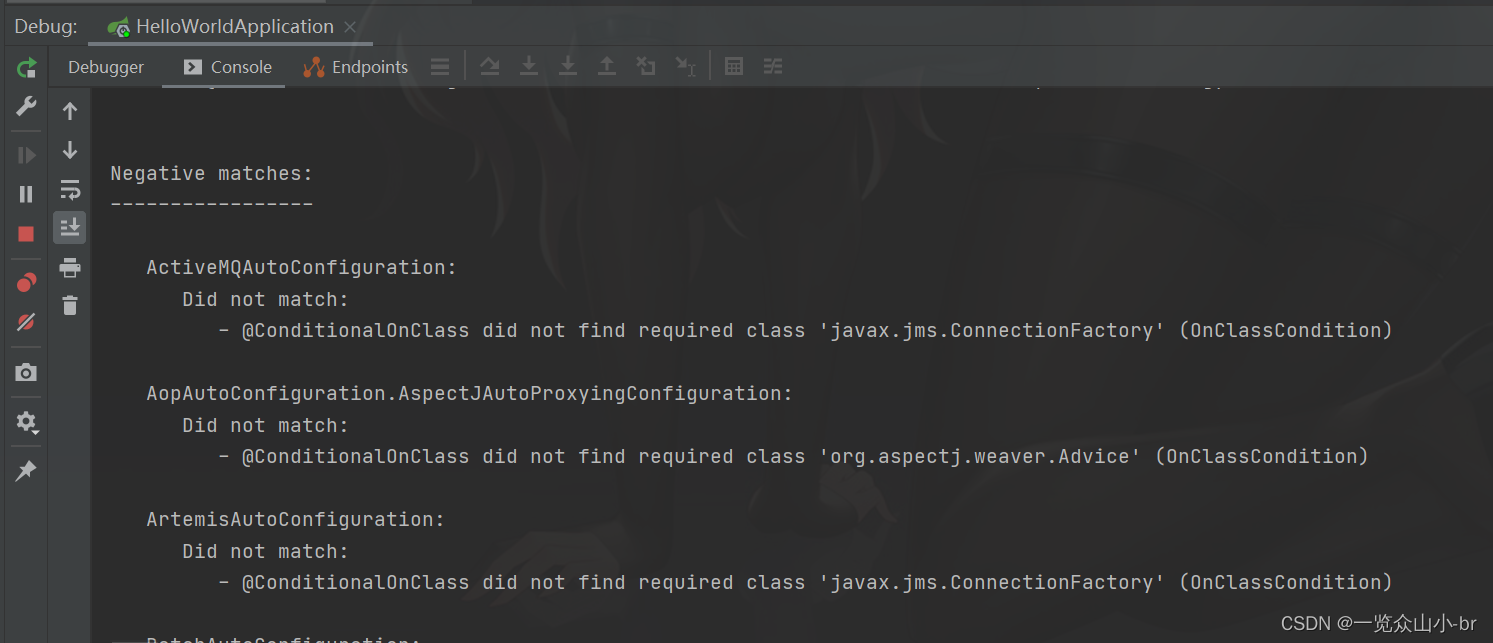
Negative matches:(没有启动,没有匹配成功的自动配置类:负匹配)
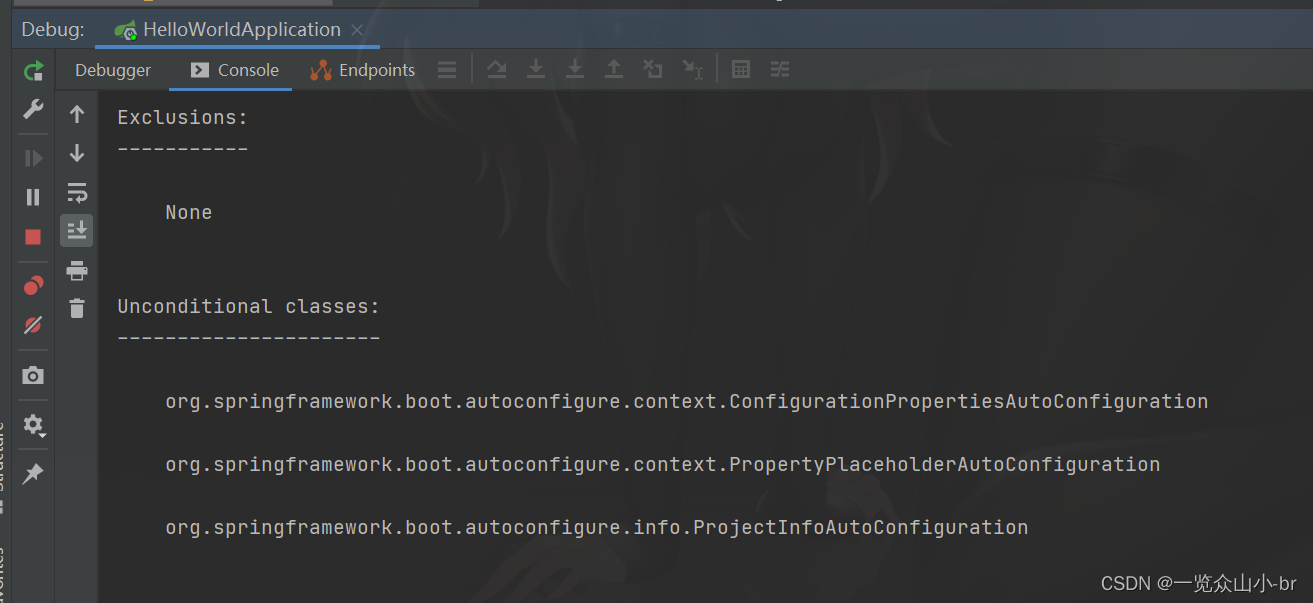
Unconditional classes: (没有条件的类)
五、WEB开发

1、SpringBoot自带的静态资源Webjars
Webjars本质就是以jar包的方式引入我们的静态资源 , 我们以前要导入一个静态资源文件,直接导入即可。
要使用jQuery,我们只要要引入jQuery对应版本的pom依赖即可!

访问:只要是静态资源,SpringBoot就会去对应的路径寻找资源,我们这里访问:http://localhost:8080/webjars/jquery/3.4.1/jquery.js

2、第二种静态资源映射规则
那我们项目中要是使用自己的静态资源该怎么导入呢?
idea按两下shift,搜索WebAutoConfiguration - WebMvcAutoConfigurationAdapter - addResourceHandlers
@Override
public void addResourceHandlers(ResourceHandlerRegistry registry) {
    if (!this.resourceProperties.isAddMappings()) {
        logger.debug("Default resource handling disabled");
        return;
    }
    Duration cachePeriod = this.resourceProperties.getCache().getPeriod();
    CacheControl cacheControl = this.resourceProperties.getCache().getCachecontrol().toHttpCacheControl();
    // 第一种方式 webjars
    if (!registry.hasMappingForPattern("/webjars/**")) {
        customizeResourceHandlerRegistration(registry.addResourceHandler("/webjars/**")
                                             .addResourceLocations("classpath:/META-INF/resources/webjars/")
                                             .setCachePeriod(getSeconds(cachePeriod)).setCacheControl(cacheControl));
    }
    // 第二种方式
    String staticPathPattern = this.mvcProperties.getStaticPathPattern();
    if (!registry.hasMappingForPattern(staticPathPattern)) {
        customizeResourceHandlerRegistration(registry.addResourceHandler(staticPathPattern)
                                             .addResourceLocations(getResourceLocations(this.resourceProperties.getStaticLocations()))
                                             .setCachePeriod(getSeconds(cachePeriod)).setCacheControl(cacheControl));
    }
}
ResourceProperties 可以设置和我们静态资源有关的参数;这里面指向了它会去寻找资源的文件夹,即staticLocation数组的内容。
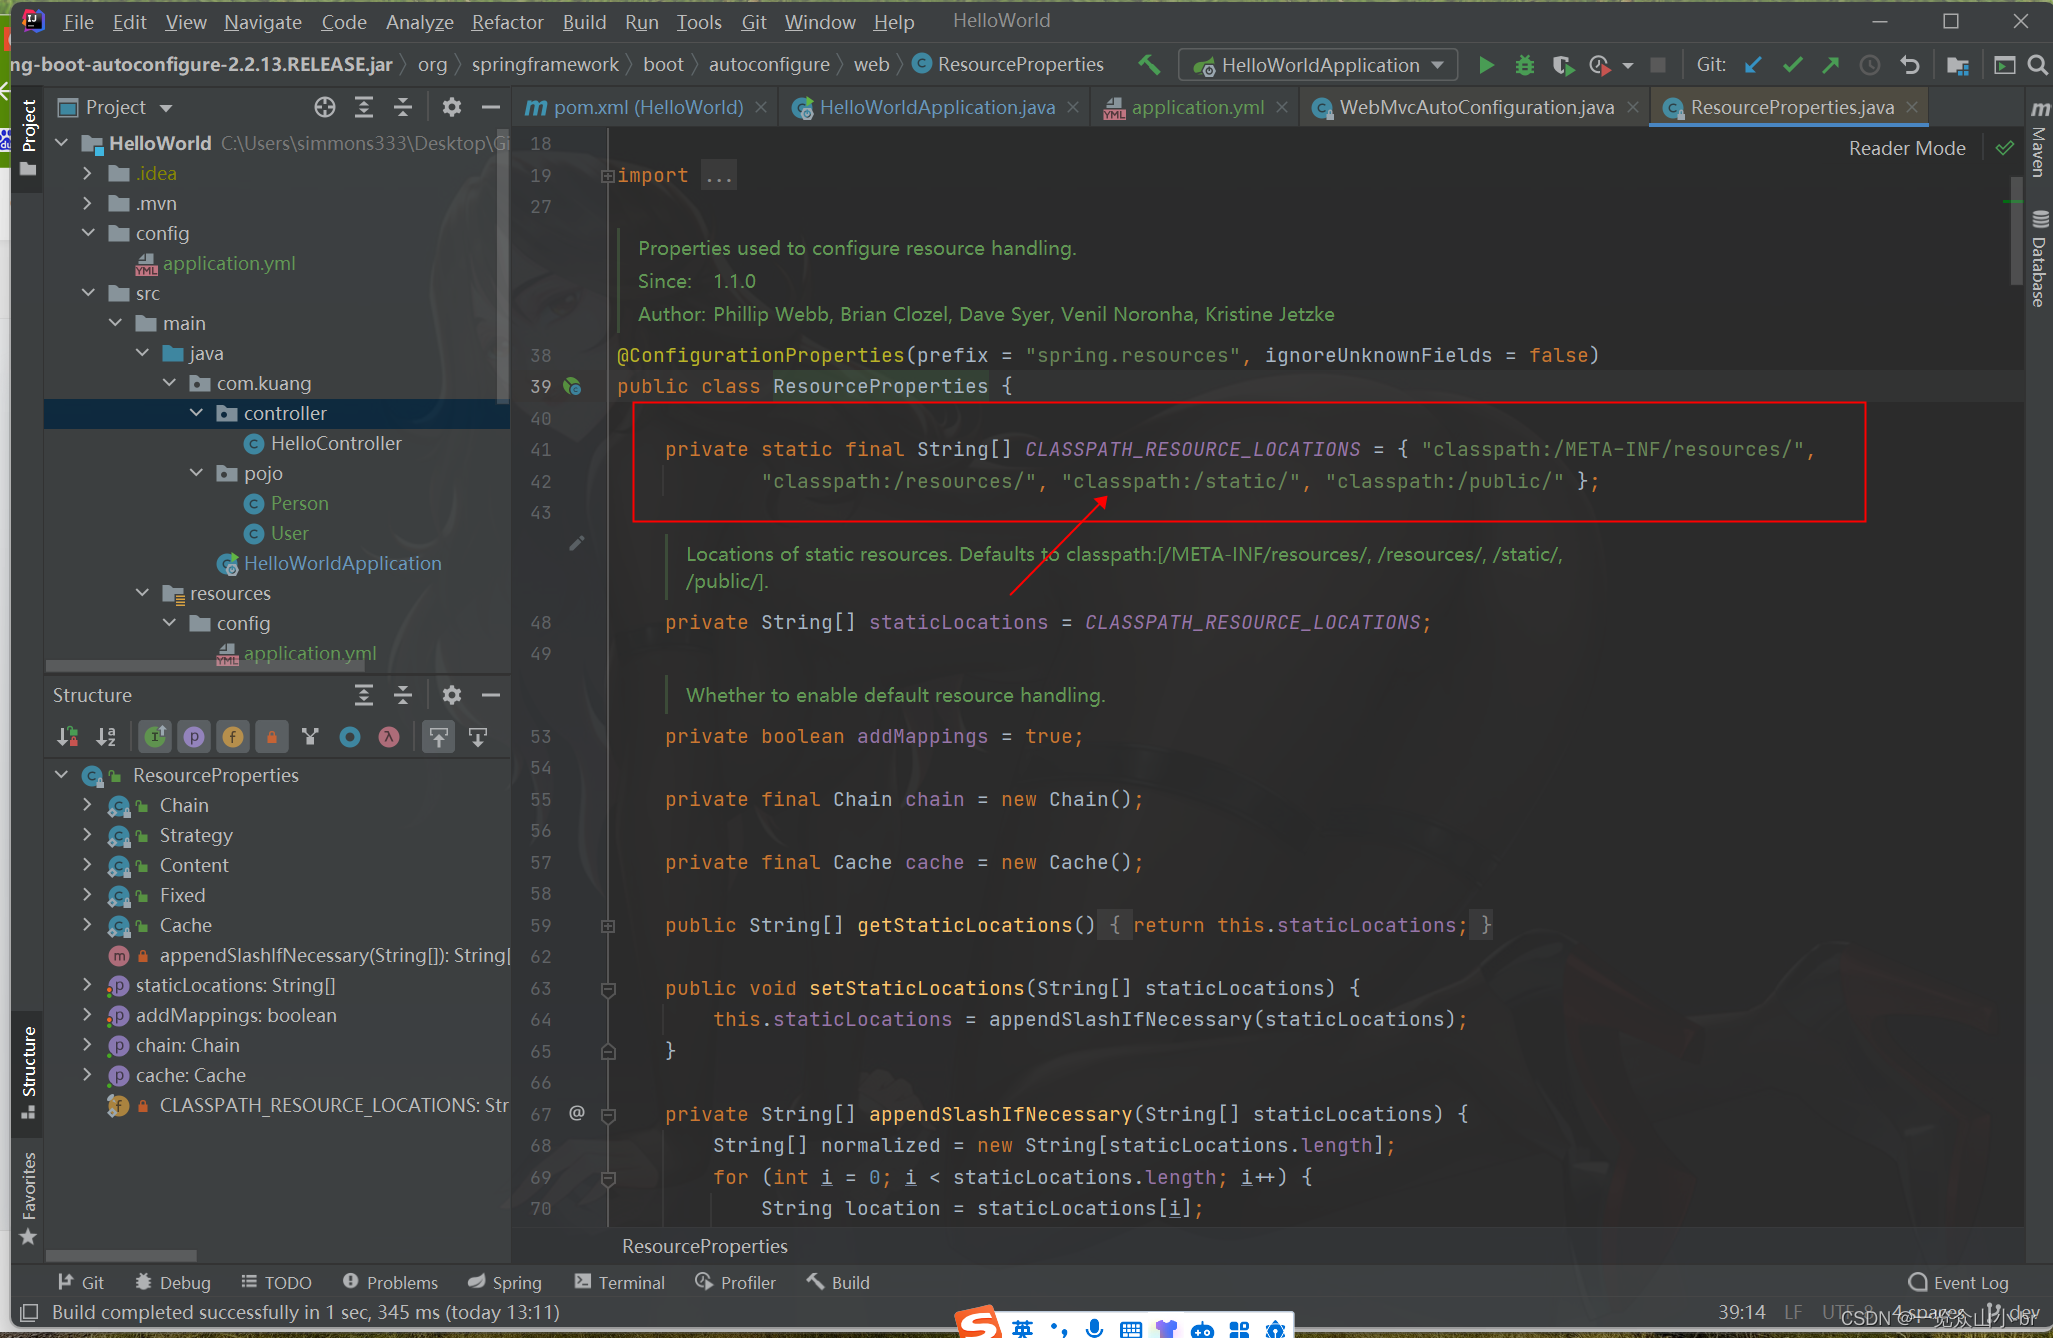
所以得出结论,以下四个目录存放的静态资源可以被我们识别:
- classpath:/META-INF/resources/
- classpath:/resources/
- classpath:/static/(默认创建)
- classpath:/public/
优先级从上到下依次降低
3、自定义静态资源路径
我们也可以自己通过配置文件来指定一下,哪些文件夹是需要我们放静态资源文件的,在application.yml中配置;
spring:
  #  自定义资源文件的位置
  resources:
    static-locations: classpath:/coding/,classpath:/kuang/
一旦自己定义了静态文件夹的路径,原来的自动配置就都会失效了!
4、首页
静态资源文件夹说完后,我们继续向下看源码!可以看到一个欢迎页的映射,就是我们的首页!
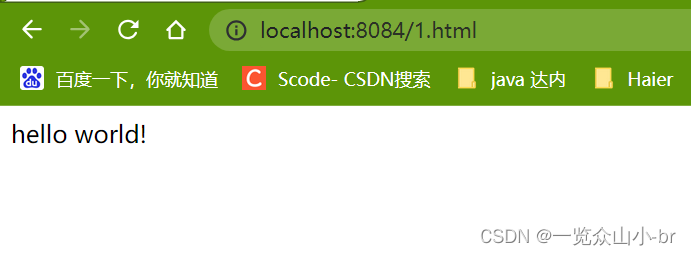
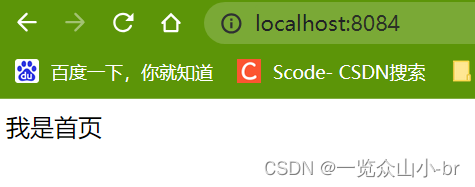
欢迎页,静态资源文件夹下的所有 index.html 页面;被 /** 映射。
比如我访问 http://localhost:8080/ ,就会找静态资源文件夹下的 index.html
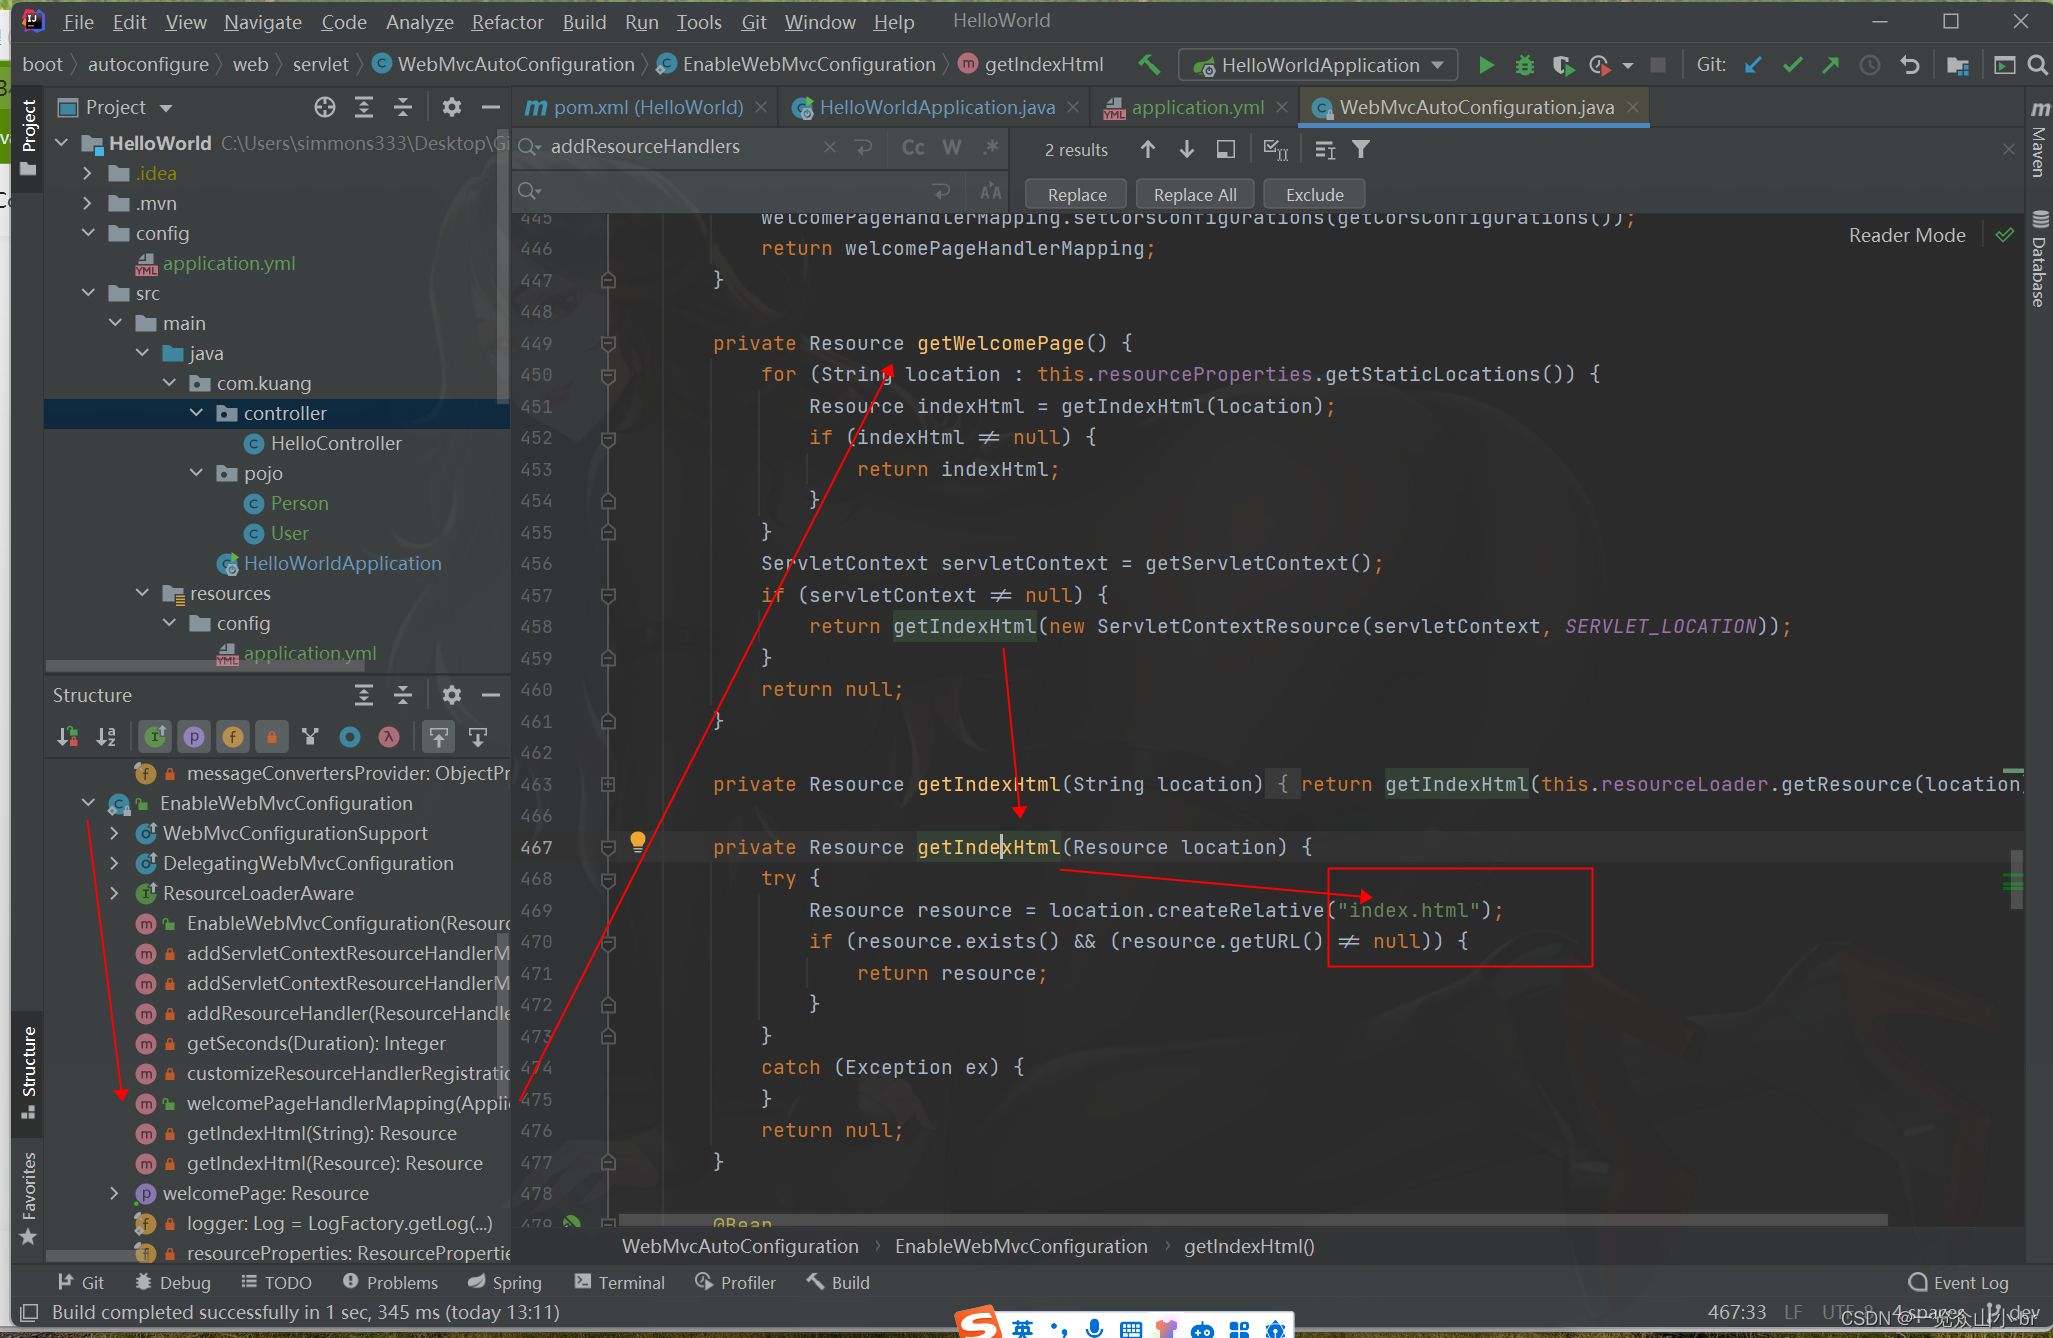
新建一个 index.html ,在我们上面的3个目录中任意一个;然后访问测试 http://localhost:8080/ 看结果!
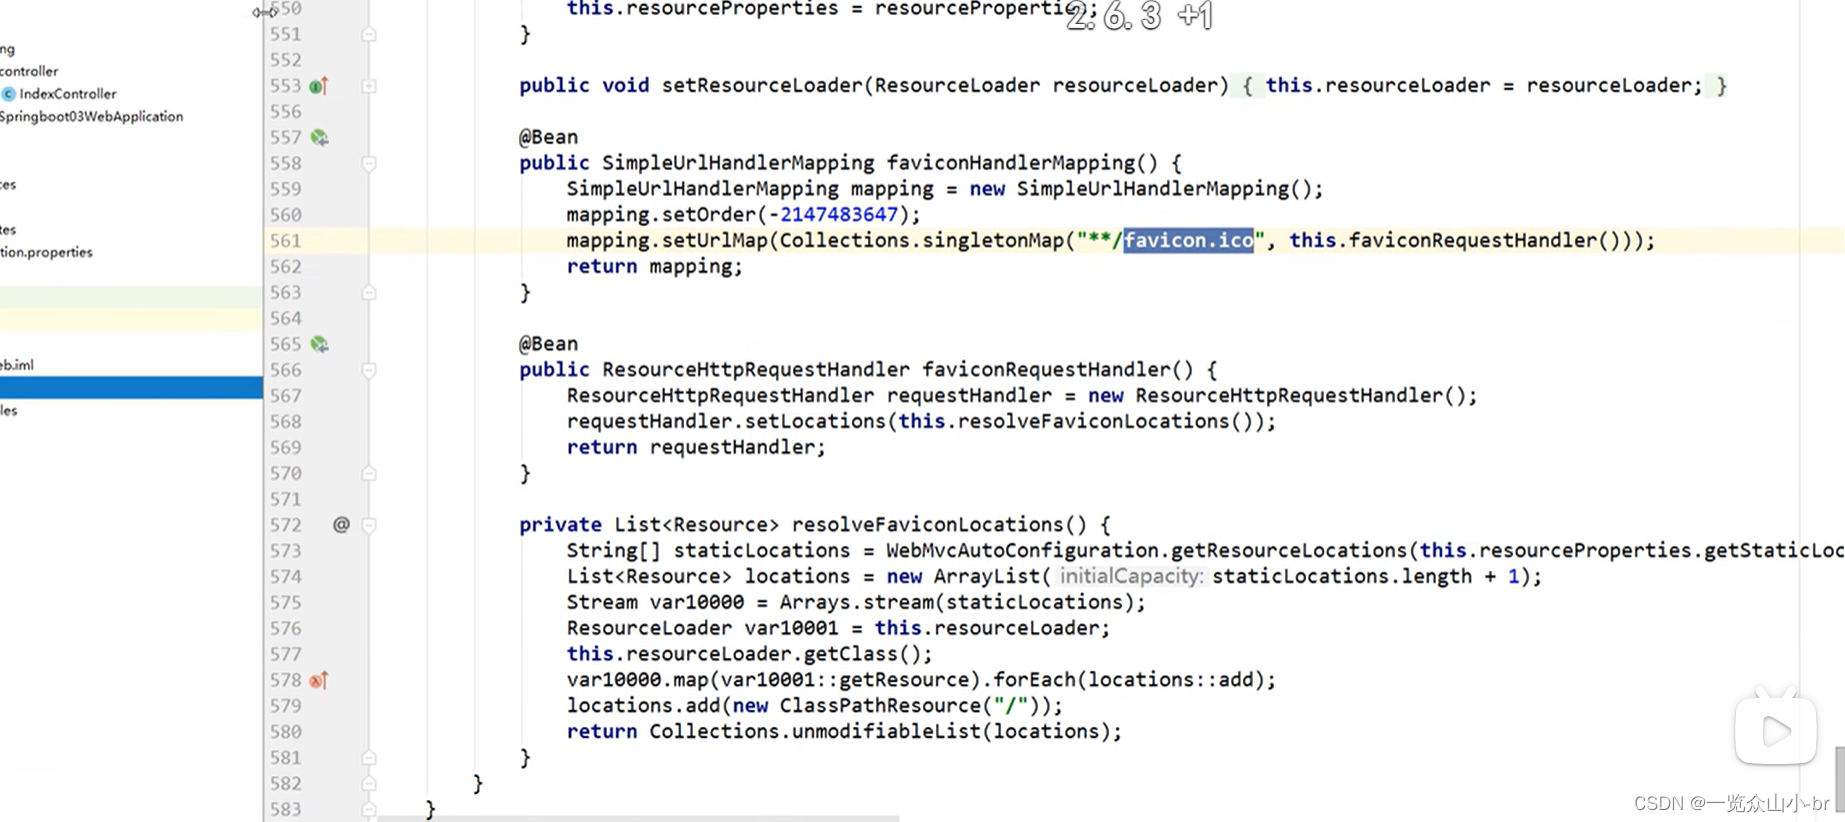
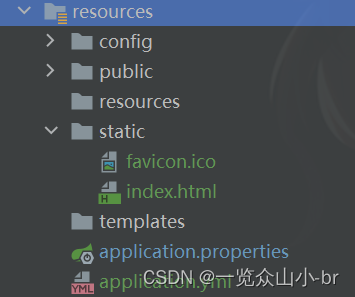
5、首页favicon图标配置
与其他静态资源一样,Spring Boot在配置的静态内容位置中查找 favicon.ico。如果存在这样的文件,它将自动用作应用程序的favicon。
关闭SpringBoot默认图标
spring:
# 关闭默认图标
mvc:
favicon:
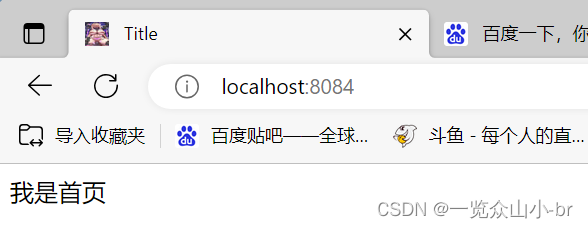
enabled: false自己放一个图标在静态资源目录下,我放在 public 目录下
清除浏览器缓存!刷新网页,发现图标已经变成自己的了!
六、Thymeleaf模版引擎
1、什么是模版引擎
其实jsp就是一个模板引擎,还有用的比较多的freemarker,包括SpringBoot给我们推荐的Thymeleaf,模板引擎有非常多,但再多的模板引擎,他们的思想都是一样的,什么样一个思想呢我们来看一下这张图:
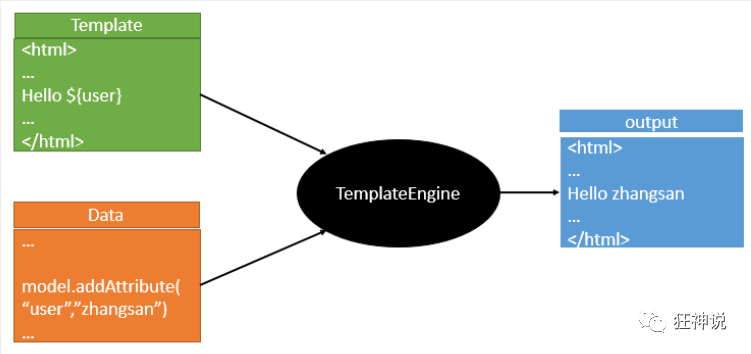
模板引擎的作用就是我们来写一个页面模板,比如有些值呢,是动态的,我们写一些表达式。而这些值,从哪来呢,就是我们在后台封装一些数据。然后把这个模板和这个数据交给我们模板引擎,模板引擎按照我们这个数据帮你把这表达式解析、填充到我们指定的位置,然后把这个数据最终生成一个我们想要的内容给我们写出去,这就是我们这个模板引擎,不管是jsp还是其他模板引擎,都是这个思想。
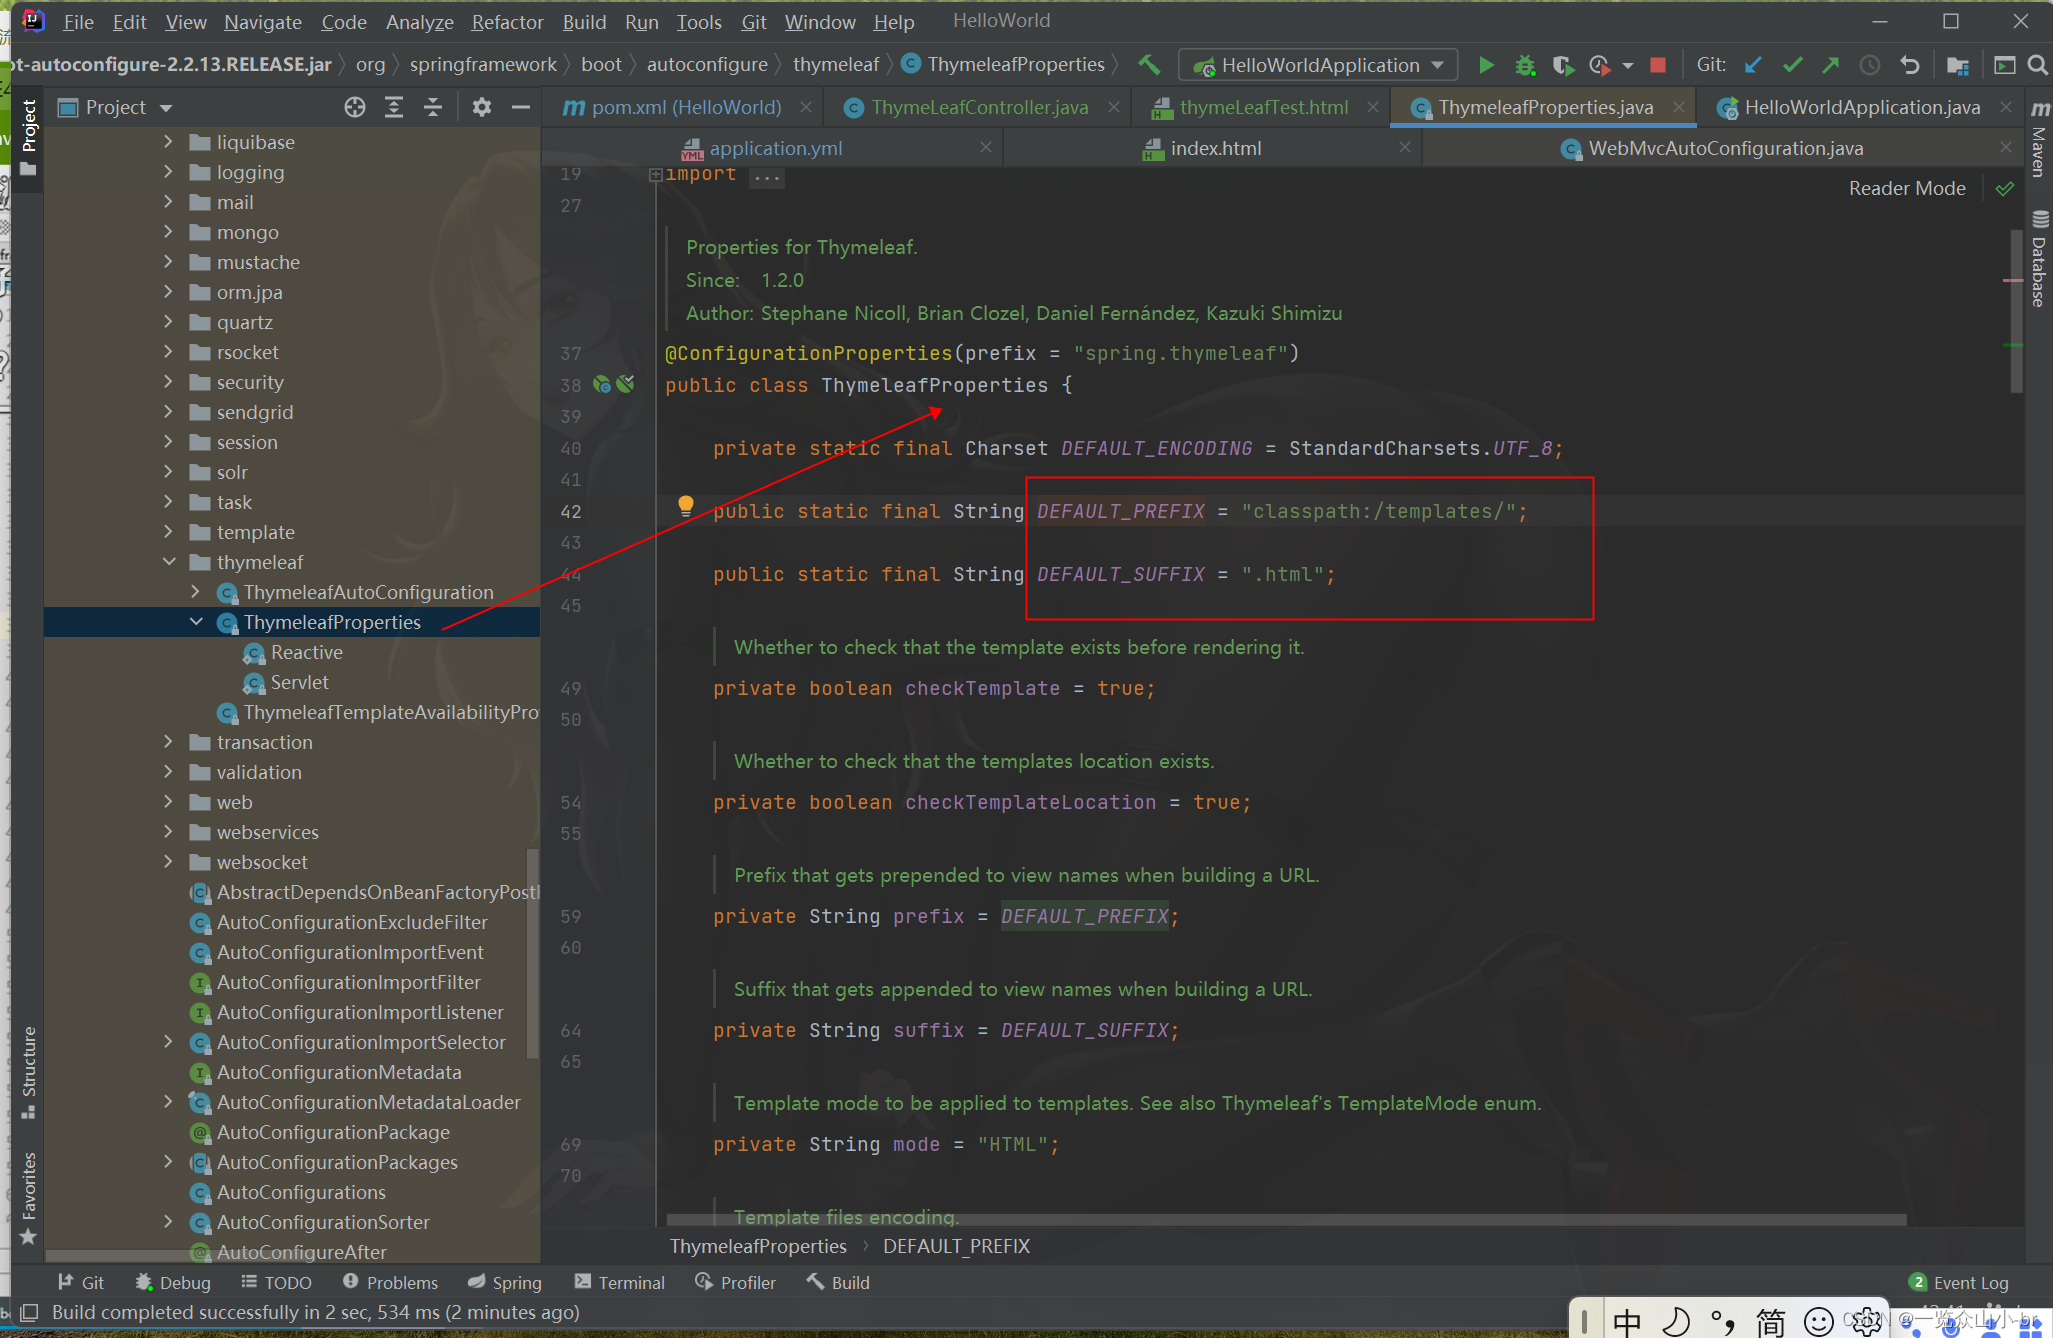
通过查看源码,可知默认放在resources/templates包中,后缀为.html
这样就会被springboot自动识别了
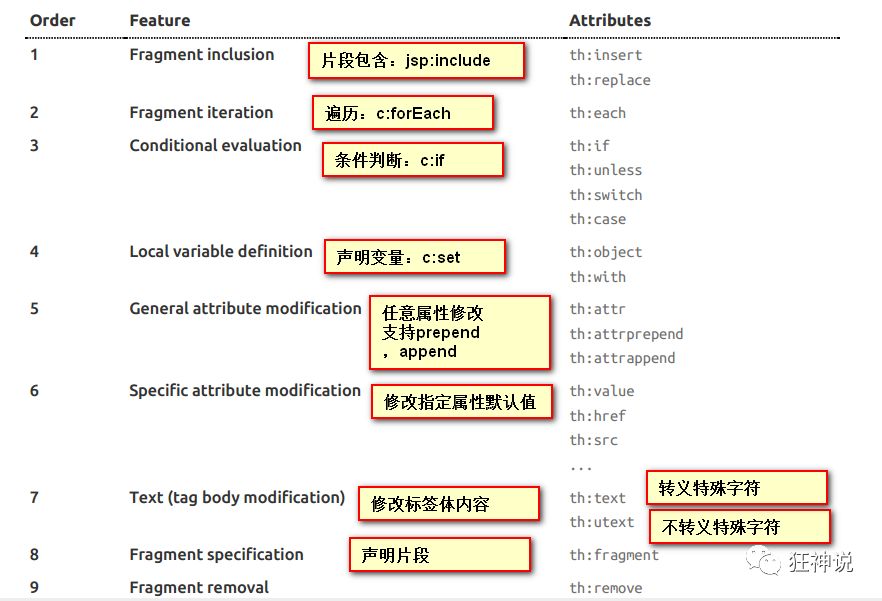
2、Thymeleaf 语法学习
引入依赖
<!--thymeleaf-->
<dependency>
    <groupId>org.springframework.boot</groupId>
    <artifactId>spring-boot-starter-thymeleaf</artifactId>
</dependency>
我们要使用thymeleaf,需要在html文件中导入命名空间的约束,方便提示。
xmlns:th="http://www.thymeleaf.org"thymeLeafController.java
@Controller
public class ThymeLeafController {

    @RequestMapping("/thymeleaf")
    public String thy(Model model) {
        model.addAttribute("msg", "<p>hello Thymeleaf</p>");
        model.addAttribute("users", Arrays.asList("张三", "李四", "王五"));
        // 后缀默认是 .html
        return "/thymeLeafTest";
    }

}
thymeLeafTest.html
<!DOCTYPE html>
<html lang="en" xmlns:th="http://www.thymeleaf.org">
<head>
<meta charset="UTF-8">
<title>Title</title>
</head>
<body>
<!--所有的html元素都可以被Th接管:th:xx元素名-->
<!--test=默认是转义文本-->
<h1 th:text="${msg}"></h1>
<!--utest=默认是不转义文本-->
<h1 th:utext="${msg}"></h1>
<h1>
<!--遍历往前写item-->
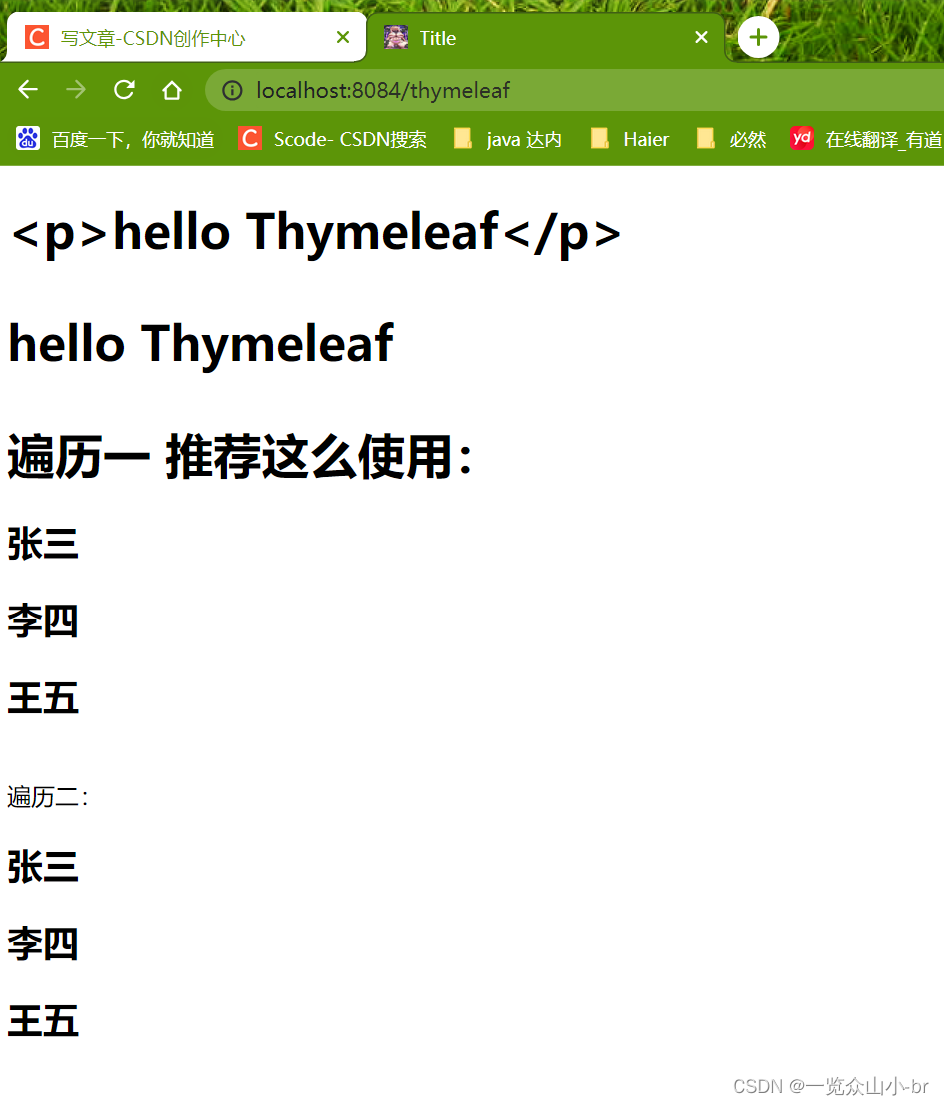
遍历一 推荐这么使用:
<h2 th:each="user:${users}" th:text="${user}"></h2><br>
遍历二:
<h2 th:each="user:${users}">[[${user}]]</h2>
</h1>
</body>
</html>启动项目测试
手册网址:https://www.thymeleaf.org/doc/tutorials/3.0/usingthymeleaf.pdf
七、WebMVC自动配置原理
承接yml的上文,除了全局配置文件,我们还可以自己编写config配置类,加上@Configuration注解来让springBoot识别,覆盖掉默认的配置文件。
MyMvcConfig.java
// 如果想写一些定制化的功能,只要写这个组件,然后将他交给springBoot就会自动装配
// 因为类型要求为WebMvcConfigurer,所以我们实现其接口
// 可以使用自定义类扩展MVC的功能
@Configuration
public class MyMvcConfig implements WebMvcConfigurer {
}
在application.properties文件中配置springmvc
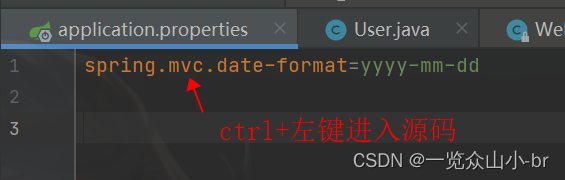
点击源码,跳转进WebMvcProperties.java 文件

再定位到源码包中,找到WebMvcAutoConfiguration.java自动装配文件
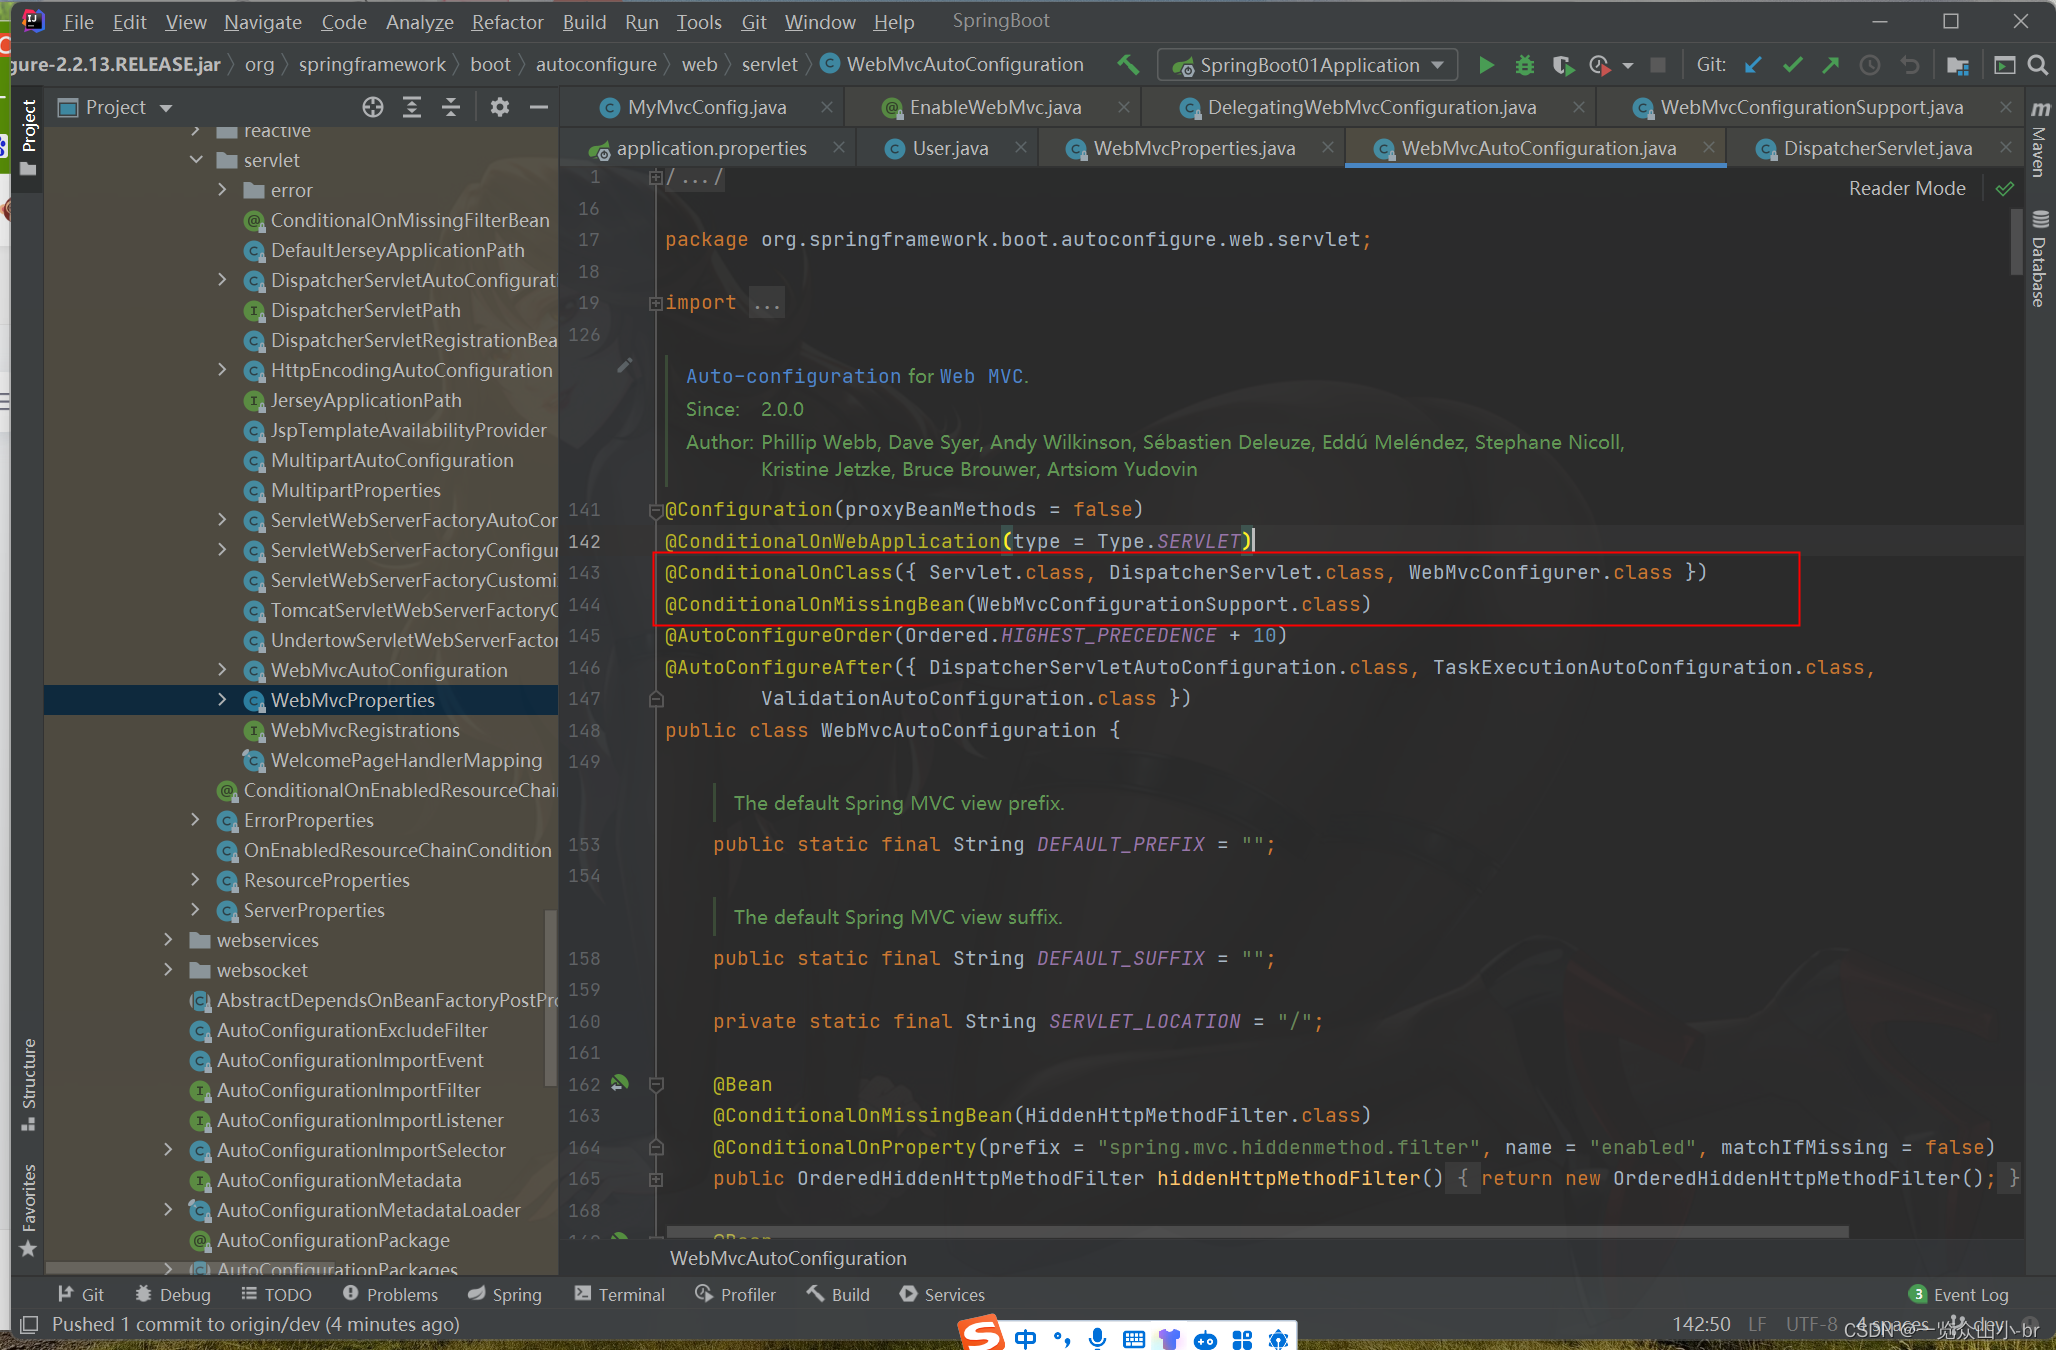
通过@Conditional获知配置文件识别的条件,然后在自己的配置类中实现WebMvcConfigurer接口,并重写其中的addViewControllers()方法
package com.kuang.config;

import org.springframework.context.annotation.Bean;
import org.springframework.context.annotation.Configuration;
import org.springframework.web.servlet.View;
import org.springframework.web.servlet.ViewResolver;
import org.springframework.web.servlet.config.annotation.EnableWebMvc;
import org.springframework.web.servlet.config.annotation.ViewControllerRegistry;
import org.springframework.web.servlet.config.annotation.WebMvcConfigurer;

import java.util.Locale;

// 如果想写一些定制化的功能,只要写这个组件,然后将他交给springBoot就会自动装配
// 因为类型要求为WebMvcConfigurer,所以我们实现其接口
// 可以使用自定义类扩展MVC的功能
@Configuration
// 这个注解就是导入了一个类@Import(DelegatingWebMvcConfiguration.class),里面实现了WebMvcConfigurer,写了一些功能
// 会使我们自定义的配置类失效,@ConditionalOnClass()
@EnableWebMvc
public class MyMvcConfig implements WebMvcConfigurer {

    // 将视图解析器交给SpringMVC
    @Bean
    public ViewResolver myViewResolver() {
        return new MyViewResolver();
    }

    // 自定义了一个自己的视图解析器
    public static class MyViewResolver implements ViewResolver {
        @Override
        public View resolveViewName(String viewName, Locale locale) throws Exception {
            System.out.println("这是我配置的视图解析器~~~~~~~~~");
            return null;
        }
    }

    @Override
    public void addViewControllers(ViewControllerRegistry registry) {
        // 浏览器发送/test , 就会跳转到test页面;
        registry.addViewController("/test").setViewName("test");
    }
}
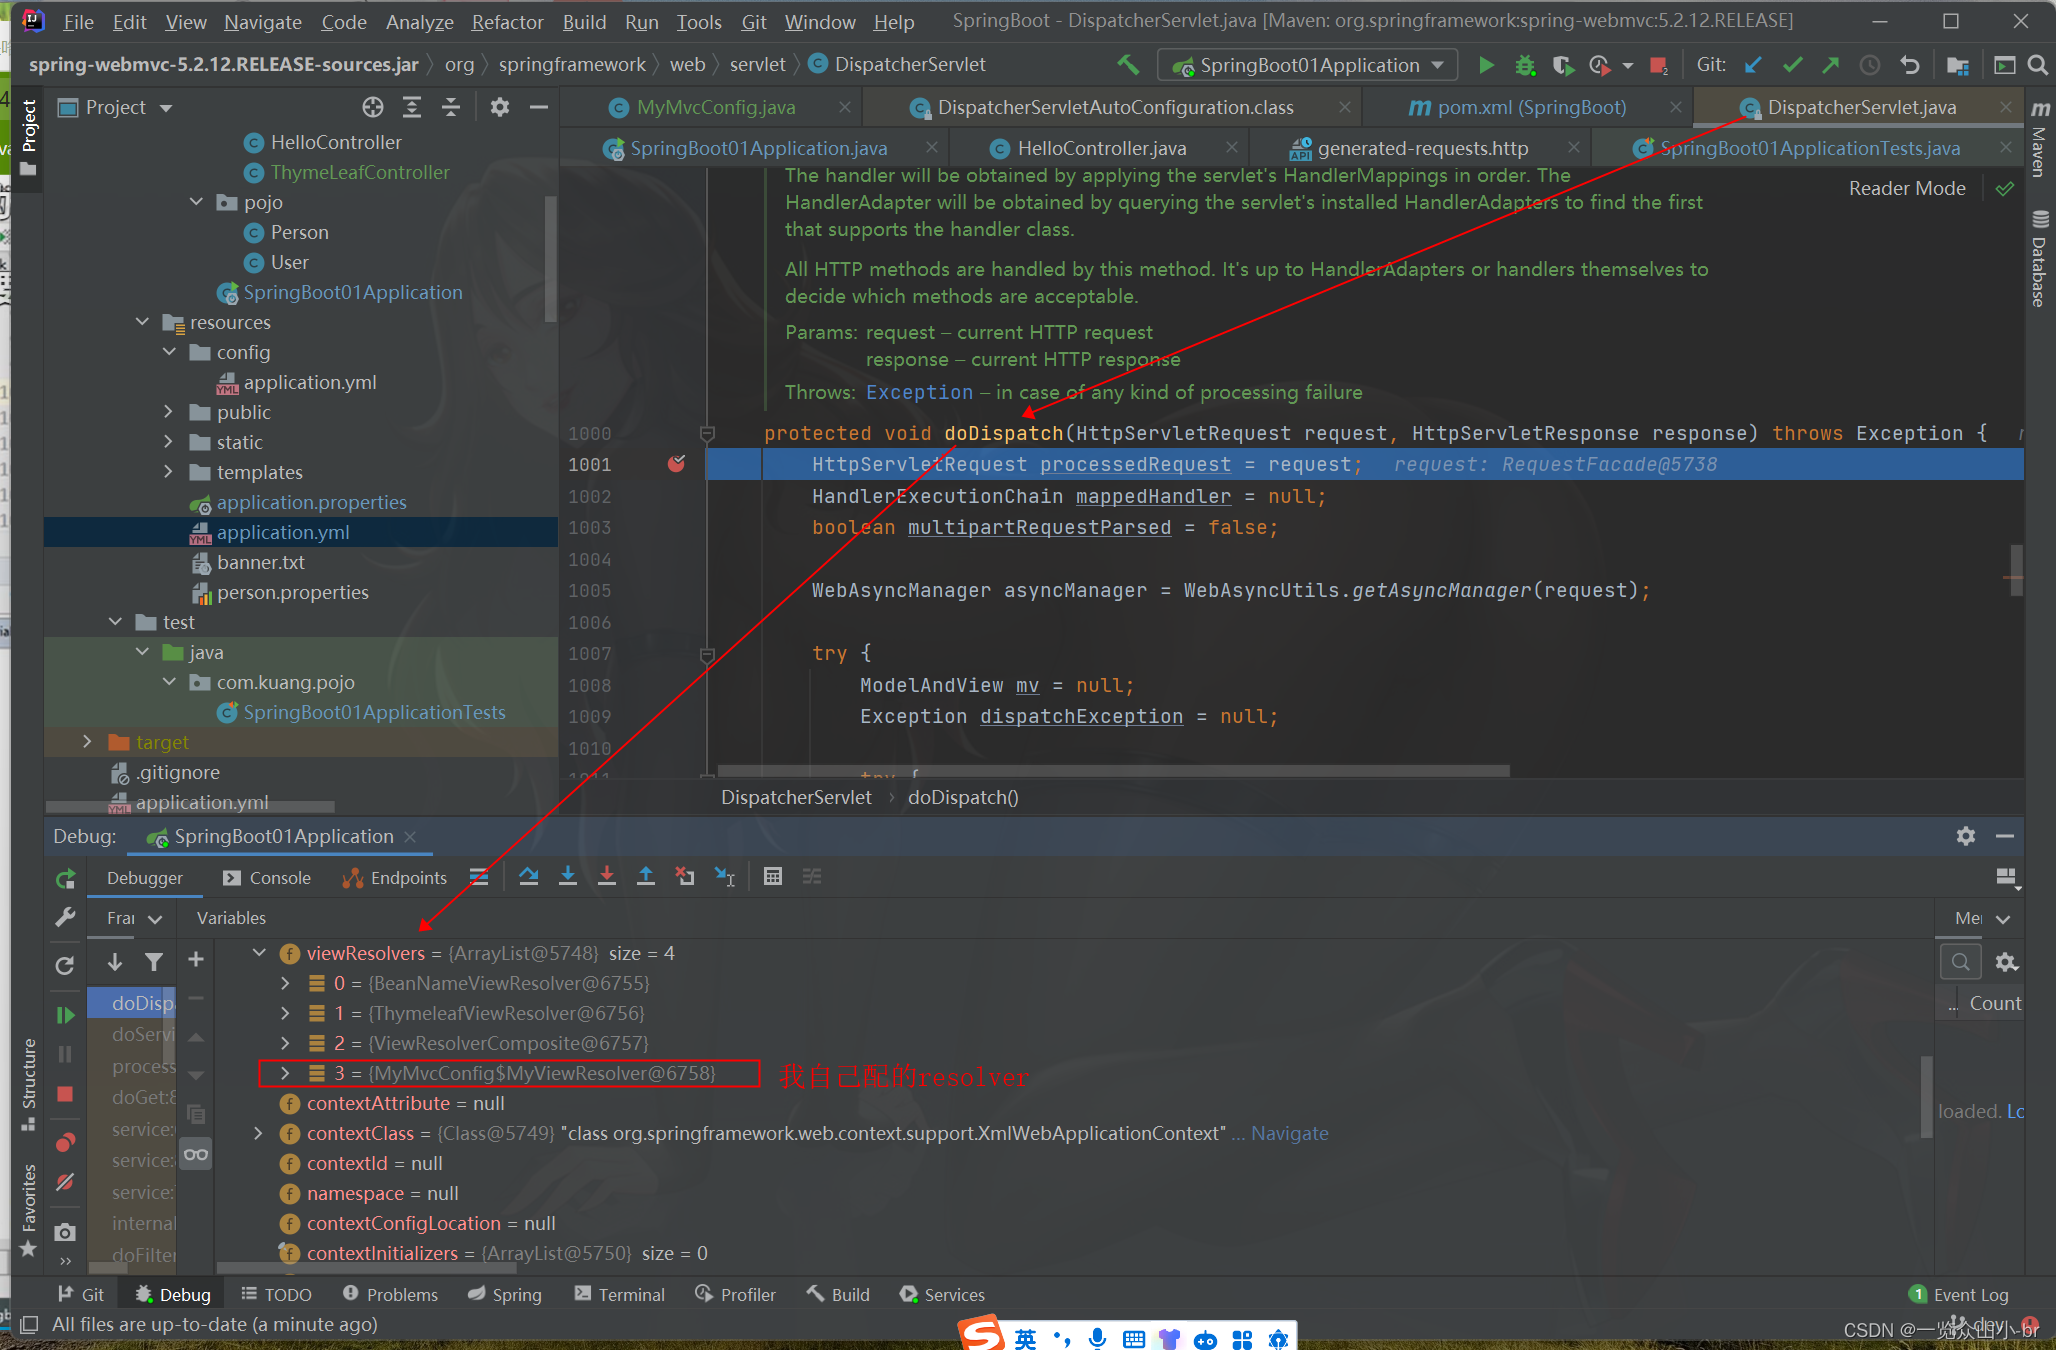
启动项目测试, 可以看到我们配置的MyViewResolver注册进spring了
八、MVC的员工管理系统
第1节后接第5节CRUD,之后可以穿插着看
1、创建工程,伪造数据库表
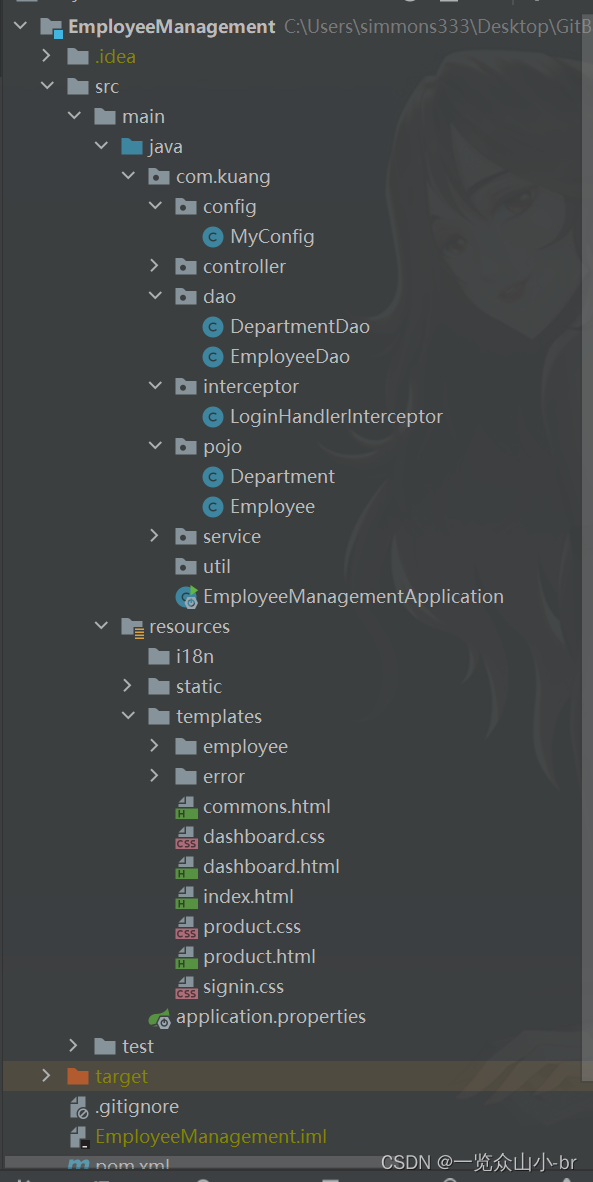
做完以后总的项目结构
new project

等待依赖下载完成,创建包结构,实体类,dao层
@Data
@AllArgsConstructor
@NoArgsConstructor
public class Department implements Serializable {
    private Integer id;
    private String departmentName;
}
Employee类
@Data
@AllArgsConstructor
@NoArgsConstructor
public class Employee implements Serializable {

    private Integer id;
    private String lastName;
    private String email;
    private Integer gender;
    private Department department;
    private Date birth;

}
DepartmentDao
@Repository
public class DepartmentDao {
    // 模拟数据库中的数据,无需创建数据库
    private static Map<Integer, Department> departments = null;

    static {
        departments = new HashMap<>();
        departments.put(101, new Department(101, "教学部"));
        departments.put(102, new Department(102, "市场部"));
        departments.put(103, new Department(103, "教研部"));
        departments.put(104, new Department(104, "运营部"));
        departments.put(105, new Department(105, "后勤部"));
    }

    //获得所有部门的信息
    public Collection<Department> getDepartments() {
        return departments.values();
    }

    // 通过id获取部门
    public Department getDepartmentById(Integer id) {
        return departments.get(id);
    }
}
EmployeeDao
@Repository
public class EmployeeDao {

    @Autowired
    private DepartmentDao departmentDao;
    // 模拟数据库中的数据,无需创建数据库
    private static Map<Integer, Employee> employees = null;

    static {
        employees = new HashMap<>();
        employees.put(1001, new Employee(1001, "AA", "123456@qq.com", 0, new Department(101, "教学部"), new Date()));
        employees.put(1002, new Employee(1002, "BB", "123456@qq.com", 1, new Department(102, "市场部"), new Date()));
        employees.put(1003, new Employee(1003, "CC", "123456@qq.com", 0, new Department(103, "教研部"), new Date()));
        employees.put(1004, new Employee(1004, "DD", "123456@qq.com", 1, new Department(104, "运营部"), new Date()));
        employees.put(1005, new Employee(1005, "EE", "123456@qq.com", 1, new Department(105, "后勤部"), new Date()));
    }

    // 主键自增
    private static Integer initId = 1006;

    // 增加一个员工
    public void saveEmp(Employee employee) {
        if (employee.getId() == null) {
            employee.setId(initId++);
        }
        employee.setDepartment(departmentDao.getDepartmentById(employee.getDepartment().getId()));
        employees.put(employee.getId(), employee);
    }

    // 删除员工
    public void deleteEmployeeById(Integer id) {
        employees.remove(id);
    }

    // 查询全部员工信息
    public Collection<Employee> getAllEmp() {
        return employees.values();
    }

    // 通过id查询员工
    public Employee getEmployeeById(Integer id) {
        return employees.get(id);
    }
}
2、创建首页
导入ThemeLeaf依赖
        <!--thymeleaf启动器-->
        <dependency>
            <groupId>org.springframework.boot</groupId>
            <artifactId>spring-boot-starter-thymeleaf</artifactId>
        </dependency>
将第5节从BootStrap模板复制过来的sign-in.html改名为,首页index.html
<!doctype html>
<html lang="en" xmlns:th="http://www.thymeleaf.org">
<head>
<meta charset="utf-8">
<meta name="viewport" content="width=device-width, initial-scale=1, shrink-to-fit=no">
<meta name="description" content="">
<meta name="author" content="">
<link rel="icon" href="../../../../favicon.ico">
<title>Signin Template for Bootstrap</title>
<!-- Bootstrap core CSS -->
<link href="../../../../dist/css/bootstrap.min.css" rel="stylesheet">
<!-- Custom styles for this template -->
<link href="signin.css" rel="stylesheet">
</head>
<body class="text-center">
<form class="form-signin" action="/user/login" type="post">
<img class="mb-4" th:src="@{/assets/img/bootstrap-solid.svg}" alt="" width="72" height="72">
<!--配置登录失败信息-->
<P style="color: red" th:text="${msg}" th:if="${not #strings.isEmpty(msg)}"></P>
<h1 class="h3 mb-3 font-weight-normal">Please sign in</h1>
<label for="inputEmail" class="sr-only">Email address</label>
<input type="email" name="email" id="inputEmail" class="form-control" placeholder="Email address" required
autofocus>
<label for="inputPassword" class="sr-only">Password</label>
<input type="password" name="password" id="inputPassword" class="form-control" placeholder="Password" required>
<div class="checkbox mb-3">
<label>
<input type="checkbox" value="remember-me"> Remember me
</label>
</div>
<button class="btn btn-lg btn-primary btn-block" type="submit">Sign in</button>
<p class="mt-5 mb-3 text-muted">© 2017-2018</p>
</form>
</body>
</html>
导入ThemeLeaf约束
<html lang="en" xmlns:th="http://www.thymeleaf.org">建议使用扩展MVC配置的首页访问方式,直接启动项目输入localhost:8080即可访问
@Configuration
public class MyConfig implements WebMvcConfigurer {

    @Override
    public void addViewControllers(ViewControllerRegistry registry) {
        // 访问首页,建议使用扩展MVC
        registry.addViewController("/").setViewName("index");
        registry.addViewController("/index").setViewName("index");
        registry.addViewController("/index.html").setViewName("index");
    }

    //登录拦截器
    @Override
    public void addInterceptors(InterceptorRegistry registry) {
        // 配置自定义拦截器
        registry.addInterceptor(new LoginHandlerInterceptor())
                .addPathPatterns("/**")
                .excludePathPatterns("/index", "/", "/user/login",
                        "/assets/**", "/dist/**", "/css/**", "/img/**", "/js/**");
    }

}
3、登陆拦截器
创建LoginHandlerInterceptor,这里假设获取session中的username,如果存在就表示登录成功;不存在就表示登录失败,request中存失败msg
public class LoginHandlerInterceptor implements HandlerInterceptor {
    /*
        登录拦截器
     */
    @Override
    public boolean preHandle(HttpServletRequest request, HttpServletResponse response, Object handler) throws Exception {
        // 获取用户名称,登录成功之后,应该有用户的session
        Object inputEmail = request.getSession().getAttribute("email");
        // 登录失败返会登录页
        if (inputEmail == null) {
            request.setAttribute("msg", "没有权限,请重新登录");
            request.getRequestDispatcher("/").forward(request, response);
            return false;
        } else {
            return true;
        }
    }
}
MyConfig中配置拦截器
@Configuration
public class MyConfig implements WebMvcConfigurer {

    @Override
    public void addViewControllers(ViewControllerRegistry registry) {
        // 访问首页,建议使用扩展MVC
        registry.addViewController("/").setViewName("index");
        registry.addViewController("/index").setViewName("index");
        registry.addViewController("/index.html").setViewName("index");
    }

    //登录拦截器
    @Override
    public void addInterceptors(InterceptorRegistry registry) {
        // 配置自定义拦截器
        registry.addInterceptor(new LoginHandlerInterceptor())
                .addPathPatterns("/**")
                .excludePathPatterns("/index", "/", "/user/login",
                        "/assets/**", "/dist/**", "/css/**", "/img/**", "/js/**");
    }

}
4、国际化
resource下新建i18n文件夹,新建中英文的properties文件

index.html前端页面使用th:text="#{login.btn}"等接收配置文件里的参数
参考上面的,我没写
自定义一个MyLocalResolver继承LocalResolver
public class MyLocalResolver implements LocaleResolver {

    //解析国际化请求
    @Override
    public Locale resolveLocale(HttpServletRequest request) {
        String language = request.getParameter("language");
        System.out.println("语言:" + language);
        Locale locale = Locale.getDefault();
        if (!Strings.isEmpty(language)) {
            String[] split = language.split("_");
            locale = new Locale(split[0], split[1]);
        }
        return locale;
    }

    @Override
    public void setLocale(HttpServletRequest httpServletRequest, HttpServletResponse httpServletResponse, Locale locale) {

    }
}
将组件注册进IOC容器
@Configuration
public class MyConfig implements WebMvcConfigurer {

    @Override
    public void addViewControllers(ViewControllerRegistry registry) {
        // 访问首页,建议使用扩展MVC
        registry.addViewController("/").setViewName("index");
        registry.addViewController("/index").setViewName("index");
        registry.addViewController("/index.html").setViewName("index");
    }

    //登录拦截器
    @Override
    public void addInterceptors(InterceptorRegistry registry) {
        // 配置自定义拦截器
        registry.addInterceptor(new LoginHandlerInterceptor())
                .addPathPatterns("/**")
                .excludePathPatterns("/index", "/", "/user/login",
                        "/assets/**", "/dist/**", "/css/**", "/img/**", "/js/**");
    }

    // 国际化解析器注册进组件
    @Bean
    public LocaleResolver localeResolver() {
        return new MyLocalResolver();
    }
}
5、CRUD环节
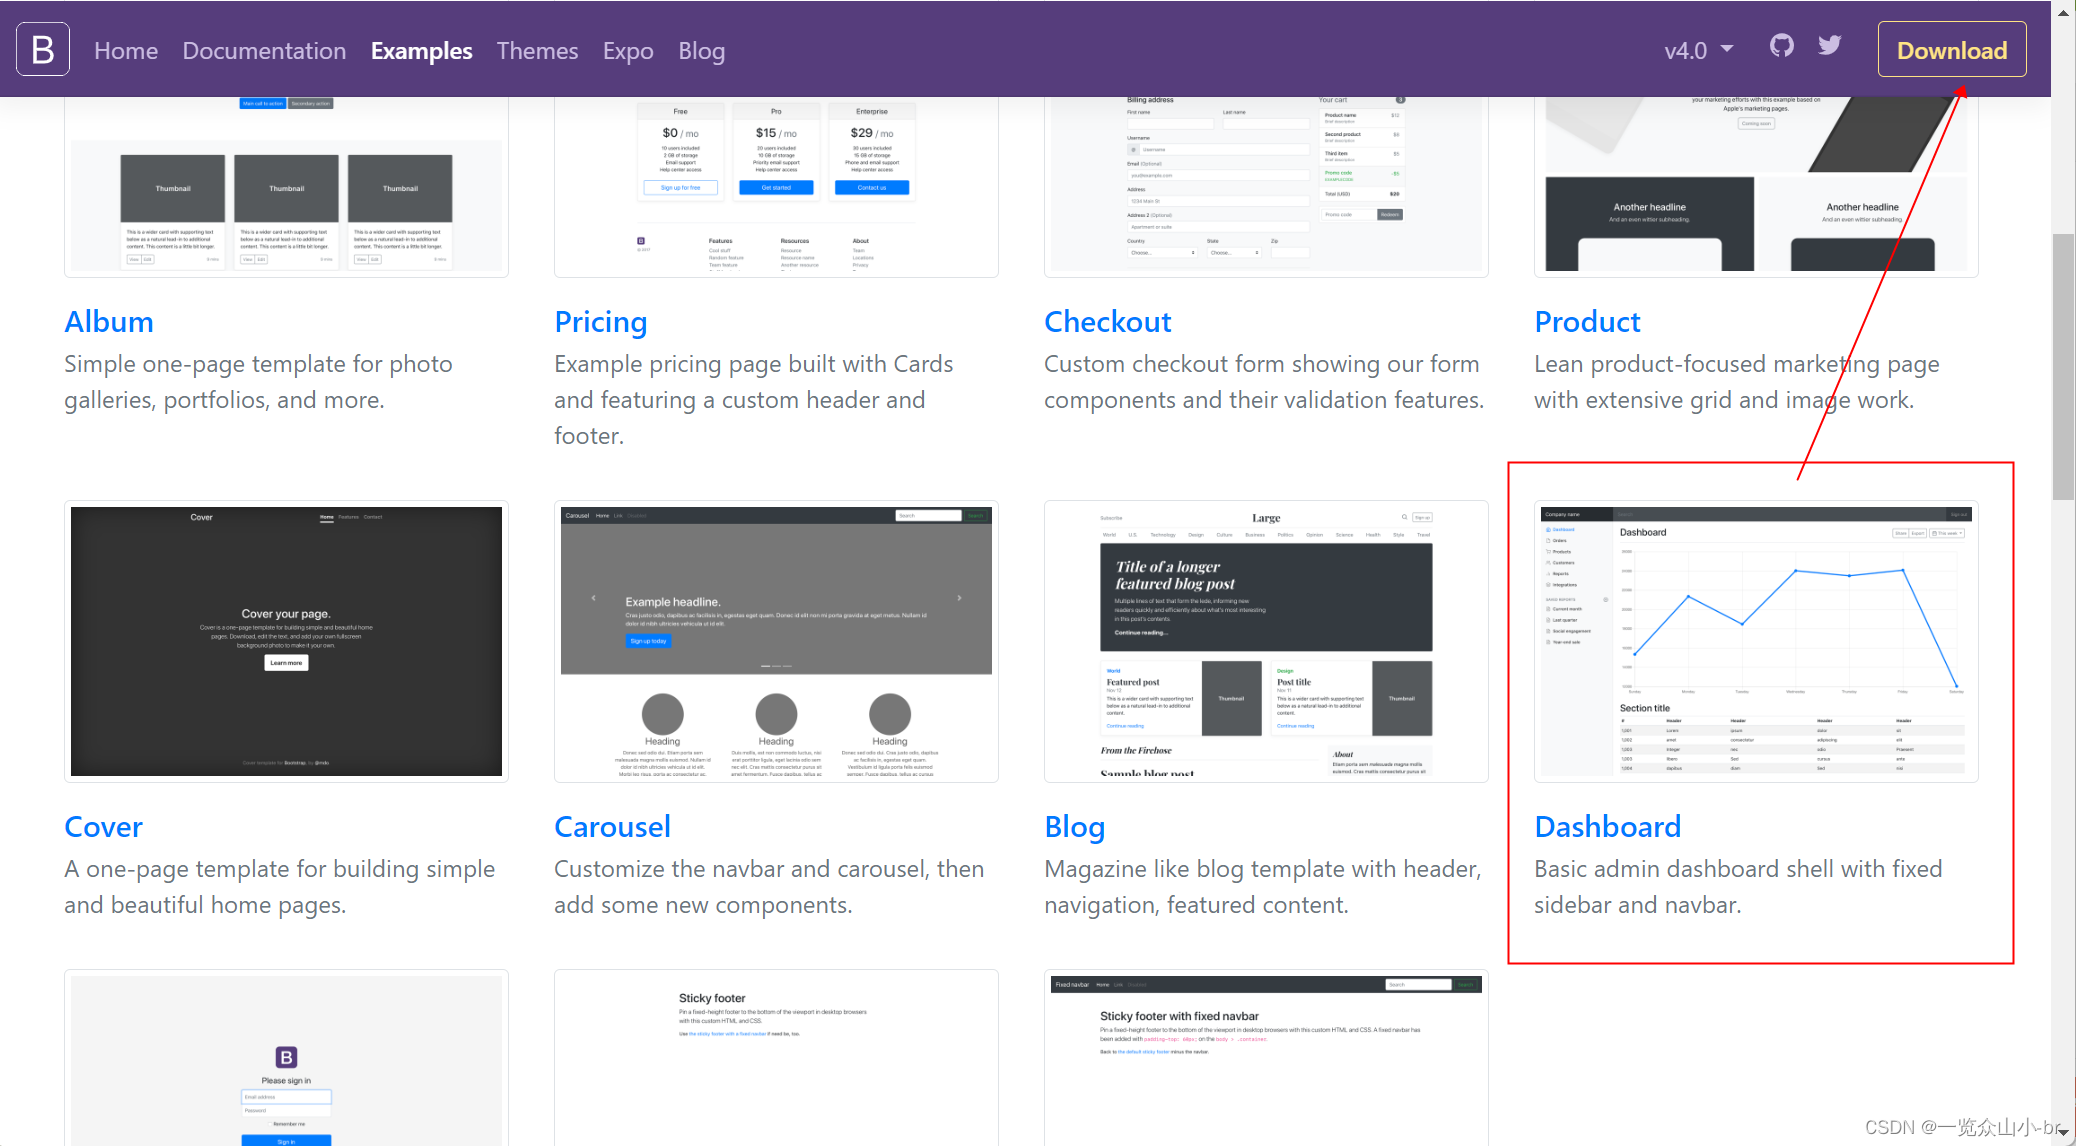
1、下载Bootstrap前端模板工程
可以直接下载全部模板,也可以挑选2个需要的页面下载,例如Dashboard和Sign-in
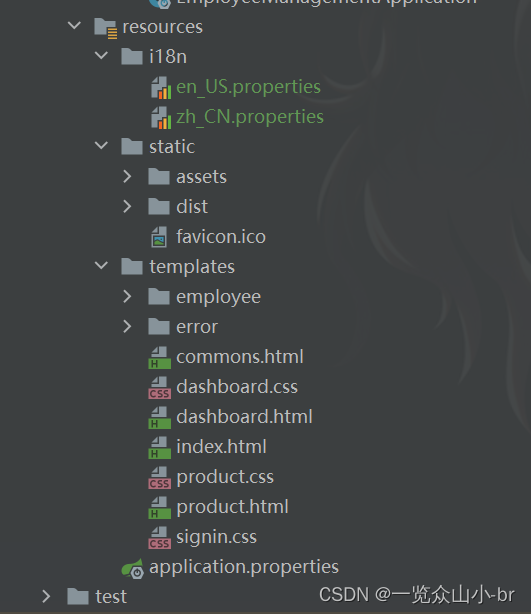
解压缩,将asserts和dist两个文件夹复制到static目录下,还可以新建个favicon.icon
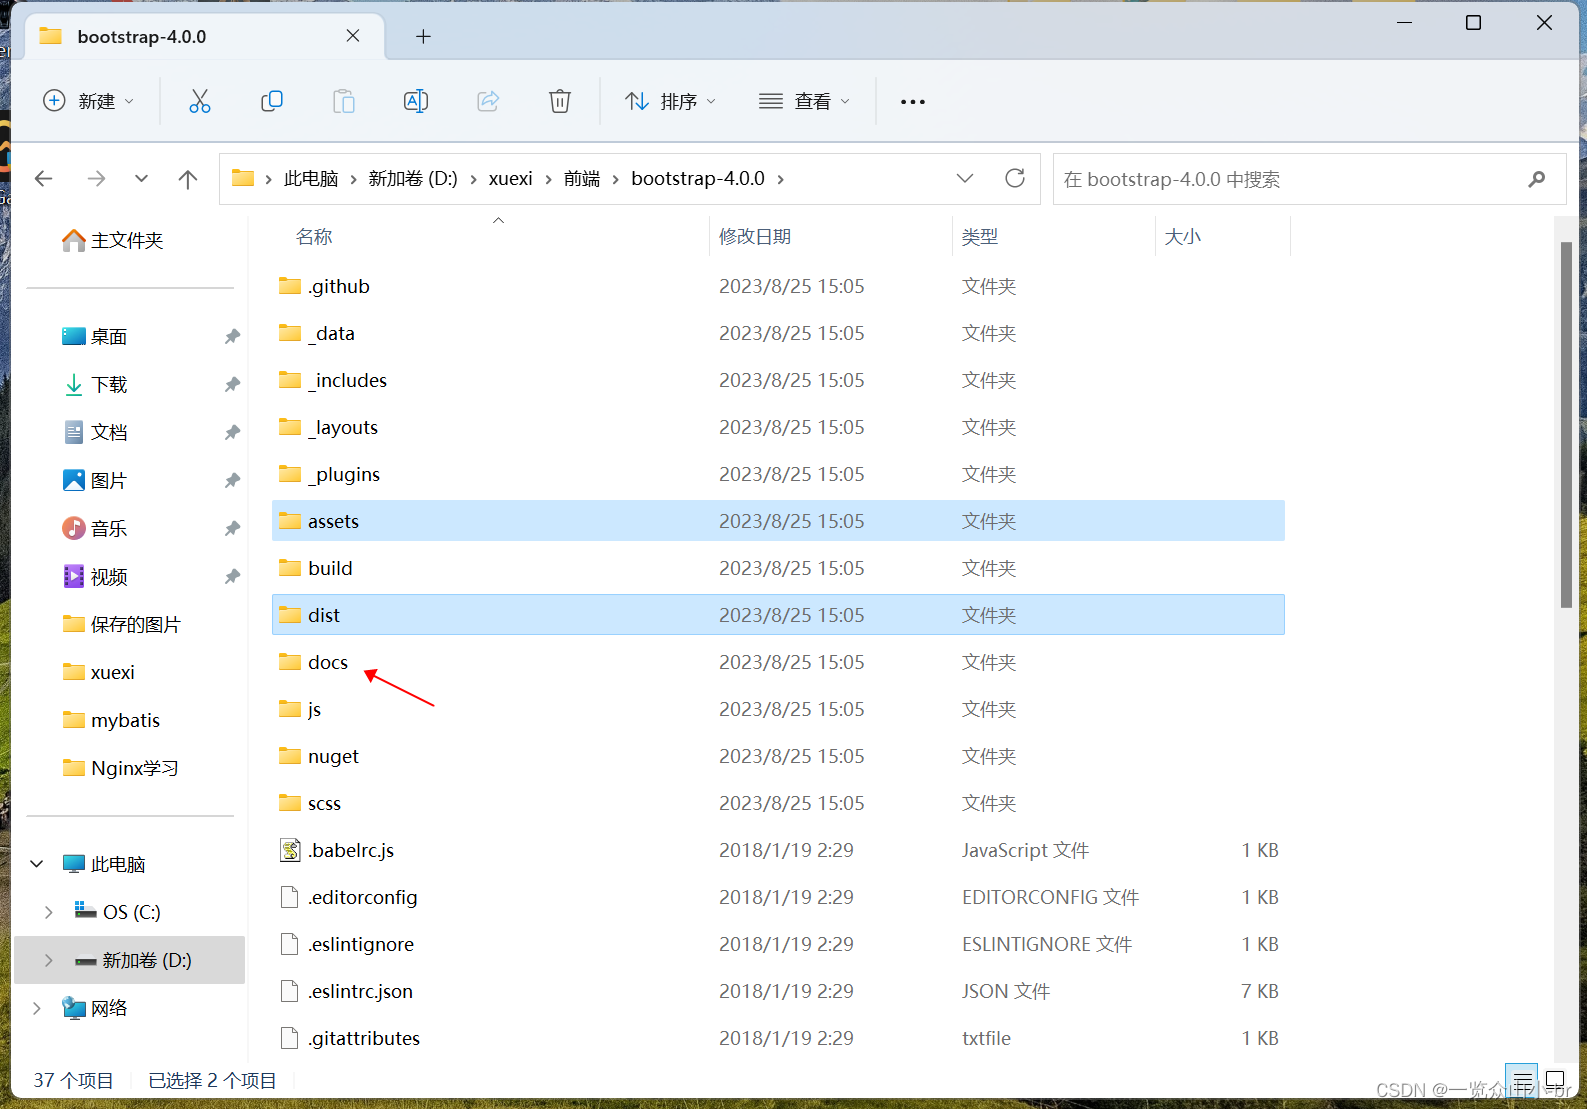
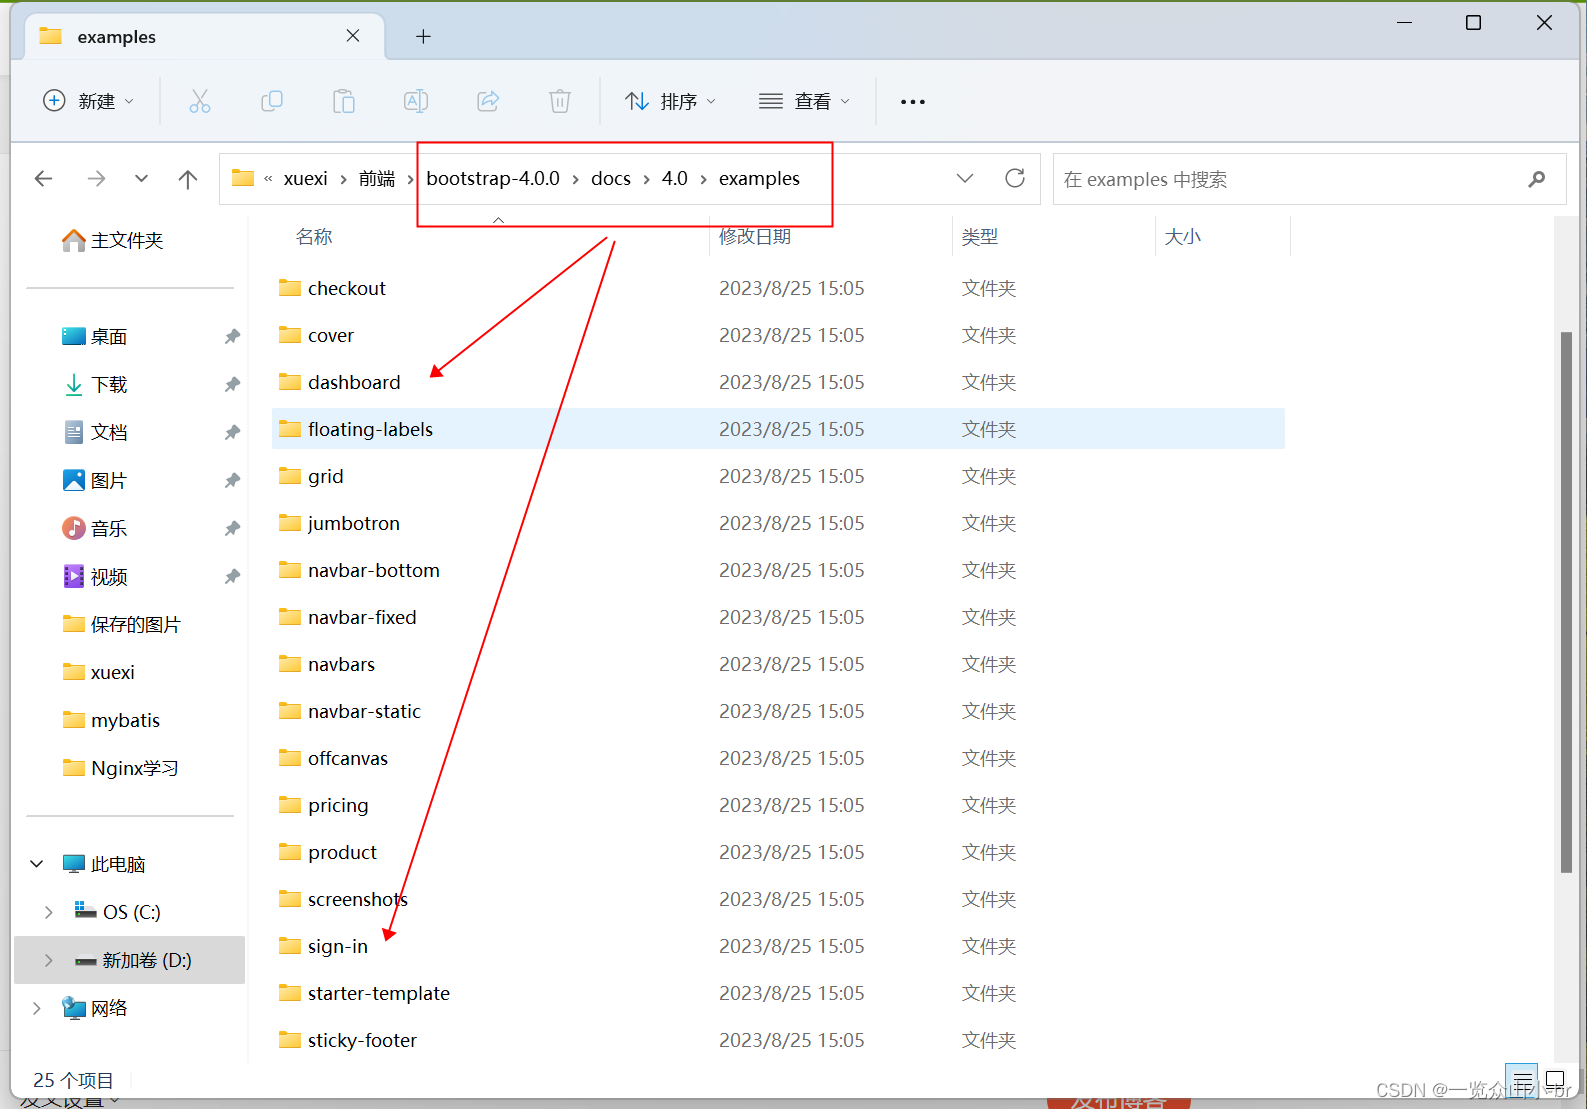
再打开docs/4.0/examples目录,挑选需要的页面,复制到templates下面
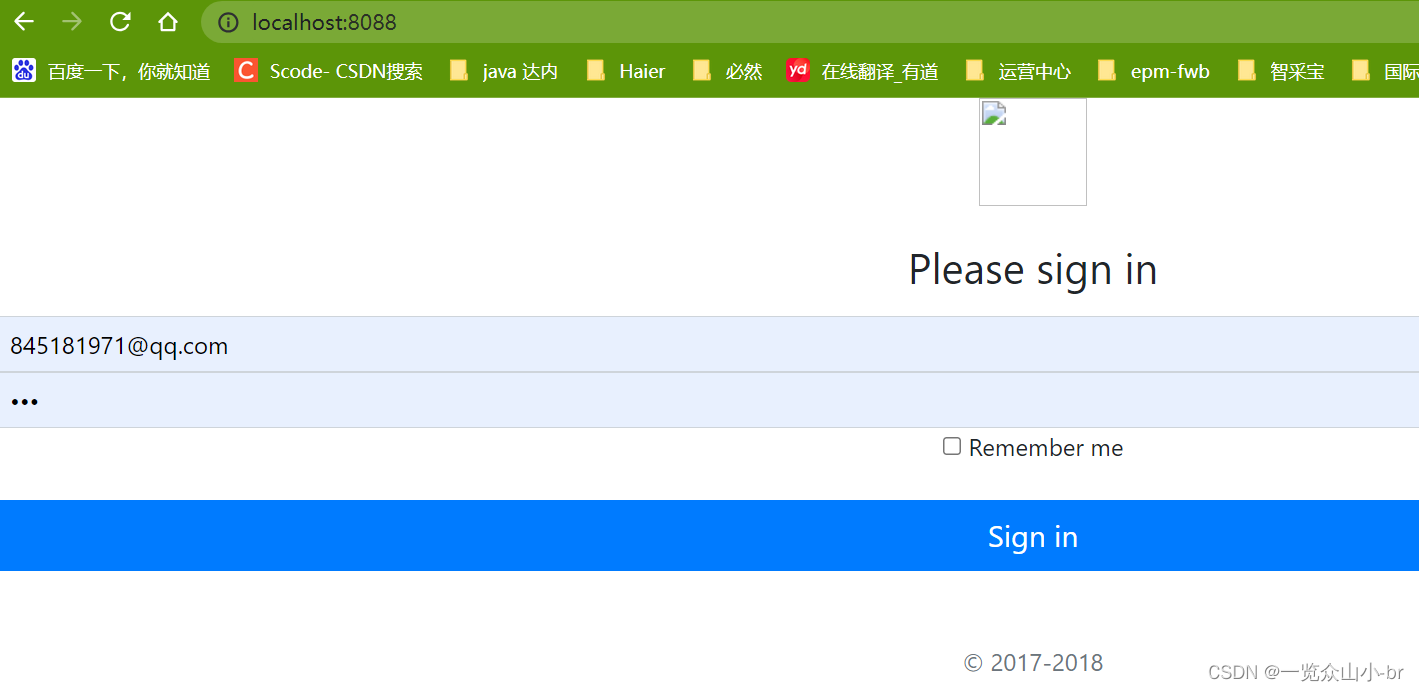
启动项目,访问登录页面
2、提取公共页面
新建commons.html,将Dashboard.html的顶部横幅、侧边栏剪切过来
<!DOCTYPE html>
<html lang="en" xmlns:th="http://www.thymeleaf.org">
<head>
<meta charset="UTF-8">
<title>Title</title>
</head>
<body>
<!--提取首页横幅-->
<nav class="navbar navbar-dark sticky-top bg-dark flex-md-nowrap p-0" th:fragment="navbar">
<a class="navbar-brand col-sm-3 col-md-2 mr-0" href="#">Company name</a>
<input class="form-control form-control-dark w-100" type="text" placeholder="Search" aria-label="Search">
<ul class="navbar-nav px-3">
<li class="nav-item text-nowrap">
<a class="nav-link" href="/user/logout">Sign out</a>
</li>
</ul>
</nav>
<!--提取侧边栏-->
<nav class="col-md-2 d-none d-md-block bg-light sidebar" th:fragment="sidebar">
<div class="sidebar-sticky">
<ul class="nav flex-column">
<li class="nav-item">
<a class="nav-link active" href="/toDashboard">
<span data-feather="home"></span>
Dashboard <span class="sr-only">(current)</span>
</a>
</li>
<li class="nav-item">
<a class="nav-link" href="/Employee/selectAll">
<span data-feather="file"></span>
员工管理
</a>
</li>
<li class="nav-item">
<a class="nav-link" href="#">
<span data-feather="shopping-cart"></span>
Products
</a>
</li>
<li class="nav-item">
<a class="nav-link" href="#">
<span data-feather="users"></span>
Customers
</a>
</li>
<li class="nav-item">
<a class="nav-link" href="#">
<span data-feather="bar-chart-2"></span>
Reports
</a>
</li>
<li class="nav-item">
<a class="nav-link" href="#">
<span data-feather="layers"></span>
Integrations
</a>
</li>
</ul>
<h6 class="sidebar-heading d-flex justify-content-between align-items-center px-3 mt-4 mb-1 text-muted">
<span>Saved reports</span>
<a class="d-flex align-items-center text-muted" href="#">
<span data-feather="plus-circle"></span>
</a>
</h6>
<ul class="nav flex-column mb-2">
<li class="nav-item">
<a class="nav-link" href="#">
<span data-feather="file-text"></span>
Current month
</a>
</li>
<li class="nav-item">
<a class="nav-link" href="#">
<span data-feather="file-text"></span>
Last quarter
</a>
</li>
<li class="nav-item">
<a class="nav-link" href="#">
<span data-feather="file-text"></span>
Social engagement
</a>
</li>
<li class="nav-item">
<a class="nav-link" href="#">
<span data-feather="file-text"></span>
Year-end sale
</a>
</li>
</ul>
</div>
</nav>
</body>
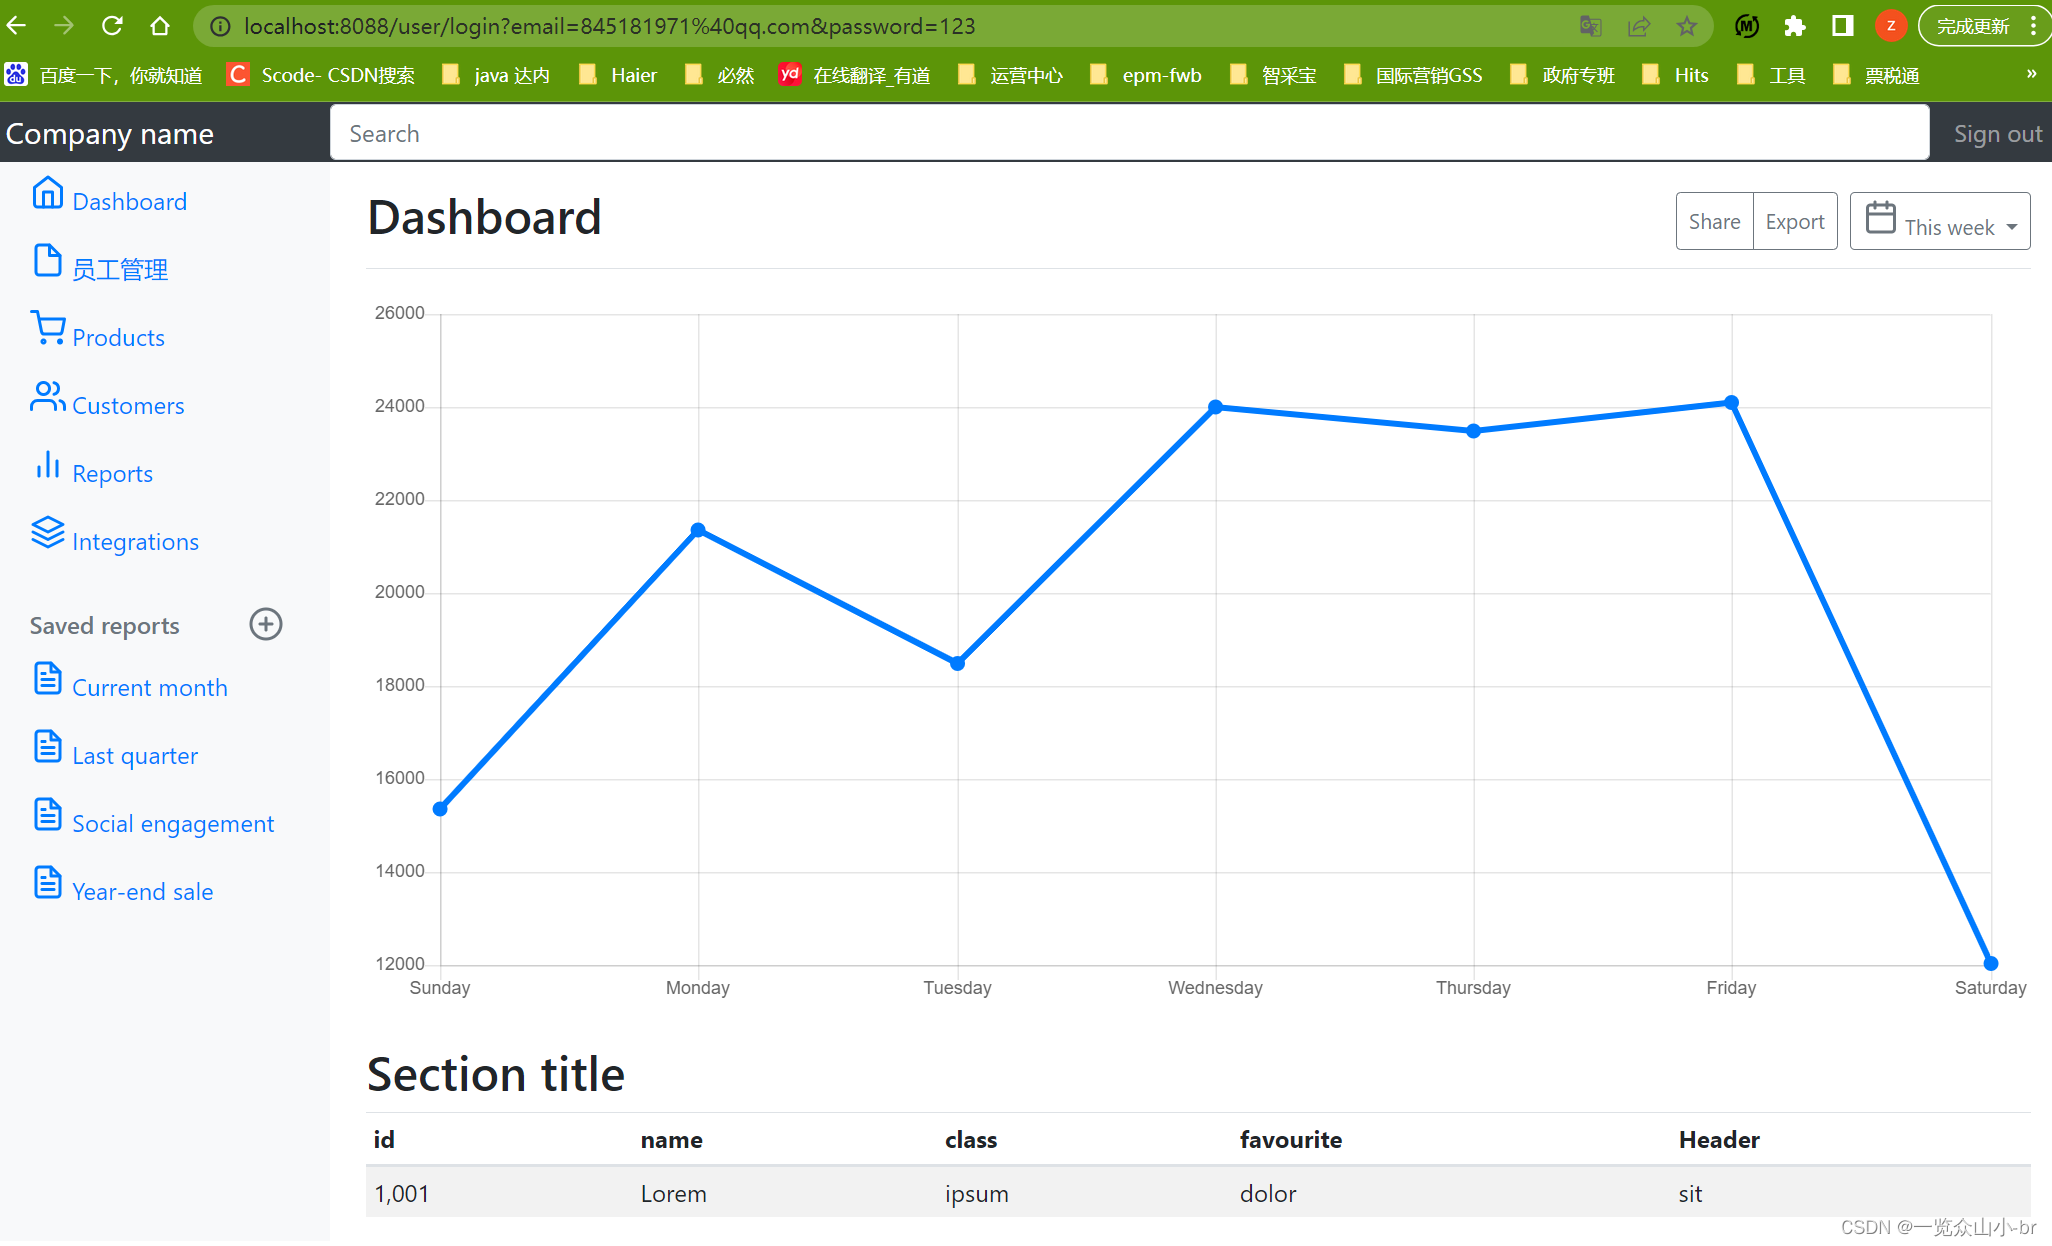
</html>修改Dashboard.html,将commons.html的元素引入
<!doctype html>
<html lang="en" xmlns:th="http://www.thymeleaf.org">
<head>
    <meta charset="utf-8">
    <meta name="viewport" content="width=device-width, initial-scale=1, shrink-to-fit=no">
    <meta name="description" content="员工管理系统">
    <meta name="author" content="孙琳昱">
    <link rel="icon" href="../../../../favicon.ico">

    <title>Dashboard Template for Bootstrap</title>

    <!-- Bootstrap core CSS -->
    <link href="../../../../dist/css/bootstrap.min.css" rel="stylesheet">

    <!-- Custom styles for this template -->
    <link href="dashboard.css" rel="stylesheet">
</head>

<body>

<div th:replace="~{commons::navbar}"></div>

<div class="container-fluid">
    <div class="row">

        <div th:replace="~{commons::sidebar}"></div>

        <main role="main" class="col-md-9 ml-sm-auto col-lg-10 pt-3 px-4">
            <div class="d-flex justify-content-between flex-wrap flex-md-nowrap align-items-center pb-2 mb-3 border-bottom">
                <h1 class="h2">Dashboard</h1>
                <div class="btn-toolbar mb-2 mb-md-0">
                    <div class="btn-group mr-2">
                        <button class="btn btn-sm btn-outline-secondary">Share</button>
                        <button class="btn btn-sm btn-outline-secondary">Export</button>
                    </div>
                    <button class="btn btn-sm btn-outline-secondary dropdown-toggle">
                        <span data-feather="calendar"></span>
                        This week
                    </button>
                </div>
            </div>

            <canvas class="my-4" id="myChart" width="900" height="380"></canvas>

            <h2>Section title</h2>
            <div class="table-responsive">
                <table class="table table-striped table-sm">
                    <thead>
                    <tr>
                        <th>id</th>
                        <th>name</th>
                        <th>class</th>
                        <th>favourite</th>
                        <th>Header</th>
                    </tr>
                    </thead>

                    <tbody>
                    <tr>
                        <td>1,001</td>
                        <td>Lorem</td>
                        <td>ipsum</td>
                        <td>dolor</td>
                        <td>sit</td>
                    </tr>
                    </tbody>
                </table>
            </div>
        </main>
    </div>
</div>

<!-- Bootstrap core JavaScript
================================================== -->
<!-- Placed at the end of the document so the pages load faster -->
<script src="https://code.jquery.com/jquery-3.2.1.slim.min.js"
        integrity="sha384-KJ3o2DKtIkvYIK3UENzmM7KCkRr/rE9/Qpg6aAZGJwFDMVNA/GpGFF93hXpG5KkN"
        crossorigin="anonymous"></script>
<script>window.jQuery || document.write('<script src="../../../../assets/js/vendor/jquery-slim.min.js"><\/script>')</script>
<script src="../../../../assets/js/vendor/popper.min.js"></script>
<script src="../../../../dist/js/bootstrap.min.js"></script>

<!-- Icons -->
<script src="https://unpkg.com/feather-icons/dist/feather.min.js"></script>
<script>
    feather.replace()
</script>

<!-- Graphs -->
<script src="https://cdnjs.cloudflare.com/ajax/libs/Chart.js/2.7.1/Chart.min.js"></script>
<script>
    var ctx = document.getElementById("myChart");
    var myChart = new Chart(ctx, {
        type: 'line',
        data: {
            labels: ["Sunday", "Monday", "Tuesday", "Wednesday", "Thursday", "Friday", "Saturday"],
            datasets: [{
                data: [15339, 21345, 18483, 24003, 23489, 24092, 12034],
                lineTension: 0,
                backgroundColor: 'transparent',
                borderColor: '#007bff',
                borderWidth: 4,
                pointBackgroundColor: '#007bff'
            }]
        },
        options: {
            scales: {
                yAxes: [{
                    ticks: {
                        beginAtZero: false
                    }
                }]
            },
            legend: {
                display: false,
            }
        }
    });
</script>
</body>
</html>
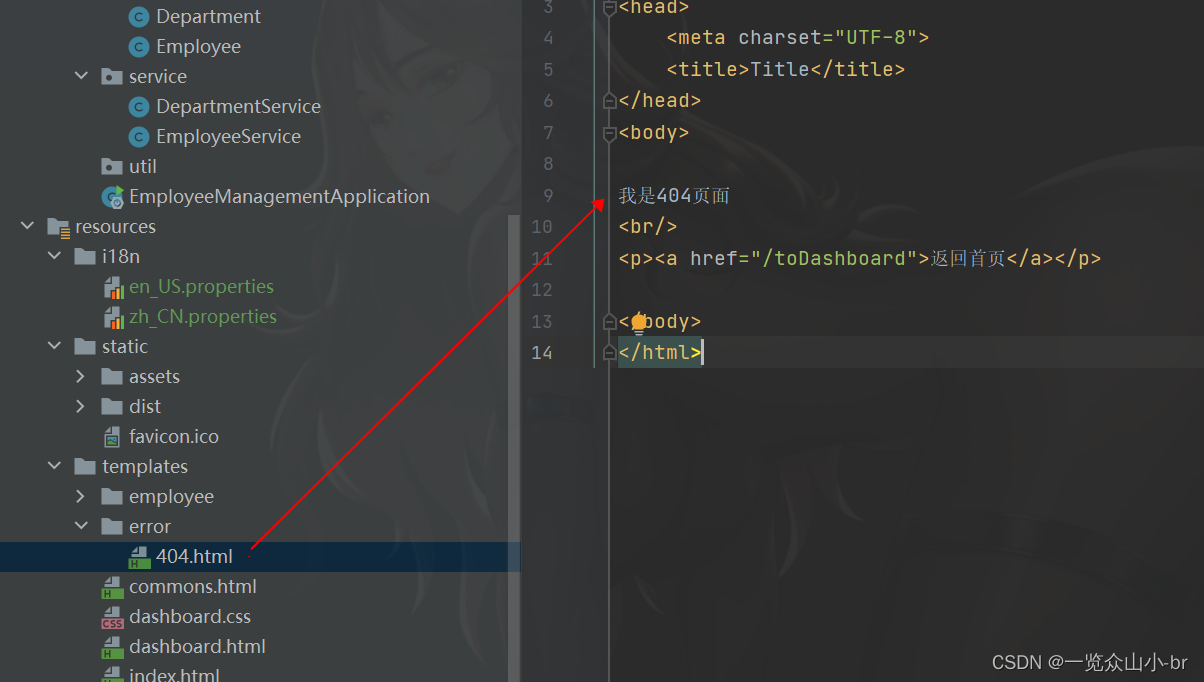
3、登陆、登出功能、404页面
编写LoginController
@Controller
@RequestMapping("/user")
public class LoginController {

    @RequestMapping("/login")
    public String login(HttpServletRequest request,
                        @RequestParam("email") String email,
                        @RequestParam("password") String password) {
        System.out.println("login方法");
        request.getSession().setAttribute("email", email);
        return "/dashboard";
    }

    @RequestMapping("/logout")
    public String logout(HttpServletRequest request) {
        System.out.println("logout方法");
        request.getSession().removeAttribute("email");
        return "/index";
    }

}
index.html配置表单提交接口,调用登陆接口
<form class="form-signin" action="/user/login" type="post">登出按钮配置在commos的首页横幅中,调用登出接口
<a class="nav-link" href="/user/logout">Sign out</a>启动项目测试
404页面Springboot有规定,在templates下新建error文件夹,再新建404.html即可
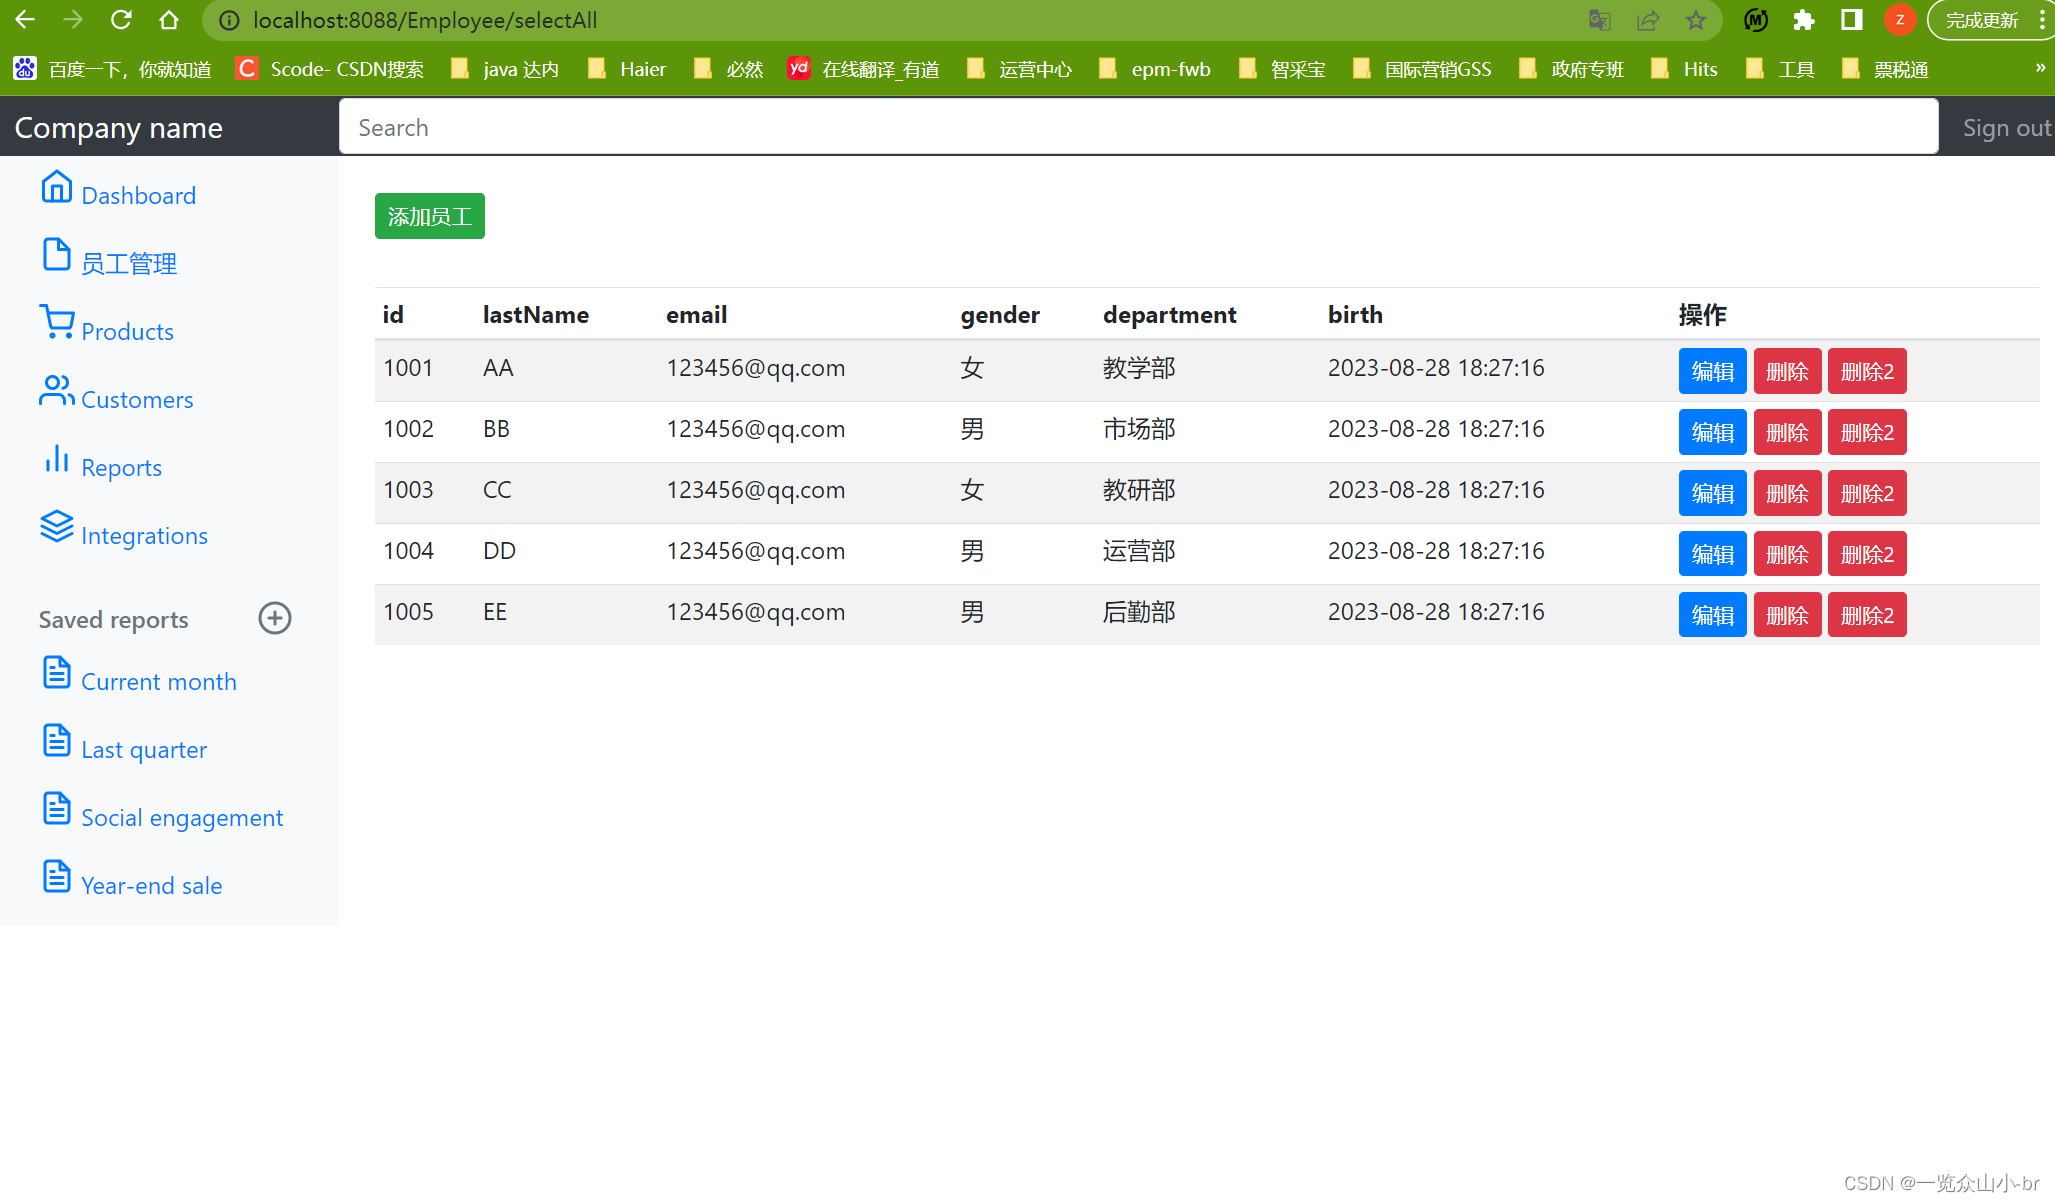
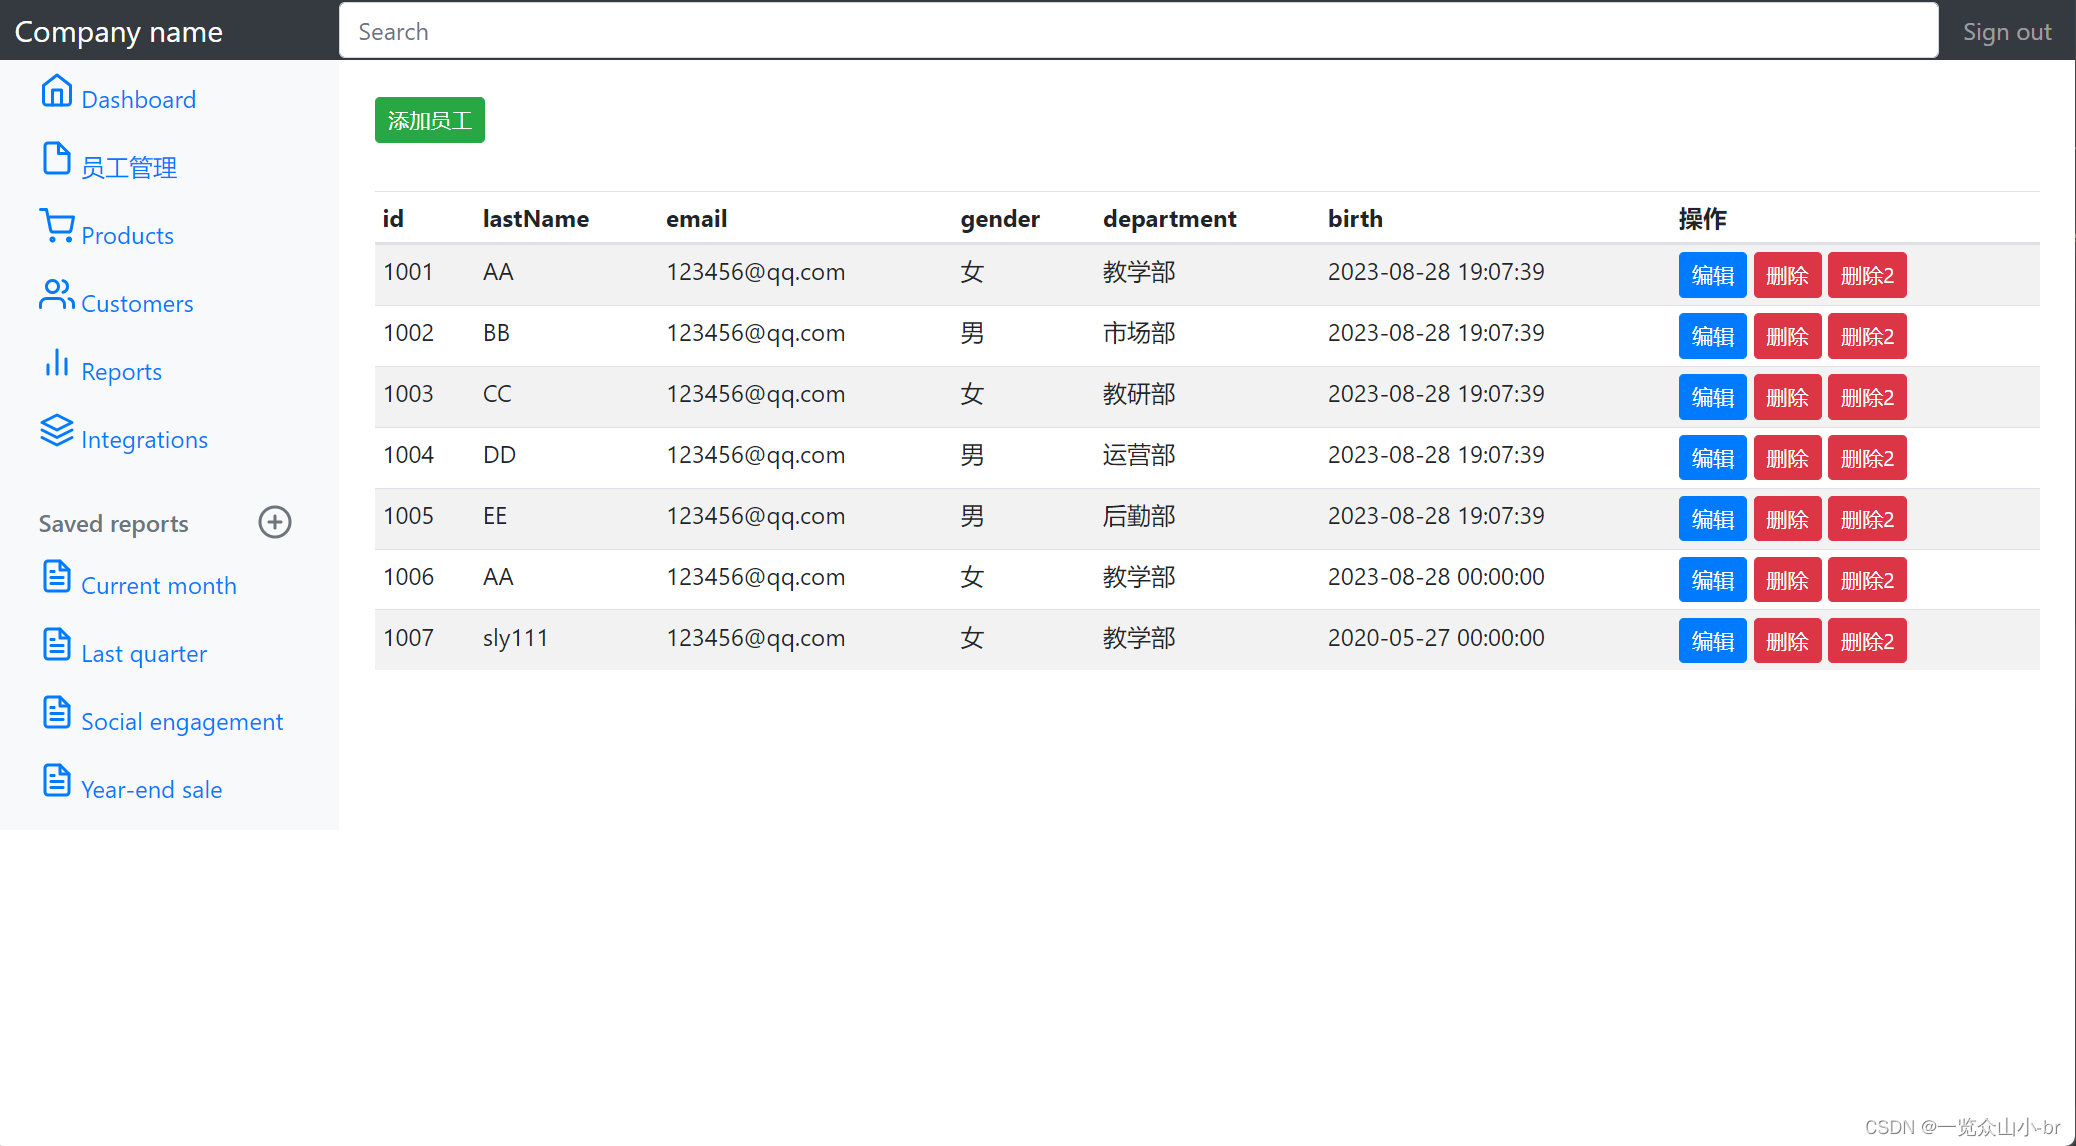
4、员工列表查询
编写EmployeeController
@Controller
@RequestMapping("/Employee")
public class EmployeeController {

    @Autowired
    private EmployeeDao employeeDao;
    @Autowired
    private DepartmentDao departmentDao;

    @GetMapping("/selectAll")
    public String selectAll(Model model) {
        System.out.println("selectAll方法");
        Collection<Employee> employees = employeeDao.getAllEmp();
        model.addAttribute("emps", employees);
        return "/employee/list";
    }
}
新建list.html,从Dashboard.html复制,然后修改内容,编写表格
<!DOCTYPE html>
<html lang="en" xmlns:th="http://www.thymeleaf.org">
<head>
    <meta charset="utf-8">
    <meta name="viewport" content="width=device-width, initial-scale=1, shrink-to-fit=no">
    <meta name="description" content="员工管理系统">
    <meta name="author" content="孙琳昱">
    <link rel="icon" href="../../../../favicon.ico">

    <title>Dashboard Template for Bootstrap</title>

    <!-- Bootstrap core CSS -->
    <link href="../../../../dist/css/bootstrap.min.css" rel="stylesheet">

    <!-- Custom styles for this template -->
    <link href="dashboard.css" rel="stylesheet">
</head>
<body>

<div th:replace="~{commons::navbar}"></div>

<div class="container-fluid">
    <div class="row">
        <div th:replace="~{commons::sidebar}"></div>
        <main role="main" class="col-md-9 ml-sm-auto col-lg-10 pt-3 px-4">
            <table class="table table-striped table-sm">
                <!--添加员工-->
                <h2>
                    <!--默认get请求,第一次回显员工中的部门信息使用默认的get请求-->
                    <a class="btn btn-sm btn-success" th:href="@{/Employee/toAdd}">添加员工</a>
                </h2>
                <br/>

                <thead>
                <tr>
                    <th>id</th>
                    <th>lastName</th>
                    <th>email</th>
                    <th>gender</th>
                    <th>department</th>
                    <th>birth</th>
                    <th>操作</th>
                </tr>
                </thead>

                <tbody>
                <tr th:each="emp:${emps}">
                    <td th:text="${emp.getId()}"></td>
                    <td th:text="${emp.getLastName()}"></td>
                    <td th:text="${emp.getEmail()}"></td>
                    <!--性别需要前端判断-->
                    <td th:text="${emp.getGender()==0?'女':'男'}"></td>
                    <td th:text="${emp.getDepartment().getDepartmentName()}"></td>
                    <!--日期需要改变格式-->
                    <td th:text="${#dates.format(emp.getBirth(),'yyyy-MM-dd HH:mm:ss')}"></td>
                    <td>
                        <a class="btn btn-sm btn-primary" th:href="@{/Employee/toUpdate/}+${emp.getId()}">编辑</a>
                        <a class="btn btn-sm btn-danger" th:href="@{/Employee/delete/}+${emp.getId()}">删除</a>
                        <!--  button无法传递url  -->
                        <button class="btn btn-sm btn-danger" th:href="@{/Employee/delete/}+${emp.getId()}">删除2</button>
                    </td>
                </tr>
                </tbody>
            </table>
        </main>
    </div>
</div>

<script src="https://code.jquery.com/jquery-3.2.1.slim.min.js"
        integrity="sha384-KJ3o2DKtIkvYIK3UENzmM7KCkRr/rE9/Qpg6aAZGJwFDMVNA/GpGFF93hXpG5KkN"
        crossorigin="anonymous"></script>
<script>window.jQuery || document.write('<script src="../../../../assets/js/vendor/jquery-slim.min.js"><\/script>')</script>
<script src="../../../../assets/js/vendor/popper.min.js"></script>
<script src="../../../../dist/js/bootstrap.min.js"></script>
<!-- Icons -->
<script src="https://unpkg.com/feather-icons/dist/feather.min.js"></script>
<script>
    feather.replace()
</script>

<!-- Graphs -->
<script src="https://cdnjs.cloudflare.com/ajax/libs/Chart.js/2.7.1/Chart.min.js"></script>

</body>
</html>
启动项目测试
5、新增员工
编写add.html
<!DOCTYPE html>
<html lang="en" xmlns:th="http://www.thymeleaf.org">
<head>
    <meta charset="UTF-8">
    <title>Title</title>
</head>
<body>

<form th:action="@{/Employee/add}" method="post">
    <div class="form-group">
        <label>LastName</label>
        <input name="lastName" value="tom" type="text" class="form-control" id="exampleInputEmail1"
               placeholder="lastName">
    </div>

    <div class="form-group">
        <label>Email</label>
        <input name="email" value="123456@qq.com" type="email" class="form-control" id="exampleInputPassword1"
               placeholder="email">
    </div>

    <div class="form-group">
        <label>Gender</label>
        <div class="form-check form-check-inline">
            <input class="form-check-input" type="radio" value="1" name="gender"/>
            <label class="form-check-label">男</label>
        </div>
        <div class="form-check form-check-inline">
            <input class="form-check-input" type="radio" value="0" name="gender"/>
            <label class="form-check-label">女</label>
        </div>
    </div>

    <div class="form-group">
        <label>Department</label>
        <!--提交的Department的是部门id-->
        <select name="department.id" class="form-control">
            <option th:each="dept:${departments}"
                    th:text="${dept.getDepartmentName()}"
                    th:value="${dept.getId()}"></option>
        </select>
    </div>

    <div class="form-group">
        <label>Birth</label>
        <input name="birth" value="2020-5-27" type="text"
               class="form-control"
               placeholder="yyyy-MM-dd">
    </div>
    <button type="submit" class="btn btn-default">添加</button>
</form>

</body>
</html>
在list.html添加add按钮
                    <!--默认get请求,第一次回显员工中的部门信息使用默认的get请求-->
                    <a class="btn btn-sm btn-success" th:href="@{/Employee/toAdd}">添加员工</a>
Controller新加接口
    @GetMapping("/toAdd")
    public String toAdd(Model model) {
        System.out.println("toAdd方法");
        // 查出所有部门的信息
        Collection<Department> departments = departmentDao.getDepartments();
        model.addAttribute("departments", departments);
        return "/employee/add";
    }

    @RequestMapping("/add")
    public String add(Model model, Employee employee) {
        System.out.println("add方法");
        employeeDao.saveEmp(employee);
        return "redirect:/Employee/selectAll";
    }
启动测试

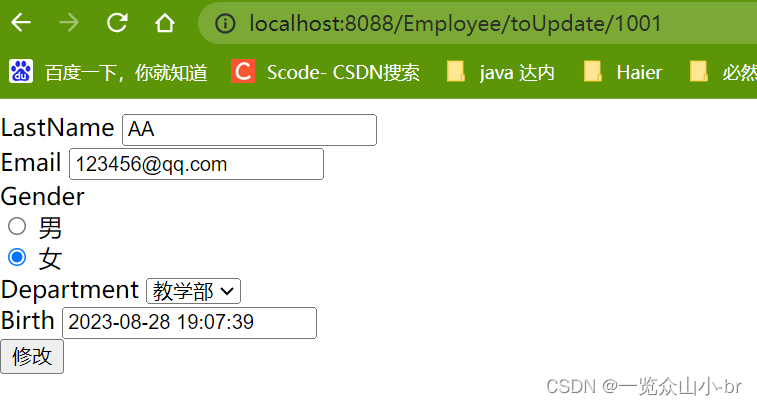
6、修改员工
编写update.html
<!DOCTYPE html>
<html lang="en" xmlns:th="http://www.thymeleaf.org">
<head>
    <meta charset="UTF-8">
    <title>Title</title>
</head>
<body>

<main role="main" class="col-md-9 ml-sm-auto col-lg-10 pt-3 px-4">
    <form th:action="@{/Employee/update}" method="post">
        <!--隐藏查出来的empId-->
        <input type="hidden" th:value="${emp.getId()}">
        <div class="form-group">
            <label>LastName</label>
            <input name="lastName" th:value="${emp.getLastName()}" type="text" class="form-control"
                   id="exampleInputEmail1" placeholder="lastName">
        </div>
        <div class="form-group">
            <label>Email</label>
            <input name="email" th:value="${emp.getEmail()}" type="email"
                   class="form-control" id="exampleInputPassword1" placeholder="email">
        </div>
        <div class="form-group">
            <label>Gender</label>
            <div class="form-check form-check-inline">
                <input th:checked="${emp.getGender()==1}" class="form-check-input" type="radio"
                       value="1" name="gender"/>
                <label class="form-check-label">男</label>
            </div>
            <div class="form-check form-check-inline">
                <input th:checked="${emp.getGender()==0}" class="form-check-input" type="radio"
                       value="0" name="gender"/>
                <label class="form-check-label">女</label>
            </div>
        </div>
        <div class="form-group">
            <label>Department</label>
            <!--提交的value是id-->
            <select name="department.id" class="form-control">
                <!--回显:部门id等于员工部门的id-->
                <option th:each="dept:${departments}"
                        th:selected="${dept.getId()==emp.getDepartment().getId()}"
                        th:text="${dept.getDepartmentName()}"
                        th:value="${dept.getId()}"></option>
            </select>
        </div>
        <div class="form-group">
            <label>Birth</label>
            <!--日期回显,需要更改默认格式-->
            <input th:value="${#dates.format(emp.getBirth(),'yyyy-MM-dd HH:mm:ss')}" name="birth" type="text"
                   class="form-control" placeholder="yyyy-MM-dd">
        </div>
        <button type="submit" class="btn btn-default">修改</button>
    </form>
</main>

</body>
</html>
在list.html添加update按钮
<a class="btn btn-sm btn-primary" th:href="@{/Employee/toUpdate/}+${emp.getId()}">编辑</a>Controller新加接口
    @GetMapping("/toUpdate/{id}")
    public String toUpdate(@PathVariable("id") Integer id, Model model) {
        System.out.println("toUpdate方法");
        // 查出所有部门的信息
        Collection<Department> departments = departmentDao.getDepartments();
        model.addAttribute("departments", departments);

        // 获取雇员
        Employee employee = employeeDao.getEmployeeById(id);
        model.addAttribute("emp", employee);
        return "/employee/update";
    }

    @RequestMapping("/update")
    public String update(Model model, Employee employee) {
        System.out.println("update方法");
        employeeDao.saveEmp(employee);
        return "redirect:/Employee/selectAll";
    }
启动测试
7、删除员工
在list.html添加delete按钮
<a class="btn btn-sm btn-danger" th:href="@{/Employee/delete/}+${emp.getId()}">删除</a>
<!--  button无法传递url  -->
<button class="btn btn-sm btn-danger" th:href="@{/Employee/delete/}+${emp.getId()}">删除2</button>
Controller新加接口
    // 删除员工
    @GetMapping("/delete/{id}")
    public String delete(@PathVariable("id") Integer id) {
        System.out.println("delete方法");
        employeeDao.deleteEmployeeById(id);
        return "redirect:/Employee/selectAll";
    }
6、如何写一个网站
- 前端
- 模版:自己网站搜
- 框架:组件,需要自己手动拼接:BootStrap,Layui,semantic-ui
- 设计数据库(真正的难点)
- 前端让他能够自动运行,独立化工程
- 数据接口如何对接:json,对象
- 前后端联调
- 前端:自己能够通过“’框架”网站组合出一个网页
- 后端:必须要有自己熟悉的一个后台模版,99%公司会让你自己写:推荐X-admin网站模版


 1894
1894

 被折叠的 条评论
为什么被折叠?
被折叠的 条评论
为什么被折叠?
 到【灌水乐园】发言


