


在一个ViewPage中设置两个frament, 点击下一步跳转到下一个fragment
新建一个ViewPage控件(activity_add_e1,xml)`
<?xml version="1.0" encoding="utf-8"?>
<LinearLayout xmlns:android="http://schemas.android.com/apk/res/android"
    android:orientation="vertical"
    android:gravity="center_horizontal"
    android:layout_width="match_parent"
    android:layout_height="match_parent">

    <android.support.v4.view.ViewPager
        android:id="@+id/viewPager"
        android:layout_width="match_parent"
        android:layout_height="wrap_content">

    </android.support.v4.view.ViewPager>
</LinearLayout>
在一个ViewPage控件配置两个碎片(AddE1Activity.java)
public class AddE1Activity extends BaseActivity {

    @BindView(R.id.viewPager)
    public ViewPager viewPager;
	//新建两个碎片
    private AddE1OneFragment oneFragment = new AddE1OneFragment();
    private AddE1TwoFragment twoFragment = new AddE1TwoFragment();

    private List<Fragment> fragments = new ArrayList<>();
    private AddE1Adapter addE1Adapter;

    private int fragmentIndex = 0;

    @Override
    protected void onCreate(Bundle savedInstanceState) {
        super.onCreate(savedInstanceState);
        setContentView(R.layout.activity_add_e1);
        ButterKnife.bind(this);

        initTitleBar();
        initView();
    }
	//将定义好的碎片配置
    private void initView() {
        fragments.add(oneFragment);
        fragments.add(twoFragment);

        addE1Adapter = new AddE1Adapter(getSupportFragmentManager());
        addE1Adapter.setFragments(fragments);
        viewPager.setAdapter(addE1Adapter);
    }

    private void initTitleBar() {
        Tools.setStatusBarColor(this, getResources().getColor(R.color.bg_title_blue));
        titleBar.setTitleText(getString(R.string.add_device));
        titleBar.setLeftIco(R.mipmap.icon_back_nor);
        titleBar.setLeftLayoutListening(new View.OnClickListener() {
            @Override
            public void onClick(View v) {
                finish();
            }
        });
    }
	//跳转到下一页的函数封装
    public void onNextFragment() {
        fragmentIndex = (fragmentIndex + 1) % fragments.size();
        viewPager.setCurrentItem(fragmentIndex);
    }
}
两个fragment, AddE1OneFragment和AddE1TwoFragment的定义
//fragment_adde1_one.xml
<?xml version="1.0" encoding="utf-8"?>
<LinearLayout xmlns:android="http://schemas.android.com/apk/res/android"
xmlns:tools="http://schemas.android.com/tools"
android:orientation="vertical"
android:gravity="center_horizontal"
android:layout_width="match_parent"
android:layout_height="match_parent">
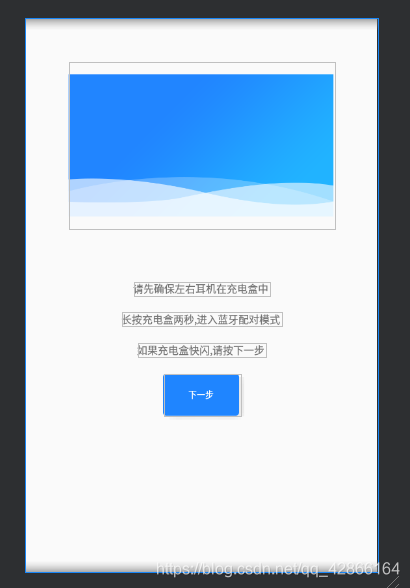
<ImageView
android:layout_width="match_parent"
android:layout_height="wrap_content"
android:layout_margin="50dp"
android:src="@mipmap/img_bg1_nor"
/>
<TextView
android:layout_width="wrap_content"
android:layout_height="wrap_content"
android:text="请先确保左右耳机在充电盒中"
android:textSize="12sp"
android:layout_margin="10dp"
/>
<TextView
android:layout_width="wrap_content"
android:layout_height="wrap_content"
android:text="长按充电盒两秒,进入蓝牙配对模式"
android:textSize="12sp"
android:layout_margin="10dp"
/>
<TextView
android:layout_width="wrap_content"
android:layout_height="wrap_content"
android:text="如果充电盒快闪,请按下一步"
android:textSize="12sp"
android:layout_margin="10dp"
/>
<Button
android:id="@+id/addE1Btn"
android:layout_width="wrap_content"
android:layout_height="wrap_content"
android:text="下一步"
android:textSize="10sp"
android:textColor="#fff"
android:background="@drawable/bg_button_experience"
android:layout_margin="10dp"
/>
</LinearLayout>
//fragment_adde1_two.xml;
<?xml version="1.0" encoding="utf-8"?>
<LinearLayout xmlns:android="http://schemas.android.com/apk/res/android"
    android:orientation="vertical"
    android:gravity="center_horizontal"
    android:layout_width="match_parent"
    android:layout_height="match_parent">
    <ImageView
        android:layout_width="wrap_content"
        android:layout_height="wrap_content"
        android:layout_margin="50dp"
        android:src="@mipmap/img_card2_dis"
        />
    <TextView
        android:layout_width="wrap_content"
        android:layout_height="wrap_content"
        android:text="打开手机系统'设置'->'蓝牙'选项"
        android:textSize="12sp"
        android:layout_margin="10dp"
        />
    <TextView
        android:layout_width="wrap_content"
        android:layout_height="wrap_content"
        android:text="搜索'eMeet Eliet E1',并点击配送"
        android:textSize="12sp"
        android:layout_margin="10dp"
        />-
    <TextView
        android:layout_width="wrap_content"
        android:layout_height="wrap_content"
        android:text="确定后完成耳机于与手机的配对"
        android:textSize="12sp"
        android:layout_margin="10dp"
        />
    <TextView
        android:layout_width="wrap_content"
        android:layout_height="wrap_content"
        android:text="前往进行手机蓝牙配对"
        android:textSize="12sp"
        android:layout_margin="10dp"
        />
    <Button
        android:id="@+id/btn_next"
        android:layout_width="wrap_content"
        android:layout_height="wrap_content"
        android:text="前往蓝牙设置"
        android:textSize="10sp"
        android:textColor="#fff"
        android:background="@drawable/bg_button_experience"
        android:layout_margin="10dp"

        />
</LinearLayout>
获取fragment_adde1_one
public class AddE1OneFragment extends BaseFragment {
	//获取按钮id
    @BindView(R.id.addE1Btn)
    public Button btnNext;

    private AddE1Activity mActivity;

    @Override
    protected int getContentLayoutId() {
        return R.layout.fragment_adde1_one;
    }

    @Override
    protected void init() {
    	//获取activity的引用
        mActivity = (AddE1Activity) getActivity();
        //监听点击事件
        btnNext.setOnClickListener(new View.OnClickListener() {
            @Override
            public void onClick(View view) {
            	//执行下一页的函数
                mActivity.onNextFragment();
            }
        });
    }

}


 3922
3922


 被折叠的 条评论
为什么被折叠?
被折叠的 条评论
为什么被折叠?
 到【灌水乐园】发言


