


一、安装目标
本次系统环境采用openeuler 20.3 LTS X86版本,规格为4C CPU,8G 内存,200G硬盘用于部署opengauss 5.0.2 LTS 极简版本数据库。生产环境建议按照指导要求部署。
软件获取链接:https://opengauss.org/zh/download/
文档获取链接:https://docs-opengauss.osinfra.cn/zh/docs/5.0.0/docs/ReleaseNotes/%E6%B3%95%E5%BE%8B%E5%A3%B0%E6%98%8E.html
二、操作系统安装
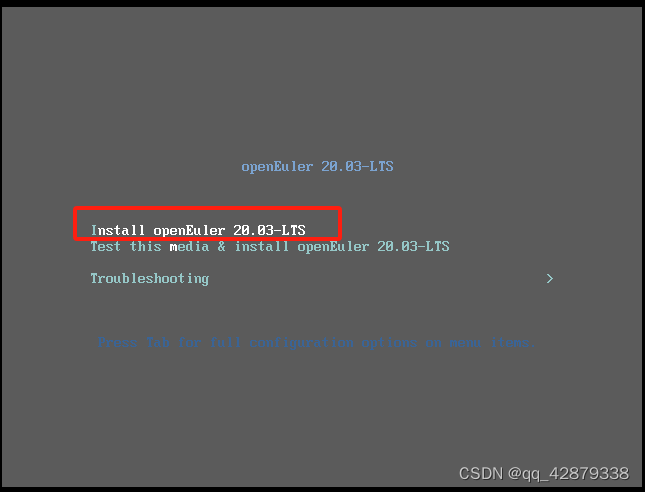
2.1 安装操作系统
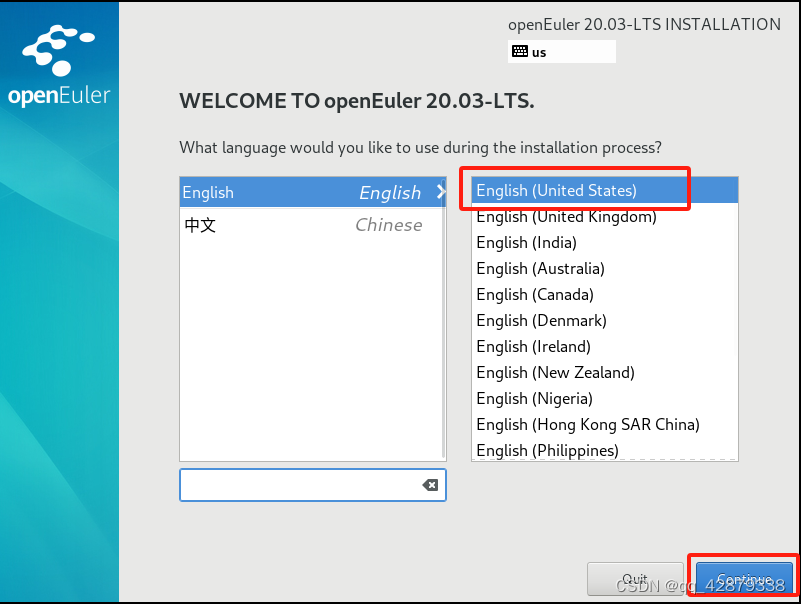
2.2 配置安装参数
2.3 设置安装文件
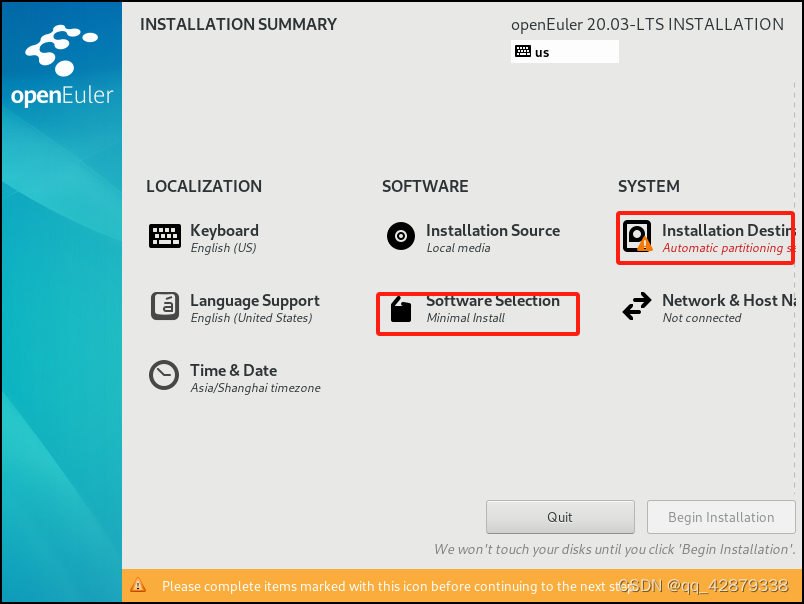
配置安装软件

2.4 配置安装目录
(保持与下一致,若硬盘大于200G,将剩余空间全部分给/目录,可不设置swap目录)

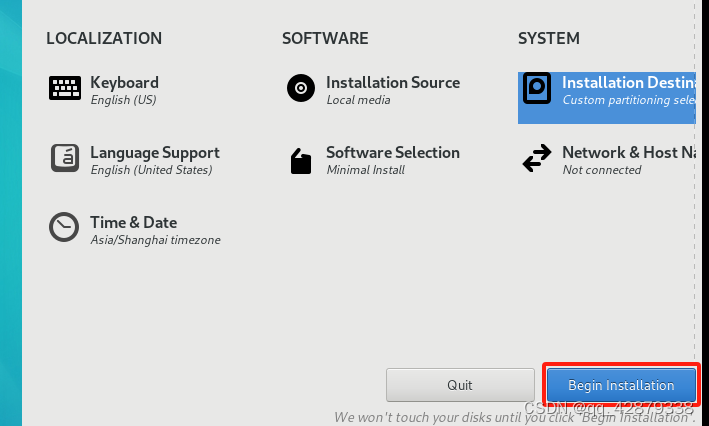
2.5 开始安装
三、配置数据库环境
1、配置IP
此IP为业务IP,可后期更改,需要连接互联网。
查看业务网卡

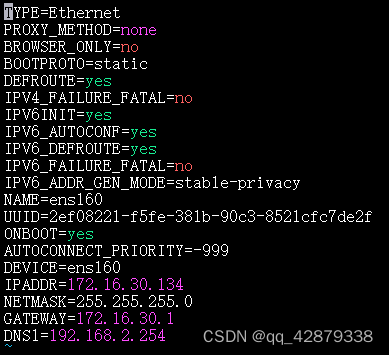
配置IP
vi /etc/sysconfig/network-scripts/ifcfg-ens160
重启网卡服务

2、关闭系统防火墙
systemctl disable firewalld.service
systemctl stop firewalld.service
检查防火墙状态
systemctl status firewalld
若防火墙状态显示为active (running),则表示防火墙未关闭,请执行;
若防火墙状态显示为inactive (dead),则无需再关闭防火墙。
3、修改/etc/selinux/config文件中的“SELINUX”值为“disabled”。
a. 使用VIM打开config文件。
vim /etc/selinux/config
b. 修改“SELINUX”的值“disabled”,执行:wq保存并退出修改。
SELINUX=disabled
重新启动操作系统。
reboot
4、设置字符集参数
vim /etc/profile
将各数据库节点的字符集设置为相同的字符集,可以在/etc/profile文件中添加“export LANG=en_US.UTF-8”(GBK为国标)。
![]()
5、设置时区和时间
date 查看系统时间
![]()
如不一致则更改为
使用如下命令将各数据库节点/usr/share/zoneinfo/目录下的时区文件拷贝为/etc/localtime文件。
cp /usr/share/zoneinfo/$地区/$时区 /etc/localtime
使用date -s命令将各数据库节点的时间设置为统一时间,举例如下。
date -s "Sat Sep 27 16:00:07 CST 2020"
集群数据库可使用NTP服务器进行时间统一。
6、关闭swap交换内存
在数据库节点上,使用swapoff -a命令将交换内存关闭。
swapoff -a
7、关闭RemoveIPC
在数据库节点上,关闭RemoveIPC。CentOS操作系统默认为关闭,可以跳过该步骤。
修改/etc/systemd/logind.conf文件中的“RemoveIPC”值为“no”。
a. 使用VIM打开logind.conf文件。
vim /etc/systemd/logind.conf
b. 修改“RemoveIPC”值为“no”。
RemoveIPC=no
修改/usr/lib/systemd/system/systemd-logind.service文件中的“RemoveIPC”值为“no”。
a. 使用VIM打开systemd-logind.service文件。
vim /usr/lib/systemd/system/systemd-logind.service
b. 修改“RemoveIPC”值为“no”。
RemoveIPC=no
重新加载配置参数。
systemctl daemon-reload
systemctl restart systemd-logind
检查修改是否生效。
loginctl show-session | grep RemoveIPC
systemctl show systemd-logind | grep RemoveIPC
8、关闭HISTORY记录
说明:
为避免指令历史记录安全隐患,需关闭各主机的history指令。
步骤 1 修改根目录下/etc/profile文件。
vim /etc/profile
步骤 2 设置HISTSIZE值为0。例如,系统中HISTSIZE默认值为1000,将其修改为0。
HISTSIZE=0
步骤 3 保存/etc/profile。
:wq
步骤 4 设置/etc/profile生效。
source /etc/profile
9、添加数据库用户(opengauss不允许使用root账户安装)
创建用户组
groupadd dbgroup
创建用户
useradd -g dbgroup omm
设置用户密码
passwd omm
10、安装运行环境
检查是否安装bzip以及python3
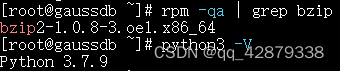
安装依赖、此步骤需要系统配置repo源
[root@gaussdb ~]# yum install -y libaio-devel readline-devel expect
Last metadata expiration check: 1:09:15 ago on Mon 17 Jun 2024 11:23:55 PM CST.
Package libaio-devel-0.3.112-5.oe2003sp4.x86_64 is already installed.
Package readline-devel-8.0-4.oe2003sp4.x86_64 is already installed.
Package expect-1:5.45.4-5.oe2003sp4.x86_64 is already installed.
Dependencies resolved.
Nothing to do.
Complete!
配置环境、需要手动配置软连接,否则安装报错
cd /usr/lib64/
ln /usr/lib64/libreadline.so.8 /usr/lib64/libreadline.so.7
创建目录
cd /opt/
mkdir opengauss
将安装包上传至opengauss目录下并解压
tar -jxf openGauss-x.x.x-openEuler-64bit.tar.bz2
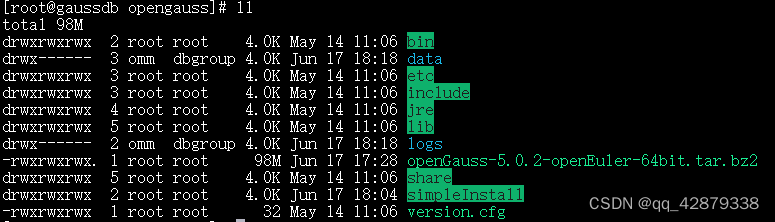
ls -lb
执行ls命令,显示类似如下信息:
total 90296
drwx------ 3 root root 4096 Mar 31 21:18 bin
drwx------ 3 root root 4096 Mar 31 21:18 etc
drwx------ 3 root root 4096 Mar 31 21:18 include
drwx------ 4 root root 4096 Mar 31 21:18 jre
drwx------ 5 root root 4096 Mar 31 21:18 lib
-rw------- 1 root root 92427499 Apr 1 09:43 openGauss-x.x.x-openEuler-64bit.tar.bz2
drwx------ 5 root root 4096 Mar 31 21:18 share
drwx------ 2 root root 4096 Mar 31 21:18 simpleInstall
-rw------- 1 root root 32 Mar 31 21:18 version.cfg
配置目录权限
chmod 777 /opt/opengauss -R
得到一下目录
配置omm用户获取管理员权限
使用root用户打开sudoers文件
vi /etc/sudoers #打开文件并添加下面一行
## Allow root to run any commands anywhere
root ALL=(ALL) ALL
omm ALL=(ALL) ALL
配置文件权限
解决方法:直接修改limits.conf配值文件,且使得永久生效
vim /etc/security/limits.conf
在末尾添加以下内容
omm soft nproc 16384
omm hard nproc 16384
omm soft nofile 65536
omm hard nofile 65536
omm soft memlock 4000000
omm hard memlock 4000000
保存后重启服务器。
四 、安装数据库
1.进入解压包的路径为/opt/opengauss,进入解压后目录下的simpleInstall。
cd /opt/opengauss/simpleInstall
2.执行install.sh脚本安装openGauss。
sh install.sh -w "Admin@9000" &&source ~/.bashrc
说明:
-w:初始化数据库密码(gs_initdb指定),因安全需要,此项必须设置。
-p:指定openGauss端口号,如不指定,默认为5432。
-h|--help:打印使用说明。
安装后,该数据库部署节点的名称为sgnode(gs_initdb指定)。
执行时,如果出现报错“the maximum number of SEMMNI is not correct, the current SEMMNI is xxx. Please check it.”,请使用有root权限的用户执行如下命令。
sysctl -w kernel.sem="250 85000 250 330"
安装后,数据库目录安装路径/opt/software/openGauss/data/single_node,其中/opt/software/openGauss为解压包路径,data/single_node为新创建的数据库节点目录。
安装完成后,默认生成名称为postgres的数据库。第一次连接数据库时可以连接到此数据库。
3.安装执行完成后,使用ps和gs_ctl查看进程是否正常。
ps ux | grep gaussdb
gs_ctl query -D /opt/software/openGauss/data/single_node
执行ps命令,显示类似如下信息:
omm 24209 11.9 1.0 1852000 355816 pts/0 Sl 01:54 0:33 /opt/software/openGauss/bin/gaussdb -D /opt/software/openGauss/single_node
omm 20377 0.0 0.0 119880 1216 pts/0 S+ 15:37 0:00 grep --color=auto gaussdb
执行gs_ctl命令,显示类似如下信息:
gs_ctl query ,datadir is /opt/software/openGauss/data/single_node
HA state:
local_role : Normal
static_connections : 0
db_state : Normal
detail_information : Normal
Senders info:
No information
Receiver info:
No information
五 、安装后配置
1.配置数据库连接用户
(用户需要在其他终端登录可配置一下步骤,只在本机登录可忽略)
创建数据库连接用户,使用omm用户在数据库本地登录数据库,并创建gauss用户设置密码为Admin@9000
[omm@gaussdb opengauss]$ gsql -d postgres -p 5432
gsql ((openGauss 5.0.2 build 48a25b11) compiled at 2024-05-14 10:53:45 commit 0 last mr )
Non-SSL connection (SSL connection is recommended when requiring high-security)
Type "help" for help.
openGauss=#
openGauss=# CREATE USER gauss WITH CREATEDB PASSWORD "Admin@9000";
CREATE ROLE
赋予管理员权限,系统安装未指定数据库管理员账号情况下默认使用安装账户omm;
openGauss=# grant omm to gauss;
GRANT ROLE
2、配置数据库可被其他客户端访问
进入到 /opt/opengauss/data/single_node目录,打开pg_hba.conf配置
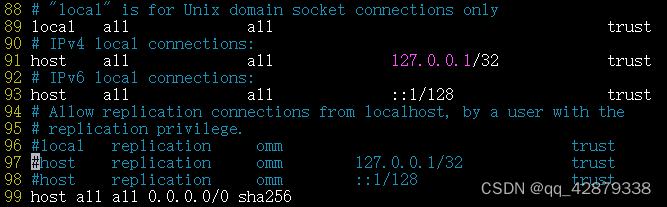
vim pg_hba.conf
在文件末尾插入第99行内容,windows客户端访问需要使用data studio
配置数据库监听地址
进入到 /opt/opengauss/data/single_node目录,打开postgresql.conf配置
vim postgresql.conf
找到71行插入以下内容:listen_addresses = '*' 保存并退出后重启数据库

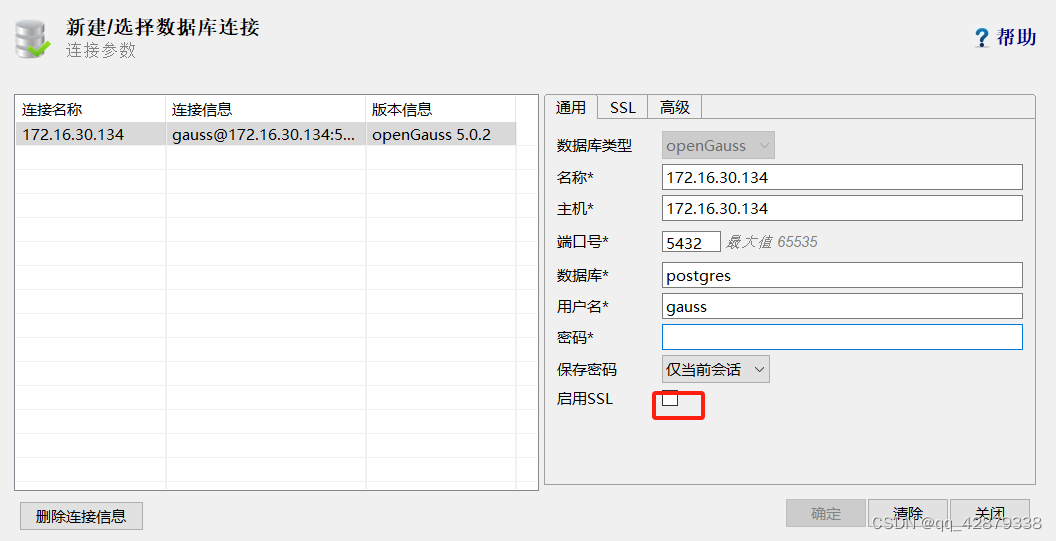
3、使用data studio登录数据库


 被折叠的 条评论
为什么被折叠?
被折叠的 条评论
为什么被折叠?
 到【灌水乐园】发言


