


前言
超简单的在Centos7上部署FastDFS方式,之前lz也发布过如何在服务器直接安装部署fastdfs与nginx,过程是否麻烦并且没有一定基础的人不一定能部署好,但是使用现在的方式部署,那真的是妈妈再也不用担心我部署的FastDFS无法使用,话不多说,快上车。
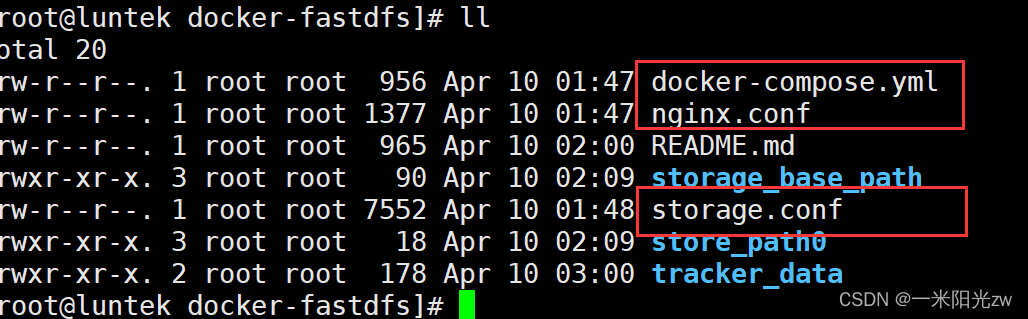
成功运行后文件结构如下图所示,只需要docker-compose.yml、nginx.conf、storage.conf三个文件就可以运行,话不多说直接上代码。如果是为了运行起来,不要做任何修改,只需要将三个文件代码拷贝到同一个目录下使用指令docker-compose up -d就可以修改,容器会自动修改里面的配置文件为容器IP地址
docker-compose.yml
映射的端口可以自己修改,里面的内容不需要做任何修改,项目启动后会自动修改配置文件中的配置为容器的IP地址
version: '3'
services:
  tracker:
    image: season/fastdfs:1.2
    container_name: tracker
    restart: always
    volumes:
      - "./tracker_data:/fastdfs/tracker/data"
    ports:
      - "22122:22122"
    command: "tracker"

  storage:
    image: season/fastdfs:1.2
    container_name: storage
    links:
      - tracker
    restart: always
    volumes:
      - "./storage.conf:/fdfs_conf/storage.conf"
      - "./storage_base_path:/fastdfs/storage/data"
      - "./store_path0:/fastdfs/store_path"
    ports:
      - "23000:23000"
    environment:
      TRACKER_SERVER: "tracker:22122"
    command: "storage"

  nginx:
    image: season/fastdfs:1.2
    container_name: fdfs-nginx
    restart: always
    volumes:
      - "./nginx.conf:/etc/nginx/conf/nginx.conf"
      - "./store_path0:/fastdfs/store_path"
    links:
      - tracker
    ports:
      - "8088:8088"
    environment:
      TRACKER_SERVER: "tracker:22122"
    command: "nginx"
nginx.conf
#user  nobody;
worker_processes  1;

#error_log  logs/error.log;
#error_log  logs/error.log  notice;
#error_log  logs/error.log  info;

#pid        logs/nginx.pid;


events {
    worker_connections  1024;
}


http {
    include       mime.types;
    default_type  application/octet-stream;

    #access_log  logs/access.log  main;

    sendfile        on;
    #tcp_nopush     on;

    #keepalive_timeout  0;
    keepalive_timeout  65;

    #gzip  on;

    server {
        listen       8088;
        server_name  localhost;

        #charset koi8-r;

        #缩略图需要使用插件,需要单独构建nginx镜像,此处忽略
        #location /group([0-9])/M00/.*\.(gif|jpg|jpeg|png)$ {
         #   root /fastdfs/storage/data;
         #   image on;
         #   image_output off;
         #   image_jpeg_quality 75;
         #   image_backend off;
        #    image_backend_server http://baidu.com/docs/aabbc.png;
       # }

        # group1
        location /group1/M00 {
        # 文件存储目录
            root /fastdfs/storage/data;
            ngx_fastdfs_module;
        }

        #error_page  404              /404.html;

        # redirect server error pages to the static page /50x.html
        #
        error_page   500 502 503 504  /50x.html;
        location = /50x.html {
            root   html;
        }
 }
}
storage.conf
#is this config file disabled
# false for enabled
# true for disabled
disabled=false

# the name of the group this storage server belongs to
group_name=group1

# bind an address of this host
# empty for bind all addresses of this host
bind_addr=

# if bind an address of this host when connect to other servers
# (this storage server as a client)
# true for binding the address configed by above parameter: "bind_addr"
# false for binding any address of this host
client_bind=true

# the storage server port
port=23000

# connect timeout in seconds
# default value is 30s
connect_timeout=30

# network timeout in seconds
# default value is 30s
network_timeout=60

# heart beat interval in seconds
heart_beat_interval=30

# disk usage report interval in seconds
stat_report_interval=60

# the base path to store data and log files
base_path=/fastdfs/storage

# max concurrent connections the server supported
# default value is 256
# more max_connections means more memory will be used
max_connections=256

# the buff size to recv / send data
# this parameter must more than 8KB
# default value is 64KB
# since V2.00
buff_size = 256KB

# accept thread count
# default value is 1
# since V4.07
accept_threads=1

# work thread count, should <= max_connections
# work thread deal network io
# default value is 4
# since V2.00
work_threads=4

# if disk read / write separated
##  false for mixed read and write
##  true for separated read and write
# default value is true
# since V2.00
disk_rw_separated = true

# disk reader thread count per store base path
# for mixed read / write, this parameter can be 0
# default value is 1
# since V2.00
disk_reader_threads = 1

# disk writer thread count per store base path
# for mixed read / write, this parameter can be 0
# default value is 1
# since V2.00
disk_writer_threads = 1

# when no entry to sync, try read binlog again after X milliseconds
# must > 0, default value is 200ms
sync_wait_msec=50

# after sync a file, usleep milliseconds
# 0 for sync successively (never call usleep)
sync_interval=0

# storage sync start time of a day, time format: Hour:Minute
# Hour from 0 to 23, Minute from 0 to 59
sync_start_time=00:00

# storage sync end time of a day, time format: Hour:Minute
# Hour from 0 to 23, Minute from 0 to 59
sync_end_time=23:59

# write to the mark file after sync N files
# default value is 500
write_mark_file_freq=500

# path(disk or mount point) count, default value is 1
store_path_count=1

# store_path#, based 0, if store_path0 not exists, it's value is base_path
# the paths must be exist
store_path0=/fastdfs/store_path
#store_path1=/home/yuqing/fastdfs2

# subdir_count  * subdir_count directories will be auto created under each
# store_path (disk), value can be 1 to 256, default value is 256
subdir_count_per_path=256

# tracker_server can ocur more than once, and tracker_server format is
#  "host:port", host can be hostname or ip address
tracker_server=192.168.209.121:22122

#standard log level as syslog, case insensitive, value list:
### emerg for emergency
### alert
### crit for critical
### error
### warn for warning
### notice
### info
### debug
log_level=info

#unix group name to run this program,
#not set (empty) means run by the group of current user
run_by_group=

#unix username to run this program,
#not set (empty) means run by current user
run_by_user=

# allow_hosts can ocur more than once, host can be hostname or ip address,
# "*" means match all ip addresses, can use range like this: 10.0.1.[1-15,20] or
# host[01-08,20-25].domain.com, for example:
# allow_hosts=10.0.1.[1-15,20]
# allow_hosts=host[01-08,20-25].domain.com
allow_hosts=*

# the mode of the files distributed to the data path
# 0: round robin(default)
# 1: random, distributted by hash code
file_distribute_path_mode=0

# valid when file_distribute_to_path is set to 0 (round robin),
# when the written file count reaches this number, then rotate to next path
# default value is 100
file_distribute_rotate_count=100

# call fsync to disk when write big file
# 0: never call fsync
# other: call fsync when written bytes >= this bytes
# default value is 0 (never call fsync)
fsync_after_written_bytes=0

# sync log buff to disk every interval seconds
# must > 0, default value is 10 seconds
sync_log_buff_interval=10

# sync binlog buff / cache to disk every interval seconds
# default value is 60 seconds
sync_binlog_buff_interval=10

# sync storage stat info to disk every interval seconds
# default value is 300 seconds
sync_stat_file_interval=300

# thread stack size, should >= 512KB
# default value is 512KB
thread_stack_size=512KB

# the priority as a source server for uploading file.
# the lower this value, the higher its uploading priority.
# default value is 10
upload_priority=10

# the NIC alias prefix, such as eth in Linux, you can see it by ifconfig -a
# multi aliases split by comma. empty value means auto set by OS type
# default values is empty
if_alias_prefix=

# if check file duplicate, when set to true, use FastDHT to store file indexes
# 1 or yes: need check
# 0 or no: do not check
# default value is 0
check_file_duplicate=0

# file signature method for check file duplicate
## hash: four 32 bits hash code
## md5: MD5 signature
# default value is hash
# since V4.01
file_signature_method=hash

# namespace for storing file indexes (key-value pairs)
# this item must be set when check_file_duplicate is true / on
key_namespace=FastDFS

# set keep_alive to 1 to enable persistent connection with FastDHT servers
# default value is 0 (short connection)
keep_alive=0

# you can use "#include filename" (not include double quotes) directive to
# load FastDHT server list, when the filename is a relative path such as
# pure filename, the base path is the base path of current/this config file.
# must set FastDHT server list when check_file_duplicate is true / on
# please see INSTALL of FastDHT for detail
##include /home/yuqing/fastdht/conf/fdht_servers.conf

# if log to access log
# default value is false
# since V4.00
use_access_log = false

# if rotate the access log every day
# default value is false
# since V4.00
rotate_access_log = false

# rotate access log time base, time format: Hour:Minute
# Hour from 0 to 23, Minute from 0 to 59
# default value is 00:00
# since V4.00
access_log_rotate_time=00:00

# if rotate the error log every day
# default value is false
# since V4.02
rotate_error_log = false

# rotate error log time base, time format: Hour:Minute
# Hour from 0 to 23, Minute from 0 to 59
# default value is 00:00
# since V4.02
error_log_rotate_time=00:00

# rotate access log when the log file exceeds this size
# 0 means never rotates log file by log file size
# default value is 0
# since V4.02
rotate_access_log_size = 0

# rotate error log when the log file exceeds this size
# 0 means never rotates log file by log file size
# default value is 0
# since V4.02
rotate_error_log_size = 0

# if skip the invalid record when sync file
# default value is false
# since V4.02
file_sync_skip_invalid_record=false

# if use connection pool
# default value is false
# since V4.05
use_connection_pool = false

# connections whose the idle time exceeds this time will be closed
# unit: second
# default value is 3600
# since V4.05
connection_pool_max_idle_time = 3600

# use the ip address of this storage server if domain_name is empty,
# else this domain name will ocur in the url redirected by the tracker server
http.domain_name=

tracker_server=tracker:22122

# the port of the web server on this storage server
http.server_port=8888
最后cd到放三个文件的目录下,使用指令启动docker-compose
docker-compose up -d
测试
进入到storage节点
docker exec -it storage /bin/bash
进入 storage 容器中使用命令上传一个图片, 可使用容器自带的测试图片, 也可 docker cp 将本机图片复制进来
cd /fdfs_conf
fdfs_upload_file storage.conf anti-steal.jpg #上传一个图片吧, 返回路径如 /group1/M00/00/00/xxxx
访问 localhost:8088/group1/M00/00/00/xxxx 出现防盗链图片即代表部署成功
相信部署过FastDFS的小伙伴就知道这玩意有多麻烦,各种配置文件另外还需要跟服务器IP有关系,为了好用可能还需要设置静态IP,或者编写脚本自动修改像storage.conf以及client.conf等里面的ip配置,麻烦的很,有了docker-compose啥也不用管,太好用了,赞!有兴趣的也可以查看docker hub上的season/fastdfs:1.2的镜像,readme也是十分好理解的
创作不易,记得点赞哦


 547
547

 被折叠的 条评论
为什么被折叠?
被折叠的 条评论
为什么被折叠?
 到【灌水乐园】发言


